Introduction to LibreOffice
•
3 likes•10,188 views

Learn about LibreOffice (http://www.libreoffice.org), a free and open source office suite alternative. LibreOffice can be used in place of programs such as Microsoft Office or iWork. It includes applications for word processing, spreadsheets, presentations, design, databases, and mathematical formula. This brief introduction describe some of the basic features and uses of LibreOffice and how you can install it on your own computer.

Recommended
More Related Content
Viewers also liked
Viewers also liked (19)
More from North Bend Public Library
More from North Bend Public Library (20)
Recently uploaded
Recently uploaded (20)
Introduction to LibreOffice
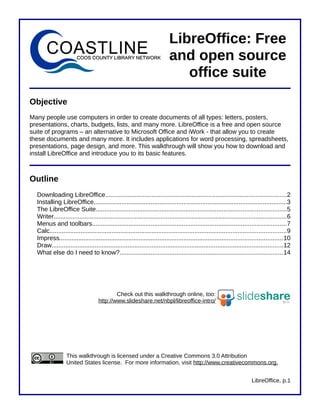
- 1. LibreOffice: Free and open source office suite Objective Many people use computers in order to create documents of all types: letters, posters, presentations, charts, budgets, lists, and many more. LibreOffice is a free and open source suite of programs – an alternative to Microsoft Office and iWork - that allow you to create these documents and many more. It includes applications for word processing, spreadsheets, presentations, page design, and more. This walkthrough will show you how to download and install LibreOffice and introduce you to its basic features. Outline Downloading LibreOffice.........................................................................................................2 Installing LibreOffice................................................................................................................3 The LibreOffice Suite..............................................................................................................5 Writer.......................................................................................................................................6 Menus and toolbars................................................................................................................7 Calc.........................................................................................................................................9 Impress.................................................................................................................................10 Draw......................................................................................................................................12 What else do I need to know?..............................................................................................14 Check out this walkthrough online, too: http://www.slideshare.net/nbpl/libreoffice-intro/ This walkthrough is licensed under a Creative Commons 3.0 Attribution United States license. For more information, visit http://www.creativecommons.org. LibreOffice, p.1
- 2. LibreOffice is an office suite that allows you to create documents such as letters, posters, cards, presentations, slideshows, lists, budgets, charts, and much more. LibreOffice is open source, which means that all of the underlying code that makes the program work is available to anyone who wants to expand on or modify it. It is the superior successor to another popular office suite OpenOffice. The LibreOffice Many people use LibreOffice as a free alternative to programs such as logo Microsoft Office or iWork. It is particularly helpful as it can open filetypes from several different other office suites, including Microsoft Office, WordPerfect, and Microsoft Works. LibreOffice is also a good option for those who only have very simplistic office applications on their computer (e.g. Microsoft Works, WordPad) or those who are attracted by LibreOffice's open source ethos. The application suite is available for all platforms of computers, including Windows, Mac OS, and Linux. Term: An office suite is a set of program that allows you to create documents on your computer, including letters, forms, financial documents, charts and graphs, databases, presentations, slideshows, posters, and cards. A typical office suite will include applications for word processing, spreadsheets, presentations, and design. The screenshots shown in this walkthrough are from Windows 7. However, the principles and basic instructions are valid no matter which operating system you use. Downloading LibreOffice LibreOffice can be downloaded for free. To download it requires a computer with an Internet connection, preferably a broadband connection as the installation files are over 150MB. Once installed, LibreOffice does not require connection to the Internet. Download and install LibreOffice by using the following steps: 1. Open your preferred web browser (e.g. Chrome, Firefox, Internet Explorer, Safari, etc.). Click inside the address bar (the box near the top of the screen that has text starting with “http://”). The text in the address bar should now be highlighted. If it's not, move your mouse cursor to the right of the text in the address bar, click and hold your left mouse button, and drag it over the text. Once the text is highlighted, type “libreoffice.org” (without the quotes). Press “Enter” on the keyboard. Type “libreoffice.org” and press Enter. LibreOffice, p.2
- 3. 2. On the LibreOffice website, left-click the “Download LibreOffice” link located in the middle of the page. 3. The LibreOffice website should automatically detect your computer's operating system. If not, use the drop-down menu in the center of the page to get the correct version. Click the link immediately under the drop-down menu to download the LibreOffice installer. If desired, you can also download additional help files by clicking the link. Left-click here to download the LibreOffice installer. The LibreOffice installer is very large, over 200 MB on Windows, so it can take a while to download even on a broadband connection. 4. Find the installer files after they successfully download. They may be located on your desktop or in the “Downloads” folder in your Documents or Home directory. Depending on your operating system or web browser, you may also have the option to “Open” the file after it successfully downloads. 5. Double-click the installer for LibreOffice and follow the steps (we'll go through them below). After the LibreOffice applications successfully install, double-click the installer for the additional help information (the installer will have “helppack” in its name). Installing LibreOffice When you double-click the installation file for LibreOffice, it will open a helpful application that will guide you through the installation process. We guide you through this installation process below. 1. When the LibreOffice installer first opens, it will bring up a welcome screen. Left-click the “Next” button, as shown at right. You can use this button throughout the installer to navigate through it. The “Back” button can be used to go to a previous part of the installer, if desired. 2. On the next screen, the installer will ask you to “unpack” the installation files. The installer file has condensed several files into one file. Unpacking expands them so the installer can use them on your computer. The files will unpack into a folder. You can delete this folder after the installer finishes. After the files unpack, click “Next” on the following screen to proceed with the installation. LibreOffice, p.3
- 4. 3. On the next screen, put in your name and, if applicable, your company. This information is not required, but it can be helpful for some of LibreOffice's features, such as the ability to comment on documents. When it asks you whether to install LibreOffice for all users, it is probably best to install it for everyone. This way, if multiple people use your computer and login using different names and passwords, they'll be able to use the programs as well. Selecting this option does not give them access to your files, though. 4. The next screen asks if you want a “typical” installation or a custom Clicking the small down installation. Left-click “Custom” if you arrows lets you select don't need some of the applications whether or not to install (say the database application) or want different features of to install spell-check for non-English LibreOffice languages. We'll proceed as if you chose “Custom.” 5. If you chose “Custom,” the next screen will give you the option to install additional features (such as selecting “Additional language packs” or uninstalling things you don't need. You can do this by clicking the small down- facing arrow next to each program and then selecting the appropriate option (such as “This feature is not available” for the programs you don't want). In the example shown above, we have chosen not to install Base, the LibreOffice database application. Left- click “Next” after you make your selections. 6. The next screen will ask if you want to open a Microsoft Office document (i.e. files from Word, Excel, and PowerPoint) using LibreOffice. If you do not have Microsoft Office installed on your computer, it's a good idea to check these boxes. This way, files that people send you will automatically open in LibreOffice. If you already have Microsoft Office installed, it's up to you whether you'd rather use LibreOffice to open such files. 7. Next, you will be asked if you want to put a start link on the desktop. This will create an icon that you can double-click to access the different LibreOffice programs. If you like your programs to be accessible from the desktop, this is a good option to select. 8. LibreOffice will now install. Once it's completed, left-click “Finish” to close the installer. You can now open LibreOffice by double-clicking the icon on your desktop or finding LibreOffice in the programs menu of your computer. LibreOffice, p.4
- 5. The LibreOffice Suite LibreOffice provides several different programs, with different functions for each. Below we list the programs available and what they do. Writer Writer is a general-purpose word processing program (similar to Microsoft Word). It can be used to create letters, reports, lists, and other text-heavy documents. You can adorn these documents with tables and pictures. Documents can be printed, if desired. This walkthrough was made using Writer. Calc Calc can be used to create spreadsheets (similar to Microsoft Excel ) tabular documents that can be used for budgeting, inventory, databases of addresses, forms, and more. Formulas can be used to dynamically calculate figures. You can also generate colorful charts and graphs. Impress This program is your go-to place for presentations (similar to Microsoft PowerPoint), such as if you're asked to present on a topic to a public group or would like to display a slideshow. You can insert text, pictures, charts, and tables. Slides and information can also be animated in various ways for emphasis. Draw Used for more free-form documents (similar to Microsoft Publisher), Draw is a great way to make posters, cards, and other documents that require a bit of creativity. It makes it particularly easy to insert pictures, change the appearance of text, and create customized shapes. Base Base is a powerful database program (similar to Microsoft Access) that allows you to enter large amounts of data and generate custom forms and reports from that data. It's best used to large projects, such as tracking store inventories. Base probably has little application for a home user. Math This specialized program is used to create the text of mathematical formulas. Such formulas often use particular characters and formatting. Math can be used to create visual representations of formulas that would be difficult to do with other applications. LibreOffice's applications enable users to perform a number of functions. Below, we'll explore a bit more about Writer, Calc, Impress, and Draw. LibreOffice, p.5
- 6. Writer You can open LibreOffice in a couple of different ways. First, you can double-click the icon that was created on your desktop during the install process. A screen similar to the one at right will open. From here, you can choose what type of document you'd like to open, and LibreOffice will open the correct application. You can also open all of the LibreOffice applications from the main menu of your computer (the Start Menu then “All Programs” in Windows, the Applications menu on Macs, or the applications or main menu of Linux-based operating systems). Clicking “Text Document” will open Writer, the word processing program. The Writer opening screen is explained below. Menus: Click the menus to access many additional functions of Writer, such as alternate views, inserting objects into your documents, adjusting font and document properties, and more. Standard toolbar: Formatting toolbar: The top toolbar gives The bottom toolbar lets you access to basic document adjust text: the font, font size, functions: saving, opening, alignment, bulleting, and more. printing, creating PDFs, etc. Rulers: Lets you know and adjust Content area: your margins and your This is where the position on the document. information you enter Documents default to 8.5 X will be displayed. 11” size and 0.79” margins. Zoom: Use this slider to adjust how large the document looks on the screen. This does not affect the size of the document when it prints. LibreOffice, p.6
- 7. Writer can be used to create a number of different types of documents that primarily focus on text. For instance, at left is a letter that includes a letterhead image. In addition to simply being able to type text, Writer can also do more complex things such as allow you to insert images (such as the letterhead image in the example), tables, charts, bulleted lists, and much more. Because of Writer's versatility, it can be used to create fairly complicated documents such as reports, detailed walkthroughs such as the one at right or the one you're reading right now! Thanks to the “Save as PDF” function, easily available on the toolbar, you can also send the documents to others and ensure that they can open it no matter what operating system or office suite they use. Menus and toolbars Many of the functions and tools available in LibreOffice are accessed through the menus and toolbars. Each program in LibreOffice uses slightly different menus and toolbars, but they also share many common features. You can use your mouse to navigate these menus by left- clicking the appropriate word or icon. LibreOffice, p.7
- 8. The menu bar (shown below) is used to access all of the functions available in a program. By left-clicking the words at the top of the screen, you have the option to select various tools and make changes. For instance, clicking the “Insert” menu in Writer allows you to insert headers & footers, images, tables, and more. Left-clicking on one of the options under a menu will often open a small window that lets you adjust options. For instance, if you open the “Insert” menu, then click “Table,” a window will appear that asks you how many columns and rows you'd like to have in your table. Toolbars are icons that allow you even quicker access to LibreOffice's tools. Moving your mouse cursor over an icon opens a small hovering explanation of what that icon will do if you click it. The standard toolbar, shown below, is common across all LibreOffice applications. It allows you to perform basic functions with the document: saving, printing, checking spelling, searching for text etc. File functions: Undo and redo: Saving, creating, or opening Fix mistakes you existing documents, etc. may have made. Printing: Document tools: Print, print preview, Change the zoom, or save as PDF. search for text, etc. Another common toolbar is the formatting toolbar. It is used to change the appearance of text by making it bold, underlined, changing its size and design, and more. To change text, click and hold your left mouse button and drag your cursor over some text to highlight it. You can then select options from the formatting toolbar (such as clicking the “bold” icon) to change the appearance of the text. Font design and size Alignment (e.g. centering) Color and highlighting Bold, italics, and underlining Bullets and numbering There are different toolbars in the different applications depending on what you are doing. You can view or add more toolbars to your screen by clicking the “View” menu, moving your cursor over “Toolbars,” and then left-clicking the toolbar you want to open. Many toolbars will open automatically when you use certain tools. For instance, when you insert a table in Writer, the LibreOffice, p.8
- 9. “Table” toolbar will open automatically. LibreOffice, p.9
- 10. Calc Speaking of tables, LibreOffice includes an application that is specifically devoted to tabular information, whether textual or numerical: Calc. Calc is a spreadsheet program. Its documents are laid out in columns and rows, and the information can be manipulated to create charts and calculate figures. The Calc screen is explained below. Standard and formatting toolbars Formula bar: Shows you the detailed content of a cell, including any functions that are performing Content area: calculations in your document. Information in Calc is divided into cells in rows and columns. Sheets: Calc allows you to create separate “sheets” to store information so that you can organize information easily. Calc excels at dealing with numbers. It can be used to create budgets, calculate statistics, and present data in easy-to-understand tabular format. Data can also be presented in charts, such as bar, line, or pie. At right is an example of a budget that was created using Calc. It makes liberal use of functions, which allow Calc to compute figures dynamically. Thus, if you change the contents of a cell, the function will autmatically update the calculation. Functions can do everything from adding up lists of LibreOffice, p.10
- 11. numbers to counting occurrences of certain words or phrases to extremely complex statistical calculations. While it is beyond the scope of this walkthrough to discuss functions in detail, they are definitely one of the most powerful aspects of Calc. Calc can be used for more than numerical purposes, though. It can also be used for lists, databases of address, schedules, and much more. At left is an example of a schedule made using Calc. The application's simple grid design makes it easy to layout a schedule. Separate sheets are used for each month, allowing for easy organization of the schedules. You can also format cells in various ways by adding gridlines, background colors, and more. Functions can be used to identify text as well as perform numerical operations. in the example on the left, functions are used to calculate how often each person appears in the schedule. Impress Sometimes, you may find yourself needing to give a public presentation, or maybe even a slideshow of photos for your family. Enter Impress. It is used to create presentations with slides. You can insert text, photos, clipart, videos, tables, charts, and much more into Impress slides. Slides typically include a title and then elements such as boxes for text or photos. You can animate various parts of the slide, as well as insert special effects when you move to a new slide. When you first open Impress, it will open a dialog window that asks what you'd like to do. You can open an empty presentation (simply white background with black text - a blank canvas!), open a presentation you've already made, or start a new presentation from a template. Templates are visual themes for a presentation. They'll typically change the background, font and color, and placement of various elements in the presentation. Use templates to make your presentation prettier! LibreOffice, p.11
- 12. If you choose to make your presentation from a template, you'll be given various options for slide designs. For instance, at right we've selected a theme called “Glacier: that puts a glacier image in the background and gives the text a black and white theme. You can also choose whether you intend to make the presentation directly from a computer, print it out on paper, or other options. Impress also allows you to animate objects in your slides as well as the transitions between slides. If you open a presentation with the template, you can set a default animation between slides. If you're doing a slideshow, you can also set the presentation to automatically advance each slide without you having to do anything. While the animations and transitions in Impress are fun, however, they should be used judiciously, especially in public presentations. At right is an example of a custom- designed Impress presentation. You can use templates to design your presentations, as already explained, or you can design your own. In the example, the background has been changed as has the overall placement of text and images on the slides. Don't feel limited by the templates! You can even make presentations that have designs custom-made to fit your business or organization's logo and theme. The Impress screen is explained a bit more below. LibreOffice, p.12
- 13. Views: View and edit your slides, notes, and handouts. Slide preview: Allows you to preview and navigate among the slides in your Tasks bar: presentation. Content area: This is where you change Change your slides by factors like slide design, inserting text, images, layout, animations, tables, and other elements. transitions, and more. Draw Sometimes you may need to create more freeform documents, ones that aren't as restricted by margins, grids, or boxes. Enter Draw. It can be used to create flyers, cards, banners, maps, and many other documents that put your creativity to work. Draw makes it easy to insert pictures and text boxes and even to design your own shapes and other elements for your flyer. At left is a flyer made in Draw that includes many photos, images, text of various sizes and colors, and a background. Items can be easily moved around the screen and can be placed in layers over or under each other. This makes designed freeform documents very simple. The Draw screen is explained in more detail below. LibreOffice, p.13
- 14. Line and filling toolbar: Add borders and fill to objects that you've put into your document. Content area: Change your slides by inserting text, images, tables, and other elements. Drawing toolbar: Allows you to create Pages: shapes, text boxes, special Shows the different parts text art, and many more of your document, such features to your documents. as if you're making a multi-page card. Because Draw is so versatile, you can use it to create many different types of documents. At right is a document that uses a scanned map and adds new elements to it. Text and images can be manipulated and moved around easily using Draw, which means that it's much easier to create documents such as this map that require many pieces to be moved around. LibreOffice, p.14
- 15. What else do I need to know? Base and Math are the two other applications that round out the LibreOffice suite. Their uses are slightly more specialized, so they're not covered in this walkthrough. However, if the descriptions of them on page 5 intrigue you, definitely check them out. LibreOffice, as you can see, is an extremely versatile and useful set of programs. It is a completely viable alternative to expensive proprietary programs such as Microsoft Office and iWork. Check it out! Last updated: April 2, 2011, by Buzzy Nielsen LibreOffice, p.15