SlideShare uma empresa Scribd logo
1 de 59
Baixar para ler offline
DESIGN YOUR OWN

BLOG

How to

Design a Custom Opt-in

form

without a Plugin
4

by Marianne Manthey
DESIGN YOUR OWN

BLOG

PART 4
Style the Opt-in Form Design in your Blog
TABLE OF CONTENTS

This Slideshare is Part 4 of a 4 part tutorial
on designing a custom opt-in (sign up) form
for your blog.

The entire tutorial can be found here:
DesignYourOwnBlog.com

©2013 DesignYourOwnBlog.com. All rights reserved.
TABLE OF CONTENTS

Part 1

(first slideshow)

Create a Sign Up Form in MailChimp*
• Create a List

• Create a Form
• Get the Embed Code

©2013 DesignYourOwnBlog.com. All rights reserved.
TABLE OF CONTENTS

Part 2

(second slideshow)

Embed a Sign Up Form into your Blog
• Embed into WordPress Widget

• Embed into Blogger Gadget

©2013 DesignYourOwnBlog.com. All rights reserved.
TABLE OF CONTENTS

Part 3A+B

(slideshare + video)

Design Your Opt-in Box in PicMonkey
• Decide on shape and style

• Pick a background
• What size is our form?

• Add text and graphics
©2013 DesignYourOwnBlog.com. All rights reserved.
TABLE OF CONTENTS

Part 4

(this slideshow)

Style the Opt-in Form Design in your Blog
• A few simple CSS lessons – don’t be scared!

©2013 DesignYourOwnBlog.com. All rights reserved.
STYLE AN OPT-IN BOX WITH CSS

Let’s Style our Opt-In Boxes!
Open up your blog using the Chrome browser.
Or another favorite browser with a code inspector as long as
it’s not IE! I’m telling you, that code inspector is horrid.

Anyway, if you recall, our forms were pretty basic
looking after we embedded them in Part 2:

©2013 DesignYourOwnBlog.com. All rights reserved.
STYLE AN OPT-IN BOX WITH CSS
Then in Part 3, we had fun designing and I designed this fun looking
form and opt-in box:

Slightly modified from Part 3B for simplicity in this tutorial

©2013 DesignYourOwnBlog.com. All rights reserved.
STYLE AN OPT-IN BOX WITH CSS
Finally we removed the HTML elements from the designs, reduced the
size to fit, and saved an almost blank background image:

Now let’s finish up our custom opt-ins shall we?

©2013 DesignYourOwnBlog.com. All rights reserved.
STYLE AN OPT-IN BOX WITH CSS

Upload your background image
First things first.
WordPress: Upload your image to the WordPress media
library. Then click Edit and copy the URL of the image
from here.

Blogger: Upload your image using Picasa, Flickr or
Photobucket and grab the URL to the image.

Just paste the URL somewhere handy as we’ll need it later.

©2013 DesignYourOwnBlog.com. All rights reserved.
STYLE AN OPT-IN BOX WITH CSS

Now we’ll do a little CSS editing
CSS stands for Cascading Style Sheet.

Tip:
If you’re not that

This is the document that allows you to change the appearance

familiar with

of HTML elements on the page: the size, style, font, and color

CSS, you may

of text; background colors; border styles; etc.

want to read this
article before

We’ll begin by creating a new custom style sheet.

©2013 DesignYourOwnBlog.com. All rights reserved.

moving on.
STYLE AN OPT-IN BOX WITH CSS

A. Let’s add a custom Style Sheet in WordPress
If you’re on Blogger, skip to this page.

Before we do this, let’s check and see if your theme may already have a
blank style sheet added to it.

Go to your Dashboard and click Appearance > Editor.

©2013 DesignYourOwnBlog.com. All rights reserved.
STYLE AN OPT-IN BOX WITH CSS
The default open file you see should be styles.css. If it’s
blank (or has notes up top that mention you can edit it),
great! You can skip the next several pages.

If not, scroll down til you get to the bottom of the list of
file names to the right where it says Styles.

Open and check to see if any of these style sheets are
blank or have notes up top that say that you can edit it.

If you don’t have one like this, you’ll need to create
one and upload it to your blog.
©2013 DesignYourOwnBlog.com. All rights reserved.
STYLE AN OPT-IN BOX WITH CSS

Why can’t we edit styles.css?
Well technically you can, but the danger in doing so is that you
run the risk of having it overwritten should you update your theme
(which you should if it’s available).
This happens especially if you are using one of the TwentyTen,

TwentyEleven, TwentyTwelve or TwentyThirteen, etc. themes
because they get updated every time you update WordPress.

Trust me, I learned this the hard way.

©2013 DesignYourOwnBlog.com. All rights reserved.
STYLE AN OPT-IN BOX WITH CSS
Depending on who you use as your host, you’ll need to access
your blog’s files using FTP (file transfer protocol). Here are a few
common hosting companies’ instructions:

Godaddy
HostGator
Bluehost
Lunarpages
If your host is not listed here and you don’t know how to do this,
do a web search for:
“how to access ftp in [your host’s name]”

©2013 DesignYourOwnBlog.com. All rights reserved.
STYLE AN OPT-IN BOX WITH CSS

Now open up Notepad
or an equivalent basic text editor and save the blank file as

custom.css.
Next, you’ll upload this new CSS file using FTP to this folder:

wp-content/themes/THEME-NAME

(where THEME-NAME= the name of the theme you have activated)

©2013 DesignYourOwnBlog.com. All rights reserved.
STYLE AN OPT-IN BOX WITH CSS

Next, we need to add a link to our new style sheet
Here’s where things get a little squirrely. To do this, we must edit our

header.php file.
Unfortunately, the way how depends on which theme you are using
and since there are thousands of themes, that’s really beyond the
scope of this tutorial, so...

You’ll need to check with your theme provider (if you bought a theme)
or Google “how to edit header.php in THEME-NAME.”

©2013 DesignYourOwnBlog.com. All rights reserved.
STYLE AN OPT-IN BOX WITH CSS

Were you able to figure out how to edit header.php?
Ok great! Here’s the line of code you’ll need to add:*
<link rel="stylesheet" href="http://www.YOURURL.com/wp-content/themes/THEME-NAME/custom.css"
type="text/css" media="all">

just replace YOUR-URL with your own and THEME-NAME with the folder
you just uploaded your CSS file to.
*This link should go below any other similar <link> tags so that it overrides any
other style sheets.*

©2013 DesignYourOwnBlog.com. All rights reserved.
STYLE AN OPT-IN BOX WITH CSS
Now go back to Appearance > Editor and open up your
new custom.css file.

Your new blank file should be ready to go!
If you don’t see custom.css, then please let me know and I can try and
help you troubleshoot.

Skip the next page (it’s for Blogger) ….

©2013 DesignYourOwnBlog.com. All rights reserved.
STYLE AN OPT-IN BOX WITH CSS

B. Create a custom Style Sheet in Blogger
Lucky for those on Blogger, it’s quite simple to edit your CSS:
1. In your Blogger Dashboard, click Template in the left column.
2. Click the Customize button below your selected template.
3. Click the Advanced link.
4. Scroll down the next column and click Add CSS.
5. The Add Custom CSS box will appear.

©2013 DesignYourOwnBlog.com. All rights reserved.
STYLE AN OPT-IN BOX WITH CSS

Ok we are all ready to add our custom CSS!
The first thing we’ll do is add a class name to our HTML.
A class is basically a name that we are giving to an HTML element so
that we can single it out using our style sheet.
You can name a class anything you want as long as it doesn’t begin
with a digit and there are no spaces (dashes + underscores are

allowed instead ).
You also want the class name to be descriptive and not previously
used in your site.
©2013 DesignYourOwnBlog.com. All rights reserved.
STYLE AN OPT-IN BOX WITH CSS
Go to your Text Widget (WordPress) or HTML Gadget (Blogger) and
take a look at the HTML code we previously pasted in.

<!-- Begin MailChimp Signup Form -->
<div id="mc_embed_signup">
<form
action="http://designyourownblog.us4.list
-manage.com/subscribe/" method="post"
id="mc-embedded-subscribe-form" name="mcembedded-subscribe-form" class="validate"
target="_blank" novalidate>
<h2>Get Lovely Design in Your
Inbox!</h2>
<div class="mc-field-group">
...

©2013 DesignYourOwnBlog.com. All rights reserved.

See this <div> tag?
A div is basically an
invisible box that we
can put around any
element on the page to
give it 2 dimensions
(height and width).
STYLE AN OPT-IN BOX WITH CSS
I am going to give our div a class name of: optin-form (it’s unique and
descriptive) and we add the class name like so:
<div id=“mc_embed_signup” class=“optin-form”>

Be sure to put quotes around your class name and no spaces anywhere
in the highlighted area above. You’ll just need a space before it to
separate it from the id.

Now click Save.

©2013 DesignYourOwnBlog.com. All rights reserved.
STYLE AN OPT-IN BOX WITH CSS

Back to custom.css
Let’s call our new class name in the style sheet.

Tip:

We do that like this:
I highly suggest
you open a new
.optin-form {
}

browser tab so
that you can
quickly jump

See how I used the class name that I made up earlier? We add a period
before it to tell the style sheet that it is the name of a class. This is very
important.

Our style declarations will go between the curly braces { }

©2013 DesignYourOwnBlog.com. All rights reserved.

back and forth
between style
sheet and HTML.
STYLE AN OPT-IN BOX WITH CSS
The first declaration we’ll add is the background. We do that like this:
.optin-form {
background: url(http://URL/airmail-bg.jpg);
}

“background” is actually a CSS property, it’s not an arbitrary word. Properties are always
followed by a colon (:) then the value we choose for it.
The value we want to choose for our background is the image we uploaded earlier.
Since we are pointing to a URL where the image is located (remember we pasted that somewhere
handy?), we type url()after the colon. The URL to our image goes between the

parentheses.

©2013 DesignYourOwnBlog.com. All rights reserved.
STYLE AN OPT-IN BOX WITH CSS

.optin-form {
background: url(http://URL/airmail-bg.jpg) no-repeat;
}

I don’t want my background to tile or repeat so I’ll add no-repeat which is an attribute
that belongs to the background property.

IMPORTANT!
Each declaration ends with a semi colon ;

©2013 DesignYourOwnBlog.com. All rights reserved.
STYLE AN OPT-IN BOX WITH CSS
Now let’s add height and width.
.optin-form {
background: url(http://URL/airmail-bg.jpg) no-repeat;
height: 225px;
width: 300px;
}

Replace the values above with whatever size your background image is.
Notice how each declaration goes on it’s own line. This is not necessary, but it makes it
easier to read. And don’t forget, each declaration ends with that semi colon.

Now hit Save or Update and refresh your blog page.

©2013 DesignYourOwnBlog.com. All rights reserved.
STYLE AN OPT-IN BOX WITH CSS
You should now see something like this (but with your own image):

Needs some work, but looks better already!

Now right click on the background and select “Inspect Element.”

©2013 DesignYourOwnBlog.com. All rights reserved.
STYLE AN OPT-IN BOX WITH CSS
Remember the element inspector from Part 3A?
On the left is the HTML and the right is our CSS.

See our
new class
name?

©2013 DesignYourOwnBlog.com. All rights reserved.

And the
style
declarations we
added to
it?
STYLE AN OPT-IN BOX WITH CSS
On the HTML side, click on the elements within that div tag and you’ll see each item highlighted
in your form on the webpage.

Here is the
h2 on the
page, also
highlighted

Here is our
heading, it’s
inside an h2
(heading 2)
tag.

©2013 DesignYourOwnBlog.com. All rights reserved.
STYLE AN OPT-IN BOX WITH CSS

Here’s where this gets fun.
See at the top of the CSS side where it says element.style with two curly braces? Click on that
and you’ll see that you can add style declarations directly in the element Inspector to try them out.

IMPORTANT: This is just to try out styles on the fly.
Once you refresh the page, you’ll lose any changes you’ve made.
©2013 DesignYourOwnBlog.com. All rights reserved.
STYLE AN OPT-IN BOX WITH CSS
Let’s play with it. Look what happens when I change the color and font size.

color and font-size are pre-defined properties and self-explantory.
Use this CSS cheat sheet for help finding which selectors are available to use.

©2013 DesignYourOwnBlog.com. All rights reserved.
STYLE AN OPT-IN BOX WITH CSS
NOTE
When looking at the CSS in the code inspector, know that anything on
the top overrides styles below it. That’s why we are able to change the
color and font size of that H2 tag, because it’s on top.
Scroll down in your element inspector window to see previous styles that were
applied to the H2 tag.

In a style sheet however, it’s the opposite: Anything on the bottom
overrides styles above it.

©2013 DesignYourOwnBlog.com. All rights reserved.
STYLE AN OPT-IN BOX WITH CSS
ANOTHER NOTE ;)

FYI:

You may have also noticed that the h2 tag in the style sheet does not
begin with a period.

You may notice

in your style
That’s because only class names begin with a period.

sheets that there
are words that

If you add styles to an actual HTML tag, then you would not use a period.
But then know that every instance of that tag in your blog will take on
those style declarations. That’s why we add a class name so that we can
single that HTML tag out.

begin with a #.

These are id’s.
Don’t worry
about id’s, we
won’t be using

them.

©2013 DesignYourOwnBlog.com. All rights reserved.
STYLE AN OPT-IN BOX WITH CSS

Ok back to styling
Let’s add some space within the form so that our elements aren’t
butted up against the borders.

Spacing is added either by padding or margins:

margin



•

Padding adds space INSIDE an element, pushing its contents
inward.

•

Margins add space OUTSIDE an element, pushing other
elements away from it.

©2013 DesignYourOwnBlog.com. All rights reserved.

padding

Here is your content,
contained within
padding inside your 
div (light blue box).

- - - - - - - - - -div width- - - - - - - - - 
STYLE AN OPT-IN BOX WITH CSS
Here’s how we add padding
.optin-form {
background: url(http://URL/airmail-bg.jpg) no-repeat;
height: 225px;
width: 300px;
padding: 20px;
box-sizing: border-box;
}

I chose 20px (20 pixels) for my padding, but you should choose whatever looks best for your
background image. Maybe your border isn’t as thick as mine so you need less.
Notice I also added box-sizing. I added this because some browsers (like Firefox) add padding to the
width of its box bringing the box’s width to 265px (225px + 20px on each side). Box-sizing forces it to
keep the padding inside thereby reducing the available content width to 185px.
©2013 DesignYourOwnBlog.com. All rights reserved.
STYLE AN OPT-IN BOX WITH CSS
Now hit Save or Update and refresh your blog page.
Mine looks like this now

That looks better doesn’t it?
There’s just one thing. We need more padding at the top to
move our h2 below the stamp.

By using just one attribute for the padding (in this case 20px),
we added the same padding to all 4 sides.

But we can add different values to each side like this:

padding: 55px 16px 20px 16px;

The order of values is: top, right, bottom, left.

©2013 DesignYourOwnBlog.com. All rights reserved.
STYLE AN OPT-IN BOX WITH CSS
Let’s style the h2 tag
I chose Lobster Two font in dark navy blue (hex color #283043). Lobster Two is a
Google font which makes it easy to use on most blogs.
To learn how to add Google fonts to your blog, read this.

So as you’ll learn in the article linked above, we add a reference to the Google font at
the top of our style sheet. This link is provided by Google fonts so it’s as easy as copy
and paste.
@import url(http://fonts.googleapis.com/css?family=Lobster+Two);

©2013 DesignYourOwnBlog.com. All rights reserved.
STYLE AN OPT-IN BOX WITH CSS
Now we want to add this font to our h2, but we’ll have to target the h2 inside our opt-in box
because we don’t want to affect every h2 in our blog.

To do this we use our unique class, a space, then h2:
.optin-form h2 {
}

That tells the browser to apply these styles just to the h2’s within the div with a class

name of optin-box.

©2013 DesignYourOwnBlog.com. All rights reserved.
STYLE AN OPT-IN BOX WITH CSS
Then we add style declarations to the h2:

.optin-form h2 {
font-family: ‘Lobster Two’;
color: #283043;
font-size: 1.6em;
}

•

Here is our result so far:
Notice the single quotes around the font name?
That’s because its name is two words.

•

The font color chosen is a very dark blue.

•

“em” is a unit of measurement for fonts.

©2013 DesignYourOwnBlog.com. All rights reserved.
STYLE AN OPT-IN BOX WITH CSS

Phew, are you still with me?
Is this starting to make sense?

©2013 DesignYourOwnBlog.com. All rights reserved.
STYLE AN OPT-IN BOX WITH CSS
Here’s where we are compared to what we’re going for:

Just a few more changes…
1. I’d like to make the h2 less bold.
2. I want to change the label from “Email” to “Enter Email”.

3. I want to reverse the position of the Subscribe button and the View previous campaigns link.

©2013 DesignYourOwnBlog.com. All rights reserved.
STYLE AN OPT-IN BOX WITH CSS
So my h2 shows up as bolded. Why?
Because the h2 has previously been defined as bold. I scrolled down the right side to find this

definition below:

©2013 DesignYourOwnBlog.com. All rights reserved.
STYLE AN OPT-IN BOX WITH CSS
No Problem!
We’ll override it by just adding a new line to our definition for optin-form h2:

.optin-form h2 {
font-family: ‘Lobster Two’;
color: #283043;
font-size: 1.6em;
font-weight: normal;
}

That resets the weight of the font back to normal, which is the default.

©2013 DesignYourOwnBlog.com. All rights reserved.
STYLE AN OPT-IN BOX WITH CSS
For my other two changes, I will need to edit my HTML.
If you look at the HTML carefully, it’s fairly easy to find what you’re looking for.
<h2>Get Lovely Design in Your Inbox!</h2>
<div class="mc-field-group">
<label for="mce-EMAIL">Email </label>
<input type="email" value="" name="EMAIL"
class="required email" id="mce-EMAIL">
</div>
<p><a href="http://us4.campaignarchive1.com/home/?u=2361b" title="View previous
campaigns">View previous campaigns.</a></p>
<div id="mce-responses" class="clear">
<div class="response" id="mce-errorresponse" style="display:none"></div>
<div class="response" id="mce-successresponse" style="display:none"></div>
</div>
<div class="clear"><input type="submit"
value="Subscribe" name="subscribe" id="mcembedded-subscribe" class="button"></div>

©2013 DesignYourOwnBlog.com. All rights reserved.

Here is my label that
says “Email”
Here is the link “View
previous campaigns.”
The <a> tag is a link
and the <p> tag
wrapped around it
denotes a paragraph.

And here is my Submit
button, an <input>
tag wrapped in a
<div>
STYLE AN OPT-IN BOX WITH CSS
I edited the label below. That was easy.

<h2>Get Lovely Design in Your Inbox!</h2>
<div class="mc-field-group">
<label for="mce-EMAIL">Enter Email </label>
<input type="email" value="" name="EMAIL"
class="required email" id="mce-EMAIL">
</div>
<p><a href="http://us4.campaignarchive1.com/home/?u=2361b" title="View previous
campaigns">View previous campaigns.</a></p>
<div id="mce-responses" class="clear">
<div class="response" id="mce-errorresponse" style="display:none"></div>
<div class="response" id="mce-successresponse" style="display:none"></div>
</div>
<div class="clear"><input type="submit"
value="Subscribe" name="subscribe" id="mcembedded-subscribe" class="button"></div>

©2013 DesignYourOwnBlog.com. All rights reserved.

Here is my label that
now says “Enter
Email”
STYLE AN OPT-IN BOX WITH CSS
Next, I took the entire yellow highlighted areas and swapped them.

<h2>Get Lovely Design in Your Inbox!</h2>
<div class="mc-field-group">
<label for="mce-EMAIL">Email </label>
<input type="email" value="" name="EMAIL"
class="required email" id="mce-EMAIL">
</div>
<div class="clear"><input type="submit"
value="Subscribe" name="subscribe" id="mcembedded-subscribe" class="button"></div>
<div id="mce-responses" class="clear">
<div class="response" id="mce-errorresponse" style="display:none"></div>
<div class="response" id="mce-successresponse" style="display:none"></div>
</div>
<p><a href="http://us4.campaignarchive1.com/home/?u=2361b" title="View previous
campaigns">View previous campaigns.</a></p>

©2013 DesignYourOwnBlog.com. All rights reserved.

Now the button is just
below the form field

(you can ignore this part,
it’s behind the scenes
code)

And the link is now at
the bottom.
STYLE AN OPT-IN BOX WITH CSS
Aaaaand we get this:

So just a few more tiny tweaks and we’re done!
1. Push the button and link right to align with the form field.
2. Style the button.

©2013 DesignYourOwnBlog.com. All rights reserved.
STYLE AN OPT-IN BOX WITH CSS
Let’s start with pushing the link over to the right.
If we look at the code two slides back, you’ll see that the link is an <a> tag and it happens to be
the only <a> tag within our optin-form div.
Therefore, we can call this tag within our div that we named with the class “optin-form”. We do
that like this:

.optin-form a {
margin-left: 74px;
}

©2013 DesignYourOwnBlog.com. All rights reserved.
STYLE AN OPT-IN BOX WITH CSS
.optin-form a {
margin-left: 74px;
}

We work from the outside, in.
First we call the outer div (.optin-form) followed by a space, then the <a> tag.

Because I only wanted to add a left margin, I just used margin-left as my property. In my form,
the correct amount was 74px to align it correctly. Yours might be different. Play with it in the
element inspector.
Note: if there were more than one <a> tag within the optin-form div, then I would have to give the <a>
that I want to affect, a class name so that I can single it out. For example, I could call it
<a class=“view-link”>. Otherwise, all the <a> tags would have the left margin applied to it.

©2013 DesignYourOwnBlog.com. All rights reserved.
STYLE AN OPT-IN BOX WITH CSS
I can apply the same principles to the button to push it to the right as well.

In the HTML code, there are two different <input> tags, but only one with a class name of
“button”. To call just this specific input tag, we write input then a period and the class name.

(No spaces between the tag, period and class name).

.optin-form input.button {
margin-left: 74px;
}

©2013 DesignYourOwnBlog.com. All rights reserved.
STYLE AN OPT-IN BOX WITH CSS
Refresh and now we get this:

Last thing to do is style that Submit button!

©2013 DesignYourOwnBlog.com. All rights reserved.
STYLE AN OPT-IN BOX WITH CSS

Add some style to that Submit button!
In my mockup, I have a fuschia colored button with rounded corners and white text. Here’s how

we add that:
.optin-form input.button {
margin-left: 74px;
background: #de0045;
border-radius: 4px;
}

•

I also give the button the same left margin as the link so they line up.

•

I gave the button a background color (#de0045 = fuschia)

•

I gave the button some rounded corners using border-radius. I picked 4px to see what it
looks like.

©2013 DesignYourOwnBlog.com. All rights reserved.
STYLE AN OPT-IN BOX WITH CSS
When I refresh the page, I get this:

A few more tweaks:
1. Change the color of “Submit” to white and the font to Lobster Two.
2. I also want to bump up the font size in the button.
3. Give the button a little more padding to make it fatter.
4. Deepen the rounded corners to better match my mockup.
5. Remove the grey border around the button (hard to see, but it’s there).
©2013 DesignYourOwnBlog.com. All rights reserved.
STYLE AN OPT-IN BOX WITH CSS
To make these changes, I’ll:
1. Add a font color (#ffffff is white) and new font-family.
2. Add a font-size property to the button text to make it larger.
3. Add some padding. Remember how padding and margins go Top, Right, Bottom, Left? I want
to add more padding to the left and right, hence the values chosen below.
4. Change the border-radius from 4px to 6px to make it a little rounder.
5. Remove the border using border: none;
.optin-form input.button {
margin-left: 74px;
background: #de0045;
color: #ffffff;
font-family: ‘Lobster Two’;
font-size: 1.2em;
padding: 4px 30px 4px 30px;
border-radius: 6px;
border: none;
}
©2013 DesignYourOwnBlog.com. All rights reserved.
STYLE AN OPT-IN BOX WITH CSS
Ok let’s refresh and now we see this:

That looks pretty good to me!
If yours doesn’t look just right, keep tweaking with it using the Element Inspector.
Then copy over the styles you chose into your style sheet once you’re satisfied.
Just remember not to hit refresh.

©2013 DesignYourOwnBlog.com. All rights reserved.
DESIGN AN OPT-IN BOX: SHAPE + STYLE

You Made It!
How do you feel? I’d love to hear how this tutorial was to follow. I hope
you were able to create a beautiful opt-in form box that you love!

If you need any help at all, please leave a comment below (or on this
page) and I’ll be happy to answer your questions!

Thank You!!

©2013 DesignYourOwnBlog.com. All rights reserved.
THANK YOU
Thank you for watching Part 4 of How to Design a Custom Opt-in Form without a Plugin!

Return to the Tutorial Page
*All MailChimp links are referral links.
©2014 DesignYourOwnBlog.com. All rights reserved.

©2013 DesignYourOwnBlog.com. All rights reserved.

Mais conteúdo relacionado

Destaque

How to Schedule a Campaign in MailChimp
How to Schedule a Campaign in MailChimpHow to Schedule a Campaign in MailChimp
How to Schedule a Campaign in MailChimpJaysarie Gundran
 
How to Add a Sign Up Form to a Facebook Page
How to Add a Sign Up Form to a Facebook Page How to Add a Sign Up Form to a Facebook Page
How to Add a Sign Up Form to a Facebook Page Jaysarie Gundran
 
A Creed for Those Who Have Suffered- An Inspirational Poem About The Meaning ...
A Creed for Those Who Have Suffered- An Inspirational Poem About The Meaning ...A Creed for Those Who Have Suffered- An Inspirational Poem About The Meaning ...
A Creed for Those Who Have Suffered- An Inspirational Poem About The Meaning ...Minna Corcuera
 
Save Time on your Email Marketing Campaign with Mailchimp
Save Time on your Email Marketing Campaign with MailchimpSave Time on your Email Marketing Campaign with Mailchimp
Save Time on your Email Marketing Campaign with MailchimpKristine Grace Gerongco
 
MailChimp Website Tutorial
MailChimp Website TutorialMailChimp Website Tutorial
MailChimp Website TutorialJasmine Ancheta
 
MAILCHIMP: A tool for Newbies and Expert Email Marketers
MAILCHIMP: A tool for Newbies and Expert Email Marketers	MAILCHIMP: A tool for Newbies and Expert Email Marketers
MAILCHIMP: A tool for Newbies and Expert Email Marketers Mafel Gorne
 
How to use mail chimp tutorial by Louie Tuboro
How to use mail chimp tutorial by Louie TuboroHow to use mail chimp tutorial by Louie Tuboro
How to use mail chimp tutorial by Louie Tuborolouie Tuboro
 
The Sales Funnel
The Sales FunnelThe Sales Funnel
The Sales Funnelshewmakt
 
Marketing Automation Hacks: MailChimp
Marketing Automation Hacks: MailChimpMarketing Automation Hacks: MailChimp
Marketing Automation Hacks: MailChimpUberflip
 
The Future Is Here: How Social Affects Lead Generation
The Future Is Here: How Social Affects Lead GenerationThe Future Is Here: How Social Affects Lead Generation
The Future Is Here: How Social Affects Lead GenerationMarketo
 
Crap. The Content Marketing Deluge.
Crap. The Content Marketing Deluge.Crap. The Content Marketing Deluge.
Crap. The Content Marketing Deluge.Velocity Partners
 
What Would Steve Do? 10 Lessons from the World's Most Captivating Presenters
What Would Steve Do? 10 Lessons from the World's Most Captivating PresentersWhat Would Steve Do? 10 Lessons from the World's Most Captivating Presenters
What Would Steve Do? 10 Lessons from the World's Most Captivating PresentersHubSpot
 

Destaque (13)

How to Schedule a Campaign in MailChimp
How to Schedule a Campaign in MailChimpHow to Schedule a Campaign in MailChimp
How to Schedule a Campaign in MailChimp
 
How to Add a Sign Up Form to a Facebook Page
How to Add a Sign Up Form to a Facebook Page How to Add a Sign Up Form to a Facebook Page
How to Add a Sign Up Form to a Facebook Page
 
A Creed for Those Who Have Suffered- An Inspirational Poem About The Meaning ...
A Creed for Those Who Have Suffered- An Inspirational Poem About The Meaning ...A Creed for Those Who Have Suffered- An Inspirational Poem About The Meaning ...
A Creed for Those Who Have Suffered- An Inspirational Poem About The Meaning ...
 
Save Time on your Email Marketing Campaign with Mailchimp
Save Time on your Email Marketing Campaign with MailchimpSave Time on your Email Marketing Campaign with Mailchimp
Save Time on your Email Marketing Campaign with Mailchimp
 
MailChimp Website Tutorial
MailChimp Website TutorialMailChimp Website Tutorial
MailChimp Website Tutorial
 
MAILCHIMP: A tool for Newbies and Expert Email Marketers
MAILCHIMP: A tool for Newbies and Expert Email Marketers	MAILCHIMP: A tool for Newbies and Expert Email Marketers
MAILCHIMP: A tool for Newbies and Expert Email Marketers
 
How to use mail chimp tutorial by Louie Tuboro
How to use mail chimp tutorial by Louie TuboroHow to use mail chimp tutorial by Louie Tuboro
How to use mail chimp tutorial by Louie Tuboro
 
The Sales Funnel
The Sales FunnelThe Sales Funnel
The Sales Funnel
 
Marketing Automation Hacks: MailChimp
Marketing Automation Hacks: MailChimpMarketing Automation Hacks: MailChimp
Marketing Automation Hacks: MailChimp
 
Mailchimp
MailchimpMailchimp
Mailchimp
 
The Future Is Here: How Social Affects Lead Generation
The Future Is Here: How Social Affects Lead GenerationThe Future Is Here: How Social Affects Lead Generation
The Future Is Here: How Social Affects Lead Generation
 
Crap. The Content Marketing Deluge.
Crap. The Content Marketing Deluge.Crap. The Content Marketing Deluge.
Crap. The Content Marketing Deluge.
 
What Would Steve Do? 10 Lessons from the World's Most Captivating Presenters
What Would Steve Do? 10 Lessons from the World's Most Captivating PresentersWhat Would Steve Do? 10 Lessons from the World's Most Captivating Presenters
What Would Steve Do? 10 Lessons from the World's Most Captivating Presenters
 

Último

CBD Belapur Individual Call Girls In 08976425520 Panvel Only Genuine Call Girls
CBD Belapur Individual Call Girls In 08976425520 Panvel Only Genuine Call GirlsCBD Belapur Individual Call Girls In 08976425520 Panvel Only Genuine Call Girls
CBD Belapur Individual Call Girls In 08976425520 Panvel Only Genuine Call Girlsmodelanjalisharma4
 
DragonBall PowerPoint Template for demo.pptx
DragonBall PowerPoint Template for demo.pptxDragonBall PowerPoint Template for demo.pptx
DragonBall PowerPoint Template for demo.pptxmirandajeremy200221
 
VIP Call Girls Service Bhagyanagar Hyderabad Call +91-8250192130
VIP Call Girls Service Bhagyanagar Hyderabad Call +91-8250192130VIP Call Girls Service Bhagyanagar Hyderabad Call +91-8250192130
VIP Call Girls Service Bhagyanagar Hyderabad Call +91-8250192130Suhani Kapoor
 
Fashion trends before and after covid.pptx
Fashion trends before and after covid.pptxFashion trends before and after covid.pptx
Fashion trends before and after covid.pptxVanshNarang19
 
VIP Call Girls Bhiwandi Ananya 8250192130 Independent Escort Service Bhiwandi
VIP Call Girls Bhiwandi Ananya 8250192130 Independent Escort Service BhiwandiVIP Call Girls Bhiwandi Ananya 8250192130 Independent Escort Service Bhiwandi
VIP Call Girls Bhiwandi Ananya 8250192130 Independent Escort Service BhiwandiSuhani Kapoor
 
Top Rated Pune Call Girls Koregaon Park ⟟ 6297143586 ⟟ Call Me For Genuine S...
Top Rated  Pune Call Girls Koregaon Park ⟟ 6297143586 ⟟ Call Me For Genuine S...Top Rated  Pune Call Girls Koregaon Park ⟟ 6297143586 ⟟ Call Me For Genuine S...
Top Rated Pune Call Girls Koregaon Park ⟟ 6297143586 ⟟ Call Me For Genuine S...Call Girls in Nagpur High Profile
 
SD_The MATATAG Curriculum Training Design.pptx
SD_The MATATAG Curriculum Training Design.pptxSD_The MATATAG Curriculum Training Design.pptx
SD_The MATATAG Curriculum Training Design.pptxjanettecruzeiro1
 
Booking open Available Pune Call Girls Nanded City 6297143586 Call Hot India...
Booking open Available Pune Call Girls Nanded City  6297143586 Call Hot India...Booking open Available Pune Call Girls Nanded City  6297143586 Call Hot India...
Booking open Available Pune Call Girls Nanded City 6297143586 Call Hot India...Call Girls in Nagpur High Profile
 
Recommendable # 971589162217 # philippine Young Call Girls in Dubai By Marina...
Recommendable # 971589162217 # philippine Young Call Girls in Dubai By Marina...Recommendable # 971589162217 # philippine Young Call Girls in Dubai By Marina...
Recommendable # 971589162217 # philippine Young Call Girls in Dubai By Marina...home
 
The history of music videos a level presentation
The history of music videos a level presentationThe history of music videos a level presentation
The history of music videos a level presentationamedia6
 
Top Rated Pune Call Girls Saswad ⟟ 6297143586 ⟟ Call Me For Genuine Sex Serv...
Top Rated  Pune Call Girls Saswad ⟟ 6297143586 ⟟ Call Me For Genuine Sex Serv...Top Rated  Pune Call Girls Saswad ⟟ 6297143586 ⟟ Call Me For Genuine Sex Serv...
Top Rated Pune Call Girls Saswad ⟟ 6297143586 ⟟ Call Me For Genuine Sex Serv...Call Girls in Nagpur High Profile
 
Kala jadu for love marriage | Real amil baba | Famous amil baba | kala jadu n...
Kala jadu for love marriage | Real amil baba | Famous amil baba | kala jadu n...Kala jadu for love marriage | Real amil baba | Famous amil baba | kala jadu n...
Kala jadu for love marriage | Real amil baba | Famous amil baba | kala jadu n...babafaisel
 
Captivating Charm: Exploring Marseille's Hillside Villas with Our 3D Architec...
Captivating Charm: Exploring Marseille's Hillside Villas with Our 3D Architec...Captivating Charm: Exploring Marseille's Hillside Villas with Our 3D Architec...
Captivating Charm: Exploring Marseille's Hillside Villas with Our 3D Architec...Yantram Animation Studio Corporation
 
(AISHA) Ambegaon Khurd Call Girls Just Call 7001035870 [ Cash on Delivery ] P...
(AISHA) Ambegaon Khurd Call Girls Just Call 7001035870 [ Cash on Delivery ] P...(AISHA) Ambegaon Khurd Call Girls Just Call 7001035870 [ Cash on Delivery ] P...
(AISHA) Ambegaon Khurd Call Girls Just Call 7001035870 [ Cash on Delivery ] P...ranjana rawat
 
SCRIP Lua HTTP PROGRACMACION PLC WECON CA
SCRIP Lua HTTP PROGRACMACION PLC  WECON CASCRIP Lua HTTP PROGRACMACION PLC  WECON CA
SCRIP Lua HTTP PROGRACMACION PLC WECON CANestorGamez6
 
Peaches App development presentation deck
Peaches App development presentation deckPeaches App development presentation deck
Peaches App development presentation decktbatkhuu1
 
AMBER GRAIN EMBROIDERY | Growing folklore elements | Root-based materials, w...
AMBER GRAIN EMBROIDERY | Growing folklore elements |  Root-based materials, w...AMBER GRAIN EMBROIDERY | Growing folklore elements |  Root-based materials, w...
AMBER GRAIN EMBROIDERY | Growing folklore elements | Root-based materials, w...BarusRa
 
CALL ON ➥8923113531 🔝Call Girls Aminabad Lucknow best Night Fun service
CALL ON ➥8923113531 🔝Call Girls Aminabad Lucknow best Night Fun serviceCALL ON ➥8923113531 🔝Call Girls Aminabad Lucknow best Night Fun service
CALL ON ➥8923113531 🔝Call Girls Aminabad Lucknow best Night Fun serviceanilsa9823
 
Chapter 19_DDA_TOD Policy_First Draft 2012.pdf
Chapter 19_DDA_TOD Policy_First Draft 2012.pdfChapter 19_DDA_TOD Policy_First Draft 2012.pdf
Chapter 19_DDA_TOD Policy_First Draft 2012.pdfParomita Roy
 
VIP Call Girls Service Mehdipatnam Hyderabad Call +91-8250192130
VIP Call Girls Service Mehdipatnam Hyderabad Call +91-8250192130VIP Call Girls Service Mehdipatnam Hyderabad Call +91-8250192130
VIP Call Girls Service Mehdipatnam Hyderabad Call +91-8250192130Suhani Kapoor
 

Último (20)

CBD Belapur Individual Call Girls In 08976425520 Panvel Only Genuine Call Girls
CBD Belapur Individual Call Girls In 08976425520 Panvel Only Genuine Call GirlsCBD Belapur Individual Call Girls In 08976425520 Panvel Only Genuine Call Girls
CBD Belapur Individual Call Girls In 08976425520 Panvel Only Genuine Call Girls
 
DragonBall PowerPoint Template for demo.pptx
DragonBall PowerPoint Template for demo.pptxDragonBall PowerPoint Template for demo.pptx
DragonBall PowerPoint Template for demo.pptx
 
VIP Call Girls Service Bhagyanagar Hyderabad Call +91-8250192130
VIP Call Girls Service Bhagyanagar Hyderabad Call +91-8250192130VIP Call Girls Service Bhagyanagar Hyderabad Call +91-8250192130
VIP Call Girls Service Bhagyanagar Hyderabad Call +91-8250192130
 
Fashion trends before and after covid.pptx
Fashion trends before and after covid.pptxFashion trends before and after covid.pptx
Fashion trends before and after covid.pptx
 
VIP Call Girls Bhiwandi Ananya 8250192130 Independent Escort Service Bhiwandi
VIP Call Girls Bhiwandi Ananya 8250192130 Independent Escort Service BhiwandiVIP Call Girls Bhiwandi Ananya 8250192130 Independent Escort Service Bhiwandi
VIP Call Girls Bhiwandi Ananya 8250192130 Independent Escort Service Bhiwandi
 
Top Rated Pune Call Girls Koregaon Park ⟟ 6297143586 ⟟ Call Me For Genuine S...
Top Rated  Pune Call Girls Koregaon Park ⟟ 6297143586 ⟟ Call Me For Genuine S...Top Rated  Pune Call Girls Koregaon Park ⟟ 6297143586 ⟟ Call Me For Genuine S...
Top Rated Pune Call Girls Koregaon Park ⟟ 6297143586 ⟟ Call Me For Genuine S...
 
SD_The MATATAG Curriculum Training Design.pptx
SD_The MATATAG Curriculum Training Design.pptxSD_The MATATAG Curriculum Training Design.pptx
SD_The MATATAG Curriculum Training Design.pptx
 
Booking open Available Pune Call Girls Nanded City 6297143586 Call Hot India...
Booking open Available Pune Call Girls Nanded City  6297143586 Call Hot India...Booking open Available Pune Call Girls Nanded City  6297143586 Call Hot India...
Booking open Available Pune Call Girls Nanded City 6297143586 Call Hot India...
 
Recommendable # 971589162217 # philippine Young Call Girls in Dubai By Marina...
Recommendable # 971589162217 # philippine Young Call Girls in Dubai By Marina...Recommendable # 971589162217 # philippine Young Call Girls in Dubai By Marina...
Recommendable # 971589162217 # philippine Young Call Girls in Dubai By Marina...
 
The history of music videos a level presentation
The history of music videos a level presentationThe history of music videos a level presentation
The history of music videos a level presentation
 
Top Rated Pune Call Girls Saswad ⟟ 6297143586 ⟟ Call Me For Genuine Sex Serv...
Top Rated  Pune Call Girls Saswad ⟟ 6297143586 ⟟ Call Me For Genuine Sex Serv...Top Rated  Pune Call Girls Saswad ⟟ 6297143586 ⟟ Call Me For Genuine Sex Serv...
Top Rated Pune Call Girls Saswad ⟟ 6297143586 ⟟ Call Me For Genuine Sex Serv...
 
Kala jadu for love marriage | Real amil baba | Famous amil baba | kala jadu n...
Kala jadu for love marriage | Real amil baba | Famous amil baba | kala jadu n...Kala jadu for love marriage | Real amil baba | Famous amil baba | kala jadu n...
Kala jadu for love marriage | Real amil baba | Famous amil baba | kala jadu n...
 
Captivating Charm: Exploring Marseille's Hillside Villas with Our 3D Architec...
Captivating Charm: Exploring Marseille's Hillside Villas with Our 3D Architec...Captivating Charm: Exploring Marseille's Hillside Villas with Our 3D Architec...
Captivating Charm: Exploring Marseille's Hillside Villas with Our 3D Architec...
 
(AISHA) Ambegaon Khurd Call Girls Just Call 7001035870 [ Cash on Delivery ] P...
(AISHA) Ambegaon Khurd Call Girls Just Call 7001035870 [ Cash on Delivery ] P...(AISHA) Ambegaon Khurd Call Girls Just Call 7001035870 [ Cash on Delivery ] P...
(AISHA) Ambegaon Khurd Call Girls Just Call 7001035870 [ Cash on Delivery ] P...
 
SCRIP Lua HTTP PROGRACMACION PLC WECON CA
SCRIP Lua HTTP PROGRACMACION PLC  WECON CASCRIP Lua HTTP PROGRACMACION PLC  WECON CA
SCRIP Lua HTTP PROGRACMACION PLC WECON CA
 
Peaches App development presentation deck
Peaches App development presentation deckPeaches App development presentation deck
Peaches App development presentation deck
 
AMBER GRAIN EMBROIDERY | Growing folklore elements | Root-based materials, w...
AMBER GRAIN EMBROIDERY | Growing folklore elements |  Root-based materials, w...AMBER GRAIN EMBROIDERY | Growing folklore elements |  Root-based materials, w...
AMBER GRAIN EMBROIDERY | Growing folklore elements | Root-based materials, w...
 
CALL ON ➥8923113531 🔝Call Girls Aminabad Lucknow best Night Fun service
CALL ON ➥8923113531 🔝Call Girls Aminabad Lucknow best Night Fun serviceCALL ON ➥8923113531 🔝Call Girls Aminabad Lucknow best Night Fun service
CALL ON ➥8923113531 🔝Call Girls Aminabad Lucknow best Night Fun service
 
Chapter 19_DDA_TOD Policy_First Draft 2012.pdf
Chapter 19_DDA_TOD Policy_First Draft 2012.pdfChapter 19_DDA_TOD Policy_First Draft 2012.pdf
Chapter 19_DDA_TOD Policy_First Draft 2012.pdf
 
VIP Call Girls Service Mehdipatnam Hyderabad Call +91-8250192130
VIP Call Girls Service Mehdipatnam Hyderabad Call +91-8250192130VIP Call Girls Service Mehdipatnam Hyderabad Call +91-8250192130
VIP Call Girls Service Mehdipatnam Hyderabad Call +91-8250192130
 

Design a Custom Opt-in Form without a Plugin // Part 4

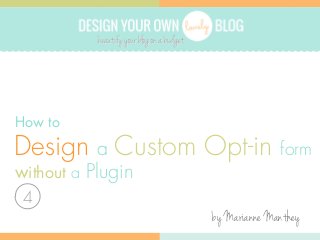
  • 1. DESIGN YOUR OWN BLOG How to Design a Custom Opt-in form without a Plugin 4 by Marianne Manthey
  • 2. DESIGN YOUR OWN BLOG PART 4 Style the Opt-in Form Design in your Blog
  • 3. TABLE OF CONTENTS This Slideshare is Part 4 of a 4 part tutorial on designing a custom opt-in (sign up) form for your blog. The entire tutorial can be found here: DesignYourOwnBlog.com ©2013 DesignYourOwnBlog.com. All rights reserved.
  • 4. TABLE OF CONTENTS Part 1 (first slideshow) Create a Sign Up Form in MailChimp* • Create a List • Create a Form • Get the Embed Code ©2013 DesignYourOwnBlog.com. All rights reserved.
  • 5. TABLE OF CONTENTS Part 2 (second slideshow) Embed a Sign Up Form into your Blog • Embed into WordPress Widget • Embed into Blogger Gadget ©2013 DesignYourOwnBlog.com. All rights reserved.
  • 6. TABLE OF CONTENTS Part 3A+B (slideshare + video) Design Your Opt-in Box in PicMonkey • Decide on shape and style • Pick a background • What size is our form? • Add text and graphics ©2013 DesignYourOwnBlog.com. All rights reserved.
  • 7. TABLE OF CONTENTS Part 4 (this slideshow) Style the Opt-in Form Design in your Blog • A few simple CSS lessons – don’t be scared! ©2013 DesignYourOwnBlog.com. All rights reserved.
  • 8. STYLE AN OPT-IN BOX WITH CSS Let’s Style our Opt-In Boxes! Open up your blog using the Chrome browser. Or another favorite browser with a code inspector as long as it’s not IE! I’m telling you, that code inspector is horrid. Anyway, if you recall, our forms were pretty basic looking after we embedded them in Part 2: ©2013 DesignYourOwnBlog.com. All rights reserved.
  • 9. STYLE AN OPT-IN BOX WITH CSS Then in Part 3, we had fun designing and I designed this fun looking form and opt-in box: Slightly modified from Part 3B for simplicity in this tutorial ©2013 DesignYourOwnBlog.com. All rights reserved.
  • 10. STYLE AN OPT-IN BOX WITH CSS Finally we removed the HTML elements from the designs, reduced the size to fit, and saved an almost blank background image: Now let’s finish up our custom opt-ins shall we? ©2013 DesignYourOwnBlog.com. All rights reserved.
  • 11. STYLE AN OPT-IN BOX WITH CSS Upload your background image First things first. WordPress: Upload your image to the WordPress media library. Then click Edit and copy the URL of the image from here. Blogger: Upload your image using Picasa, Flickr or Photobucket and grab the URL to the image. Just paste the URL somewhere handy as we’ll need it later. ©2013 DesignYourOwnBlog.com. All rights reserved.
  • 12. STYLE AN OPT-IN BOX WITH CSS Now we’ll do a little CSS editing CSS stands for Cascading Style Sheet. Tip: If you’re not that This is the document that allows you to change the appearance familiar with of HTML elements on the page: the size, style, font, and color CSS, you may of text; background colors; border styles; etc. want to read this article before We’ll begin by creating a new custom style sheet. ©2013 DesignYourOwnBlog.com. All rights reserved. moving on.
  • 13. STYLE AN OPT-IN BOX WITH CSS A. Let’s add a custom Style Sheet in WordPress If you’re on Blogger, skip to this page. Before we do this, let’s check and see if your theme may already have a blank style sheet added to it. Go to your Dashboard and click Appearance > Editor. ©2013 DesignYourOwnBlog.com. All rights reserved.
  • 14. STYLE AN OPT-IN BOX WITH CSS The default open file you see should be styles.css. If it’s blank (or has notes up top that mention you can edit it), great! You can skip the next several pages. If not, scroll down til you get to the bottom of the list of file names to the right where it says Styles. Open and check to see if any of these style sheets are blank or have notes up top that say that you can edit it. If you don’t have one like this, you’ll need to create one and upload it to your blog. ©2013 DesignYourOwnBlog.com. All rights reserved.
  • 15. STYLE AN OPT-IN BOX WITH CSS Why can’t we edit styles.css? Well technically you can, but the danger in doing so is that you run the risk of having it overwritten should you update your theme (which you should if it’s available). This happens especially if you are using one of the TwentyTen, TwentyEleven, TwentyTwelve or TwentyThirteen, etc. themes because they get updated every time you update WordPress. Trust me, I learned this the hard way. ©2013 DesignYourOwnBlog.com. All rights reserved.
  • 16. STYLE AN OPT-IN BOX WITH CSS Depending on who you use as your host, you’ll need to access your blog’s files using FTP (file transfer protocol). Here are a few common hosting companies’ instructions: Godaddy HostGator Bluehost Lunarpages If your host is not listed here and you don’t know how to do this, do a web search for: “how to access ftp in [your host’s name]” ©2013 DesignYourOwnBlog.com. All rights reserved.
  • 17. STYLE AN OPT-IN BOX WITH CSS Now open up Notepad or an equivalent basic text editor and save the blank file as custom.css. Next, you’ll upload this new CSS file using FTP to this folder: wp-content/themes/THEME-NAME (where THEME-NAME= the name of the theme you have activated) ©2013 DesignYourOwnBlog.com. All rights reserved.
  • 18. STYLE AN OPT-IN BOX WITH CSS Next, we need to add a link to our new style sheet Here’s where things get a little squirrely. To do this, we must edit our header.php file. Unfortunately, the way how depends on which theme you are using and since there are thousands of themes, that’s really beyond the scope of this tutorial, so... You’ll need to check with your theme provider (if you bought a theme) or Google “how to edit header.php in THEME-NAME.” ©2013 DesignYourOwnBlog.com. All rights reserved.
  • 19. STYLE AN OPT-IN BOX WITH CSS Were you able to figure out how to edit header.php? Ok great! Here’s the line of code you’ll need to add:* <link rel="stylesheet" href="http://www.YOURURL.com/wp-content/themes/THEME-NAME/custom.css" type="text/css" media="all"> just replace YOUR-URL with your own and THEME-NAME with the folder you just uploaded your CSS file to. *This link should go below any other similar <link> tags so that it overrides any other style sheets.* ©2013 DesignYourOwnBlog.com. All rights reserved.
  • 20. STYLE AN OPT-IN BOX WITH CSS Now go back to Appearance > Editor and open up your new custom.css file. Your new blank file should be ready to go! If you don’t see custom.css, then please let me know and I can try and help you troubleshoot. Skip the next page (it’s for Blogger) …. ©2013 DesignYourOwnBlog.com. All rights reserved.
  • 21. STYLE AN OPT-IN BOX WITH CSS B. Create a custom Style Sheet in Blogger Lucky for those on Blogger, it’s quite simple to edit your CSS: 1. In your Blogger Dashboard, click Template in the left column. 2. Click the Customize button below your selected template. 3. Click the Advanced link. 4. Scroll down the next column and click Add CSS. 5. The Add Custom CSS box will appear. ©2013 DesignYourOwnBlog.com. All rights reserved.
  • 22. STYLE AN OPT-IN BOX WITH CSS Ok we are all ready to add our custom CSS! The first thing we’ll do is add a class name to our HTML. A class is basically a name that we are giving to an HTML element so that we can single it out using our style sheet. You can name a class anything you want as long as it doesn’t begin with a digit and there are no spaces (dashes + underscores are allowed instead ). You also want the class name to be descriptive and not previously used in your site. ©2013 DesignYourOwnBlog.com. All rights reserved.
  • 23. STYLE AN OPT-IN BOX WITH CSS Go to your Text Widget (WordPress) or HTML Gadget (Blogger) and take a look at the HTML code we previously pasted in. <!-- Begin MailChimp Signup Form --> <div id="mc_embed_signup"> <form action="http://designyourownblog.us4.list -manage.com/subscribe/" method="post" id="mc-embedded-subscribe-form" name="mcembedded-subscribe-form" class="validate" target="_blank" novalidate> <h2>Get Lovely Design in Your Inbox!</h2> <div class="mc-field-group"> ... ©2013 DesignYourOwnBlog.com. All rights reserved. See this <div> tag? A div is basically an invisible box that we can put around any element on the page to give it 2 dimensions (height and width).
  • 24. STYLE AN OPT-IN BOX WITH CSS I am going to give our div a class name of: optin-form (it’s unique and descriptive) and we add the class name like so: <div id=“mc_embed_signup” class=“optin-form”> Be sure to put quotes around your class name and no spaces anywhere in the highlighted area above. You’ll just need a space before it to separate it from the id. Now click Save. ©2013 DesignYourOwnBlog.com. All rights reserved.
  • 25. STYLE AN OPT-IN BOX WITH CSS Back to custom.css Let’s call our new class name in the style sheet. Tip: We do that like this: I highly suggest you open a new .optin-form { } browser tab so that you can quickly jump See how I used the class name that I made up earlier? We add a period before it to tell the style sheet that it is the name of a class. This is very important. Our style declarations will go between the curly braces { } ©2013 DesignYourOwnBlog.com. All rights reserved. back and forth between style sheet and HTML.
  • 26. STYLE AN OPT-IN BOX WITH CSS The first declaration we’ll add is the background. We do that like this: .optin-form { background: url(http://URL/airmail-bg.jpg); } “background” is actually a CSS property, it’s not an arbitrary word. Properties are always followed by a colon (:) then the value we choose for it. The value we want to choose for our background is the image we uploaded earlier. Since we are pointing to a URL where the image is located (remember we pasted that somewhere handy?), we type url()after the colon. The URL to our image goes between the parentheses. ©2013 DesignYourOwnBlog.com. All rights reserved.
  • 27. STYLE AN OPT-IN BOX WITH CSS .optin-form { background: url(http://URL/airmail-bg.jpg) no-repeat; } I don’t want my background to tile or repeat so I’ll add no-repeat which is an attribute that belongs to the background property. IMPORTANT! Each declaration ends with a semi colon ; ©2013 DesignYourOwnBlog.com. All rights reserved.
  • 28. STYLE AN OPT-IN BOX WITH CSS Now let’s add height and width. .optin-form { background: url(http://URL/airmail-bg.jpg) no-repeat; height: 225px; width: 300px; } Replace the values above with whatever size your background image is. Notice how each declaration goes on it’s own line. This is not necessary, but it makes it easier to read. And don’t forget, each declaration ends with that semi colon. Now hit Save or Update and refresh your blog page. ©2013 DesignYourOwnBlog.com. All rights reserved.
  • 29. STYLE AN OPT-IN BOX WITH CSS You should now see something like this (but with your own image): Needs some work, but looks better already! Now right click on the background and select “Inspect Element.” ©2013 DesignYourOwnBlog.com. All rights reserved.
  • 30. STYLE AN OPT-IN BOX WITH CSS Remember the element inspector from Part 3A? On the left is the HTML and the right is our CSS. See our new class name? ©2013 DesignYourOwnBlog.com. All rights reserved. And the style declarations we added to it?
  • 31. STYLE AN OPT-IN BOX WITH CSS On the HTML side, click on the elements within that div tag and you’ll see each item highlighted in your form on the webpage. Here is the h2 on the page, also highlighted Here is our heading, it’s inside an h2 (heading 2) tag. ©2013 DesignYourOwnBlog.com. All rights reserved.
  • 32. STYLE AN OPT-IN BOX WITH CSS Here’s where this gets fun. See at the top of the CSS side where it says element.style with two curly braces? Click on that and you’ll see that you can add style declarations directly in the element Inspector to try them out. IMPORTANT: This is just to try out styles on the fly. Once you refresh the page, you’ll lose any changes you’ve made. ©2013 DesignYourOwnBlog.com. All rights reserved.
  • 33. STYLE AN OPT-IN BOX WITH CSS Let’s play with it. Look what happens when I change the color and font size. color and font-size are pre-defined properties and self-explantory. Use this CSS cheat sheet for help finding which selectors are available to use. ©2013 DesignYourOwnBlog.com. All rights reserved.
  • 34. STYLE AN OPT-IN BOX WITH CSS NOTE When looking at the CSS in the code inspector, know that anything on the top overrides styles below it. That’s why we are able to change the color and font size of that H2 tag, because it’s on top. Scroll down in your element inspector window to see previous styles that were applied to the H2 tag. In a style sheet however, it’s the opposite: Anything on the bottom overrides styles above it. ©2013 DesignYourOwnBlog.com. All rights reserved.
  • 35. STYLE AN OPT-IN BOX WITH CSS ANOTHER NOTE ;) FYI: You may have also noticed that the h2 tag in the style sheet does not begin with a period. You may notice in your style That’s because only class names begin with a period. sheets that there are words that If you add styles to an actual HTML tag, then you would not use a period. But then know that every instance of that tag in your blog will take on those style declarations. That’s why we add a class name so that we can single that HTML tag out. begin with a #. These are id’s. Don’t worry about id’s, we won’t be using them. ©2013 DesignYourOwnBlog.com. All rights reserved.
  • 36. STYLE AN OPT-IN BOX WITH CSS Ok back to styling Let’s add some space within the form so that our elements aren’t butted up against the borders. Spacing is added either by padding or margins: margin  • Padding adds space INSIDE an element, pushing its contents inward. • Margins add space OUTSIDE an element, pushing other elements away from it. ©2013 DesignYourOwnBlog.com. All rights reserved. padding Here is your content, contained within padding inside your  div (light blue box). - - - - - - - - - -div width- - - - - - - - - 
  • 37. STYLE AN OPT-IN BOX WITH CSS Here’s how we add padding .optin-form { background: url(http://URL/airmail-bg.jpg) no-repeat; height: 225px; width: 300px; padding: 20px; box-sizing: border-box; } I chose 20px (20 pixels) for my padding, but you should choose whatever looks best for your background image. Maybe your border isn’t as thick as mine so you need less. Notice I also added box-sizing. I added this because some browsers (like Firefox) add padding to the width of its box bringing the box’s width to 265px (225px + 20px on each side). Box-sizing forces it to keep the padding inside thereby reducing the available content width to 185px. ©2013 DesignYourOwnBlog.com. All rights reserved.
  • 38. STYLE AN OPT-IN BOX WITH CSS Now hit Save or Update and refresh your blog page. Mine looks like this now That looks better doesn’t it? There’s just one thing. We need more padding at the top to move our h2 below the stamp. By using just one attribute for the padding (in this case 20px), we added the same padding to all 4 sides. But we can add different values to each side like this: padding: 55px 16px 20px 16px; The order of values is: top, right, bottom, left. ©2013 DesignYourOwnBlog.com. All rights reserved.
  • 39. STYLE AN OPT-IN BOX WITH CSS Let’s style the h2 tag I chose Lobster Two font in dark navy blue (hex color #283043). Lobster Two is a Google font which makes it easy to use on most blogs. To learn how to add Google fonts to your blog, read this. So as you’ll learn in the article linked above, we add a reference to the Google font at the top of our style sheet. This link is provided by Google fonts so it’s as easy as copy and paste. @import url(http://fonts.googleapis.com/css?family=Lobster+Two); ©2013 DesignYourOwnBlog.com. All rights reserved.
  • 40. STYLE AN OPT-IN BOX WITH CSS Now we want to add this font to our h2, but we’ll have to target the h2 inside our opt-in box because we don’t want to affect every h2 in our blog. To do this we use our unique class, a space, then h2: .optin-form h2 { } That tells the browser to apply these styles just to the h2’s within the div with a class name of optin-box. ©2013 DesignYourOwnBlog.com. All rights reserved.
  • 41. STYLE AN OPT-IN BOX WITH CSS Then we add style declarations to the h2: .optin-form h2 { font-family: ‘Lobster Two’; color: #283043; font-size: 1.6em; } • Here is our result so far: Notice the single quotes around the font name? That’s because its name is two words. • The font color chosen is a very dark blue. • “em” is a unit of measurement for fonts. ©2013 DesignYourOwnBlog.com. All rights reserved.
  • 42. STYLE AN OPT-IN BOX WITH CSS Phew, are you still with me? Is this starting to make sense? ©2013 DesignYourOwnBlog.com. All rights reserved.
  • 43. STYLE AN OPT-IN BOX WITH CSS Here’s where we are compared to what we’re going for: Just a few more changes… 1. I’d like to make the h2 less bold. 2. I want to change the label from “Email” to “Enter Email”. 3. I want to reverse the position of the Subscribe button and the View previous campaigns link. ©2013 DesignYourOwnBlog.com. All rights reserved.
  • 44. STYLE AN OPT-IN BOX WITH CSS So my h2 shows up as bolded. Why? Because the h2 has previously been defined as bold. I scrolled down the right side to find this definition below: ©2013 DesignYourOwnBlog.com. All rights reserved.
  • 45. STYLE AN OPT-IN BOX WITH CSS No Problem! We’ll override it by just adding a new line to our definition for optin-form h2: .optin-form h2 { font-family: ‘Lobster Two’; color: #283043; font-size: 1.6em; font-weight: normal; } That resets the weight of the font back to normal, which is the default. ©2013 DesignYourOwnBlog.com. All rights reserved.
  • 46. STYLE AN OPT-IN BOX WITH CSS For my other two changes, I will need to edit my HTML. If you look at the HTML carefully, it’s fairly easy to find what you’re looking for. <h2>Get Lovely Design in Your Inbox!</h2> <div class="mc-field-group"> <label for="mce-EMAIL">Email </label> <input type="email" value="" name="EMAIL" class="required email" id="mce-EMAIL"> </div> <p><a href="http://us4.campaignarchive1.com/home/?u=2361b" title="View previous campaigns">View previous campaigns.</a></p> <div id="mce-responses" class="clear"> <div class="response" id="mce-errorresponse" style="display:none"></div> <div class="response" id="mce-successresponse" style="display:none"></div> </div> <div class="clear"><input type="submit" value="Subscribe" name="subscribe" id="mcembedded-subscribe" class="button"></div> ©2013 DesignYourOwnBlog.com. All rights reserved. Here is my label that says “Email” Here is the link “View previous campaigns.” The <a> tag is a link and the <p> tag wrapped around it denotes a paragraph. And here is my Submit button, an <input> tag wrapped in a <div>
  • 47. STYLE AN OPT-IN BOX WITH CSS I edited the label below. That was easy. <h2>Get Lovely Design in Your Inbox!</h2> <div class="mc-field-group"> <label for="mce-EMAIL">Enter Email </label> <input type="email" value="" name="EMAIL" class="required email" id="mce-EMAIL"> </div> <p><a href="http://us4.campaignarchive1.com/home/?u=2361b" title="View previous campaigns">View previous campaigns.</a></p> <div id="mce-responses" class="clear"> <div class="response" id="mce-errorresponse" style="display:none"></div> <div class="response" id="mce-successresponse" style="display:none"></div> </div> <div class="clear"><input type="submit" value="Subscribe" name="subscribe" id="mcembedded-subscribe" class="button"></div> ©2013 DesignYourOwnBlog.com. All rights reserved. Here is my label that now says “Enter Email”
  • 48. STYLE AN OPT-IN BOX WITH CSS Next, I took the entire yellow highlighted areas and swapped them. <h2>Get Lovely Design in Your Inbox!</h2> <div class="mc-field-group"> <label for="mce-EMAIL">Email </label> <input type="email" value="" name="EMAIL" class="required email" id="mce-EMAIL"> </div> <div class="clear"><input type="submit" value="Subscribe" name="subscribe" id="mcembedded-subscribe" class="button"></div> <div id="mce-responses" class="clear"> <div class="response" id="mce-errorresponse" style="display:none"></div> <div class="response" id="mce-successresponse" style="display:none"></div> </div> <p><a href="http://us4.campaignarchive1.com/home/?u=2361b" title="View previous campaigns">View previous campaigns.</a></p> ©2013 DesignYourOwnBlog.com. All rights reserved. Now the button is just below the form field (you can ignore this part, it’s behind the scenes code) And the link is now at the bottom.
  • 49. STYLE AN OPT-IN BOX WITH CSS Aaaaand we get this: So just a few more tiny tweaks and we’re done! 1. Push the button and link right to align with the form field. 2. Style the button. ©2013 DesignYourOwnBlog.com. All rights reserved.
  • 50. STYLE AN OPT-IN BOX WITH CSS Let’s start with pushing the link over to the right. If we look at the code two slides back, you’ll see that the link is an <a> tag and it happens to be the only <a> tag within our optin-form div. Therefore, we can call this tag within our div that we named with the class “optin-form”. We do that like this: .optin-form a { margin-left: 74px; } ©2013 DesignYourOwnBlog.com. All rights reserved.
  • 51. STYLE AN OPT-IN BOX WITH CSS .optin-form a { margin-left: 74px; } We work from the outside, in. First we call the outer div (.optin-form) followed by a space, then the <a> tag. Because I only wanted to add a left margin, I just used margin-left as my property. In my form, the correct amount was 74px to align it correctly. Yours might be different. Play with it in the element inspector. Note: if there were more than one <a> tag within the optin-form div, then I would have to give the <a> that I want to affect, a class name so that I can single it out. For example, I could call it <a class=“view-link”>. Otherwise, all the <a> tags would have the left margin applied to it. ©2013 DesignYourOwnBlog.com. All rights reserved.
  • 52. STYLE AN OPT-IN BOX WITH CSS I can apply the same principles to the button to push it to the right as well. In the HTML code, there are two different <input> tags, but only one with a class name of “button”. To call just this specific input tag, we write input then a period and the class name. (No spaces between the tag, period and class name). .optin-form input.button { margin-left: 74px; } ©2013 DesignYourOwnBlog.com. All rights reserved.
  • 53. STYLE AN OPT-IN BOX WITH CSS Refresh and now we get this: Last thing to do is style that Submit button! ©2013 DesignYourOwnBlog.com. All rights reserved.
  • 54. STYLE AN OPT-IN BOX WITH CSS Add some style to that Submit button! In my mockup, I have a fuschia colored button with rounded corners and white text. Here’s how we add that: .optin-form input.button { margin-left: 74px; background: #de0045; border-radius: 4px; } • I also give the button the same left margin as the link so they line up. • I gave the button a background color (#de0045 = fuschia) • I gave the button some rounded corners using border-radius. I picked 4px to see what it looks like. ©2013 DesignYourOwnBlog.com. All rights reserved.
  • 55. STYLE AN OPT-IN BOX WITH CSS When I refresh the page, I get this: A few more tweaks: 1. Change the color of “Submit” to white and the font to Lobster Two. 2. I also want to bump up the font size in the button. 3. Give the button a little more padding to make it fatter. 4. Deepen the rounded corners to better match my mockup. 5. Remove the grey border around the button (hard to see, but it’s there). ©2013 DesignYourOwnBlog.com. All rights reserved.
  • 56. STYLE AN OPT-IN BOX WITH CSS To make these changes, I’ll: 1. Add a font color (#ffffff is white) and new font-family. 2. Add a font-size property to the button text to make it larger. 3. Add some padding. Remember how padding and margins go Top, Right, Bottom, Left? I want to add more padding to the left and right, hence the values chosen below. 4. Change the border-radius from 4px to 6px to make it a little rounder. 5. Remove the border using border: none; .optin-form input.button { margin-left: 74px; background: #de0045; color: #ffffff; font-family: ‘Lobster Two’; font-size: 1.2em; padding: 4px 30px 4px 30px; border-radius: 6px; border: none; } ©2013 DesignYourOwnBlog.com. All rights reserved.
  • 57. STYLE AN OPT-IN BOX WITH CSS Ok let’s refresh and now we see this: That looks pretty good to me! If yours doesn’t look just right, keep tweaking with it using the Element Inspector. Then copy over the styles you chose into your style sheet once you’re satisfied. Just remember not to hit refresh. ©2013 DesignYourOwnBlog.com. All rights reserved.
  • 58. DESIGN AN OPT-IN BOX: SHAPE + STYLE You Made It! How do you feel? I’d love to hear how this tutorial was to follow. I hope you were able to create a beautiful opt-in form box that you love! If you need any help at all, please leave a comment below (or on this page) and I’ll be happy to answer your questions! Thank You!! ©2013 DesignYourOwnBlog.com. All rights reserved.
  • 59. THANK YOU Thank you for watching Part 4 of How to Design a Custom Opt-in Form without a Plugin! Return to the Tutorial Page *All MailChimp links are referral links. ©2014 DesignYourOwnBlog.com. All rights reserved. ©2013 DesignYourOwnBlog.com. All rights reserved.