공간정보거점대학 - PyQGIS 및 플러그인 개발
•Transferir como PPTX, PDF•
15 gostaram•20,082 visualizações

국토교통부 공간정보 거점대학 오픈 소스 GIS 심화 과정 - QGIS 고급 & PyQGIS(QGIS 분석도구, PyQGIS 스크립트 & 플러그인)

Recomendados
Mais conteúdo relacionado
Mais procurados
Mais procurados (20)
Destaque
Destaque (7)
Semelhante a 공간정보거점대학 - PyQGIS 및 플러그인 개발
Semelhante a 공간정보거점대학 - PyQGIS 및 플러그인 개발 (20)
Mais de MinPa Lee
Mais de MinPa Lee (8)
공간정보거점대학 - PyQGIS 및 플러그인 개발
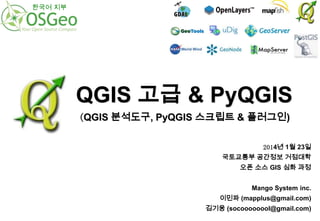
- 1. 한국어 지부 QGIS 고급 & PyQGIS (QGIS 분석도구, PyQGIS 스크립트 & 플러그인) 2014년 1월 23일 국토교통부 공간정보 거점대학 오픈 소스 GIS 심화 과정 Mango System inc. 이민파 (mapplus@gmail.com) 김기웅 (socoooooool@gmail.com)
- 2. 목차 I. QGIS 설치 및 환경설정 I-1. QGIS 개요 I-2. QGIS 설치하기 I-3. QGIS 환경 설정 I-4. QGIS 실습데이터 I-5. PostGIS 연결 및 레이어 불러오기 II. 분석 툴박스의 이해 및 활용 II-1. QGIS processing framework II-2. 환경 설정 II-3. 분석 툴박스 활용 II-4. Graphical Modeler III. PyQGIS의 이해 III-1. PyQGIS 개요 III-2. Python in QGIS III-3. Geographic Objects III-4. QGIS API 이해 III-5. PyQGIS Console - Python III-6. PyQGIS 기초 국가공간정보 거점대학 오픈 소스 GIS 심화 과정 III-7. Script Runner Plugin 활용 III-8. 분석 툴박스 스크립트 추가 IV. 플러그인 개발 IV-1. QGIS Plugin Builder & Reloader 설치 IV-3. 플러그인 설계 IV-3. 플러그인 템플릿 생성 IV-4. 플러그인 코드 작성 IV-5. 플러그인 실행 IV-6. 플러그인 배포 IV-7. 플러그인 개발 심화학습 V. TMS for Korea 플러그인 V-1. OpenLayers & TMS for Korea Plugin V-2. TMS for Korea 플러그인 설치 V-3. TMS for Korea 플러그인 구성 V-4. TMS for Korea 플러그인 추가 VI. 유용한 정보들 VI-1. 유용한 정보들 2 이민파 (mapplus@gmail.com)
- 3. I. QGIS 설치 및 환경설정 - 일러두기 • 본 자료는 모두 Creative Commons License CC-BY-NC을 따릅니다. • 본 교재에서는 교육의 편의상 Windows 32비트 기반의 QGIS 위주로 설명합니다. • 본 교재에서 사용하는 이미지의 QGIS 버전은 최신 버전과 다를 수 있으나, 기능상 차이는 없습니다. • 본 교재에서 사용하는 샘플 데이터 셋은 실제 정보와 다르므로 교육용 이외에는 사용할 수 없습니다.
- 4. I-1. QGIS 개요 QGIS란? 오픈 소스 기반의 강력하고 편리한 GIS 소프트웨어 지원 운영 체제 MS Windows Mac OSX Linux, Unix 라이선스 GPL 기반 언어 C++, Python 최신버전 2.0.1 Dufour 국가공간정보 거점대학 오픈 소스 GIS 심화 과정 4 이민파 (mapplus@gmail.com)
- 5. I-1. QGIS 개요 QGIS 제품군 지리정보 조회, 생성, 편집, 분석용 데스크탑 GIS WMS 1.3.0, 1.1.1 서버 FastCGI/CGI 프로그 램 SLD 등 지원 QGIS Desktop의 프로 젝트 파일을 이용한 손 쉬운 설정 국가공간정보 거점대학 오픈 소스 GIS 심화 과정 QGIS Desktop QGIS Browser 지리정보 조회 전용의 작고 빠른 뷰어 QGIS Libraries QGIS Server QGIS Client 5 QGIS Server와 GeoExt 기반의 Web Mapping Framework 이민파 (mapplus@gmail.com)
- 6. I-2. QGIS 설치하기 QGIS 공식 버전 설치 ① http://qgis.org/ 에 접속하여 QGIS 최신 버전(QGIS Version 2.0 Dufour)을 내려 받음 ② 또는 배포된 자료의 Program 폴더에서 QGIS 최신 버젼을 자신의 컴퓨터로 복사 ③ 설치 파일을 더블클릭하여 설치를 시작 ④ QGIS 프로그램 외의 GIS 자료는 설치하지 않음 ⑤ 기본적인 설정에 따라 설치를 완료 ⑥ 바탕화면의 QGIS 아이콘을 클릭하여 QGIS를 실행 국가공간정보 거점대학 오픈 소스 GIS 심화 과정 6 이민파 (mapplus@gmail.com)
- 7. I-3. QGIS 환경 설정 QGIS UI 및 언어설정 등 ① QGIS 시작 ② 영문으로 전환: [설정] [옵션…] [언어설정] [U.S. English] [확인] ③ 한국어로 전환: [Setting] [Options…] [Locale] [한국어] [OK] ④ 기타 [일반 정보], [시스템] 탭에서 ⑤ QGIS 종료 후 재시작 국가공간정보 거점대학 오픈 소스 GIS 심화 과정 7 이민파 (mapplus@gmail.com)
- 8. I-3. QGIS 환경 설정 플러그인 최신정보 유지 ① [Plugins] [Manage and install plugins…] 실행 국가공간정보 거점대학 오픈 소스 GIS 심화 과정 8 이민파 (mapplus@gmail.com)
- 9. I-4. QGIS 실습데이터 서울특별시, 대구광역시 벡터, 래스터 및 POI 등 * 실제 업무에 활용할 수 없는 샘플 데이터! 국가공간정보 거점대학 오픈 소스 GIS 심화 과정 9 이민파 (mapplus@gmail.com)
- 10. I-5. PostGIS 연결 및 레이어 불러오기 실습 데이터 PostGIS 서버에 연결 후 레이어 추가 ① [Layer] [Add PostGIS Layer…] 메뉴 실행 ② [New] 버튼 클릭 후 오른쪽 그림과 같이 연결 정보 입력 ③ [Connect] 버튼 클릭 후 서버에 연결 ④ 불러올 레이어 선택 후 [Add] 버튼 클릭하여 레이어 추가 127.0.0.1 seoul postgres ******** 국가공간정보 거점대학 오픈 소스 GIS 심화 과정 10 이민파 (mapplus@gmail.com)
- 11. II. 분석 툴박스의 이해 및 활용 - 일러두기 • 본 자료는 모두 Creative Commons License CC-BY-NC을 따릅니다. • 본 교재에서는 교육의 편의상 Windows 32비트 기반의 QGIS 위주로 설명합니다. • 본 교재에서 사용하는 이미지의 QGIS 버전은 최신 버전과 다를 수 있으나, 기능상 차이는 없습니다.
- 12. II-1. QGIS processing framework QGIS의 분석 프레임워크 ① GDAL/OGR, GRASS, SAGA GIS, OTB, Native QGIS 알고리즘, R, TauDEM, LiDAR data 등 내/외부 분석기 능을 활용할 수 있도록 하는 체계 ② Processing Toolbox, Graphical Modeler, Commander 등으로 구성되며 사용자 정의 스크립트 추가 가능 툴 툴박스 모델러 국가공간정보 거점대학 오픈 소스 GIS 심화 과정 12 이민파 (mapplus@gmail.com)
- 13. II-2. 환경 설정 General, Models, Scripts 환경 설정 ① General • 전역 분석 환경 설정 ② Models • 그래피컬 모델러 활성화 및 저장 폴더 설정 ③ Scripts • 사용자 스크립트 활성화 및 저장 폴더 설정 국가공간정보 거점대학 오픈 소스 GIS 심화 과정 13 이민파 (mapplus@gmail.com)
- 14. II-2. 환경 설정 Providers 환경 설정 ① 사용 가능한 분석 도구의 활성화/비활성화, 경로 설정 등의 환경 설정 ② 기본 프로그램 경로 설정 예 • C:Program FilesQGIS Dufourappsgrassgrass-6.4.3 • C:Program FilesQGIS Dufourappssaga • 표준 인스톨러 사용하는 경우 GRASS, SAGA GIS는 기본으로 설치되므로 경로 확인만 필요 http://grass.osgeo.org/ http://www.saga-gis.org 국가공간정보 거점대학 오픈 소스 GIS 심화 과정 14 이민파 (mapplus@gmail.com)
- 15. II-2. 환경 설정 Providers 환경 설정 - R ① R 홈페이지에서 최신 버전의 프로그램 다운로드 또는 샘플 데이터 폴더의 프로그램(R-3.0.2-win.exe) 설치 ② 추가 프로그램 경로 설정 예 • C:Program FilesRR-3.0.1 http://www.r-project.org/ 국가공간정보 거점대학 오픈 소스 GIS 심화 과정 15 이민파 (mapplus@gmail.com)
- 16. II-2. 환경 설정 Providers 환경 설정 - R ① R Sptial 기능 추가 패키지 설치 install.packages("rgeos") install.packages("sp") install.packages("spdep") install.packages("rgdal") install.packages("maptools") install.packages("vec2dtransf") install.packages("maps") install.packages("ggplot2") install.packages("RColorBrewer") install.packages("gtools") install.packages("shapefiles") # Interface to Geometry Engine - Open Source (GEOS) # Classes and methods for spatial data # # Bindings for the Geospatial Data Abstraction Library # Tools for reading and handling spatial objects # 2D Cartesian Coordinate Transformation # Draw Geographical Maps # An implementation of the Grammar of Graphics # ColorBrewer palettes # Various R programming tools # Read and Write ESRI Shapefiles install.packages("raster") install.packages("rasterVis") install.packages("sm") install.packages("lattice") install.packages("akima") # Raster data analysis and modeling # Visualization methods for the raster package # Smoothing methods for nonparametric regression and density estimation # Lattice Graphics # Interpolation of irregularly spaced data install.packages("rworldmap") install.packages("googleVis") install.packages("RgoogleMaps") install.packages("png") # Mapping global data, vector and raster # Interface between R and the Google Chart Tools # Overlays on Google map tiles in R # Read and write PNG images install.packages("spatial") install.packages("spatstat") install.packages("spatgraphs") install.packages("gstat") install.packages("spacetime") install.packages("geoR") install.packages("portfolio") # Functions for Kriging and Point Pattern Analysis # Spatial Point Pattern analysis, model-fitting, simulation, tests # Graphs for spatial point patterns # Spatial and spatio-temporal geostatistical modelling, prediction and simulation # Spatio-temporal data # Geostatistical analysis including traditional, likelihood-based and Bayesian methods. # Analysing equity portfolios install.packages("RSAGA") install.packages("RPyGeo") install.packages("spgrass6") # SAGA Geoprocessing and Terrain Analysis in R # ArcGIS Geoprocessing in R via PythonR # Interface between GRASS 6+ geographical information system and R 국가공간정보 거점대학 오픈 소스 GIS 심화 과정 16 이민파 (mapplus@gmail.com)
- 17. II-2. 환경 설정 http://orfeo-toolbox.org/otb/ Providers 환경 설정 - Orfeo ToolBox (OTB) ① 샘플 데이터 폴더의 프로그램(osgeo4w-setup-x86.exe) 을 통해 다음 프로그램 설치 • otb-bin : command line and QT applications • otb-python : python applications • otb-wrapping : low level Python/Java bindings ② http://www.orfeo-toolbox.org/SoftwareGuide/SoftwareGuidech2.html Monteverdi2 독립 프로그램 국가공간정보 거점대학 오픈 소스 GIS 심화 과정 17 이민파 (mapplus@gmail.com)
- 18. II-2. 환경 설정 Providers 환경 설정 - Orfeo ToolBox (OTB) ① QGIS 툴박스 환경설정에서 다음을 추가 ② 추가 프로그램 경로 설정 예 – 32bit only • OTB applications folder : C:OSGeo4Wappsorfeotoolboxapplications • OTB command line tools folder : C:OSGeo4Wbin ③ 영상 이미지 불러온 후 [Smoothing] 도구 확인 Orfeo ToolBox 환경 설정 국가공간정보 거점대학 오픈 소스 GIS 심화 과정 Smoothing 예 18 이민파 (mapplus@gmail.com)
- 19. II-2. 환경 설정 Providers 환경 설정 - TauDEM (Terrain Analysis Using Digital Elevation Models) ① OTB 홈페이지에서 최신 버전의 프로그램 다운로드 또는 샘플 데이터 폴더의 프로그램 (TauDEM511.zip) 압축 해제 후 순서대로 설치 mpi_x86.msi vcredist_x86_2010.exe TaudemSetup_x86.msi ② 추가 프로그램 경로 설정 예 • C:Program FilesMicrosoft HPC Pack 2012Bin • C:Program FilesTauDEMTauDEM5Exe ③ DEM 불러온 후 실행 확인 http://hydrology.usu.edu/taudem/taudem5/index.html 국가공간정보 거점대학 오픈 소스 GIS 심화 과정 19 이민파 (mapplus@gmail.com)
- 20. II-2. 환경 설정 http://rapidlasso.com/LAStools/ Providers 환경 설정 - LAStools ① 아래 블로그 또는 샘플 데이터 폴더의 프로그램(lastools.zip) 압축 해제 http://rapidlasso.com/2013/09/29/how-to-install-lastools-toolbox-in-qgis/ ② 추가 프로그램 경로 설정 예 – 공백이 없어야 함 • C:OpenGeoSuitelastools • lastools 폴더 내 QGIS_2_0_toolbox.zip 압축해제 후 lidar 폴더를 processing 플러그인 폴더로 복사(기존 lidar폴더 삭제 후) ③ C:OpenGeoSuitelastoolsdata 의 lasview 도구 확인 국가공간정보 거점대학 오픈 소스 GIS 심화 과정 20 이민파 (mapplus@gmail.com)
- 21. II-3. 분석 툴박스 활용 R 활용 예 ① 샘플 데이터 폴더에서 admin_emd.shp 파일 불러오기 ② R 툴박스에서 Histogram 실행 후 결과 확인 ③ admin_emd.shp 파일을 QGIS 기본 알고리즘의 Polygon centroid 툴을 이용해서 admin_emd_point 로 변환 ④ R 툴박스에서 Quadrat analysis 실행 후 결과 확인 국가공간정보 거점대학 오픈 소스 GIS 심화 과정 21 이민파 (mapplus@gmail.com)
- 22. II-3. 분석 툴박스 활용 사용자 Scripts ① 툴박스의 Scripts 카테고리에서 스크립트 선택 후 오른쪽 마우스 눌러 Edit Script 실행 ② Scripts Tools Create new script 실행 국가공간정보 거점대학 오픈 소스 GIS 심화 과정 22 이민파 (mapplus@gmail.com)
- 23. II-3. 분석 툴박스 활용 사용자 Scripts 추가 ① [parameter_name]=[parameter_type] [optional_values] raster. A raster layer vector. A vector layer table. A table number. A numerical value. A default value must be provided. For instance, depth=number 2.4 string. A text string. As in the case of numerical values, a default value must be added. For instance, name=string Victor boolean. A boolean value. Add True or False after it to set the default value. For example, verbose=boolean True multiple raster. A set of input raster layers. multiple vector. A set of input vector layers. field. A field in the attributes table of a vector layer. The name of the layer has to be added after the field tag. For instance, if you have declared a vector input with mylayer=vector, you could use myfield=field mylayer to add a field from that layer as parameter. folder. A folder III. 장에서 PyQGIS 이해 후 추가해 보기 file. A filename 국가공간정보 거점대학 오픈 소스 GIS 심화 과정 23 이민파 (mapplus@gmail.com)
- 24. II-4. Graphical Modeler Graphical Modeler 변수 및 프로세스 추가 ① [Processing] [Graphical Modeler) 실행 국가공간정보 거점대학 오픈 소스 GIS 심화 과정 24 이민파 (mapplus@gmail.com)
- 25. II-4. Graphical Modeler 모델러 작성해 보기 ① 입력된 input points에서 사용자 버퍼 거리만큼 버퍼한 폴리곤 내의 sample points의 개수 등 계산한 버퍼 폴리곤 레이어 반환 국가공간정보 거점대학 오픈 소스 GIS 심화 과정 25 이민파 (mapplus@gmail.com)
- 26. II-4. Graphical Modeler 모델러 작성해 보기 ① stores, subway_station 레이어 추가 후 생성한 모델러 실행 국가공간정보 거점대학 오픈 소스 GIS 심화 과정 26 이민파 (mapplus@gmail.com)
- 27. III. PyQGIS의 이해 -일러두기 – - 본 자료는 모두 Creative Commons License CC-BY-NC을 따릅니다. - 본 교재는 다음의 내용을 토대로 제작되었습니다. • PyQGIS Developer Cookbook : http://qgis.org/en/docs/pyqgis_developer_cookbook/index.html • QGIS API Documentation : http://qgis.org/api/ • QGIS Workshop: http://www.qgisworkshop.org/html/workshop/index.html • The Python Tutorial: http://docs.python.org/2/tutorial/index.html
- 28. III-1. PyQGIS 개요 PyQGIS란? QGIS Python bindings ① Python • ② QT • ③ Python is a fun and powerful programming language used in web applications and desktop software. It can also be found wrapping OSGeo-backed libraries such as GDAL/OGR, JTS and GEOS Qt (pronounced: cute ) is an open-source cross-platform application framework (a set of tools) developed by Nokia for building graphical user interfaces (GUIs) and software. You’ve probably worked with Qt designed software if you’ve touched these programs: Google Earth, Virtual Box, Skype, Autodesk or Android smartphones. PyQT • PyQt is a Python binding of the cross-platform GUI toolkit Qt 국가공간정보 거점대학 오픈 소스 GIS 심화 과정 28 이민파 (mapplus@gmail.com)
- 29. III-2. Python in QGIS PyQGIS를 활용하는 방법 ① Python Console • • ② a command-line terminal inside QGIS to test ideas and do one-off quick jobs ArcGIS Python Window Python Plugins • • ③ creating/extending editing tools that interact with data inside the QGIS environment ArcGIS ArcToolbox Script Python Applications • writing Python applications from scratch that are built off QGIS and Qt libraries. These applications would process spatial data outside the QGIS application but use core functionality under the hood • ArcGIS Server & Engine + GeoProcessing Script 국가공간정보 거점대학 오픈 소스 GIS 심화 과정 29 이민파 (mapplus@gmail.com)
- 30. III-3. Geographic Objects GIS Objects 및 Application의 구성 출처: OGC: GO(Geographic Objects )-1 Application Objects. Retired 국가공간정보 거점대학 오픈 소스 GIS 심화 과정 30 이민파 (mapplus@gmail.com)
- 31. III-3. Geographic Objects Geometry class hierarchy 출처: OGC Simple Feature Access - Part 1: Common Architecture 국가공간정보 거점대학 오픈 소스 GIS 심화 과정 31 이민파 (mapplus@gmail.com)
- 32. III-4. QGIS API 이해 Plugin 사용하기 QGIS API Documentation: http://www.qgis.org/api/ ① 모듈 구성 QGIS core library QGIS gui library QGIS analysis library QgsGeometryAnalyzer QgsOverlayAnalyzer MapComposer QGIS network analysis library ② 주요 클래스 QgisInterface(iface) QgsMapCanvas QgsDataProvider QgsVectorDataProvider, QgsRasterDataProvider QgsLayer Vector, Raster, Plugin Layer QgsFeature QgsField QgsGeometry 국가공간정보 거점대학 오픈 소스 GIS 심화 과정 32 이민파 (mapplus@gmail.com)
- 33. III-4. QGIS API 이해 QGIS Data Provider, Map Layer, Feature, Geometry 국가공간정보 거점대학 오픈 소스 GIS 심화 과정 33 이민파 (mapplus@gmail.com)
- 34. III-4. QGIS API 이해 GIS Map Canvas 국가공간정보 거점대학 오픈 소스 GIS 심화 과정 34 이민파 (mapplus@gmail.com)
- 35. III-4. QGIS API 이해 QGIS Vector Layer 국가공간정보 거점대학 오픈 소스 GIS 심화 과정 35 이민파 (mapplus@gmail.com)
- 36. III-4. QGIS API 이해 QGIS Raster Layer 국가공간정보 거점대학 오픈 소스 GIS 심화 과정 36 이민파 (mapplus@gmail.com)
- 37. III-5. PyQGIS Console - Python Python Coding Style ① Use 4-space indentation, and no tabs. Tabs introduce confusion, and are best left out. ② Wrap lines so that they don’t exceed 79 characters. ③ Use blank lines to separate functions and classes, and larger blocks of code inside functions. ④ When possible, put comments on a line of their own. ⑤ Use docstrings. ⑥ Use spaces around operators and after commas, but not directly inside bracketing constructs: a = f(1, 2) + g(3, 4). ⑦ Name your classes and functions consistently The convention is to use CamelCase for classes and lower_case_with_underscores for functions and methods. Always use self as the name for the first method argument (see A First Look at Classes for more on classes and methods). ⑧ Don’t use fancy encodings if your code is meant to be used in international environments. Plain ASCII works best in any case. 국가공간정보 거점대학 오픈 소스 GIS 심화 과정 37 이민파 (mapplus@gmail.com)
- 38. III-5. PyQGIS Console - Python Python 모듈 참조 from 모듈이름 import 모듈함수 Code here! 국가공간정보 거점대학 오픈 소스 GIS 심화 과정 38 이민파 (mapplus@gmail.com)
- 39. III-5. PyQGIS Console - Python Python 자료형 및 제어문 국가공간정보 거점대학 오픈 소스 GIS 심화 과정 39 이민파 (mapplus@gmail.com)
- 40. III-5. PyQGIS Console - Python Python 함수, 클래스 등 https://wikidocs.net/32 국가공간정보 거점대학 오픈 소스 GIS 심화 과정 40 이민파 (mapplus@gmail.com)
- 41. III-6. PyQGIS 기초 help (object) QGIS 관련 라이브러리 참조 및 환경 정보 확인 국가공간정보 거점대학 오픈 소스 GIS 심화 과정 41 이민파 (mapplus@gmail.com)
- 42. III-6. PyQGIS 기초 벡터 레이어 추가하기 및 QGIS 캔버스 다루기 국가공간정보 거점대학 오픈 소스 GIS 심화 과정 42 이민파 (mapplus@gmail.com)
- 43. III-6. PyQGIS 기초 PostGIS, OGC WFS, Ratser 레이어 추가하기 국가공간정보 거점대학 오픈 소스 GIS 심화 과정 43 이민파 (mapplus@gmail.com)
- 44. III-6. PyQGIS 기초 래스터 값, 레이어 목록, 선택된 피처 확인 국가공간정보 거점대학 오픈 소스 GIS 심화 과정 44 이민파 (mapplus@gmail.com)
- 45. III-6. PyQGIS 기초 공간 및 속성 필터 사용하기 1 국가공간정보 거점대학 오픈 소스 GIS 심화 과정 45 이민파 (mapplus@gmail.com)
- 46. III-6. PyQGIS 기초 공간 및 속성 필터 사용하기 2 국가공간정보 거점대학 오픈 소스 GIS 심화 과정 46 이민파 (mapplus@gmail.com)
- 47. III-6. PyQGIS 기초 QGIS Geometry 및 좌표변환 다루기 http://www.qgis.org/api/classQgsGeometry.html 국가공간정보 거점대학 오픈 소스 GIS 심화 과정 47 이민파 (mapplus@gmail.com)
- 48. III-6. PyQGIS 기초 벡터 레이어 스키마 다루기 국가공간정보 거점대학 오픈 소스 GIS 심화 과정 48 이민파 (mapplus@gmail.com)
- 49. III-6. PyQGIS 기초 Memory 레이어 다루기 및 피처 편집 기초 국가공간정보 거점대학 오픈 소스 GIS 심화 과정 49 이민파 (mapplus@gmail.com)
- 50. III-6. PyQGIS 기초 벡터 레이어의 필드 통계정보 확인 및 다른 포맷으로 내보내기 국가공간정보 거점대학 오픈 소스 GIS 심화 과정 50 이민파 (mapplus@gmail.com)
- 51. III-6. PyQGIS 기초 심화 1: 기존 레이어에 X, Y 좌표값 계산하기 국가공간정보 거점대학 오픈 소스 GIS 심화 과정 51 이민파 (mapplus@gmail.com)
- 52. III-6. PyQGIS 기초 심화 2: 포인트 레이어에 DEM의 표고값 계산하기 국가공간정보 거점대학 오픈 소스 GIS 심화 과정 52 이민파 (mapplus@gmail.com)
- 53. III-6. PyQGIS 기초 QgsGeometryAnalyzer 다뤄보기 ① buffer (QgsVectorLayer *layer, const QString &shapefileName, double bufferDistance, bool onlySelectedFeatures=false, bool dissolve=false, int bufferDistanceField=-1, QProgressDialog *p=0) ② centroids (QgsVectorLayer *layer, const QString &shapefileName, bool onlySelectedFeatures=false, QProgressDialog *p=0) ③ convexHull (QgsVectorLayer *layer, const QString &shapefileName, bool onlySelectedFeatures=false, int uniqueIdField=-1, QProgressDialog *p=0) ④ dissolve (QgsVectorLayer *layer, const QString &shapefileName, bool onlySelectedFeatures=false, int uniqueIdField=-1, QProgressDialog *p=0) ⑤ simplify (QgsVectorLayer *layer, const QString &shapefileName, double tolerance, bool onlySelectedFeatures=false, QProgressDialog *p=0) 국가공간정보 거점대학 오픈 소스 GIS 심화 과정 53 이민파 (mapplus@gmail.com)
- 54. III-6. PyQGIS 기초 QgsSpatialIndex 다뤄보기 국가공간정보 거점대학 오픈 소스 GIS 심화 과정 54 이민파 (mapplus@gmail.com)
- 55. III-7. Script Runner Plugin 활용 Script Runner Plugin 설치 플러그인 작성 없이 외부에서 작성한 PyQGIS 스크립트를 실행하는 도구 ① [Plugins] -> [Manage and Install Plugins…] 실행 후 [Script Runner] 플러그인 설치 ② [Script Runner] 플러그인 실행 후 예제 파일(runner_0X.py) 불러온 후 실행 출처: http://spatialgalaxy.net/2012/01/29/script-runner-a-plugin-to-run-python-scripts-in-qgis/ 국가공간정보 거점대학 오픈 소스 GIS 심화 과정 55 이민파 (mapplus@gmail.com)
- 56. III-8. 분석 툴박스 스크립트 추가 그룹 및 다양한 변수 설정 ① http://doc.qgis.org/html/en/docs/user_manual/processing/console.html 22 페이지 확인 ##[My Scripts]=group ##[parameter_name]=[parameter_type] [optional_values] ##vector_layer=vector ##vector_field=field vector_layer ##raster_layer=raster ##table_attributes=table ##real_value=number 3.141592 ##integer_value=number 500 ##string_val=string my input string ##boolean_value=boolean True ##input_folder=folder ##input_file=file ##output_vector=output vector ##output_raster=output raster vlayer = processing.getObject(vector_layer) Idx_field = vlayer.fieldNameIndex(vector_field) ##multiple_vector=multiple vector ##multiple_raster=multiple raster 국가공간정보 거점대학 오픈 소스 GIS 심화 과정 56 이민파 (mapplus@gmail.com)
- 57. III-8. 분석 툴박스 스크립트 추가 툴박스 스크립트 생성 ① 분석 툴박스의 [Scripts] [Tools] [Create new script] 실행 ② 편집기에서 예제 파일 코드(MyScript.py) 참조하여 스크립트 추가 ③ 저장한 후 편집기를 닫으면 [Scripts] [My Scripts] 내에 저장한 이름의 스크립트 추가 ④ 저장위치: C:Users사용자명.qgis2processingscripts ##[My Scripts]=group ##input=vector ##buffer_distance=number 500 ##output=output vector from qgis.core import * from processing.core.VectorWriter import VectorWriter vectorLayer = processing.getObject(input) provider = vectorLayer.dataProvider() writer = VectorWriter(output, None, provider.fields(), QGis.WKBPolygon, vectorLayer.crs()) features = processing.features(vectorLayer) for feat in features: output_feature = QgsFeature() # buffer feature output_feature.setGeometry(feat.geometry().buffer(buffer_distance, 8)) output_feature.setAttributes(feat.attributes()) writer.addFeature(output_feature) del writer 국가공간정보 거점대학 오픈 소스 GIS 심화 과정 57 이민파 (mapplus@gmail.com)
- 58. III-8. 분석 툴박스 스크립트 추가 Ring Maps 분석하기 ① 분석 툴박스의 [Scripts] [Tools] [Create new script] 실행 ② 편집기에서 예제 파일 코드(Create Ring Maps.py) 참조하여 스크립트 추가 후 저장 ③ 샘플 데이터셋의 seoul_series.shp 레이어 불러온 후 실행하여 심볼 및 레이블 렌더링 적용 국가공간정보 거점대학 오픈 소스 GIS 심화 과정 58 이민파 (mapplus@gmail.com)
- 59. IV. 플러그인 개발 - 일러두기 • 본 자료는 모두 Creative Commons License CC-BY-NC을 따릅니다. • 본 교재에서는 교육의 편의상 Windows 32비트 기반의 QGIS 위주로 설명합니다. • 본 교재에서 사용하는 이미지의 QGIS 버전은 최신 버전과 다를 수 있으나, 기능상 차이는 없습니다. • 참고 • http://www.qgisworkshop.org/html/workshop/index.html
- 60. IV-1. QGIS Plugin Builder & Reloader 설치 QGIS Plugin Builder & Reloader 플러그인 템플릿 작성 및 코드 수정 후 새로 고침 ① [Plugins] [Manage and Install Plugins…] 실행 Plugin Builder 설치 Plugin Reloader 설치 국가공간정보 거점대학 오픈 소스 GIS 심화 과정 60 이민파 (mapplus@gmail.com)
- 61. IV-2. 플러그인 설계 플러그인 설계 Raster Value Picker Tool ① Raster Value Picker 1 레이어 탭에서 정보를 검색할 래스터 레이어를 선택하고 지도에서 특정 위치에 마우스를 클릭하면 활성화된 래스터 레이어의 해당 위치에 래스터 값을 찾고 폼의 텍스트박스에 좌표 및 래스터 값을 표시하는 도구 ② Raster Value Picker 2 폼에 콤보박스를 추가 후 지도의 래스터 레이어를 불러오고 해당 래스터 레이어를 활성화하여 값 보여주기 벡터 데이터에 대해서도 Identify 기능 적용 국가공간정보 거점대학 오픈 소스 GIS 심화 과정 61 이민파 (mapplus@gmail.com)
- 62. IV-3. 플러그인 템플릿 생성 내 플러그인 생성 기본 구조의 플러그인 템플릿 생성 ① [Plugins] [Plugin Builder…] [Plugin Builder…] 실행 ② 정보 입력 후 저장 (저장위치: C:Users사용자명.qgis2pythonplugins) RasterValuePicker - metadata.txt 국가공간정보 거점대학 오픈 소스 GIS 심화 과정 http://www.dimitrisk.gr/qgis/creator/ 62 이민파 (mapplus@gmail.com)
- 63. IV-3. 플러그인 템플릿 생성 플러그인 메타데이터 편집 ① metadata.txt – utf-8 encoding metadata.txt 구성 http://docs.qgis.org/2.0/en/docs/pyqgis_developer_cookbook/plugins.html#plugin-metadata 국가공간정보 거점대학 오픈 소스 GIS 심화 과정 63 이민파 (mapplus@gmail.com)
- 64. rastervaluepicker.py 파일 import resources_rc IV-4. 플러그인 코드 작성 내 플러그인 코드 작성 및 실행 README.html 또는 README.txt 파일 확인 ① QGIS 다시 실행 후 플러그인 확인 Oooops! ② Plugin Builder Results Your plugin RasterValuePicker was created in: C:Users사용자명.qgis2pythonpluginsRasterValuePicker Your QGIS plugin directory is located at: C:/Users/사용자명/.qgis2/python/plugins ③ What's Next: * Copy the entire directory containing your new plugin to the QGIS plugin directory * Compile the ui file using pyuic4 * Compile the resources file using pyrcc4 * Test the plugin by enabling it in the QGIS plugin manager * Customize it by editing the implementation file: rastervaluepicker.py * Create your own custom icon, replacing the default icon.png * Modify your user interface by opening rastervaluepicker.ui pyuic4 after changing it) * You can use the Makefile to compile your Ui and resource files when you make changes. This requires GNU make (gmake) >pyuic4 -o ui_rastervaluepicker.py ui_rastervaluepicker.ui in Qt Designer (don't forget to compile it with >cd C:Users사용자.qgis2pythonpluginsRasterValuePicker >pyrcc4 -o resources_rc.py resources.qrc 국가공간정보 거점대학 오픈 소스 GIS 심화 과정 64 이민파 (mapplus@gmail.com)
- 65. IV-5. 플러그인 코드 작성 내 플러그인 코드 작성 ① 플러그인 Manager에서 활성화 ② [Plugins] [Raster Value Picker Tool] 실행 첫 실행 화면 국가공간정보 거점대학 오픈 소스 GIS 심화 과정 65 이민파 (mapplus@gmail.com)
- 66. IV-5. 플러그인 코드 작성 내 플러그인 코드 작성 – UTF-8로 변환 후 작성 ① UI나 Resource 파일은 수정 후 항상 컴파일 ② UI 수정 C:Program FilesQGIS Dufourbindesigner.exe 실행 콤보박스 및 텍스트박스 추가 ③ Resource 파일 확인 <RCC> <qresource prefix="/plugins/rastervaluepicker" > <file>icon.png</file> </qresource> </RCC> ④ OSGeo4W 셀에서 컴파일 >pyuic4 -o ui_rastervaluepicker.py ui_rastervaluepicker.ui >pyrcc4 -o resources_rc.py resources.qrc ⑤ 코드 편집 http://qgis.org/api/2.0/classQgisInterface.html http://qgis.org/api/2.0/classQgsMapCanvas.html http://www.qgis.org/api/classQgsMapToolEmitPoint.html 국가공간정보 거점대학 오픈 소스 GIS 심화 과정 66 이민파 (mapplus@gmail.com)
- 67. IV-5. 플러그인 실행 My First Plugin 실행 ① [Plugins] [Raster Value Picker Tool] 실행 RasterValuePicker_02.zip 국가공간정보 거점대학 오픈 소스 GIS 심화 과정 67 이민파 (mapplus@gmail.com)
- 68. IV-6. 플러그인 배포 QGIS 플러그인 저장소 : QGIS plugins web portal 플러그인 폴더를 포함하여 zip으로 압축 ① http://www.osgeo.org/osgeo_userid 에서 가입 ② http://plugins.qgis.org/ 로그인 후 [Share a plugin] 링크 실행 ③ 약 2주 후 승인 또는 거절, 약 2번 이후 업로드 후 자동 승인 됨 국가공간정보 거점대학 오픈 소스 GIS 심화 과정 68 이민파 (mapplus@gmail.com)
- 69. IV-7. 플러그인 개발 심화학습 IDE settings for writing and debugging plugins Eclipse PyDev & Pyscripter IDE ① http://qgis.org/en/docs/pyqgis_developer_cookbook/ide_debugging.html 국가공간정보 거점대학 오픈 소스 GIS 심화 과정 69 이민파 (mapplus@gmail.com)
- 70. V. TMS for Korea 플러그인 - 일러두기 • 본 자료는 모두 Creative Commons License CC-BY-NC을 따릅니다. • 본 교재에서는 교육의 편의상 Windows 32비트 기반의 QGIS 위주로 설명합니다. • 본 교재에서 사용하는 이미지의 QGIS 버전은 최신 버전과 다를 수 있으나, 기능상 차이는 없습니다.
- 71. V-1. OpenLayers & TMS for Korea Plugin OpenLayers Pugin을 기반으로 한국의 포털지도 등 Tile Map Services를 활용하도록 한 플러그인 ① OpenLayers Plugin GitHub: https://github.com/sourcepole/qgis-openlayers-plugin Google TMS(EPSG:3857) 좌표체계 활용 ② TMS for Korea Plugin GitHub: https://github.com/MapPlus/qgis-tmsforkorea-plugin 국내 포털 - 다음 (EPSG:5181), 네이버(EPSG:5179), Olleh(EPSG:5179), VWorld (EPSG:900913) 국가공간정보 거점대학 오픈 소스 GIS 심화 과정 71 이민파 (mapplus@gmail.com)
- 72. V-2. TMS for Korea 플러그인 설치 다음 (EPSG:5181), 네이버(EPSG:5179), Olleh(EPSG:5179), VWorld (EPSG:900913)지도 이용 ① [File] -> [New Project] 실행하여 새로운 프로젝트 시작 ② [Plugins] -> [Manage and Install Plugins…] -> ‘Get more’탭에서 ‘Korea’로 해당 플러그인 검색 및 설 치 ③ [Plugins] -> [TMS for Korea]에서 원하는 배경 영상 선택 ④ 샘플 데이터 중 원하는 자료(예, admin_sgg.shp 등)을 불러 오기 ⑤ - http://www.onspatial.com/2013/02/qgis-tms-for-korean-users-plugin.html CRS는 네이버, 다음 지도 선택시 자동 설정됨 국가공간정보 거점대학 오픈 소스 GIS 심화 과정 72 이민파 (mapplus@gmail.com)
- 73. V-3. TMS for Korea 플러그인 구성 다음 (EPSG:5181), 네이버(EPSG:5179), Olleh(EPSG:5179), VWorld (EPSG:900913)지도 이용 ① C:Users사용자명.qgis2pythonpluginstmsforkorea ② TMS 레이어를 위한 HTML(좌표체계 등 필수정보 확인) 및 아이콘 준비 국가공간정보 거점대학 오픈 소스 GIS 심화 과정 73 이민파 (mapplus@gmail.com)
- 74. V-4. TMS for Korea 플러그인 추가 MapBox Physical 레이어 추가하기 ① openlayers_layer.py 플러그인 레이어 좌표체계 및 렌더링 ② openlayers_plugin.py 플러그인 레이어 관리 ③ 수정할 곳 Html 추가 샘플데이터 폴더 실습 코드 수정 국가공간정보 거점대학 오픈 소스 GIS 심화 과정 74 이민파 (mapplus@gmail.com)
- 75. VI. 유용한 정보들
- 76. VI-1. 유용한 정보들 QGIS 관련 정보 얻기 ① 공식 페이지 QGIS 홈: http://www.qgis.org QGIS 매뉴얼 : http://docs.qgis.org/2.0/ko_KR/docs/index.html PyQGIS Cookbook: http://docs.qgis.org/2.0/ko_KR/docs/pyqgis_developer_cookbook/index.html QGIS Planet : http://planet.qgis.org/planet/ ② 블로그 및 사이트 하버드 대학교 QGIS Workshop : http://maps.cga.harvard.edu/qgis/ UC Davis QGIS Tutorial Labs : http://www.plantsciences.ucdavis.edu/plant/qgislabs.htm Nathan's QGIS Blog : http://nathanw.net/ Free and Open Source GIS Ramblings : http://anitagraser.com/ Spatial Galaxy : http://spatialgalaxy.net/ Spatial Thoughts QGIS Tutorials : http://qgis.spatialthoughts.com/ Misanthrope's Thoughts : http://ssrebelious.blogspot.com/ ③ 커뮤니티 OSGeo 한국어 지부 : http://www.osgeo.kr OSGeo 한국어 지부 메일링 리스트 : http://groups.google.com/group/osgeo-kr 국가공간정보 거점대학 오픈 소스 GIS 심화 과정 76 이민파 (mapplus@gmail.com)
- 77. 한국어 지부 함께 성장하는 새로운 방법, 오픈 소스 소프트웨어!! 감사합니다. Q&A