
Recomendados
Mais conteúdo relacionado
Mais procurados
Mais procurados (20)
Semelhante a Flip Video 101 Guide
Semelhante a Flip Video 101 Guide (20)
Último
Último (20)
Flip Video 101 Guide
- 2. Flip agenda Flip overview Shooting tips Editing Exporting Upload to web Resources Using Flip in the classroom
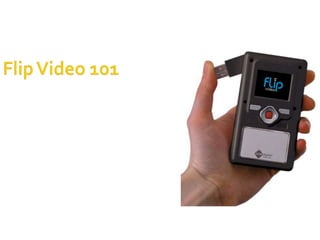
- 3. Flip overview Features Lens and Microphone on front
- 4. Flip Software - FlipShare
- 6. Flip Video Spotlight - Shooting Tips http://www.youtube.com/watch?v=rC-HdpXiLx0
- 8. Natural movements, slow and steady avoid excessive panning and tilting
- 10. Stay close
- 11. Camera Distance and angle – medium close ups
- 12. Audio – must be close to subject
- 13. Framing
- 14. Frame subject with proper head room
- 15. Be aware of what’s in the background
- 16. Lighting
- 17. Shoot in good lighting conditions, lowlight makes for grainy video
- 18. Focus
- 19. Focal length - area of fixed focus
- 20. Depth of field - area of acceptable sharpness
- 21. Sharp focus - picture is in focus
- 22. Microphone
- 23. Be aware of noise in background or rooms with too much reverb
- 25. Composing a Single or “Talking Head” Shot The subject can also be to one side of the frame to include or highlight background For interviews the subject is also set to one side of the frame with plenty of “nose room”
- 26. Use a tripod Flip desk tripod 42" Lightweight tripod
- 27. Hands on Video recording
- 28. Hands on Editing
- 29. Windows Movie Maker (Windows XP) 2 Editing software
- 30. Hands on Tips for Editing in Windows MovieMaker XP Flip Ultra HD records in MPEG-4 MovieMaker in XP will not import MPEG-4 Options Convert Video from MPEG-4 to WMV or AVI (Any Video Converter works well for this) From FlipShare software select Share – Online – Others to save file as WMV FlipShare software 4.5 vs 5.05
- 31. Hands on Plug Flip into USB port FlipShare will open Clips will populate into FlipShare (Camcorder) Select clip(s), go to Share, Online, Other Clip will save as WMV format After clip is converted go to desktop folder (Items for uploading January 4, 2010) to retrieve clip
- 32. Hands on Create a folder for Flip projects Place video clips (wmv) in folder Open new project in Windows Movie Maker Import video clip(s) into Movie Maker Edit clips using Trim and Split Clip Add video effects and transitions Add title and other media (images, audio, etc) Save project (saves in Windows Movie Maker) Save movie to computer (saves as a completed video) (Refer to Movie Maker Tutorials for assistance)
- 34. For Windows Media (.wmv) to web
- 36. Save Movie Wizard for web Name movie file and select destination
- 37. Save Movie Wizard for web Select “Video for local playback (at 640x480 size)”