Kodo Millet PPT made by Ghanshyam bairwa college of Agriculture kumher bhara...
Satellite With Alt Dvb
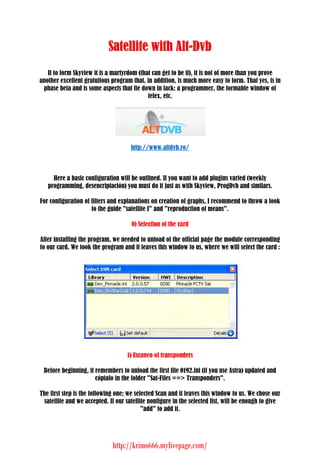
1. Satellite with Alt-Dvb If to form Skyview it is a martyrdom (that can get to be it), it is not of more than you proveanother excellent gratuitous program that, in addition, is much more easy to form. That yes, is in phase beta and is some aspects that lie down in lack: a programmer, the formable window of telex, etc. http://www.altdvb.ro/ Here a basic configuration will be outlined. If you want to add plugins varied (weekly programming, desencriptación) you must do it just as with Skyview, ProgDvb and similars.For configuration of filters and explanations on creation of graphs, I recommend to throw a look to the guide "satellite I" and "reproduction of means". 0) Selection of the card e ciAfter installing the program, we needed to unload of the official page the module correspondingto our card. We took the program and it leaves this window to us, where we will select the card : 1) Escaneo of transponders ) o f a n Before beginning, it remembers to unload the first file 0192.ini (if you use Astra) updated and cópialo in the folder "Sat-Files ==> Transponders".The first step is the following one; we selected Scan and it leaves this window to us. We chose our satellite and we accepted. If our satellite nonfigure in the selected list, will be enough to give "add" to add it. http://krimo666.mylivepage.com/
2. Soon we give "Select" and we chose all the transponders. Once scanned the transponders, they will appear to us data similar to those of the following capture : http://krimo666.mylivepage.com/
3. If we chose to update (case of having made the scanned one previously), it will leave this ventanita to us : If it is the first time that we used the program, we can choose "Replace" so that it puts all the channels new (those that we finished scanning). Also it is a useful option if we wished to borrar/sustituir the existing channels. 2) basic Configuration a) Data of the channels and updateWe selected any channel and we will see that in the inferior box of the right they appear to us a series of data on the chosen channel : http://krimo666.mylivepage.com/
4. Sometimes, the suppliers update the values or data of some channels, reason why it agrees that we do the same (otherwise the channel at issue not side ). We selected the channel and we give "edit" : http://krimo666.mylivepage.com/
5. Next we selected "Rescan" and it will say to us if there are changes or no. Case of having them, we will have to choose "save" to keep those changes : b) PiP ) i The popular PiP way also can be used with Alt-Dvb : http://krimo666.mylivepage.com/
6. The secondary window can be modified of position, size, etc, and can also qualify the sound. If we closed all the pictures of information, we would have left to something asi : c1) Properties of the card 1 etIn the eyelash "Hardware" of "Card Properties" indicates the PIDs to us of the channel that we are seeing as well as the version of drivers of the card and other data: http://krimo666.mylivepage.com/
7. c2) Configuration of the decoding filters. g ai f c eIn the Settings eyelash - > Video/DirectShow --> DVB-Main we will select what codecs we will use to see the channels; like almost always, those of Intervideo usually are those that fulfill better in ALL the aspects, is enough to select it in the drop-down window : http://krimo666.mylivepage.com/
8. From version 2 post-processing is possible to add to the image, so and as it is appraised in the image. Apply is necessary to give "save and" so that it applies the filters and it keeps that created profile to us.When reproducing any channel, with the right button of the mouse we can accede to the properties of DirectShow and see what filters are being used : http://krimo666.mylivepage.com/
9. If we selected codec of audio or video during the reproduction is possible to accede to the configuration of the same one : d1) Recording ) cIn the eyelash "Recording" of "Settings" he is recommendable to activate the squares so and as it is seen in the capture and choose the folder in which the archives will be recorded :Finally, when we selected "Record" appears to us this window in which we will mark the squares that we wish (usually they correspond to the different channels from audio and subtitles, case of having them) : http://krimo666.mylivepage.com/
10. d2) Programmer From version 2, a programmer exists; something simple, but functional.We selected any channel, we give the right button and we give "scheduler" : http://krimo666.mylivepage.com/
11. In the following ventanita we introduce the data (hour of recording, duration, etc) :Finally, we verified that in the eyelash "to scheduler" they appear to us the data that we finished introducing : http://krimo666.mylivepage.com/
12. e) Plug-ins ) l i sThey are placed in the corresponding folder and soon it is acceded to them in the Plugins icon of the main screen; in the capture all the information available on plug-in at issue is appraised : f) Subtítulos b It is possible to activate the subtitles and to see them in screen of very simple way. First it is necessary to verify if the channel at issue has subtitles and, case of having them, in what page of the telex is. Once we know the page of the telex, we introduce it manually so and as it is seen in the capture : http://krimo666.mylivepage.com/