How to Make a Simple Yarn Project Tote
•
0 gostou•2,182 visualizações

This document provides instructions for making a simple project tote bag for carrying yarn and craft projects. The instructions involve selecting a plastic container, tracing its base onto fabric, cutting circles and rectangles from the fabric, and sewing them together to form a bag that can be placed inside the container. Once assembled, the bag is weighted with rice and has drawstrings added to its top opening to secure items inside and allow for easy carrying. The finished tote keeps yarn and projects organized and protected from dust.

Recomendados
Mais conteúdo relacionado
Mais procurados
Mais procurados (20)
Destaque
Semelhante a How to Make a Simple Yarn Project Tote
Semelhante a How to Make a Simple Yarn Project Tote (20)
Mais de kootoyoo
Mais de kootoyoo (13)
Último
Último (20)
How to Make a Simple Yarn Project Tote
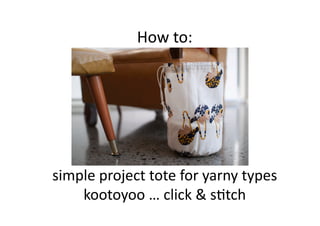
- 1. How to: simple project tote for yarny types kootoyoo … click & s7tch
- 2. Choose some pre:y fabric…be daring…cut into the stash.
- 3. Select a plas7c container. This one is from Safeway & used to hold their “home baked” anzac biscuits. Cut the lip off the container so that it is round.
- 4. Trace around the base of your container. Direct onto the fabric…you’re going to cut along the line. Cut 2 circles this size.
- 5. With right sides together sew the two circles together…leave a gap for turning.
- 6. Turn your circle in the right way fill with rice. This is to weight your flimsy plas7c container so that your yarn doesn’t fly around when your hooking or kniMng. S7tch the opening closed.
- 7. Measure around the top of your container (at its widest point). Divide this measurement by 2, then add seam allowance cut two rectangles this size. My maths … 52÷2=26 then 26+2cm for seams = 28cm rectangle (x2).
- 8. With right sides together sew up your side seams. I just used the selvedge at one side the pinks on the other…I’m lazy. Then sew a li:le U shape extending from the top of the fabric down about 2 inches. This is for your drawstrings. You might be puzzled about this? If you are it’s 7me to visit this post. h:p://www.kootoyoo.com/2008/11/how-‐to-‐make-‐drawstring-‐bag.html
- 9. Now you need to hem the casings top bo:om. The bo:om one can be rough ready…no body is going to see the inside of that. You need to leave a li:le gap in the bo:om casing so that you can insert your drawstring later. BUT make sure you finish of the top one neatly…or use your pinks. You need to s7tch the casing top bo:om (say ¼ inch from top ¾ inch from top). You want those nosey craeers who turn stuff over to see that you know what’s what (insert winky smiley face here).
- 10. This step is not necessary. I just wanted mine to look more substan7al so I used a bit of lee over quilt baMng to pad it out a bit.
- 11. I love an excuse to break out the Tarzan’s Grip. I glued my li:le rice pouch to the base of the container then threaded some string through the bo:om casing. Draw the string in to cover the edges of your pouch. Tie a knot to secure then run a line of slip s7tch through the cover the pouch to keep everything secure.
- 12. Once you’ve unpicked your side seams between the two rows of s7tching (as per the drawstring tute h:p://www.kootoyoo.com/2008/11/how-‐to-‐make-‐drawstring-‐bag.html), you need to thread the string through the casing. Thread one side first then the other.
- 13. You’re done! Perfect for car7ng small projects around keeping yarn dust free. June 2011 www.kootoyoo.com