SlideShare uma empresa Scribd logo
1 de 28
1) After proper configuration  of the boot sequence, your computer should read the files on your bootable media. The first screen should show you that Windows is loading files with a progress bar below it.
2) In the second screen you should see a progress bar with a text “ Starting Windows” above it. Just wait for the next screen, this will take a while.
3) The third screen show you the first graphical window where you are given first options to choose. These are the selection for Language, Time and currency format, and Keyboard layout. Choose your selections by clicking the pull down menus and press the Next button.
4) The fourth screen still shows the Install Windows dialog window and this time, allowing you to start the installations of this software by clicking the Install now arrow button. You may also press the key combination Alt + I for its shortcut command. On this window also, you are given option to repair the previous Windows installed on your computer.
5) The fifth screen shows a text “Setup is Starting..” Just wait until the next screen appear.
6) Again on the sixth screen, the Install Windows appear and this time, informing you about the Microsoft Software License Terms. Below is a check box with a text saying I accept the license terms. Click this check box and click Next.
7)On the seventh screen, Under Install Windows, The setup ask you “Which type of installation do you want?” Two options are available. Uprade and Custom. Since we want a new copy of windows, Select Custom to continue.
8) Still, on the Install Windows, Another important question is ask, “Where Do you want to install windows? You can set an allocation space for the this operating system by clicking New button and assign a disk space intended for this software and for future application that will be installed on your computer. Click New button to continue.
9) On the ninth screen, on the Install windows, after creating new allocation space, you could continue the installation by clicking Next button.
10) After answering important questions and because you click the next button, the Windows Setup automatically starts Installing Windows. You could see all the task being done by the Windows Setup, from Copying Windows files to your hard drive, Expanding Windows files, Installation of features, updates and completing the installations.
11) After all the process have been done, the Windows Setup should restart your machine automatically. If you are impatient, you may click the Restart now button.
12) After your machine restart, the Windows Seven logo appear and below it is a text containing “ Setup is updating registry settings”.
13) The thirteenth screen, Windows 7 Setup is starting services needed to continue the installations.
14) The Installing Windows appear again and this time, all installation processes are almost done. You could see that the setup is on the completion process.
15) After the complete process, Windows 7 setup automatically restart your computer.
16) The windows 7 logo appear again after the reboot. Just wait for the next screen to appear.
17) The seventeenth screen says “Setup is preparing your computer for first use” .
18) Windows setup test your video performance on the eighteenth screen.
19) On the nineteenth screen, Set Up Windows appear giving you the chance to create a user account. Type in your desired username for your account.
20) Next to username is the password. Type in your password two times. For your safety, you could also type a hint for your password, so in case you forgot it, you could remember it by reading your hint.
21) After creating username and password, Windows setup allow you to select a security options. For your computer security use the recommended settings. Click it to continue.
22) The options in changing the Time zone, date and time appear so change it suitable for your computer and click Next button.
24) Next to time and date settings is the network settings. Choose the type of network suitable for your computer. Click it or hit Enter to continue.
24) After selecting the type of network, Windows setup automatically configure your network settings.
26) Windows 7 Ultimate on the Set up Windows along with a bar showing a message “ Windows is finalizing your settings. Just wait until it brings you to the last step.
27) A welcome message appear. This indicate that you are almost done.
28) Preparing your desktop… this is the last message in the Windows setup wait until the desktop appear.
29) Finally. The Windows 7 Desktop. You’re done and ready to go for drivers and application software installations.

Mais conteúdo relacionado

Mais procurados

Mais procurados (19)

Installation of windows server 2008
Installation of windows server 2008Installation of windows server 2008
Installation of windows server 2008
 
Windows 7 Installation
Windows 7 InstallationWindows 7 Installation
Windows 7 Installation
 
Windows xp install
Windows xp installWindows xp install
Windows xp install
 
Configuring virtualization on single linux machine
Configuring virtualization on single linux machineConfiguring virtualization on single linux machine
Configuring virtualization on single linux machine
 
How to reformat pc
How to reformat pcHow to reformat pc
How to reformat pc
 
How to install windows 7
How to install windows 7How to install windows 7
How to install windows 7
 
Formating computer
Formating computerFormating computer
Formating computer
 
How to install windows 7
How to install windows 7How to install windows 7
How to install windows 7
 
Windows 7 Installation
Windows 7 InstallationWindows 7 Installation
Windows 7 Installation
 
Windows 7 installation
Windows 7 installationWindows 7 installation
Windows 7 installation
 
تثبيت وتقسيم وندوز 7
تثبيت وتقسيم وندوز 7تثبيت وتقسيم وندوز 7
تثبيت وتقسيم وندوز 7
 
Jc's window 7 installation
Jc's window 7 installationJc's window 7 installation
Jc's window 7 installation
 
How to install windows 8
How to install windows 8How to install windows 8
How to install windows 8
 
How to install windows 7
How to install windows 7How to install windows 7
How to install windows 7
 
Windows xp and windows 7 installaton
Windows xp and windows 7 installatonWindows xp and windows 7 installaton
Windows xp and windows 7 installaton
 
Installing windows 10
Installing windows 10Installing windows 10
Installing windows 10
 
How 2 format a pc
How 2 format a pcHow 2 format a pc
How 2 format a pc
 
How to install Windows 7
How to install Windows 7 How to install Windows 7
How to install Windows 7
 
Windows 7
Windows 7Windows 7
Windows 7
 

Destaque (7)

Installing memory
Installing memoryInstalling memory
Installing memory
 
Installing motherboard
Installing motherboardInstalling motherboard
Installing motherboard
 
Cross over cabling
Cross over cablingCross over cabling
Cross over cabling
 
Straight thru cabling
Straight thru cablingStraight thru cabling
Straight thru cabling
 
Parts of a Computer
Parts of a ComputerParts of a Computer
Parts of a Computer
 
5 parts of a computer
5 parts of a computer5 parts of a computer
5 parts of a computer
 
Parts of Computer
Parts of ComputerParts of Computer
Parts of Computer
 

Semelhante a Win7setup

Personal & professional practice
Personal & professional practicePersonal & professional practice
Personal & professional practice
kouko67
 
Lotus notes-703-1232746032205457-2
Lotus notes-703-1232746032205457-2Lotus notes-703-1232746032205457-2
Lotus notes-703-1232746032205457-2
IN023227
 
12705 installing xp (2)
12705 installing xp (2)12705 installing xp (2)
12705 installing xp (2)
Nishant Siddhu
 
windows 8 installation
windows 8 installationwindows 8 installation
windows 8 installation
selvadad
 

Semelhante a Win7setup (20)

win7setup (2).pptx
win7setup (2).pptxwin7setup (2).pptx
win7setup (2).pptx
 
win7setup (2).pptx
win7setup (2).pptxwin7setup (2).pptx
win7setup (2).pptx
 
Win7setup (2)
Win7setup (2)Win7setup (2)
Win7setup (2)
 
vistasetup.ppt
vistasetup.pptvistasetup.ppt
vistasetup.ppt
 
Win2k (2)
Win2k (2)Win2k (2)
Win2k (2)
 
BitNation Client-Server Manual
BitNation Client-Server ManualBitNation Client-Server Manual
BitNation Client-Server Manual
 
Personal & professional practice
Personal & professional practicePersonal & professional practice
Personal & professional practice
 
Windows server 2008 r2 installation
Windows server 2008 r2 installationWindows server 2008 r2 installation
Windows server 2008 r2 installation
 
Windows 7 installation
Windows 7 installationWindows 7 installation
Windows 7 installation
 
COMPUTER REFORMATTING COT.pptx
COMPUTER REFORMATTING COT.pptxCOMPUTER REFORMATTING COT.pptx
COMPUTER REFORMATTING COT.pptx
 
Margareth's powerpoint
Margareth's powerpointMargareth's powerpoint
Margareth's powerpoint
 
Activity 1 windows 7 installation
Activity 1 windows 7 installationActivity 1 windows 7 installation
Activity 1 windows 7 installation
 
Activity 1 windows 7 installation
Activity 1 windows 7 installationActivity 1 windows 7 installation
Activity 1 windows 7 installation
 
Raid 1 and raid 5 configuration in windows server
Raid 1 and raid 5 configuration in windows serverRaid 1 and raid 5 configuration in windows server
Raid 1 and raid 5 configuration in windows server
 
Lotus notes-703-1232746032205457-2
Lotus notes-703-1232746032205457-2Lotus notes-703-1232746032205457-2
Lotus notes-703-1232746032205457-2
 
Lotus Notes 7.0.3
Lotus Notes 7.0.3Lotus Notes 7.0.3
Lotus Notes 7.0.3
 
How to install windows xp
How to install windows xpHow to install windows xp
How to install windows xp
 
12705 installing xp (2)
12705 installing xp (2)12705 installing xp (2)
12705 installing xp (2)
 
windows 8 installation
windows 8 installationwindows 8 installation
windows 8 installation
 
6_2020_03_05!06_46_22_PM.pptx
6_2020_03_05!06_46_22_PM.pptx6_2020_03_05!06_46_22_PM.pptx
6_2020_03_05!06_46_22_PM.pptx
 

Mais de kapitanbasa

Straight thru cabling
Straight thru cablingStraight thru cabling
Straight thru cabling
kapitanbasa
 
Straight thru cabling
Straight thru cablingStraight thru cabling
Straight thru cabling
kapitanbasa
 
How to connect keyboard to the system unit
How to connect keyboard to the system unitHow to connect keyboard to the system unit
How to connect keyboard to the system unit
kapitanbasa
 
Char of living things
Char of living thingsChar of living things
Char of living things
kapitanbasa
 
Straight thru cabling
Straight thru cablingStraight thru cabling
Straight thru cabling
kapitanbasa
 
Scientific method
Scientific methodScientific method
Scientific method
kapitanbasa
 
Introduction to computer
Introduction to computerIntroduction to computer
Introduction to computer
kapitanbasa
 
Computer maintenance
Computer maintenanceComputer maintenance
Computer maintenance
kapitanbasa
 
Parts of system unit
Parts of system unitParts of system unit
Parts of system unit
kapitanbasa
 
Installing hard drive and optical drive
Installing hard drive and optical driveInstalling hard drive and optical drive
Installing hard drive and optical drive
kapitanbasa
 
Installing hard drive and optical drive
Installing hard drive and optical driveInstalling hard drive and optical drive
Installing hard drive and optical drive
kapitanbasa
 
Installing motherboard
Installing motherboardInstalling motherboard
Installing motherboard
kapitanbasa
 
Installing motherboard
Installing motherboardInstalling motherboard
Installing motherboard
kapitanbasa
 
Installing memory
Installing memoryInstalling memory
Installing memory
kapitanbasa
 

Mais de kapitanbasa (20)

Straight thru cabling
Straight thru cablingStraight thru cabling
Straight thru cabling
 
Straight thru cabling
Straight thru cablingStraight thru cabling
Straight thru cabling
 
How to connect keyboard to the system unit
How to connect keyboard to the system unitHow to connect keyboard to the system unit
How to connect keyboard to the system unit
 
Char of living things
Char of living thingsChar of living things
Char of living things
 
Win xp setup
Win xp setupWin xp setup
Win xp setup
 
The microscope
The microscopeThe microscope
The microscope
 
Straight thru cabling
Straight thru cablingStraight thru cabling
Straight thru cabling
 
Win xp setup
Win xp setupWin xp setup
Win xp setup
 
Scientific method
Scientific methodScientific method
Scientific method
 
Introduction to computer
Introduction to computerIntroduction to computer
Introduction to computer
 
Computer maintenance
Computer maintenanceComputer maintenance
Computer maintenance
 
Parts of system unit
Parts of system unitParts of system unit
Parts of system unit
 
Stage3
Stage3Stage3
Stage3
 
Stage3
Stage3Stage3
Stage3
 
Installing hard drive and optical drive
Installing hard drive and optical driveInstalling hard drive and optical drive
Installing hard drive and optical drive
 
Installing hard drive and optical drive
Installing hard drive and optical driveInstalling hard drive and optical drive
Installing hard drive and optical drive
 
Installing motherboard
Installing motherboardInstalling motherboard
Installing motherboard
 
Installing motherboard
Installing motherboardInstalling motherboard
Installing motherboard
 
Installing memory
Installing memoryInstalling memory
Installing memory
 
Installing cpu
Installing cpuInstalling cpu
Installing cpu
 

Último

IAC 2024 - IA Fast Track to Search Focused AI Solutions
IAC 2024 - IA Fast Track to Search Focused AI SolutionsIAC 2024 - IA Fast Track to Search Focused AI Solutions
IAC 2024 - IA Fast Track to Search Focused AI Solutions
Enterprise Knowledge
 
EIS-Webinar-Prompt-Knowledge-Eng-2024-04-08.pptx
EIS-Webinar-Prompt-Knowledge-Eng-2024-04-08.pptxEIS-Webinar-Prompt-Knowledge-Eng-2024-04-08.pptx
EIS-Webinar-Prompt-Knowledge-Eng-2024-04-08.pptx
Earley Information Science
 

Último (20)

Evaluating the top large language models.pdf
Evaluating the top large language models.pdfEvaluating the top large language models.pdf
Evaluating the top large language models.pdf
 
How to convert PDF to text with Nanonets
How to convert PDF to text with NanonetsHow to convert PDF to text with Nanonets
How to convert PDF to text with Nanonets
 
08448380779 Call Girls In Diplomatic Enclave Women Seeking Men
08448380779 Call Girls In Diplomatic Enclave Women Seeking Men08448380779 Call Girls In Diplomatic Enclave Women Seeking Men
08448380779 Call Girls In Diplomatic Enclave Women Seeking Men
 
What Are The Drone Anti-jamming Systems Technology?
What Are The Drone Anti-jamming Systems Technology?What Are The Drone Anti-jamming Systems Technology?
What Are The Drone Anti-jamming Systems Technology?
 
Handwritten Text Recognition for manuscripts and early printed texts
Handwritten Text Recognition for manuscripts and early printed textsHandwritten Text Recognition for manuscripts and early printed texts
Handwritten Text Recognition for manuscripts and early printed texts
 
Mastering MySQL Database Architecture: Deep Dive into MySQL Shell and MySQL R...
Mastering MySQL Database Architecture: Deep Dive into MySQL Shell and MySQL R...Mastering MySQL Database Architecture: Deep Dive into MySQL Shell and MySQL R...
Mastering MySQL Database Architecture: Deep Dive into MySQL Shell and MySQL R...
 
ProductAnonymous-April2024-WinProductDiscovery-MelissaKlemke
ProductAnonymous-April2024-WinProductDiscovery-MelissaKlemkeProductAnonymous-April2024-WinProductDiscovery-MelissaKlemke
ProductAnonymous-April2024-WinProductDiscovery-MelissaKlemke
 
Axa Assurance Maroc - Insurer Innovation Award 2024
Axa Assurance Maroc - Insurer Innovation Award 2024Axa Assurance Maroc - Insurer Innovation Award 2024
Axa Assurance Maroc - Insurer Innovation Award 2024
 
2024: Domino Containers - The Next Step. News from the Domino Container commu...
2024: Domino Containers - The Next Step. News from the Domino Container commu...2024: Domino Containers - The Next Step. News from the Domino Container commu...
2024: Domino Containers - The Next Step. News from the Domino Container commu...
 
How to Troubleshoot Apps for the Modern Connected Worker
How to Troubleshoot Apps for the Modern Connected WorkerHow to Troubleshoot Apps for the Modern Connected Worker
How to Troubleshoot Apps for the Modern Connected Worker
 
IAC 2024 - IA Fast Track to Search Focused AI Solutions
IAC 2024 - IA Fast Track to Search Focused AI SolutionsIAC 2024 - IA Fast Track to Search Focused AI Solutions
IAC 2024 - IA Fast Track to Search Focused AI Solutions
 
🐬 The future of MySQL is Postgres 🐘
🐬  The future of MySQL is Postgres   🐘🐬  The future of MySQL is Postgres   🐘
🐬 The future of MySQL is Postgres 🐘
 
How to Troubleshoot Apps for the Modern Connected Worker
How to Troubleshoot Apps for the Modern Connected WorkerHow to Troubleshoot Apps for the Modern Connected Worker
How to Troubleshoot Apps for the Modern Connected Worker
 
Boost Fertility New Invention Ups Success Rates.pdf
Boost Fertility New Invention Ups Success Rates.pdfBoost Fertility New Invention Ups Success Rates.pdf
Boost Fertility New Invention Ups Success Rates.pdf
 
Strategies for Unlocking Knowledge Management in Microsoft 365 in the Copilot...
Strategies for Unlocking Knowledge Management in Microsoft 365 in the Copilot...Strategies for Unlocking Knowledge Management in Microsoft 365 in the Copilot...
Strategies for Unlocking Knowledge Management in Microsoft 365 in the Copilot...
 
From Event to Action: Accelerate Your Decision Making with Real-Time Automation
From Event to Action: Accelerate Your Decision Making with Real-Time AutomationFrom Event to Action: Accelerate Your Decision Making with Real-Time Automation
From Event to Action: Accelerate Your Decision Making with Real-Time Automation
 
Strategize a Smooth Tenant-to-tenant Migration and Copilot Takeoff
Strategize a Smooth Tenant-to-tenant Migration and Copilot TakeoffStrategize a Smooth Tenant-to-tenant Migration and Copilot Takeoff
Strategize a Smooth Tenant-to-tenant Migration and Copilot Takeoff
 
A Domino Admins Adventures (Engage 2024)
A Domino Admins Adventures (Engage 2024)A Domino Admins Adventures (Engage 2024)
A Domino Admins Adventures (Engage 2024)
 
GenCyber Cyber Security Day Presentation
GenCyber Cyber Security Day PresentationGenCyber Cyber Security Day Presentation
GenCyber Cyber Security Day Presentation
 
EIS-Webinar-Prompt-Knowledge-Eng-2024-04-08.pptx
EIS-Webinar-Prompt-Knowledge-Eng-2024-04-08.pptxEIS-Webinar-Prompt-Knowledge-Eng-2024-04-08.pptx
EIS-Webinar-Prompt-Knowledge-Eng-2024-04-08.pptx
 

Win7setup

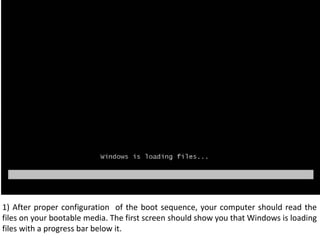
  • 1. 1) After proper configuration of the boot sequence, your computer should read the files on your bootable media. The first screen should show you that Windows is loading files with a progress bar below it.
  • 2. 2) In the second screen you should see a progress bar with a text “ Starting Windows” above it. Just wait for the next screen, this will take a while.
  • 3. 3) The third screen show you the first graphical window where you are given first options to choose. These are the selection for Language, Time and currency format, and Keyboard layout. Choose your selections by clicking the pull down menus and press the Next button.
  • 4. 4) The fourth screen still shows the Install Windows dialog window and this time, allowing you to start the installations of this software by clicking the Install now arrow button. You may also press the key combination Alt + I for its shortcut command. On this window also, you are given option to repair the previous Windows installed on your computer.
  • 5. 5) The fifth screen shows a text “Setup is Starting..” Just wait until the next screen appear.
  • 6. 6) Again on the sixth screen, the Install Windows appear and this time, informing you about the Microsoft Software License Terms. Below is a check box with a text saying I accept the license terms. Click this check box and click Next.
  • 7. 7)On the seventh screen, Under Install Windows, The setup ask you “Which type of installation do you want?” Two options are available. Uprade and Custom. Since we want a new copy of windows, Select Custom to continue.
  • 8. 8) Still, on the Install Windows, Another important question is ask, “Where Do you want to install windows? You can set an allocation space for the this operating system by clicking New button and assign a disk space intended for this software and for future application that will be installed on your computer. Click New button to continue.
  • 9. 9) On the ninth screen, on the Install windows, after creating new allocation space, you could continue the installation by clicking Next button.
  • 10. 10) After answering important questions and because you click the next button, the Windows Setup automatically starts Installing Windows. You could see all the task being done by the Windows Setup, from Copying Windows files to your hard drive, Expanding Windows files, Installation of features, updates and completing the installations.
  • 11. 11) After all the process have been done, the Windows Setup should restart your machine automatically. If you are impatient, you may click the Restart now button.
  • 12. 12) After your machine restart, the Windows Seven logo appear and below it is a text containing “ Setup is updating registry settings”.
  • 13. 13) The thirteenth screen, Windows 7 Setup is starting services needed to continue the installations.
  • 14. 14) The Installing Windows appear again and this time, all installation processes are almost done. You could see that the setup is on the completion process.
  • 15. 15) After the complete process, Windows 7 setup automatically restart your computer.
  • 16. 16) The windows 7 logo appear again after the reboot. Just wait for the next screen to appear.
  • 17. 17) The seventeenth screen says “Setup is preparing your computer for first use” .
  • 18. 18) Windows setup test your video performance on the eighteenth screen.
  • 19. 19) On the nineteenth screen, Set Up Windows appear giving you the chance to create a user account. Type in your desired username for your account.
  • 20. 20) Next to username is the password. Type in your password two times. For your safety, you could also type a hint for your password, so in case you forgot it, you could remember it by reading your hint.
  • 21. 21) After creating username and password, Windows setup allow you to select a security options. For your computer security use the recommended settings. Click it to continue.
  • 22. 22) The options in changing the Time zone, date and time appear so change it suitable for your computer and click Next button.
  • 23. 24) Next to time and date settings is the network settings. Choose the type of network suitable for your computer. Click it or hit Enter to continue.
  • 24. 24) After selecting the type of network, Windows setup automatically configure your network settings.
  • 25. 26) Windows 7 Ultimate on the Set up Windows along with a bar showing a message “ Windows is finalizing your settings. Just wait until it brings you to the last step.
  • 26. 27) A welcome message appear. This indicate that you are almost done.
  • 27. 28) Preparing your desktop… this is the last message in the Windows setup wait until the desktop appear.
  • 28. 29) Finally. The Windows 7 Desktop. You’re done and ready to go for drivers and application software installations.

Notas do Editor

  1. Ou
  2. s
  3. ange