
Recomendados
Mais conteúdo relacionado
Semelhante a Guide to military surplus ammo cans
Semelhante a Guide to military surplus ammo cans (20)
Último
Último (20)
Guide to military surplus ammo cans
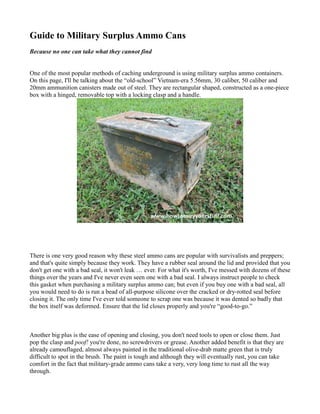
- 1. Guide to Military Surplus Ammo Cans Because no one can take what they cannot find One of the most popular methods of caching underground is using military surplus ammo containers. On this page, I'll be talking about the “old-school” Vietnam-era 5.56mm, 30 caliber, 50 caliber and 20mm ammunition canisters made out of steel. They are rectangular shaped, constructed as a one-piece box with a hinged, removable top with a locking clasp and a handle. There is one very good reason why these steel ammo cans are popular with survivalists and preppers; and that's quite simply because they work. They have a rubber seal around the lid and provided that you don't get one with a bad seal, it won't leak … ever. For what it's worth, I've messed with dozens of these things over the years and I've never even seen one with a bad seal. I always instruct people to check this gasket when purchasing a military surplus ammo can; but even if you buy one with a bad seal, all you would need to do is run a bead of all-purpose silicone over the cracked or dry-rotted seal before closing it. The only time I've ever told someone to scrap one was because it was dented so badly that the box itself was deformed. Ensure that the lid closes properly and you're “good-to-go.” Another big plus is the ease of opening and closing, you don't need tools to open or close them. Just pop the clasp and poof! you're done, no screwdrivers or grease. Another added benefit is that they are already camouflaged, almost always painted in the traditional olive-drab matte green that is truly difficult to spot in the brush. The paint is tough and although they will eventually rust, you can take comfort in the fact that military-grade ammo cans take a very, very long time to rust all the way through.
- 2. The above photograph shows a 50 caliber box that was recently excavated after being undisturbed 24 inches underground for 4 years. A friend of mine used it to store a Sig model 229 with 300 rounds of Federal 40 caliber JHP. He didn't use desiccant and since the gun was undamaged and the bullets fired just fine, I'll assume that this is a “good” can and show you how to restore it. The little bit of surface rust that you can observe in the photo is perfectly normal and nothing to worry about, there is only slight pitting in the metal and my friend could've left the ammo can underground for another 4 years with nothing to worry about. Although I mentioned that a little rust won't hurt, I'm more than a bit “meticulous” when it comes to caching. My friend replaced this box with a newer one, reburied his Sig and gave me this ammo can; and I want it in the absolute best possible condition should I decide to use it. So here we go … you're gonna want a wire brush (the longer the bristles, the better) some sandpaper and some isopropyl alcohol. Remove the lid from the box and scrape all the outside surfaces. You will want to use the wire brush to dig as deep as possible into any pits or crevices. Sandpaper is fine for the flat surfaces as long as you remove as much rust as possible from each and every part of the box and lid. When you're done, use the rubbing alcohol and a couple of clean rags to remove every bit of dirt, dust and grit. After you've successfully cleaned your ammo can, you'll want to paint it. Spray primer on it first if you
- 3. want, but in my experience the spray paint primers don't stick any better than the paint itself. For this ammo box, I picked out a can of Rust-Oleum textured enamel in flat pewter. I can't tell you how many coats of paint I sprayed but I used more than half the can of paint. I put a couple extra coats of paint on the bottom of the box and all the way around the bottom about an inch up all four sides. If you'll scroll back up to the first photograph of this box, you'll see an extra layer of caked-up mud and rust along the bottom of the ammo can. This is the result of a plastic “bell” that my friend used when he cached it four years ago. I'll explain in more detail shortly. Well here's my finished product. I removed as much rust as was possible, thoroughly cleaned it and I feel pretty confident about the paint job. My next step was to rummage through the garage and find a tarpaulin; the tarp itself is in good condition except most of the grommets are ripped out. I laid my freshly painted ammo can upside-down in the middle of the tarp and cut a rectangular section out of the tarp.
- 4. The rectangular section is trimmed down so as to allow me to wrap the ammo can in such a way as to create a bell shaped cover for the box; leaving only the bottom of the box open. If you haven't read it yet, I recommend my web page entitled “How to Bury; 5 Methods” as it explains my Bell Method a little more thoroughly. Please take note that in this photo, the ammo can is upside-down and the masking tape that you see is on the bottom of the box. I've already cut a second rectangular section (identical in size to the first) out of the tarp and wrapped it in the exact same manner (with the tape on the bottom of the box); making a two-layered bell to keep the ammo can dry. Note that I've wrapped it so that the only openings in the tarps are on the bottom of the box. When you bury your surplus ammo can “right-side-up,” the openings in the tarp with the masking tape will be on the bottom. The weight of the soil will keep the tarps in place and since it's impossible for water to flow uphill, your ammo can will stay dry until the tarps rot enough to leak. In my experience, two layers of a typical tarp like this one from Wal-Mart, should keep most of your box dry for the first 1-4 years. (depending on climate, annual rainfall and depth)
- 5. My friend used garbage bags when he cached his Sig four years ago and they rotted quickly; this is why you can clearly see a ring of rust and mud around the bottom of the ammo can in the first pic. This is also why I put extra coats of paint on the bottom, because the bottom of the box will get a little wetter. An alternative would be to use an upside-down Tupperware container or a junked vehicle's fuel tank as a bell but that means more work by digging a bigger hole. I might also note that making a “bell” to keep your ammo can dry is only for long term storage and might be a little extreme. A lot of preppers don't cover their military surplus ammo cans with anything; they just drop them in a hole and cover with dirt. There's nothing wrong with this method. As I mentioned before, these cans are water-tight and they take many years to rust. Just off-hand as I'm typing this, I can't ever remember hearing about anyone losing anything that they put in them. Here's what it would look like going in the ground. I'm not actually burying this can so you'll have to imagine caching it a little deeper. In this photo, the top of the ammo can is about 8 inches below the surface. I just dug this hole as a demonstration, I would triple that depth to about 24 inches if this cache was staying in the ground. The frost line here is 15 inches but that varies, you'd have to research the frost line for your location. That's just about everything you need to know about military-grade surplus ammunition canisters. Don't be afraid to buy one that's a little beat-up; if it's got a little rust or a few small dents that's perfectly normal. Every ammo can that I've ever used or seen anyone else use looked just like the first photo on this page and it's just hard to go wrong with them. You can use these cans to safely bury anything that will fit inside them; handguns, hard drives, ammunition or valuable documents. I recommend them to everyone because they are affordable, quick
- 6. and because they do their job quite well. Dave, September 2013 www.howtoburyyourstuff.com