

Recomendados
Mais conteúdo relacionado
Mais procurados
Mais procurados (11)
Destaque
Destaque (18)
Semelhante a Tie knots
Semelhante a Tie knots (20)
Último
Último (20)
Tie knots
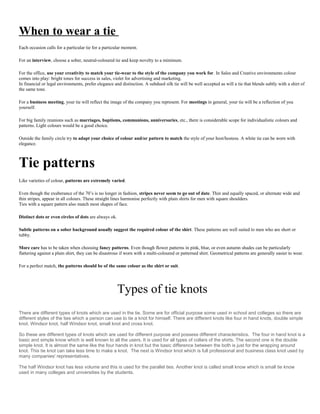
- 1. When to wear a tie Each occasion calls for a particular tie for a particular moment. For an interview, choose a sober, neutral-coloured tie and keep novelty to a minimum. For the office, use your creativity to match your tie-wear to the style of the company you work for. In Sales and Creative environments colour comes into play: bright tones for success in sales, violet for advertising and marketing. In financial or legal environments, prefer elegance and distinction. A subdued silk tie will be well accepted as will a tie that blends subtly with a shirt of the same tone. For a business meeting, your tie will reflect the image of the company you represent. For meetings in general, your tie will be a reflection of you yourself. For big family reunions such as marriages, baptisms, communions, anniversaries, etc., there is considerable scope for individualistic colours and patterns. Light colours would be a good choice. Outside the family circle try to adapt your choice of colour and/or pattern to match the style of your host/hostess. A white tie can be worn with elegance. Tie patterns Like varieties of colour, patterns are extremely varied. Even though the exuberance of the 70’s is no longer in fashion, stripes never seem to go out of date. Thin and equally spaced, or alternate wide and thin stripes, appear in all colours. These straight lines harmonise perfectly with plain shirts for men with square shoulders. Ties with a square pattern also match most shapes of face. Distinct dots or even circles of dots are always ok. Subtle patterns on a sober background usually suggest the required colour of the shirt. These patterns are well suited to men who are short or tubby. More care has to be taken when choosing fancy patterns. Even though flower patterns in pink, blue, or even autumn shades can be particularly flattering against a plain shirt, they can be disastrous if worn with a multi-coloured or patterned shirt. Geometrical patterns are generally easier to wear. For a perfect match, the patterns should be of the same colour as the shirt or suit. Types of tie knots There are different types of knots which are used in the tie. Some are for official purpose some used in school and colleges so there are different styles of the ties which a person can use to tie a knot for himself. There are different knots like four in hand knots, double simple knot, Windsor knot, half Windsor knot, small knot and cross knot. So these are different types of knots which are used for different purpose and possess different characteristics. The four in hand knot is a basic and simple know which is well known to all the users. It is used for all types of collars of the shirts. The second one is the double simple knot. It is almost the same like the four hands in knot but the basic difference between the both is just for the wrapping around knot. This tie knot can take less time to make a knot. The next is Windsor knot which is full professional and business class knot used by many companies' representatives. The half Windsor knot has less volume and this is used for the parallel ties. Another knot is called small know which is small tie know used in many colleges and universities by the students.
- 2. Types of tie knots There a number of tips on how to tie a tie. However, you must know which type of knot goes well with which type of shirt. For instance the Windsor knot, Hanover and St. Andrews knot go quite well with wide spread collar. This type of knot also looks good on button down shirt. The next thing that counts while tying a tie is the tie material. Depending on the thickness and thinness of the material, the type of knot is determined. As far as fashion is concerned, there are various types of knots which give you a flashy edge complementing your style. Knowing more than one type of knot will always add to your credit. So, no matter what, try to learn at least more than two types of knot, if not all. Following are some of the types of knots that will be useful to know. Types of Tie Knots 1) Windsor knot 2) Half Windsor knot 3) Four-in-Hand knot 4) Bow Tie 5) Pratt knot 6) Oriental knot 7) Kelvin knot 8) Nicky knot 9) Victoria Knot 10) St. Andrews knot Listed above are some of the knots from which you can decide on which type you would want to learn. Of all the types of knots that are there, the most popularly and widely used knot today is the four in hand neck tie knot. There are certain things that must be kept in mind when tying a tie. The following are some of the tips to tie a tie: 1) Make sure that the wider end of the tie is longer than the narrow end of the tie. The longer the wider end is, the longer will your tie be. 2) When you tie a tie, make sure that the biased cut of the tie is on top of the other end or crosses over the other end. This will make the tie to hold the knot more properly and firmly. 3) Consider the occasion or event for which you are wearing the tie. A bow tie fits into a more formal party. For a business meeting, the Windsor or even half Windsor tie will also fit in properly. The Pratt knot is suitable for most of the shirt and occasions. It gives you a neat look. 4) Consider the material of the tie whether it is thick or not before you decide upon the type of knot you want. For instance, tying a Windsor knot on a thick material tie will make it look awkward.
- 3. 5) For a more fashionable situation, St Andrew knot, Windsor or Hanover knots goes well. To make your appearance more flashy you can even go for Kelvin knot and Nicky knot as well. The basic point is, if not more than two, learn atleast two types of knots. It would be even better if you learn two knots for two different materials of tie. It would be an icing on the cake. Depending on your preference and comfort level, you can decide which types of knot you would want to learn from those given above. The Windsor Knot The Windsor Knot is the knot for special occasions. Typically English, it owes its name to the Duke of Windsor who made it popular. As the finished knot has considerable volume it is preferable to restrict its use to wide-spaced collars such as Italian collars or Windsor collars. This knot is complicated to form. It has to fit exactly between the two ends of the collar and must completely hide the top button of the shirt. Preparation: Slide the tie around your neck after first having buttoned up the top button of your shirt and turned up the collar. The two ends of the tie must be of different lengths. The wide end must hang down much longer than the narrow end. The steps: Step 1: Lay the wide end over the narrow end. Step 2: Bring the wide end up through the gap between the layover and your neck. Step 3: Take the wide end to the right behind the layover, then forwards and up, then down into the gap between the layover and your neck. Step 4: Take the wide end round the front of the layover, up close to your neck, and down through the loop just formed. Step 5: Hold the narrow end and tighten the finished knot by pulling it gently up to centre it on your collar. The Windsor Knot in a few words: Names: Windsor Knot, Full Windsor, Double Windsor Difficulty: *** Popularity: ***** Morphology: medium height, shorter men, narrow chests, thin necks. Types of collar: classic, wide-spaced. Types of tie: standard, long, lightweight fabrics.
- 4. The Half Windsor The Half Windsor is similar to the Full Windsor although slightly less bulky, and easier to do. It is ideal for lightweight or not too thick fabrics. This elegant triangular knot works well with shirts with a classic collar or an open-collar. Preparation: Place the tie around your neck. Medium-sized men should start with the narrow end well below the belt. Tying the Half Windsor in 4 steps: Step 1: Lay the wide end over the narrow end. Hold this layover and make a second turn around the narrow end just above the first. Step 2: Take the wide end horizontally behind the layover and bring it forward. Step 3: Hold the layover, take the wide end up under the layover and slide it down through the loop. Step 4: Hold the narrow end and pull gently on the wide end to form the knot. When finished, the narrow end should be concealed behind the wide end, which should be level with your belt. The Half Windsor in a few words: Name: Half Windsor Difficulty: ** Popularity: *** Morphology: nearly all sizes. Types of collar: classic, wide-spaced. Types of tie: standard, lightweight and not too thick fabrics. The Four-in-hand The four-in-hand is the all-time classic of tie knots. It is by far the most used, because it is simple to tie. It works well for most types of tie and with nearly all types of shirt collar. It is perfect for men of medium height and for tall men. Conical and elongated, the Four-in-hand is narrow when tied with a lightweight fabric and wider when formed with a thick material.
- 5. Preparation: Turn up the collar of your shirt, button the top button, then put the tie around your neck. Medium height men should position the narrow end of the tie at waist level. Tall men should position the narrow end a little above the waist. Narrow- chested men will look better with the Double Knot which has a similar shape. The steps: Step 1: Just below the collar, lay the wide end over the narrow end. Step 2: Take the wide end behind the narrow end. Step 3: Bring the wide end across the layover. Step 4: Holding a finger in the loop, bring the wide end up, then down through the loop. Step 5: Holding the narrow end, pull the knot gently up to the top shirt button. When the knot is finished, the narrow end must be concealed and the wide end should be level with your belt. The Four-in-hand in a few words: Names: Four-in-hand, Simple Knot Difficulty: * Popularity: ***** Morphology: medium heights, tall men, deep-chested men, wide necks Types of collar: nearly all Types of tie: nearly all The Double Knot The Double Knot is very similar to the Four-in-Hand. It has just one more layover. At the beginning the wide end is turned twice over the narrow end. The slightly thicker finished knot makes it ideal for use with most shirts. It is also perfect with all types of tie, with the exception of very thick fabrics.
- 6. Preparation: Slide the tie around your neck after first having buttoned up the top button of your shirt and turned up the collar. The two ends of the tie must be of different lengths. The wide end must hang down much further than the narrow end. Tying the Double Knot in 4 steps: Step 1: Just below the collar, lay the wide end over the narrow end (see steps 1 to 3 of the Simple Knot). Step 2: Take the wide end behind the narrow end a second time. Step 3: Bring the wide end up and under the layover and then into the loop formed by the first or second layer. Step 4: Finally, adjust the knot and slide it up to the centre of your collar. The Double Knot in a few words: Names: Double Knot, Simple Double, Victoria, Prince Albert. Difficulty: ** Popularity: *** Morphology: nearly all sizes. Types of collar: nearly all. Types of tie: standard, lightweight, and thin fabrics. The Small Knot As its name clearly indicates, this is a small knot. Its great advantage is its use with heavy fabrics and/or with close-cut collars. Do not use it on collars that are long or wide-spaced. Easy to do, even with its 180° twist, the Small Knot is by far the easiest of all the knots.
- 7. Preparation: Put the tie in place around your neck, then twist the wide end 180° (see illustration above). To avoid doing the twist you can simply place your tie around your neck back to front. The wide end needs to be longer than the narrow end. Tying the Small Knot in 4 steps: Step 1: Under the collar, lay the wide end over the narrow end. Step 2: Now run the wide end over the layover. Step 3: Hold the layover with one hand and run the wide end behind the layover and up. Smooth out the wide end and slide it down through the loop of the layover. Step 4: Adjust the knot, sliding it up to your collar. For a smart finish the knot must cover the top button of your shirt and the narrow end must be completely hidden. The Small Knot in a few words: Names: Small Knot, Oriental Knot Difficulty: ** Popularity: ** Morphology: tall men, wide chests, wide necks. Types of collar: classic, close fitting. Types of tie: standard or thick fabrics.