SlideShare uma empresa Scribd logo
1 de 79
Baixar para ler offline
ELECTRIC & GAS DRYER
SERVICE MANUAL
CAUTION
READ THIS MANUAL CAREFULLY IN ORDER TO
PROPERLY DIAGNOSE PROBLEMS AND TO SAFELY            SIGN
PROVIDE QUALITY SERVICE ON THESE DRYERS.       DE


MODEL : RN1329AN1/RV1329AN1
        RN1329AN4/RV1329AN4                ER


                                           C


                                                       D
                                                TIFIE
        RN1329AN7/RV1329AN7
        RN1329AD6/RV1329AD6
        RN1329AD1/RV1329AD1
        RN1329AD5/RV1329AD5
        RN1329A1/RV1329A1
        RN1329A4/RV1329A4
        RN1329A7/RV1329A7
April 2011 PRINTED IN KOREA   P/No. : MFL62119935
IMPORTANT SAFETY NOTICE

The information in this service guide is intended for use by individuals possessing skill and experience in
electrical, electronic, and mechanical appliance repair. Any attempt to repair a major appliance may result
in injury to persons and property damage. The manufacturer or seller cannot be responsible for the
interpretation of this information, nor can it assume any liability in connection with its use.

                                          !   WARNING
   To avoid injury to persons disconnect power before se rvicing this product. If electrical power is required
 for diagnosis or test purposes, disconnect the power immediately after performing the necessary checks.


             RECONNECT ALL GROUNDING DEVICES
   If grounding wires, screws, straps, clips, nuts, or washers used to complete a path to ground are
  removed for service, they must be returned to their original position and properly fastened.


                       WHAT TO DO IF YOU SMELL GAS:
 ■ Do not try to light a match, or cigarette, or turn on       ■ Immediately call your gas supplier from a neighborís
   any gas or electrical appliance.                              phone. Follow the gas supplierís instructions
 ■ Do not touch any electrical switches. Do not use any          carefully.
   phone in your building.                                     ■ If you cannot reach your gas supplier, call the fire
 ■ Clear the room, building or area of all occupants.            department.


                                              IMPORTANT
                                        Electrostatic Discharge (ESD)
                                            Sensitive Electronics
   ESD problems are present everywhere. ESD may damage or weaken the electronic
  control assembly. The new control assembly may appear to work well after repair is
  finished, but failure may occur at a later date due to ESD stress.
  ■   Use an anti-static wrist strap. Connect wrist strap to green ground connection point or unpainted
      metal in the appliance.
                                                     - OR -
   Touch your finger repeatedly to a green ground connection point or unpainted metal
  in the appliance.
  ■ Before removing the part from its package, touch the anti-static bag to a green ground connection
    point or unpainted metal in the appliance.
  ■ Avoid touching electronic parts or terminal contacts. Handle electronic control assembly by edges only.
  ■ Observe above instructions when repackaging failed electronic control assembly in an anti-static bag.


                                                           2
CONTENTS
1. IMPORTANT SAFETY INSTRUCTIONS .............................................................................. 4
2. SPECIFICATIONS ................................................................................................................ 9
3. FEATURES AND BENEFITS .............................................................................................. 11
4. INITIAL STEPS FOR INSTALLING YOUR DRYER ............................................................ 13
5. INSTALLATION INSTRUCTIONS ....................................................................................... 19
6. ELECTRICAL REQUIREMENTS FOR ELECTRIC DRYERS ............................................ 29
7. ELECTRICAL REQUIREMENTS FOR GAS DRYERS ...................................................... 37
8. GAS REQUIREMENTS AND INSTRUCTIONS .................................................................. 38
9. EXHAUST REQUIREMENTS AND MAINTENANCE .......................................................... 39
10. DRYER CYCLE PROCESS ............................................................................................. 43
11. COMPONENT TESTING INFORMATION ....................................................................... 44
12. MOTOR DIAGRAM AND SCHEMATIC............................................................................. 47
13. CONTROL LAYOUT ........................................................................................................ 48
14. WIRING DIAGRAM ........................................................................................................... 49
15. DIAGNOSTIC TEST.......................................................................................................... 50
    15-1. TEST 1 240V AC ELECTRICAL SUPPLY ............................................................ 51
    15-2. TEST 2 THERMISTOR TEST ................................................................................ 54
    15-3. TEST 3 MOTOR TEST ......................................................................................... 55
    15-4. TEST 4 MOISTURE SENSOR............................................................................... 56
    15-5. TEST 5 DOOR SWITCH TEST.............................................................................. 57
    15-6. TEST 6 HEATER SWITCH TEST - ELECTRIC MODEL ....................................... 58
    15-7. TEST 7 GAS VALVE TEST - GAS MODEL .......................................................... 59
16. ERROR MODE ................................................................................................................ 60
17. CHANGE GAS SETTING (NATURAL GAS, PROPANE GAS) ....................................... 61
18. DISASSEMBLY INSTRUCTIONS .................................................................................... 63
19. EXPLODED VIEW ........................................................................................................... 71
    19-1-1. Control Panel & Plate Assembly - Coin Type ....................................................... 71
    19-1-2. Control Panel & Plate Assembly - Card Type ....................................................... 72
    19-2-1. Cabinet & Door Assembly - Electric Stack Upper Type ........................................ 73
    19-2-2. Cabinet & Door Assembly - Electric Stack Lower Type ........................................ 74
    19-2-3. Cabinet & Door Assembly - Gas Stack Upper Type ............................................. 75
    19-2-4. Cabinet & Door Assembly - Gas Stack Lower Type ............................................. 76
    19-3-1. Drum & Motor Assembly: Electric Type ................................................................ 77
    19-3-2. Drum & Motor Assembly: Gas Type ..................................................................... 78

                                                                  3
1          IMPORTANT SAFETY INSTRUCTIONS

READ ALL INSTRUCTIONS BEFORE USE
  WARNING For your safety, the information in this manual must be followed to minimize the risk
of fire or explosion, electric shock, or to prevent property damage, injury to persons , or death.

                Your Safety and the safety of others is very important.
  We have provided many important safety messages in this manual and on your appliance.
  Always read and obey all safety messages.
           This is the safety alert symbol.
           This symbol alerts you to potential hazards that can kill or hurt you and others.
  All safety messages will follow the safety alert symbol and either the word DANGER or WARNING.
  These words mean:
      DANGER: You can be killed or seriously injured if you don’t immediately follow instructions.
      WARNING: You can be killed or seriously injured if you don’t follow instructions.
  All safety messages will tell you what the potential hazard is, tell you how to reduce the
  chance of injury, and tell you what can happen if the instructions are not followed.

BASIC SAFETY PRECAUTIONS
    WARNING:          To reduce the risk of fire, electric shock, or injury to persons when using
this appliance, follow basic precautions, including the following:
• Read all instructions before using the dryer.               discarded, remove the door to the drying
• Before use, the dryer must be properly installed as         compartment.
  described in this manual.                               •   Do not allow children to play on or in the dryer.
• Do not place items exposed to cooking oils in your          Close supervision of children is necessary when
  dryer. Items contaminated with cooking oils may             the dryer is used near children.
  contribute to a chemical reaction that could cause      •   Do not use fabric softeners or products to
  a load to catch fire.                                       eliminate static unless recommended by the
• Do not dry articles that have been previously               manufacturer of the fabric softener or product.
  cleaned in, washed in, soaked in, or spotted with       •   Do not use heat to dry articles containing foam
  gasoline, dry-cleaning solvents, or other                   rubber or similarly textured rubber-like materials.
  flammable or explosive substances as they give          •   Keep area around the exhaust opening and
  off vapors that could ignite or explode.                    adjacent surrounding areas free from the
• Do not reach into the dryer if the drum or any other        accumulation of lint, dust, and dirt.
  part is moving.                                         •   The interior of the dryer and exhaust vent should
• Do not repair or replace any part of the dryer or           be cleaned periodically by qualified service
  attempt any servicing unless specifically                   personnel.
  recommended in this Use and Care Guide or in            •   Do not install or store the dryer where it will be
  published user-repair instructions that you                 exposed to the weather.
  understand and have the skills to carry out.            •   Always check the inside of the dryer for foreign
• Do not tamper with controls.                                objects.
• Before the dryer is removed from service or             •   Clean lint screen before or after each load.

                                                      4
READ ALL INSTRUCTIONS BEFORE USE
  WARNING For your safety, the information in this manual must be followed to minimize the risk of
fire or explosion, electric shock, or to prevent property damage, injury to persons, or death.

• Do not store or use gasoline or other flammable             • Installation and service must be performed by a
  vapors and liquids in the vicinity of this appliance or       qualified installer, service agency, or the gas
  any other appliances.                                         supplier.


WHAT TO DO IF YOU SMELL GAS:
1. Do not try to light a match or cigarette, or turn on       4. Immediately call your gas supplier from a
   any gas or electrical appliance.                              neighbor’s phone. Follow the gas supplier’s
2. Do not touch any electrical switches. Do not use              instructions carefully.
   any phone in your building.                                5. If you cannot reach your gas supplier, call the fire
3. Clear the room, building, or area of all occupants.           department.


CALIFORNIA SAFE DRINKING WATER AND TOXIC ENFORCEMENT ACT
This act requires the governor of California to publish a list of substances known to the state to
cause cancer, birth defects, or other reproductive harm and requires businesses to warn customers
of potential exposure to such substances.
Gas appliances can cause minor exposure to four of these substances, namely benzene, carbon
monoxide, formaldehyde, and soot, caused primarily by the incomplete combustion of natural gas or
LP fuels.
Properly adjusted dryers will minimize incomplete combustion. Exposure to these substances can
be minimized further by properly venting the dryer to the outdoors.


                                                          5
READ ALL INSTRUCTIONS BEFORE USE
  WARNING For your safety, the information in this manual must be followed to minimize the risk
of fire or explosion, electric shock, or to prevent property damage, injury to persons, or death.

GROUNDING INSTRUCTIONS
This appliance must be grounded. In the event of           person if you are in doubt as to whether the
malfunction or breakdown, grounding will reduce the        appliance is properly grounded.
risk of electric shock by providing a path of least
                                                           Do not modify the plug provided with the appliance.
resistance for electric current. This appliance must
                                                           If it will not fit the outlet, have a proper outlet
be equipped with a cord having an equipment-
                                                           installed by a qualified electrician.
grounding conductor and a grounding plug. The plug
must be plugged into an appropriate outlet that is         This appliance must be connected to a grounded
properly installed and grounded in accordance with         metal, permanent wiring system or an equipment-
all local codes and ordinances.                            grounding conductor must be run with the circuit
                                                           conductors and connected to the equipment-
    WARNING             — Improper connection of           grounding terminal or lead on the appliance.
the equipment-grounding conductor can result in a
                                                           Electric shock can result if the dryer is not properly
risk of electric shock. Check with a qualified
                                                           grounded.
electrician or service


SAFETY INSTRUCTIONS FOR INSTALLATION
    WARNING         To reduce the risk of fire, electric shock, or injury to persons when using this
appliance, follow basic precautions, including the following:
• Properly ground dryer to conform with all                • To reduce the risk of electric shock, do not
  governing codes and ordinances. Follow details             install the dryer in humid spaces. Failure to
  in the installation instructions. Electric shock can       follow this warning can cause serious injury, fire,
  result if the dryer is not properly grounded.              electric shock, or death.
• Before use, the dryer must be properly                   • Connect to a properly rated, protected, and
  installed as described in this manual.                     sized power circuit to avoid electrical overload.
  Electric shock can result if the dryer is not properly     Improper power circuit can melt, creating electric
  grounded.                                                  shock and/or fire hazard.
• Install and store the dryer where it will not be         • Remove all packing items and dispose of all
  exposed to temperatures below freezing or                  shipping materials properly. Failure to do so can
  exposed to the weather.                                    result in death, explosion, fire, or burns.
• All repairs and servicing must be performed by           • Place dryer at least 18 in. above the floor for a
  an authorized servicer unless specifically                 garage installation. Failure to do so can result in
  recommended in this Owner’s Guide. Use only                death, explosion, fire, or burns.
  authorized factory parts. Failure to follow this         • Keep all packaging from children. Packaging
  warning can cause serious injury, fire, electric           material can be dangerous for children. There is a
  shock, or death.                                           risk of suffocation.

                                                       6
READ ALL INSTRUCTIONS BEFORE USE
  WARNING For your safety, the information in this manual must be followed to minimize the risk
of fire or explosion, electric shock, or to prevent property damage, injury to persons, or death.

SAFETY INSTRUCTIONS FOR INSTALLATION
Exhaust/Ducting:
• Gas dryers MUST be exhausted to the outside.                     • The openings must not beobstructed by a carpet.
  Failure to follow these instructions can result in fire or       • Rigid or semi rigid metal ducting is recommended
  death.                                                             for use between the dryer and the wall. In special
• The dryer exhaust system must be exhausted to                      installations when it is impossible to make a
  the outside of the dwelling. If the dryer is not                   connection with the above recommendations, a
  exhausted outdoors, some fine lint and large                       UL-listed flexible metal transition duct may be
  amounts of moisture will be expelled into the                      used between the dryer and wall connection only.
  laundry area. An accumulation of lint in any area of               The use of this ducting will affect drying time.
  the home can create a health and fire hazard.                      Failure to follow these instructions can result in fire or
• Use only rigid metal or flexible metal 4-in.                       death.
  diameter ductwork inside the dryer cabinet or for                • Do not use sheet metal screws or other fasteners
  exhausting to the outside. Use of plastic or other                 which extend into the duct that could catch lint
  combustible ductwork can cause a fire. Punctured                   and reduce the efficiency of the exhaust system.
  ductwork can cause a fire if it collapses or becomes               Secure all joints with duct tape. For complete
  otherwise restricted in use or during installation.                details, follow the Installation Instructions. Failure
• Ductwork is not provided with the dryer, and you                   to follow these instructions can result in fire or death.
  should obtain the necessary ductwork locally.                    • Keep the area underneath and around your
  The end cap should have hinged dampers to                          appliances free of combustible materials such as
  prevent backdraft when the dryer is not in use.                    lint, paper, rags, chemicals, etc. Failure to do so
  Failure to follow these instructions can result in fire or         can result in fire.
  death.
• The exhaust duct must be 4 in. (10 cm) in
  diameter with no obstructions. The exhaust duct
  should be kept as short as possible. Make sure to
  clean any old ducts before installing your new
  dryer. Failure to follow these instructions can result in
  fire or death.


                                                               7
READ ALL INSTRUCTIONS BEFORE USE
  WARNING For your safety, the information in this manual must be followed to minimize the risk
of fire or explosion, electric shock, or to prevent property damage, injury to persons, or death.

SAFETY INSTRUCTIONS FOR CONNECTING ELECTRICITY
    WARNING: To reduce the risk of fire, electric shock, or injury to persons when using this
appliance, follow basic precautions, including the following:
• Do not, under any circumstances, cut or                 • Never unplug your dryer by pulling on the
  remove the ground prong from the power cord.              power cord. Always grip plug firmly and pull
  To prevent injury to persons or damage to the             straight out from the outlet. The power cord can
  dryer, the electrical power cord must be plugged          be damaged, resulting in a risk of fire and electric
  into a properly grounded outlet.                          shock.
• For personal safety, this dryer must be                 • Repair or replace immediately all power cords
  properly grounded. Failure to do so can result in         that have become frayed or otherwise
  electric shock or injury.                                 damaged. Do not use a cord that shows cracks
• Refer to the installation instructions in this            or abrasion damage along its length or at
  manual for specific electrical requirements for           either end. The power cord can melt, creating
  your model. Failure to follow these instructions          electric shock and/or fire hazard.
  can create an electric shock hazard and/or a fire       • When installing or moving the dryer, be careful
  hazard.                                                   not to pinch, crush, or damage the power cord.
• This dryer must be plugged into a properly                This will prevent injury and prevent damage to the
  grounded outlet. Electrical shock can result if           dryer from fire and electric shock.
  the dryer is not properly grounded. Have the            • To reduce the risk of injury to persons,
  wall outlet and circuit checked by a qualified            adhere to all industry recommended safety
  electrician to make sure the outlet is properly           procedures including the use of long sleeved
  grounded. Failure to follow these instructions can        gloves and safety glasses. Failure to follow all of
  create an electric shock hazard and/or a fire             the safety warnings in this manual could result in
  hazard.                                                   property damage, injury to persons or death.
• The dryer should always be plugged into its             • Connect the power cord to the terminal block.
  own individual electrical outlet which has a              Each colored wire should be connected to
  voltage rating that matches the rating plate.             same color screw. Wire color indicated on
  This provides the best performance and also               manual is connected to the same color screw
  prevents overloading house wiring circuits which          in block. Failure to follow these instructions may
  could cause a fire hazard from overheated wires.          result in a short or overload.


                               SAVE THESE INSTRUCTIONS

                                                      8
2    SPECIFICATIONS


    ■ Type : Electric and Gas Dryer
    ■ Rating : Please refer to the rating label regarding detailed information.
    ■ Size : 686mm(W) x 764mm(D) x 983mm(H)
    ■ Capacity : 10Kg
    ■ Weight : 59.4 kg
    ❋ Specifications are subject to change by manufacturer.


                                          9
RV1329AN1                     RN1329AN1
                                   RV1329AN4                     RN1329AN4
                                   RV1329AN7                     RN1329AN7
                                   RV1329AD6                     RN1329AD6
            ITEM                   RV1329AD1                     RN1329AD1             REMARK
                                   RV1329AD5                     RN1329AD5
                                    RV1329A1                     RN1329A1
                                    RV1329A4                     RN1329A4
                                    RV1329A7                     RN1329A7
              TYPE                    Electric                      Gas (LNG)

       POWER SUPPLY                240V, 17Amps                           -

                        Color                       Blue white

                                                                                Porcelain :RV1329AN4/RN1329AN4
                                                                                           RV1329AD1/RN1329AD1
                       Top Plate                      Painted
 MATERIAL &                                                                                RV1329A4/RN1329A4
   FINISH
                     Door Trim               Stainless Deco (Hair line)

                     Door Frame                       Chrom

                  C/Panel Color                     Blue white

                       MOTOR                       250W (4.5V)                           AC 240V
 ELECTRICITY
CONSUMPTION            HEATER       4000W (17A)                           -              AC 240V

                   GAS VALVE             -                                -

       CONTROL TYPE                                 Electronic

       DRUM CAPACITY                                   10Kg

    Weight (lbs.) - Net/Gross                        126/144

        No. of Programs                                   4

  Audible End of Cycle Beeper                        Available

            Time dry                                 Available

        Reversible Door                              Available

              Drum                                Stainless Steel

       Product (WxHxD)                686mm(W) x 764mm(D) x 983mm(H)

       Packing (WxHxD)               744mm(W) x 385mm(D) x 1140mm(H)


                                                     10
3         FEATURES AND BENEFITS

  ■ CARD TYPE
   - SIDE BY SIDE(RN1329AD1, RV1329AD1)
   - STACK UPPER(RN1329AD5, RV1329AD5)
   - STACK LOWER(RN1326AD6, RV1326AD6)
           4         1             2


                                       3


  ■ OPL TYPE
   - SIDE BY SIDE(RN1329A4, RV1329A4)
   - STACK UPPER(RN1329A7, RV1329A7)
   - STACK LOWER(RN1326A1, RV1326A1)

           4         1             2


                                       3


1. DISPLAY LED                                  3. START BUTTON
2. CYCLE BUTTON                                 4. STATUS LED


                                           11
■ COIN TYPE
  - SIDE BY SIDE(RN1329AN4, RV1329AN4)
          4         1             2


                                      3

■ COIN TYPE
  - STACK UPPER(RN1329AN7, RV1329AN7)
           4         1             2


                                          3

■ COIN TYPE
  - STACK LOWER(RN1329AN1, RV1329AN1)
              4         1             2


                                          3
 1. DISPLAY LED                                    3. START BUTTON
 2. CYCLE BUTTON                                   4. STATUS LED
                                              12
4          INITIAL STEPS FOR INSTALLING YOUR DRYER
 The following instructions will help guide you through the initial steps of setting up your dryer for use.
 Please note that every section of this manual provides important information regarding the preparation and
 use of your dryer, and it is important that you review this entire manual before proceeding with any
 installation or use. More detailed instructions concerning electrical connections, gas connections, and
 exhaust requirements are provided at other parts of this manual.
   STEP 1 Positioning the Dryer.                                  Certain minimum clearances are required
                                                                  above, behind, and to the sides of the unit, as
 Choose a location with a solid floor for your dryer.             shown below. Those required minimum clearances
 Place the dryer at least eighteen inches above the               are set forth in the picture below. Please also keep the
 floor for a garage installation. After placing the               following instructions in mind when installing in a
 dryer in the desired location, please make sure that             closet or recessed area:
 it has the required clearances shown below, and                   Consider allowing additional clearance for
 sections on Exhaust and Maintenance requirements.                  installation and servicing.
                                                                    Wall, door and floor molding may force additional
                                                                    clearances.
                                                                   An additional inch of clearance is recommended to
                                                49.8¡±              minimize noise transfer .
                                              (126.4 cm)
                                                                   Consider space needed for companion appliances.
  38.7¡±                                                           For closet installations, the picture below shows the
(98.3 cm)                                                           minimum required ventilation openings for the door.
                                                                    A louvered door with comparable ventilation openings
                                                                    is also acceptable.

                                                                                      ventilation
               27¡±                29.96¡±                                            hole
            (68.6 cm)             (76.1 cm)
 * Most installations require a minimum 5 1/2 in.
   (14 cm) clearance behind the dryer for the exhaust
   vent with elbow.
   Note
   Level the dryer using the leveling legs and tighten                                ventilation
   the adjusting nuts to hold them in place.                                          hole


                    r.                                                Closet door                   Closet-Side view
   If the d ryer is not level, the clothes will not tumble
   properly and the sensor will not be able to de tect
   the dryness level accurately.
   Adjust the le veling legs carefully to avoid injury.

   Note
   No other fuel-burning appliance shall be installed
   in the same closet as the drye r.
   This applies only to dryers suitable for installation
   in a closet.
     WARNING
 The applian ces are he avy.
 Two or more people a re requi red when moving
 or installing the appliance.                                13                      Closet-Front view
 There is a risk of serious back injury or other injuries.
Once in position, adjust the leveling legs of the dryer          All four leveling feet must rest solidl y on the
until it is level from left to right and from front to           floo r. Gently push on the top co rners of the
back. The leveling legs must remain firmly on the                dryer to make sure that the dryer doe s not
                                                                 rock f rom co rner to co rner.
floor and the dryer should not rock. The maximum               If you are installing the dryer on the optional
slope of the dryer from left to right or from front to         pedestal, you must use the leveling feet on the
back should not exceed 2.5 cm (1 inch). If the dryer           pedestal to level the dryer. The dryer leveling feet
is not level, and if the slope exceeds 2.5 cm (1 inch),        should be fully retracted.
a load may not tumble properly and internal sensors
may malfunction. Note: Other sections of this
manual also provide important information
concerning the placement of and clearances for your
dryer. Please review this entire manual before


  STEP 2 Leveling the Dryer.

 wWARNING
                                                                   Use an adjustable or open ended spanner to
                                                                   turn the leveling feet. Turn clockwise to raise
 To ensure that the dryer provides optimal drying                  the dryer or counte rclockwise to lower it.
 performance, it must be level. To minimize                        Raise or lower the leveling feet until dryer is
 vibration, noise, and unwanted movement, the                      level from
 floor must be a perfectly level, solid surface.                   side to side and front to back.
 NOTE: Adjust the leveling feet only as far as                     Make sure that all 4 leveling feet are in firm
 necessary to level the dryer. Extending the                       contact with the floo r.
 leveling feet more than necessary can cause
 the dryer to vibrate.


                                          Level


                                    Leveling Feet

       Position the dryer in the final location. Place
       a level across the top of the dryer.


                                                          14
STEP 3 Procedure for Reversing
        the Door

The door on your dryer can be installed to open
either to the left or the right. Follow these
procedures to reverse the direction in which your
door opens:
 Note
 Door and l atch should be ali gned at the center
 when closed. O the rwise, the door will not open,
 close, or latch prope rly.


                                                         !


                                                     15
STEP 4 Connecting the Exhaust                               °   ALTERNATE EXHAUST DIRECTIONS
         and Venting System.                                  1. Remove the screw that attaches the duct's tab to
                                                                 the dryer.

       !   WARNING
    Use a heavy metal vent.

    Do not use plastic or thin foil duct.

   Clean old ducts before installing this dryer

    Failure to follow these instructions can
    result in death or fire.                                  2-1. Detach and remove the knockout that
                                                                   matches the desired venting direction
 Note                                                              (Right side not available on Gas Dryers)
 V                                                                 Follow steps 1, 2, and 3, as shown
 smaller endsfacing away from the dryer.                           below.
 Incorrect installation of the vent and imp roper
 taping of the joi nts will interfere with correct
 d ryer and vent fun ction.
In addition to the following warnings, please refer to
manual section on Exhaust Requirements and
Maintenance. IMPORTANT: To reduce the risk of fire,
combustion, and gas accumulation, the dryer must be
vented to the outdoors. Please follow the instructions
(and all others in this manual) very carefully.
                                                              2-2. Reconnect the duct to the blower
                                                                   housing and attach the duct to the base.
                                                                   The side vent kit is available as a
                                                                   service part, #383EEL9001B.


 Do not use plastic or thin foil duct.                        3-1. Pre-assemble a 4 elbow with a 4 duct.
 Use 4 (10.2 cm) diameter rigid or semi-rigid                     Wrap duct tape around joint.
 metal duct (note: venting materials are not
 supplied with the dryer, and you must obtain the
 venting materials necessary for proper installation)
 Position the dryer so the exhaust duct run is as
 short as possible.

 Clean old ducts before installing this dryer
 The male end of each section of exhaust duct must
 point away from the dryer

 Use as few elbow joints as possible.                         3-2. Insert the elbow duct assembly first through
 Use duct tape on all duct joints                                  the side opening and connect the elbow to
 Insulate ductwork that runs through unheated
                                                                   the internal duct.
 areas in order to reduce condensation and lint
 build-up on pipe walls; and

 PLEASE BE AWARE THAT FAILURE TO
 EXHAUST THE DRYER CORRECTLY WILL
 VOID THE DRYER’S WARRANTY.                              16
STEP 5 Connection of Gas Supply                                         STEP 6 Electrical Plug Connection

(Gas dryer only).     In addition to the following,                     Following are several warnings and instructions
please refer to manual section on Gas Requirements                      concerning making the electrical connection for electric
and Instructions.                                                       dryers. More detailed information concerning the
                                                                        electrical connection is provided at the manual section
                                                                        entitled Electrical Requirements for Electric Dryer.
             1                                                          It is important that you thoroughly review that section,
                                                                        and the remainder of this manual before taking any
             2                                                          steps to install or use this dryer.
                 5
             3                                                          1. Use only a new U.L. listed No. 10 (copper wire only)
                                                                          three conductor power supply cord kit rated 240
             4
     1. New stainless steel flexible connector. Use this type of          Volts (minimum) 30 Amperes and labeled as suitable
        connector only if allowed by local codes. Use Design AGA          for use in a clothes dryer.
        Certified Connector.                                            2. Four-wire cord is required for manufactured (mobile)
     2. 1/8 NPT Pipe Plug (for checking inlet gas pressure)              home installations and use and where local codes do
     3. Equipment Shut-Off Valve-                                         not allow grounding of this appliance through
        Installed within 6'(1.8m) of dryer                                neutral.
     4. Iron Pipe. Shorter than 20'(6.1m)
        Use 3/8 pipe. Longer than 20'(6.1m) - Use 1/2 pipe.
                                                                        3. Electrical Plug Connections.

     5. 3/8 N.P.T. Gas Connection                                      4. For additional instruction on connecting the dryer to
     6. Apply pipe joint compound or about 1 1/2 wraps of Teflon          an electrical power source, please refer to this
        tape over all threaded connection                                 manual’s section on Electrical Requirements and
 Note                                                                     Electric Dryer.


  gas you are pr ovided with.                                            Note
                                                                        Burner input requirements:
                                                                        Adjusting burner input setting is not needed (at the

                                                                        dryer will not have a ny problem with the BTU rating.
                                                                        If your house is at ab ove 10,000 feet, you are required
                                                                        to adjust a four percent (4%) reduction of the burner
                                                                        BTU rating indicated on the model/serial rating plate.
1. Confirm that the type of gas available in your laundry


                                                                                    WARNING
  room is appropriate for the dryer. The dryer is prepared
  for Natural Gas with a 3/8 NPT gas connection.
                                                                                !
2. Remove the shipping cap from the gas connection at the
                                                                         • Use a new UL approved 30 amp power
  back of the dryer. Make sure that you don’t damage the
                                                                           supply cord or 10 gauge solid copper wire.
  threads of the gas connection pipe when you remove the
                                                                         • Use a UL approved strain relief.
  shipping cap.
                                                                         • Disconnect power before making electrical
3. Connect the dryer to your laundry room’s gas supply
                                                                           connections.
  using a new flexible stainless steel connector (as noted
                                                                         • Connect neutral wire (white or center wire)
  below, only use a new stainless steel flexible connector if
                                                                           to center terminal.
  allowed by your local codes).
                                                                         • Ground wire (green or bare         wire) must be
4. Securely tighten all connections between the dryer and                  connected to green ground connector.

  your laundry room’s gas supply. Turn on your laundry                   • Securely tighten all electrical connections

  room’s gas supply and check all pipe connections (both                 • See installation instructions for complete
  internal and external) for gas leaks with a non-corrosive                instructions.

  leak detection fluid. Refer to Part 7 (page 20)                        • Failure to do so can result in fire or
                                                                           electrical shock.
5. For LP (Liquefied Petroleum) gas connection, refer to           17
  this manual’s section entitled Gas Requirements and
  Instructions.
STEP 7 Preparation of the Dryer                                 STEP 9 Dryer Airflow

Prior to the first use of this appliance, use all-             Effective dryer operation requires appropriate dryer
purpose cleaning products or a solution of detergent           airflow. The adequacy of the airflow can be
and water, with damp clothes to remove from the                measured by evaluating the static pressure. Static
inside of the dryer drum/drying compartment any                pressure in the exhaust duct can be measured with a
dust or dirt that may have accumulated the inside of           manometer, placed on the exhaust duct
the dryer. Plug-in your dryer after reviewing the              approximately 2 ft. (60.9 cm) from the dryer. Static
following parts on your dryer’s Electrical                     pressure in the exhaust duct should not exceed 0.6
Requirements.                                                  inches (1.5 cm). The dryer should be checked with
                                                               the dryer running with no load.
                                                                            Measuring Static Pressure

 STEP 8 Confirming Heat Source
        Operation


Confirming Heat Source in Gas Dryers                                                                       Manometer
Close the door to the dryer drum/drying
compartment and, after completing all steps in this
manual for proper installation of this dryer, start the
dryer on a heat setting, as described more fully in
the operating instructions that accompany the dryer.
After the dryer starts, the igniter will glow red and
the main burner will ignite.

 Note
 If all air is not purged from the gas line,

 main burner have ignited. If this happens, the
 igniter will re-attempt gas ignition after
 approximately two minutes.                                                Exhaust Duct
                                                                                    MAXIMUM STATIC
                                                                                     PRESSURE IN
Confirming Heat Source in Electric Dryers                                           WATER COLUMN
Close the door to the dryer drum/drying                                               0.6 inche (1.5 cm)


                                                                         WARNING
compartment and, after completing all steps in this
manual for proper installation of this dryer, start the              !
dryer on a heat setting, as described more fully in              • The dryer must be disconnected from the
the operating instructions that accompany the dryer.               gas supply piping system during pressure
The exhaust air or the exhaust pipe should be warm                 testing.
after the dryer has been operating for three minutes.            • Failure to do so can result in death,
                                                                   explosion, or fire.

                                                          18
4) Electric dryers may be vented to the outside
 STEP 9 Additional Instructions                             using the back, left, right, or bottom panel.
        for Installation of Your                         5) Gas dryers may be vented to the outside using the
        Dryer in a Manufactured                             back, left, or bottom panel. Gas dryer may not be
        or Mobile Home.                                     vented to the outside using the right side panel
                                                            because of the burner housing.
                                                         6) The dryer exhaust duct must be affixed securely
The following instructions are applicable to
                                                            to the manufactured or mobile home structure,
installations of the dryer in a manufactured or
                                                            and the exhaust duct must be made of a material
mobile home. Any installation in a manufactured or
                                                            that will resist fire and combustion, and it is
mobile home must comply with the Manufactured
                                                            recommended that you use a rigid or flexible
Home Construction and Safety Standards Title 24
                                                            metal pipe.
CFR, Part 32-80 or Standard CAN/CSA0Z240 MH
and local codes and ordinances. If you are               7) DO NOT connect the exhaust duct with any other
uncertain whether your proposed installation will           duct, vent, chimney, or other exhaust duct.
comply with these standards, please contact a            8) Make sure the dryer has adequate access to
service and installation professional for assistance.       outside fresh air to ensure proper operation. The
                                                            opening for outside fresh air must be at least 25
                                                            in2 (163 cm2).
The following instructions apply to any installation
of the dryer in a manufactured or mobile home:           9) It is important that the clearance of the duct from
                                                            any combustible construction be at least 2 inches
                                                            (5 cm), and, when venting the dryer to the
1) The gas dryer must be permanently attached to            outdoors, the dryer can be installed with a
   the floor.                                               clearance of 1 inch at the sides and back of the
2) The electrical connection for an electric dryer          dryer.
   must be a 4-wire connection. More detailed            10) Please be aware that venting materials are not
   information concerning the electrical connection          supplied with the dryer. You should obtain the
   is provided at the manual section entitled                venting materials necessary for proper
   Electrical Requirements for Electric Dryer                installation.
3) To reduce the risk of combustion and fire, the
   dryer must be vented to the outside.


         WARNING                                                   WARNING
 Do not connect exhaust ducts with                           Do not vent the exhaust duct under the
 metal screws or fasteners that extend                       manufactured or mobile home.
 into the duct.


                                                        19
5             INSTALLATION INSTRUCTIONS
Single Coin  Card

1 Coin/Card housing
How to connect the housing
The dryer has a connector for both a coin collector and a card reader. Use the one you need and tuck the other one
away safely.

2 COIN TYPE
                                                                                     When power on the machine at
                                                                                 ❇
                                                                                     first time without connecting card
                                                                                     reader or coin housing ,display
                                                                                     will show LqC1


                                                                  Coin housing

                                                                  Card reader
                                                                  housing


3 CARD TYPE (Single)

                                                                           WARNING
                                                                  • Disconnect power before service.
                                                                  • Failure to follow these instructions can result
                                                                    in death or electric shock.


     Note
     The Coin drop assembly operates on DC12V in dryer.
     The Card reader assembly operates on DC12V in dryer.


                                                         20
4 STACK TYPE
  Installation Method (Dryer) - Coin Type Lower
  Stacking Coin


Disassemble the control plate   Disconnect the connectors.         Remove 2 screws


Disassemble the top plate                              Remove 4 pieces


                                              21
Installation Method (Dryer) – Coin Type Lower
  Stacking Coin
    Coin Harness – provided by Munzprufer


         Assemble the switch
Insert the switch into the recess on the        The connectors should be visible on the
back of the coin box. Face it toward the        rear of the box for connection to the
front so the coin box will press the button     harness later. Connect the coin box switch
when it is in place.                            at this time.


Use an adhesive tie fastener and a cable
tie to affix the service switch to the front
panel.


                                               22
Assemble the security bracket
Attach the security lock bracket if it wasn’t
          Installed at the factory.


             Assemble the top plate
           Install the top plate on the
                       dryer.


                     23
Installation Method (Dryer) – Coin Type Upper
 Stacking Coin


                                 Disassemble the control plate
                                Remove the lower control panel.
                             (Remember, this is the TOP dryer when
                                      they are stacked.)


    Stack the machine               Disassemble the lower
Stack the upper dryer onto               panel frame                 Connect the bolt
the lower dryer.
Remove the lower panel
from the upper dryer.


                                              24
Disassemble the lower panel frame
                          Remove the lower control panel.
               (Remember, this is the TOP dryer when they are stacked.)

Coin Harness – provided by Munzprufer


                                        25
Installation Method (Dryer) – Coin Type
Stacking Coin


Coin Drop – provided by Munzprufer


Install the double coin drop mechanism onto the back of the upper dryer control panel.
Attach the bolts using the nuts provided.
Connect the harness to the upper dryer and secure the wiring harness.
Route the wiring to the lower control panel. Be careful to avoid confusing the upper and
lower harness.
After installing the coin drop module and coin box, replace the front panels on both machine.
Be sure to secure all wiring harness parts to avoid vibration, pinching, chafing, or other
Damage using adhesive blocks and cable ties.


                                             26
Assemble the control plate (Upper)
                      Attach the control panel with the dual coin drop
                            module to the bottom of top dryer.


                            Assemble the control plate (Lower)
                                  Install security lock

Attach the control panel with
coin drop box module to the top
of the bottom dryer.

                                            27
Install the stacking bracket at the
rear of the stacked dryers                There are six (6) screws that hold the assembly
                                          in place.


Installation Method (Dryer) – Card Type
Stacking Card
  Different point between Coin type and Card type


                                           28
Connect Gas Supply Pipe (Gas Dryer ONLY)

For further assistance, refer to section on Gas Requirements.
1. Make certain your dryer is equipped for use with the   3. Connect to gas supply pipe using a new flexible
   type of gas in your laundry room. Dryer is equipped       stainless steel connector.
   at the factory for natural gas with a 3/8” NPT gas     4. Tighten all connections securely. Turn on gas and
   connection.                                               check all pipe connections (internal  external) for
2. Remove the shipping cap from the gas connection           gas leaks with a non-corrosive leak detection fluid.
   at the rear of the dryer. Make sure you do not         5. For L.P. (Liquefied Petroleum) gas connection, refer
   damage the pipe thread when removing the cap.             to section on Gas Requirements.


                                      1

                                      2
                                          5
                                      3

                                      4


       1 New Stainless Steel Flexible Connector - Use           4 Black Iron Pipe
         only if allowed by local codes (Use Design               Shorter than 20¡fl (6.1 m) - Use 3/8¡– pipe
         A.G.A. Certified Connector)                              Longer than 20¡fl (6.1 m) - Use 1/2¡– pipe
       2 1/8¡– N.P.T. Pipe Plug                                 5 3/8¡– N.P.T. Gas Connection
         (for checking inlet gas pressure)
       3 Equipment Shut-Off Valve-Installed within 6¡fl
         (1.8 m) of dryer


                                                          29
6       ELECTRICAL REQUIREMENTS FOR ELECTRIC DRYERS

CONNECTING ELECTRIC DRYERS

!   WARNING:                  To help prevent fire, electric shock, serious injury or death, the wiring and
grounding must conform to the latest edition of the National Electrical Code, ANSI/NFPA 70 and all
applicable local regulations. Please contact a qualified electrician to check your home’s wiring and
fuses to ensure that your home has adequate electrical power to operate the dryer.


Electrical Requirements for Electric Models Only
 !  WARNING:                 To reduce the risk of fire, electric shock, or injury to persons when using this
appliance, follow basic precautions, including the following:
• This dryer must be connected to a grounded                • If branch circuit to dryer is 15 ft. (4.5 m)
  metal, permanent wiring system, or an                       or less in length, use UL (Underwriters
  equipment- rounding conductor must be run                   Laboratories) listed No.-10 AWG wire
  with the circuit conductors and connected                   (copper wire only), or as required by local
  to the equipment-grounding terminal or lead                 codes. If over 15 ft. (4.50 m), use UL-listed
  on the dryer. Failure to do so can result in fire,           No.-8 AWG wire (copper wire only), or as
  explosion, or death.                                        required by local codes. Allow sufficient
• The dryer has its own terminal block that                   slack in wiring so dryer can be moved from
  must be connected to a separate 240V AC                     its normal location when necessary. Failure
  50-Hertz, single-phase circuit, fused at 30                 to do so can result in fire, explosion, or death.
  amperes (the circuit must be fused on both                • The power cord (pigtail) connection between
  sides of the line). ELECTRICAL SERVICE                      wall receptacle and dryer terminal block
  FOR THE DRYER SHOULD BE OF THE                              IS NOT supplied with dryer. Type of pigtail
  MAXIMUM RATE VOLTAGE LISTED ON THE                          and gauge of wire must conform to local
  NAMEPLATE. DO NOT CONNECT DRYER TO                          codes and with instructions on the following
  110-, 115-, OR 120-VOLT CIRCUIT. Heating                    pages. Failure to follow these instructions can
  elements are available for field installation                result in fire, explosion, or death.
  in dryers which are to be connected to an                 • A 4-wire connection is required for all mobile
  electrical service of a different voltage than              and manufactured home installations, as
  that listed on the rating plate. Failure to follow          well as all new construction after January
  these instructions can result in fire, explosion,            1, 1996. A 4-wire connection must be used
  or death.                                                   where local codes do not permit grounding
                                                              through the neutral wire. Failure to do so can
                                                              result in fire, explosion, or death.


Special Electrical Requirements for Mobile or Manufactured Homes
 !  WARNING:                 To reduce the risk of fire, electric shock, or injury to persons when using this
appliance, follow basic precautions, including the following:
• Any installation in a manufactured or mobile              • A 4-wire connection is required for all mobile
  home must comply with the Manufactured                      and manufactured home installations, as well
  Home Construction and Safety Standards                      as all new construction after January 1, 1996.
  Title 24 CFR, Part 32-80 or Standard CAN/                   Failure to do so can result in fire, explosion, or
  CSA0Z240 MH and local codes and ordinances.                 death.


                                                       30
WARNING


               '


          31
WARNING


     '


          32
WARNING


          33
WARNING


          34
35
36
7           ELECTRICAL REQUIREMENTS FOR GAS DRYERS
                              240 Volt, 50 Hertz, 60 Hertz, with 3-Prong Grounding Plug
Following are additional instructions regarding electrical connections and requirements for gas dryers.

     WARNING: The wiring and grounding must conform to the latest edition of the National
 Electrical Code, ANSI/NFPA 70, or the Canadian Electrical Code, CSA C22.1, and all applicable
 local regulations. Please contact a qualified electrician to check your home's wiring and fuses to
 ensure that your home has adequate electrical power to operate the dryer. Failure to do so can
 result in fire or electric shock.
Electrical Requirements for Your Dryer:

a) Please note that the wiring diagram is provided
   inside the dryer control hood. Label all wires
   prior to disconnection when servicing the dryer,
   because wiring errors can cause serious injury to
   you and your dryer.
b) Your dryer is designed to be used on a separate
   branch, polarized, three-wire, effectively
   grounded, 240 Volt, 50 Hertz, AC (alternating
   current) circuit protected by a 17 Ampere fuse,
   equivalent fuse or circuit breaker.
c) Use separately fused circuits for washers and              STANDARD 240V Volt, 50 Hertz, 3-WIRE
   dryers, and DO NOT operate a washer and a                  EFFECTIVELY GROUNDED CIRCUIT
   dryer on the same circuit.
                                                              1      L1
         WARNING                                              2      Ground
  • Do not overload the circuit by operating                  3      Neutral Side
                                                              4      Round Grounding Prong
    other appliances on the same circuit
                                                              5      Neutral
    when this appliance is operating, by
    using an extension cord to connect the                  a) The dryer has a three-prong plug to help guard
    dryer to the power source, or by using                     against shock. The plug should be plugged
    any adapter to allow additional cords to                   directed into a properly grounded three-prong
    connect to the same outlet.                                receptacle that is rated 240Volts AC (alternating
  • Failure to do so can result in fire or                     current) 17 Amps. This plug, in order to be
    electric shock.                                            properly and fully effective, must be plugged into
                                                               a properly installed outlet that is grounded in
                                                               accordance with all local codes and ordinances.
                                                            b) The dryer must be grounded in order to reduce
         WARNING                                               the risk of electric shock, including a
  • Do not modify the plug provided with                       malfunction or breakdown.
    the dryer. If it does not fit the outlet in             c) If your laundry room does not meet the
    your laundry room, a proper outlet will                    specifications required by this manual, or if you
    need to be installed in your laundry                       are uncertain whether or not your laundry room
    room by a qualified service person or                      meets these specifications, please have a
    company.                                                   qualified service person or company.
  • Failure to do so can result in fire or                     Review your laundry room’s electrical supply for
    electric shock.                                            any problems.

                                                         37
8          GAS REQUIREMENTS AND INSTRUCTIONS
Following are important instructions and information concerning the requirements for the gas supply and service for
gas dryers.     IMPORTANT WARNING: The gas supply and service for a gas dryer must comply with all local
codes and ordinances. In the absence of any local codes or ordinances in your area, the gas supply and
service for your gas dryer must comply with the latest edition of the National Fuel Gas Code, ANSI
Z223.1/NFPA 54(USA) or Canadian gas installation code CAS B149.1(Canada).
1. Gas supply requirements: Liquefied Petroleum                5. If using a rigid pipe, the rigid pipe should be 1/2
   (L.P.) Gas (2,500 Btu/ft3 (93.1 MJ/m3)) service                inch IPS. If acceptable under local codes and
   must be provided at 10 + 1.5 in. water column                  ordinances and when acceptable to your gas
   pressure.                                                      supplier, 3/8 inch approved tubing may be used
                                                                  where lengths are less than 20 feet (6.1 m).
2. Do not attempt to connect the dryer to Liquified
                                                                  Larger tubing should be used for lengths in
   Petroleum (LP Gas) Gas service without a
                                                                  excess of 20 feet (6.1 m). It is also important that
   qualified professional.
                                                                  you use pipe joint compound that is insoluble in
3. Isolate the dryer from the gas supply piping                   LP gas.
   system by closing its individual manual shut-off
                                                               6. To reduce the danger of gas leaks, explosion, and
   valve during any pressure testing of the gas
                                                                  fire, please follow and observe the following
   supply system at test pressure equal to or less
                                                                  instructions and WARNINGS.
   than 1/2 psi (3.45 kPa).
                                                               • Connect the dryer to the type of gas shown on the
4. Supply Line Requirements. Your laundry room                   nameplate.
   must have a rigid gas supply line to your dryer.
   In the United States, an individual manual shutoff          • Use new flexible stainless steel connectors.
   valve MUST be installed within at least 6 feet              • Use Teflon tape and pipe joint compound
   (1.8 m) of the dryer, in accordance with the                  insoluble in LP gas on all pipe threads.
   National Fuel Gas Code ANSI Z223.1 or                       • Purge gas supply of air and sediment before
   Canadian gas installation code CSA B149.1.                    connecting the gas supply to the dryer in order to
  A 1/8 in. N.P.T. pipe plug must be installed as                prevent gas valve contamination. Before
  shown.                                                         tightening connection between gas supply and
                                                                 dryer, purge remaining air until odor of gas is
                                                                 identified.
                                                               • DO NOT use an open flame to inspect for gas leaks;
                                                                 instead use a non-corrosive leak detection fluid.


            WARNING                                                     WARNING
     • Do not attempt any disassembly of the                     • Use a new AGA or CSA approved gas
       dryer. Any disassembly requires the                         supply line.
       attention and tools of an authorized                      • Install a shut-off valve.
       and qualified service person or                           • Securely tighten all gas connections.
       company.
                                                                 • If connected to LP, have a qualified
     • Failure to do so can result in
                                                                   person make sure gas pressure does not
       death,explosion, or fire.
                                                                   exceed 13 in. water column.
                                                                 • Examples of a qualified person include
                                                                   licensed heating personnel, authorized
                                                                   gas company personnel, and authorized
                                                                   service personnel.
                                                                 • Failure to do so can result in death,
                                                                   explosion, or fire.
                                                        38
9   EXHAUST REQUIREMENTS AND MAINTENANCE


                   39
NATURAL MULTIPLE VENTING SYSTEM

           Over sum of area   Over sum of area   Over sum of area
             A + B+ C+ D         A + B+ C             A+B
                                                                    Over area A


    Exit                                                                            Inspection
                                                                                       Cap


                                                   * Lg exhaust Duct Diameter:    100mm


 Use the exhaust duct over the inner diameter of exhaust pipe.
 Do not use too small inner diameter of exhaust pipe or too long exhaust duct,
 Because it makes bad ventilation and low drying performance and it will be cause of
 trouble.

 Follow the below guide in case of using gathering exhaust duct installed with over 2
 duct.
 Incline the exhaust duct toward exit about an 45 angle when exhaust duct from dryer
 is connected to main exhaust duct. ( If you don’t make perpendicular connection,
 airflow is disturbed.)


                                                     40
FORCED MULTIPLE VENTING SYSTEM
Use adjust damper to fit airflow velocity 5m/s at exit


                                                     Blower
         Gas                                      (Suction fan)     Outdoor
        Dryer
                                                                     (Exit)


                                                                    Air flow
                                                                    velocity
                                                          Adjust     :5m/s
                Exhaust duct                              Damper


                                      Exhaust
                                                           Main
                                       duct
                                                          Exhaust
                                                           Duct


                                             41
Exhaust and Dryer Maintenance                                       Cleaning the Lint Screen
                                                                    1. Clean the lint filter either before drying each load
                                                                       or after drying each load. Always make sure the
           WARNING                                                     lint filter is clean before starting a new load,
   • Disconnect the dryer’s electric power                             because a clogged lint filter may increase drying
     prior to any cleaning or maintenance.                             times.
   • Failure to do so can result in fire or
                                                                    2. To clean, pull the lint screen straight up and roll
     electric shock.
                                                                       any lint off the screen with your fingers.
                                                                       Do not rinse or wash screen to remove lint. Push
1. After one year of use, the interior and complete exhaust            the lint screen firmly back into place.
   system of the dryer should be examined and cleaned if
   necessary.                                                       3. Always ensure the lint screen is firmly secured
                                                                       before running the dryer. Running the dryer with
2. Before one year of use, when drying performance has
                                                                       a loose lint screen may cause overheating and
   become unsatisfactory, please examine and clean the
                                                                       damage to the dryer and articles being dried.
   exhaust duct for better drying performance.
3. Check the weather hoods frequently to ensure the                 4. Some articles of clothing may shed more lint than
   dampers are moving freely, that the dampers are not                 others (towels for example), causing the lint
   pushed in and that nothing has been set against the                 screen to fill rapidly. Remove lint from the lint
   dampers.                                                            screen before and after drying these articles, such
4. A qualified service person or company should be used                as new towels.
   to perform this maintenance.                                     5. In the event lint falls off of the lint screen and
5. A Flexible Metal Vent Kit, available at extra cost, can             into the dryer during removal, inspect the exhaust
   be used to exhaust the dryer when it is placed in hard to           hood and remove any lint.
   reach places. This Kit comes in two pieces, one of               6. Laundry detergent and fabric softener residue can
   which is attached to the dryer and the other is attached            build up on the lint screen, causing longer drying
   to the wall exhaust outlet. Following attachment of the             times. The screen is likely blocked if lint falls off
   two separate pieces to the dryer and the wall, the dryer            the screen. In order to prevent this type of build
   may be returned to its final position, after which the              up, and help ensure proper operation of your
   two pieces themselves can be connected.                             dryer, clean the lint screen with a nylon brush
7. Ordinarily, the dryer drum will need no care. Wipe the              every six months or, if necessary, more
   exterior of the dryer as required, and always wipe the              frequently. The lint filter can also be washed as
   exterior of the dryer in the event any detergent, bleach,           follows:
   or other washing products is spilled on the dryer.
                                                                    a) After rolling the lint off of the screen with your
8. Clean the control panel with a damp cloth as
                                                                       fingers, wet both sides of the screen with hot or
   necessary. Warning: spray pre-wash products may
                                                                       warm water.
   damage the finish of the control panel.
9. Please clean the lint filter either before drying each           b) Wet a nylon brush with hot water and liquid
   load or after drying each load.                                     detergent and scrub the lint screen with the brush
10. Always make sure the lint filter is clean before                   to remove the buildup of detergent and fabric
     starting a new load, because a clogged lint filter may            softener.
     increase drying times.                                         c) After the residue has been removed, rinse screen
11. Annually remove the lint filter and attach it to the               with hot water.
     vacuum duct. See item #2 above.
                                                                    d) After drying the lint screen with a clean towel,
12. Please note that the wiring diagram is provided inside             firmly replace the lint screen in your dryer.
     the dryer control hood. Label all wires prior to
     disconnection when servicing the dryer, because
     wiring errors can cause serious injury to you and your
     dryer.
                                                               42
10       DRYER CYCLE PROCESS


                               Default           Conditions of operation and termination

                                                        Drying                           Cooling
       Cycle
                     Temp-       Dry     Display
                     erature    Level     time   Electro-          Temp-              Default Temp-
                                                 sensor            Control             time Control **

        WHITES AND
                      HIGH     More Dry 50 min   Saturation        68±4°C             2 min.   47±5°C
         COLORS
Time   PERMANENT
                     MEDIUM    More Dry 50 min   Saturation        60±4°C             2 min.   47±5°C
Dry    PRESS PRICE

        DELICATES                                             Electric Model:52±3°C
                      LOW      More Dry 50 min   Saturation                           2 min.   38±5°C
          PRICE                                               Gas Model:47±3°C

                                                      Temperature Control for each cycle
                               MOTOR
       LOAD
                               HEATER


                                          43
11   COMPONENT TESTING INFORMATION


                   44
45
46
12   MOTOR DIAGRAM AND SCHEMATIC


                   47
13    CONTROL LAY - OUT

PWB ASSEMBLY DISPLAY LAY-OUT


PWB ASSEMBLY LAY-OUT


                               48
14         WIRING DIAGRAM
CAUTION: Label all wires prior to disconnection when servicing controls.
         Wiring errors can cause improper and dangerous operation. Verify proper Operation after
         servicing.

ELECTRIC DRYER WIRING DIAGRAM


                                                    49
15              DIAGNOSTIC TEST
1.This TEST should be used for Factory test /Service test. Do not use this DIAGNOSTIC TEST other than specified.
2.Activating the heater manually with the door open may trip the thermostat attached to the heater, therefore do
  not activate it manually. (Do not press the door switch to operate the heater while the door is open).
     Diagnostic test:                  (display)
This program has been added for testing the dryer and detecting errors.

 Entering the test mode
     Machine     Data Name                   Button                 Display                          Description
                                1. Entering programming mode                  Insert service card (card type), Turn on/off toggle switch (Coin type).
CARD                            2. WHITES  COLORS                            Press the WHITES  COLORS button.
/COIN                                                                         Then            appears in the display.
                Entering      3. START                                        Enter the diagnostic test mode.
                the test mode                                                 Push and hold the WHITES  COLORS and DELICATES at the same time.
                              1. Entering programming mode.
                                                                              After that push PERM. PRESS button for 3 times. Push START button.
OPL                             2. WHITES  COLORS                            Press the WHITES  COLORS button.
                                                                              Then            appears in the display.
                                3. START                                      Enter the diagnostic test mode.


 1
       Pressing the START button cycles to the next test function.
     Number of times the START
                                                      Checking point                                                 Display
        button is pressed
 None                                                                                     LqC 1
 1 time                                 Check the version and code of machine.            Version and code of machine (All LED on)
                                          ELECTRIC TYPE : US:OE                           CA:OE or CA:Og and gU:XX
                                          GAS TYPE : US:Og                                alternately. OPL machine-Display
                                                                                          CA:PE or CA:Pg and gU:XX
                                                                                          alternately. XX is the version number
 2 times                                Motor runs.                                       Measured moisture value (70~239)
 3 times                                   ELECTRIC TYPE: Heater runs.                    Current temperature (5~70)
                                        Motor + Heater 1 (2700W)                          (Displays the temperature inside the drum in
                                           GAS TYPE: GAS valve runs.                      ° Celsius.)
                                        Motor + Valve
                                           ELECTRIC TYPE: Heater runs.                    Current temperature (5~70)
 4 times                                Motor + Heater 1 +Heater 2 (5400W)                (Displays the temperature inside the drum in
                                           GAS TYPE: GAS valve runs.                      ° Celsius.)
                                        Motor+Valve
                                        LED  KEY CHECK
                                        Press WHITES  COLORS button.                     Version and code of machine
 5 times                                Press PERM.PRESS button.
                                        Press DELICATES button.
 6 times                                Test ends.                                        LqC 1
 During check, if the door is open.     Door switch                                       dE
                                        (Motor  Heater Off, Buzzer beeps seven           (The door is open. Please close the door
                                        times)                                            completely)
 During check, if the door is closed    Test goes back at step 2.                         Measured moisture value (70~239)
                                        (Motor on  Heater Off)

Note
During LqC1 test, if no buttons are pressed for 4 minutes, machine will be turned off automatically.
Do not use         .
                                                                    50
Test 1 240V Electrical Supply

       WARNING
• When measuring power, be sure to wear insulated gloves to avoid an electric shock.
• Failure to follow these instructions can result in death or electric shock.


Trouble Symptom         No power was applied to controller. (LED, LCD Display off)

Measurement Condition With Dryer Power On; connector linked to controller.


                              Check the outlet, is the voltage                         • Check the fuse or
                                                                               NO
                              240V AC?                                                   circuit breaker.

                                                    YES

      BK2 or WH2 YL3

                              Check if the voltage measured between
                                                                                       • Check if power
                              Connector BK2 or WH2- 2 (Black Wire)
                                                                               NO        cord is properly
                              Linked to the Controller and YL3- 1
                                                                                         connected.
                              (White Wire) Is 240V?


                                                    YES


                               1 Check if the controller wire is
                                 disconnected.
                               2 Check if terminal block and power cord                • Reconnect the
                                                                               NO        controller.
                                 are connected (Check Plug).
                                 - Does Power Cord N (Natural) line match
                                 to Terminal Center N (Natural) line?


                                                    YES


                                             Replace controIler.


                                                      51
WARNING


          52
53
Test 2 Thermistor Test --- Measure with Power Off


                                 54
Test 3 Motor Test

       WARNING
• Before measuring resistance, be sure to turn power off, and do voltage discharge. (When discharging,
  contact the metal plug of power cord with the earth line.)
• Failure to follow these instructions can result in death or electric shock.


Trouble Symptom         Drum does not turn, fan does not blow, and heater does not operate.

Measurement Condition Turn the dryer’s power off, then measure resistance.

      YL3         BL2                                                                   • Replace control.
                              Is resistance below 3Ω between connector
                              YL3- 1 (White wire) and BL2- 2 (Brown wire)?        YES     (Relay check)
                                Measure while door is closed.                           • Check controller
                                                                                          connector.
                                                    NO
                                                                                        • Check if door frame
                              Is resistance below 3Ω between Connector                    presses door
                                                                                  NO      switch knob.
                              YL3- 1 (White wire) and BL2- 2 Measure
                                                                                        • Check door switch.
                                while door is closed.(Yellow wire)?                     • Check harness
                                                   YES                                    connection.


                              Is resistance below 3Ω between Connector                  • Replace control.
                              BL2- 1 (Yellow wire) and BL2- 2 (Brown wire)? YES         (Relay check)
                                                                                        • Check controller
                                                                                          connector.
                                                    NO
                                                                                        • Replace outlet
                              Is resistance below 1Ω between terminals of               • Thermostat.
                                                                                  NO    (Refer to
                              outlet thermostat attached to blower housing?
                                                                                          component)
                                                   YES
                                                                                        • Check idler assembly
                              Does idle switch attached to motor bracket                • Drum belt cuts off
                              operate level by drum belt?                         YES   • Drum belt takes off
                              (Not operating lever is normal.)                            from motor pulley.


                              Is resistance below 1Ω between idler switch               • Replace idler
                                                                                  NO      switch.
                              terminals?

                                                   YES

                              • Check motor. (Refer to Motor Diagram and Check)
                              • Check if control connector is contacted.


                                                      55
Test 4 Moisture Sensor

WARNING


                         56
Test 5 Door switch test

       WARNING
• Before measuring resistance, be sure to turn power off, and do voltage discharge. (When discharging,
  contact the metal plug of power cord with the earth line.)
• Failure to follow these instructions can result in death or electric shock.


                        Door opening is not sensed. (During operation, when opening door, drum motor and
Trouble Symptom         Heater run continuously) Door close is not sensed.
                        (Drum motor will not operate. Display will flash at 1/

Measurement Condition Turn the dryer’s power off, then measure resistance.


       BK2     YL3           Measure while door is closed. Check it resistance is         • Door switch
                             below 2500 Ω between YL3- 1 (White wire) and                   check (Refer to
                             BK2- 2 Connector                                       YES     component
                             YL3,BL2 after taking WH1,BL2 out from Controller.              testing.)

                                                      NO
                                                                                          • Check lamp. (When
                             Measure while door is open. Check it resistance is             opening lamp,
                             300~60 Ω between YL3- 1 (White wire) and BK2- 2                replace then
                                                                                    NO      measure again.)
                             (Black wire). Connector YL3,BL2 after taking
                             YL3,BL2 out from controller.                                 • Door switch check
                                                                                            (Refer to
                                                     YES                                    component testing.)


       YL3        BL2
                             Measure while door is open. Check it resistance is           • Door switch
                             below 1 Ω between BL2- 1 (Yellow wire) and                     check (Refer to
                                                                                    YES     component
                             YL3- 1 (White wire) after taking connector YL3,BL2
                             out from controller.                                           testing.)

                                                      NO

                             Measure while door is closed. Check it resistance is         • Door switch
                             below 1 Ω between BL2- 1 (Yellow wire) and             NO      check (Refer to
                             YL3- 1 (White wire) after taking connector YL3,BL2             component
                             out from controller.                                           testing.)

                                                     YES

                                              Check hontroller.
                                       Check harness-linking connector.


                                                        57
Test 6 Heater switch test - Electric Type

WARNING


                                   58
Test 7 GAS valve test - Gas Type

WARNING


                                   59
16         ERROR MODE

   Meaning of Error Codes that LED displays during occurrence or problem.


Dryer error code

   PROBLEM                            POSSIBLE CAUSE                                 SOLUTION
                   It is displayed when thermistor is opened or shorted   Thermistor should be replaced.

                   It is displayed when thermistor temperature have       Thermistor should be replaced.
                   increased about 17 degrees for 10 seconds

                   Disconnection of card reader wire.                     Check the card reader wire.


                                                        60
17 CHANGE GAS SETTING (NATURAL GAS, PROPANE GAS)
  WARNING


                       61
62
18         DISASSEMBLY INSTRUCTIONS

      WARNING
• Disassemble and repair the unit only after pulling out power plug from the outlet.
• Failure to follow these instructions can result in death or electrical shock.


             CONTROL PANEL ASSEMBLY                                         WARNING
                                                                    • When you disassemble the control
                                                                      panel, be sure to take gloves and
                                                                      careful panel frame’s edge. Failure to
                                                                      do so can cause serious injury.


                                                                  1. Remove 2 screws on the control panel
                                                                      assembly.


                                                                  2. Pull the control panel assembly upward
                                                                      and then forward.


                                                                  3. Disconnct the connectors.


                                                     63
TOP PLATE                 WARNING
                 • When you disassemble the top plate, be sure to
                   take gloves and careful plate’s edge. Failure to do
                   so can cause serious injury.


                 1. Remove 2 screws on the control panel
                    frame.


                 2. Push the top plate backward forcefully.


                 3. Lift the plate.


            64
LOWER COVER

                     1. Remove 2 screw on the lower cover.
                     2. Take out of the lower cover.


COVER CABINET

                              WARNING
                      • When you disassemble the door switch connector,
                        be sure to take gloves and careful cabinet edge.
                        Failure to do so can cause serious injury.


                     1. Open the door assembly.
                     2. Remove 2 screws.


                     3. Remove 4 screws from the top of cabinet cover.
                     4. Disconnect the harness of door switch.
                     5. Disassemble the cover cabinet.


                65
PANEL FRAME

                             1. Disconnect the housing of the panel frame.
                             2. Remove 4 screws on the panel frame.
                             3. Disassemble panel frame from pulling upside.

       Push     Push


         LOWER FRAME

                             1. Disconnect the housing of the panel frame.
                             2. Remove 4 screw on the panel frame.
                             3. Disassemble lower frame from pulling forward
                                with pushing down.


Push


Push


                        66
TUB DRUM [FRONT]

                                  1. Disassemble the top plate.
                                  2. Remove cover cabinet.
                                  3. Disconnect the door lamp and electrode
                                     sensor connector.

                                  4. Remove 4 screws.
                                  5. Disassemble the tub drum front.


     DRUM ASSEMBLY

-1                                1. Disassemble the top plate.
                        -1
                                  2. Remove the cabinet cover and
                                     drum front.
                 -2
                                  3. Loosen belt from motor and idler pulleys.
                                  4. Carefully remove the drum.


                             67
DRYER EXHAUST CHANGE

                                   1. Remove the screw.


                                   2-1. Detach and remove a knockout at the botton,
                                        left or right side as desired. (Right side vent not
                                        available on gas dryer)
                                           , ,      the order of work.


                                   2-2. Replace it with an 11-inch (28 cm) duct
             DUCT
             TAPE                        connected to the blower housing, and attach
                                         the duct to the base. (The side vent kit is
                                         available as a service part, # 383EEL9001B.)


                                   3-1. Pre-assemble a 4-inch elbow to a piece of duct.
                                        Wrap duct tape around the joint.
                       DUCT
                       TAPE


                                   3-2. Insert the elbow duct assembly through the side
                                        opening and connect the elbow to the internal
                                        duct.


                              68
FILTER ASSEMBLY

                       1. Remove the filter.
                       2. Remove 3 screws.
                       3. Remove the cover grid.
                       4. Disconnect the electrode sensor.


BLOWER HOUSING

                       1. Disassemble the top plate.
                       2. Remove the cabinet cover and drum front.
                       3. Remove the Drum assembly.
                       4. Remove 2 screws and cover (air guide).
                       5. Remove the bolt and washer.
                       6. Remove the fan.
                       7. Disconnect the motor clamp and motor.


  BACK COVER

                       1. Disassemble the top plate.
                       2. Remove the cabinet cover and drum front.
                       3. Remove the drum assembly.
                       4. Remove 7 screws.
                       5. Remove the back cover.


                  69
LG Commercial Front End Dryer User Manual

Mais conteúdo relacionado

Mais procurados

Types and Uses of Washing Machines and Dryers
Types and Uses of Washing Machines and DryersTypes and Uses of Washing Machines and Dryers
Types and Uses of Washing Machines and DryersNylir Kagamine
 
11kV Cable Termination Heat Shrink Kits 3 Core 16-25sqmm SPS 3TIS-12X-A
11kV Cable Termination Heat Shrink Kits 3 Core 16-25sqmm SPS 3TIS-12X-A11kV Cable Termination Heat Shrink Kits 3 Core 16-25sqmm SPS 3TIS-12X-A
11kV Cable Termination Heat Shrink Kits 3 Core 16-25sqmm SPS 3TIS-12X-AThorne & Derrick International
 
Dry Type Transformer
Dry  Type TransformerDry  Type Transformer
Dry Type TransformerSmit Shah
 
Knife Skills. Kitchen Safety And Simpler Cooking
Knife Skills. Kitchen Safety And Simpler CookingKnife Skills. Kitchen Safety And Simpler Cooking
Knife Skills. Kitchen Safety And Simpler CookingAngela McKeller
 
high voltage circuit breaker
high voltage circuit breakerhigh voltage circuit breaker
high voltage circuit breakerHanif Pathan
 
GSM900 basestation antennas - GSM900 tukiasema-antennit
GSM900 basestation antennas - GSM900 tukiasema-antennitGSM900 basestation antennas - GSM900 tukiasema-antennit
GSM900 basestation antennas - GSM900 tukiasema-antennitAerial Oy
 
1. Heat Shrink Cable Termination (HV) - 11kV 33kV 3 Core XLPE BS6622 Cables
1. Heat Shrink Cable Termination (HV) - 11kV 33kV 3 Core XLPE BS6622 Cables1. Heat Shrink Cable Termination (HV) - 11kV 33kV 3 Core XLPE BS6622 Cables
1. Heat Shrink Cable Termination (HV) - 11kV 33kV 3 Core XLPE BS6622 CablesThorne & Derrick International
 
Approach cable installation
Approach cable installationApproach cable installation
Approach cable installationMayank Porwal
 
Power cable - Installation methods
Power cable - Installation methodsPower cable - Installation methods
Power cable - Installation methodsLeonardo ENERGY
 
Ironing and Folding Cloths Presentation
Ironing and Folding Cloths PresentationIroning and Folding Cloths Presentation
Ironing and Folding Cloths PresentationSumit Mandal
 
Fuses vs. Circuit Breakers
Fuses vs. Circuit BreakersFuses vs. Circuit Breakers
Fuses vs. Circuit BreakersSima Yildirim
 

Mais procurados (19)

3m termination
3m termination3m termination
3m termination
 
Circuit breakers basics
Circuit breakers   basicsCircuit breakers   basics
Circuit breakers basics
 
High voltage fuse test techniques
High voltage fuse test techniquesHigh voltage fuse test techniques
High voltage fuse test techniques
 
Types and Uses of Washing Machines and Dryers
Types and Uses of Washing Machines and DryersTypes and Uses of Washing Machines and Dryers
Types and Uses of Washing Machines and Dryers
 
11kV Cable Termination Heat Shrink Kits 3 Core 16-25sqmm SPS 3TIS-12X-A
11kV Cable Termination Heat Shrink Kits 3 Core 16-25sqmm SPS 3TIS-12X-A11kV Cable Termination Heat Shrink Kits 3 Core 16-25sqmm SPS 3TIS-12X-A
11kV Cable Termination Heat Shrink Kits 3 Core 16-25sqmm SPS 3TIS-12X-A
 
High voltage underground cables
High voltage underground cablesHigh voltage underground cables
High voltage underground cables
 
Dry Type Transformer
Dry  Type TransformerDry  Type Transformer
Dry Type Transformer
 
Knife Skills. Kitchen Safety And Simpler Cooking
Knife Skills. Kitchen Safety And Simpler CookingKnife Skills. Kitchen Safety And Simpler Cooking
Knife Skills. Kitchen Safety And Simpler Cooking
 
high voltage circuit breaker
high voltage circuit breakerhigh voltage circuit breaker
high voltage circuit breaker
 
Washing machine
Washing machineWashing machine
Washing machine
 
Electrical testing
Electrical testingElectrical testing
Electrical testing
 
GSM900 basestation antennas - GSM900 tukiasema-antennit
GSM900 basestation antennas - GSM900 tukiasema-antennitGSM900 basestation antennas - GSM900 tukiasema-antennit
GSM900 basestation antennas - GSM900 tukiasema-antennit
 
1. Heat Shrink Cable Termination (HV) - 11kV 33kV 3 Core XLPE BS6622 Cables
1. Heat Shrink Cable Termination (HV) - 11kV 33kV 3 Core XLPE BS6622 Cables1. Heat Shrink Cable Termination (HV) - 11kV 33kV 3 Core XLPE BS6622 Cables
1. Heat Shrink Cable Termination (HV) - 11kV 33kV 3 Core XLPE BS6622 Cables
 
Complete Cleaning Equipments
Complete Cleaning EquipmentsComplete Cleaning Equipments
Complete Cleaning Equipments
 
Approach cable installation
Approach cable installationApproach cable installation
Approach cable installation
 
Power cable - Installation methods
Power cable - Installation methodsPower cable - Installation methods
Power cable - Installation methods
 
Ironing and Folding Cloths Presentation
Ironing and Folding Cloths PresentationIroning and Folding Cloths Presentation
Ironing and Folding Cloths Presentation
 
Vacuum ppt
Vacuum pptVacuum ppt
Vacuum ppt
 
Fuses vs. Circuit Breakers
Fuses vs. Circuit BreakersFuses vs. Circuit Breakers
Fuses vs. Circuit Breakers
 

Semelhante a LG Commercial Front End Dryer User Manual

Use and care en wfe301
Use and care en wfe301Use and care en wfe301
Use and care en wfe301jazzercr
 
User Instructions W10200356
User Instructions   W10200356User Instructions   W10200356
User Instructions W10200356guest301b87a
 
Avtron IR Bullet Camera Aa 4545 p-6045-fsr3-manual
Avtron IR Bullet Camera Aa 4545 p-6045-fsr3-manualAvtron IR Bullet Camera Aa 4545 p-6045-fsr3-manual
Avtron IR Bullet Camera Aa 4545 p-6045-fsr3-manualAvtron
 
Avtron IR Bullet Camera Aa 4547 p-6047-fsr4-manual
Avtron IR Bullet Camera Aa 4547 p-6047-fsr4-manualAvtron IR Bullet Camera Aa 4547 p-6047-fsr4-manual
Avtron IR Bullet Camera Aa 4547 p-6047-fsr4-manualAvtron
 
(Regi) Jual Total Station Cygnus KS 102 HP. 0812.9595.8196
(Regi) Jual Total Station Cygnus KS 102 HP. 0812.9595.8196(Regi) Jual Total Station Cygnus KS 102 HP. 0812.9595.8196
(Regi) Jual Total Station Cygnus KS 102 HP. 0812.9595.8196Regi Bungsu
 
Avtron IR Bullet Camera Aa 4544-6044 p-fsr2-manual
Avtron IR Bullet Camera Aa 4544-6044 p-fsr2-manualAvtron IR Bullet Camera Aa 4544-6044 p-fsr2-manual
Avtron IR Bullet Camera Aa 4544-6044 p-fsr2-manualAvtron
 
GENERAL SAFETY RULESWARNING Read and understand all instruc.docx
GENERAL SAFETY RULESWARNING Read and understand all instruc.docxGENERAL SAFETY RULESWARNING Read and understand all instruc.docx
GENERAL SAFETY RULESWARNING Read and understand all instruc.docxbudbarber38650
 
Hướng dẫn sử dụng Testo 770
Hướng dẫn sử dụng Testo 770Hướng dẫn sử dụng Testo 770
Hướng dẫn sử dụng Testo 770Tenmars Việt Nam
 
John deere 455 lawn garden tractor service repair manual
John deere 455 lawn garden tractor service repair manualJohn deere 455 lawn garden tractor service repair manual
John deere 455 lawn garden tractor service repair manualfjjskedmmemm
 
John deere 455 lawn garden tractor service repair manual
John deere 455 lawn garden tractor service repair manualJohn deere 455 lawn garden tractor service repair manual
John deere 455 lawn garden tractor service repair manualfjskedsxmmem
 
John deere 445 lawn garden tractor service repair manual
John deere 445 lawn garden tractor service repair manualJohn deere 445 lawn garden tractor service repair manual
John deere 445 lawn garden tractor service repair manualfjskemdme
 
John deere 425 lawn garden tractor service repair manual
John deere 425 lawn garden tractor service repair manualJohn deere 425 lawn garden tractor service repair manual
John deere 425 lawn garden tractor service repair manualfjjskekdm
 
(Service Manual Di470) Manual de Mantenimiento para Maquinas Fotocopiadoras M...
(Service Manual Di470) Manual de Mantenimiento para Maquinas Fotocopiadoras M...(Service Manual Di470) Manual de Mantenimiento para Maquinas Fotocopiadoras M...
(Service Manual Di470) Manual de Mantenimiento para Maquinas Fotocopiadoras M...Kevin Lazkanu
 
John deere e gator utility vehicle service repair manual (tm1766)
John deere e gator utility vehicle service repair manual (tm1766)John deere e gator utility vehicle service repair manual (tm1766)
John deere e gator utility vehicle service repair manual (tm1766)fsjefjskekmm
 
John deere e gator utility vehicle service repair manual (tm1766)
John deere e gator utility vehicle service repair manual (tm1766)John deere e gator utility vehicle service repair manual (tm1766)
John deere e gator utility vehicle service repair manual (tm1766)fusjefjskekmem
 
John deere e gator utility vehicle service repair manual (tm1766)
John deere e gator utility vehicle service repair manual (tm1766)John deere e gator utility vehicle service repair manual (tm1766)
John deere e gator utility vehicle service repair manual (tm1766)ujfjjdkkkkmm
 
John deere e gator utility vehicle service repair manual (tm1766)
John deere e gator utility vehicle service repair manual (tm1766)John deere e gator utility vehicle service repair manual (tm1766)
John deere e gator utility vehicle service repair manual (tm1766)fjjskekdmmme
 

Semelhante a LG Commercial Front End Dryer User Manual (20)

Use and care en wfe301
Use and care en wfe301Use and care en wfe301
Use and care en wfe301
 
User Instructions W10200356
User Instructions   W10200356User Instructions   W10200356
User Instructions W10200356
 
Avtron IR Bullet Camera Aa 4545 p-6045-fsr3-manual
Avtron IR Bullet Camera Aa 4545 p-6045-fsr3-manualAvtron IR Bullet Camera Aa 4545 p-6045-fsr3-manual
Avtron IR Bullet Camera Aa 4545 p-6045-fsr3-manual
 
Avtron IR Bullet Camera Aa 4547 p-6047-fsr4-manual
Avtron IR Bullet Camera Aa 4547 p-6047-fsr4-manualAvtron IR Bullet Camera Aa 4547 p-6047-fsr4-manual
Avtron IR Bullet Camera Aa 4547 p-6047-fsr4-manual
 
Máy chà nhám quỹ đạo tròn MT922 (2)
Máy chà nhám quỹ đạo tròn MT922 (2)Máy chà nhám quỹ đạo tròn MT922 (2)
Máy chà nhám quỹ đạo tròn MT922 (2)
 
(Regi) Jual Total Station Cygnus KS 102 HP. 0812.9595.8196
(Regi) Jual Total Station Cygnus KS 102 HP. 0812.9595.8196(Regi) Jual Total Station Cygnus KS 102 HP. 0812.9595.8196
(Regi) Jual Total Station Cygnus KS 102 HP. 0812.9595.8196
 
Avtron IR Bullet Camera Aa 4544-6044 p-fsr2-manual
Avtron IR Bullet Camera Aa 4544-6044 p-fsr2-manualAvtron IR Bullet Camera Aa 4544-6044 p-fsr2-manual
Avtron IR Bullet Camera Aa 4544-6044 p-fsr2-manual
 
GENERAL SAFETY RULESWARNING Read and understand all instruc.docx
GENERAL SAFETY RULESWARNING Read and understand all instruc.docxGENERAL SAFETY RULESWARNING Read and understand all instruc.docx
GENERAL SAFETY RULESWARNING Read and understand all instruc.docx
 
Hướng dẫn sử dụng Testo 770
Hướng dẫn sử dụng Testo 770Hướng dẫn sử dụng Testo 770
Hướng dẫn sử dụng Testo 770
 
John deere 455 lawn garden tractor service repair manual
John deere 455 lawn garden tractor service repair manualJohn deere 455 lawn garden tractor service repair manual
John deere 455 lawn garden tractor service repair manual
 
John deere 455 lawn garden tractor service repair manual
John deere 455 lawn garden tractor service repair manualJohn deere 455 lawn garden tractor service repair manual
John deere 455 lawn garden tractor service repair manual
 
John deere 445 lawn garden tractor service repair manual
John deere 445 lawn garden tractor service repair manualJohn deere 445 lawn garden tractor service repair manual
John deere 445 lawn garden tractor service repair manual
 
John deere 425 lawn garden tractor service repair manual
John deere 425 lawn garden tractor service repair manualJohn deere 425 lawn garden tractor service repair manual
John deere 425 lawn garden tractor service repair manual
 
craftsman saw.pdf
craftsman saw.pdfcraftsman saw.pdf
craftsman saw.pdf
 
(Service Manual Di470) Manual de Mantenimiento para Maquinas Fotocopiadoras M...
(Service Manual Di470) Manual de Mantenimiento para Maquinas Fotocopiadoras M...(Service Manual Di470) Manual de Mantenimiento para Maquinas Fotocopiadoras M...
(Service Manual Di470) Manual de Mantenimiento para Maquinas Fotocopiadoras M...
 
Máy chà nhám quỹ đạo tròn hướng dẫn chung mt924
Máy chà nhám quỹ đạo tròn hướng dẫn chung mt924Máy chà nhám quỹ đạo tròn hướng dẫn chung mt924
Máy chà nhám quỹ đạo tròn hướng dẫn chung mt924
 
John deere e gator utility vehicle service repair manual (tm1766)
John deere e gator utility vehicle service repair manual (tm1766)John deere e gator utility vehicle service repair manual (tm1766)
John deere e gator utility vehicle service repair manual (tm1766)
 
John deere e gator utility vehicle service repair manual (tm1766)
John deere e gator utility vehicle service repair manual (tm1766)John deere e gator utility vehicle service repair manual (tm1766)
John deere e gator utility vehicle service repair manual (tm1766)
 
John deere e gator utility vehicle service repair manual (tm1766)
John deere e gator utility vehicle service repair manual (tm1766)John deere e gator utility vehicle service repair manual (tm1766)
John deere e gator utility vehicle service repair manual (tm1766)
 
John deere e gator utility vehicle service repair manual (tm1766)
John deere e gator utility vehicle service repair manual (tm1766)John deere e gator utility vehicle service repair manual (tm1766)
John deere e gator utility vehicle service repair manual (tm1766)
 

Último

Call Girls In Karkardooma 83770 87607 Just-Dial Escorts Service 24X7 Avilable
Call Girls In Karkardooma 83770 87607 Just-Dial Escorts Service 24X7 AvilableCall Girls In Karkardooma 83770 87607 Just-Dial Escorts Service 24X7 Avilable
Call Girls In Karkardooma 83770 87607 Just-Dial Escorts Service 24X7 Avilabledollysharma2066
 
西伦敦大学毕业证学位证成绩单-怎么样做
西伦敦大学毕业证学位证成绩单-怎么样做西伦敦大学毕业证学位证成绩单-怎么样做
西伦敦大学毕业证学位证成绩单-怎么样做j5bzwet6
 
Call Girls In Dwarka Sub City ☎️7838079806 ✅ 💯Call Girls In Delhi
Call Girls In Dwarka Sub City  ☎️7838079806 ✅ 💯Call Girls In DelhiCall Girls In Dwarka Sub City  ☎️7838079806 ✅ 💯Call Girls In Delhi
Call Girls In Dwarka Sub City ☎️7838079806 ✅ 💯Call Girls In DelhiSoniyaSingh
 
Inspiring Through Words Power of Inspiration.pptx
Inspiring Through Words Power of Inspiration.pptxInspiring Through Words Power of Inspiration.pptx
Inspiring Through Words Power of Inspiration.pptxShubham Rawat
 
Authentic No 1 Amil Baba In Pakistan Amil Baba In Faisalabad Amil Baba In Kar...
Authentic No 1 Amil Baba In Pakistan Amil Baba In Faisalabad Amil Baba In Kar...Authentic No 1 Amil Baba In Pakistan Amil Baba In Faisalabad Amil Baba In Kar...
Authentic No 1 Amil Baba In Pakistan Amil Baba In Faisalabad Amil Baba In Kar...Authentic No 1 Amil Baba In Pakistan
 
办理西悉尼大学毕业证成绩单、制作假文凭
办理西悉尼大学毕业证成绩单、制作假文凭办理西悉尼大学毕业证成绩单、制作假文凭
办理西悉尼大学毕业证成绩单、制作假文凭o8wvnojp
 
E J Waggoner against Kellogg's Pantheism 8.pptx
E J Waggoner against Kellogg's Pantheism 8.pptxE J Waggoner against Kellogg's Pantheism 8.pptx
E J Waggoner against Kellogg's Pantheism 8.pptxJackieSparrow3
 
南新罕布什尔大学毕业证学位证成绩单-学历认证
南新罕布什尔大学毕业证学位证成绩单-学历认证南新罕布什尔大学毕业证学位证成绩单-学历认证
南新罕布什尔大学毕业证学位证成绩单-学历认证kbdhl05e
 
Call Girls in Govindpuri Delhi 💯Call Us 🔝8264348440🔝
Call Girls in Govindpuri Delhi 💯Call Us 🔝8264348440🔝Call Girls in Govindpuri Delhi 💯Call Us 🔝8264348440🔝
Call Girls in Govindpuri Delhi 💯Call Us 🔝8264348440🔝soniya singh
 
(No.1)↠Young Call Girls in Sikanderpur (Gurgaon) ꧁❤ 9711911712 ❤꧂ Escorts
(No.1)↠Young Call Girls in Sikanderpur (Gurgaon) ꧁❤ 9711911712 ❤꧂ Escorts(No.1)↠Young Call Girls in Sikanderpur (Gurgaon) ꧁❤ 9711911712 ❤꧂ Escorts
(No.1)↠Young Call Girls in Sikanderpur (Gurgaon) ꧁❤ 9711911712 ❤꧂ EscortsDelhi Escorts Service
 
(南达科他州立大学毕业证学位证成绩单-永久存档)
(南达科他州立大学毕业证学位证成绩单-永久存档)(南达科他州立大学毕业证学位证成绩单-永久存档)
(南达科他州立大学毕业证学位证成绩单-永久存档)oannq
 

Último (12)

Call Girls In Karkardooma 83770 87607 Just-Dial Escorts Service 24X7 Avilable
Call Girls In Karkardooma 83770 87607 Just-Dial Escorts Service 24X7 AvilableCall Girls In Karkardooma 83770 87607 Just-Dial Escorts Service 24X7 Avilable
Call Girls In Karkardooma 83770 87607 Just-Dial Escorts Service 24X7 Avilable
 
西伦敦大学毕业证学位证成绩单-怎么样做
西伦敦大学毕业证学位证成绩单-怎么样做西伦敦大学毕业证学位证成绩单-怎么样做
西伦敦大学毕业证学位证成绩单-怎么样做
 
Call Girls In Dwarka Sub City ☎️7838079806 ✅ 💯Call Girls In Delhi
Call Girls In Dwarka Sub City  ☎️7838079806 ✅ 💯Call Girls In DelhiCall Girls In Dwarka Sub City  ☎️7838079806 ✅ 💯Call Girls In Delhi
Call Girls In Dwarka Sub City ☎️7838079806 ✅ 💯Call Girls In Delhi
 
Inspiring Through Words Power of Inspiration.pptx
Inspiring Through Words Power of Inspiration.pptxInspiring Through Words Power of Inspiration.pptx
Inspiring Through Words Power of Inspiration.pptx
 
Authentic No 1 Amil Baba In Pakistan Amil Baba In Faisalabad Amil Baba In Kar...
Authentic No 1 Amil Baba In Pakistan Amil Baba In Faisalabad Amil Baba In Kar...Authentic No 1 Amil Baba In Pakistan Amil Baba In Faisalabad Amil Baba In Kar...
Authentic No 1 Amil Baba In Pakistan Amil Baba In Faisalabad Amil Baba In Kar...
 
办理西悉尼大学毕业证成绩单、制作假文凭
办理西悉尼大学毕业证成绩单、制作假文凭办理西悉尼大学毕业证成绩单、制作假文凭
办理西悉尼大学毕业证成绩单、制作假文凭
 
Model Call Girl in Lado Sarai Delhi reach out to us at 🔝9953056974🔝
Model Call Girl in Lado Sarai Delhi reach out to us at 🔝9953056974🔝Model Call Girl in Lado Sarai Delhi reach out to us at 🔝9953056974🔝
Model Call Girl in Lado Sarai Delhi reach out to us at 🔝9953056974🔝
 
E J Waggoner against Kellogg's Pantheism 8.pptx
E J Waggoner against Kellogg's Pantheism 8.pptxE J Waggoner against Kellogg's Pantheism 8.pptx
E J Waggoner against Kellogg's Pantheism 8.pptx
 
南新罕布什尔大学毕业证学位证成绩单-学历认证
南新罕布什尔大学毕业证学位证成绩单-学历认证南新罕布什尔大学毕业证学位证成绩单-学历认证
南新罕布什尔大学毕业证学位证成绩单-学历认证
 
Call Girls in Govindpuri Delhi 💯Call Us 🔝8264348440🔝
Call Girls in Govindpuri Delhi 💯Call Us 🔝8264348440🔝Call Girls in Govindpuri Delhi 💯Call Us 🔝8264348440🔝
Call Girls in Govindpuri Delhi 💯Call Us 🔝8264348440🔝
 
(No.1)↠Young Call Girls in Sikanderpur (Gurgaon) ꧁❤ 9711911712 ❤꧂ Escorts
(No.1)↠Young Call Girls in Sikanderpur (Gurgaon) ꧁❤ 9711911712 ❤꧂ Escorts(No.1)↠Young Call Girls in Sikanderpur (Gurgaon) ꧁❤ 9711911712 ❤꧂ Escorts
(No.1)↠Young Call Girls in Sikanderpur (Gurgaon) ꧁❤ 9711911712 ❤꧂ Escorts
 
(南达科他州立大学毕业证学位证成绩单-永久存档)
(南达科他州立大学毕业证学位证成绩单-永久存档)(南达科他州立大学毕业证学位证成绩单-永久存档)
(南达科他州立大学毕业证学位证成绩单-永久存档)
 

LG Commercial Front End Dryer User Manual

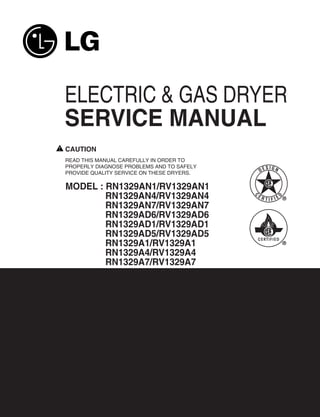
  • 1. ELECTRIC & GAS DRYER SERVICE MANUAL CAUTION READ THIS MANUAL CAREFULLY IN ORDER TO PROPERLY DIAGNOSE PROBLEMS AND TO SAFELY SIGN PROVIDE QUALITY SERVICE ON THESE DRYERS. DE MODEL : RN1329AN1/RV1329AN1 RN1329AN4/RV1329AN4 ER C D TIFIE RN1329AN7/RV1329AN7 RN1329AD6/RV1329AD6 RN1329AD1/RV1329AD1 RN1329AD5/RV1329AD5 RN1329A1/RV1329A1 RN1329A4/RV1329A4 RN1329A7/RV1329A7
  • 2. April 2011 PRINTED IN KOREA P/No. : MFL62119935
  • 3. IMPORTANT SAFETY NOTICE The information in this service guide is intended for use by individuals possessing skill and experience in electrical, electronic, and mechanical appliance repair. Any attempt to repair a major appliance may result in injury to persons and property damage. The manufacturer or seller cannot be responsible for the interpretation of this information, nor can it assume any liability in connection with its use. ! WARNING To avoid injury to persons disconnect power before se rvicing this product. If electrical power is required for diagnosis or test purposes, disconnect the power immediately after performing the necessary checks. RECONNECT ALL GROUNDING DEVICES If grounding wires, screws, straps, clips, nuts, or washers used to complete a path to ground are removed for service, they must be returned to their original position and properly fastened. WHAT TO DO IF YOU SMELL GAS: ■ Do not try to light a match, or cigarette, or turn on ■ Immediately call your gas supplier from a neighborís any gas or electrical appliance. phone. Follow the gas supplierís instructions ■ Do not touch any electrical switches. Do not use any carefully. phone in your building. ■ If you cannot reach your gas supplier, call the fire ■ Clear the room, building or area of all occupants. department. IMPORTANT Electrostatic Discharge (ESD) Sensitive Electronics ESD problems are present everywhere. ESD may damage or weaken the electronic control assembly. The new control assembly may appear to work well after repair is finished, but failure may occur at a later date due to ESD stress. ■ Use an anti-static wrist strap. Connect wrist strap to green ground connection point or unpainted metal in the appliance. - OR - Touch your finger repeatedly to a green ground connection point or unpainted metal in the appliance. ■ Before removing the part from its package, touch the anti-static bag to a green ground connection point or unpainted metal in the appliance. ■ Avoid touching electronic parts or terminal contacts. Handle electronic control assembly by edges only. ■ Observe above instructions when repackaging failed electronic control assembly in an anti-static bag. 2
  • 4. CONTENTS 1. IMPORTANT SAFETY INSTRUCTIONS .............................................................................. 4 2. SPECIFICATIONS ................................................................................................................ 9 3. FEATURES AND BENEFITS .............................................................................................. 11 4. INITIAL STEPS FOR INSTALLING YOUR DRYER ............................................................ 13 5. INSTALLATION INSTRUCTIONS ....................................................................................... 19 6. ELECTRICAL REQUIREMENTS FOR ELECTRIC DRYERS ............................................ 29 7. ELECTRICAL REQUIREMENTS FOR GAS DRYERS ...................................................... 37 8. GAS REQUIREMENTS AND INSTRUCTIONS .................................................................. 38 9. EXHAUST REQUIREMENTS AND MAINTENANCE .......................................................... 39 10. DRYER CYCLE PROCESS ............................................................................................. 43 11. COMPONENT TESTING INFORMATION ....................................................................... 44 12. MOTOR DIAGRAM AND SCHEMATIC............................................................................. 47 13. CONTROL LAYOUT ........................................................................................................ 48 14. WIRING DIAGRAM ........................................................................................................... 49 15. DIAGNOSTIC TEST.......................................................................................................... 50 15-1. TEST 1 240V AC ELECTRICAL SUPPLY ............................................................ 51 15-2. TEST 2 THERMISTOR TEST ................................................................................ 54 15-3. TEST 3 MOTOR TEST ......................................................................................... 55 15-4. TEST 4 MOISTURE SENSOR............................................................................... 56 15-5. TEST 5 DOOR SWITCH TEST.............................................................................. 57 15-6. TEST 6 HEATER SWITCH TEST - ELECTRIC MODEL ....................................... 58 15-7. TEST 7 GAS VALVE TEST - GAS MODEL .......................................................... 59 16. ERROR MODE ................................................................................................................ 60 17. CHANGE GAS SETTING (NATURAL GAS, PROPANE GAS) ....................................... 61 18. DISASSEMBLY INSTRUCTIONS .................................................................................... 63 19. EXPLODED VIEW ........................................................................................................... 71 19-1-1. Control Panel & Plate Assembly - Coin Type ....................................................... 71 19-1-2. Control Panel & Plate Assembly - Card Type ....................................................... 72 19-2-1. Cabinet & Door Assembly - Electric Stack Upper Type ........................................ 73 19-2-2. Cabinet & Door Assembly - Electric Stack Lower Type ........................................ 74 19-2-3. Cabinet & Door Assembly - Gas Stack Upper Type ............................................. 75 19-2-4. Cabinet & Door Assembly - Gas Stack Lower Type ............................................. 76 19-3-1. Drum & Motor Assembly: Electric Type ................................................................ 77 19-3-2. Drum & Motor Assembly: Gas Type ..................................................................... 78 3
  • 5. 1 IMPORTANT SAFETY INSTRUCTIONS READ ALL INSTRUCTIONS BEFORE USE WARNING For your safety, the information in this manual must be followed to minimize the risk of fire or explosion, electric shock, or to prevent property damage, injury to persons , or death. Your Safety and the safety of others is very important. We have provided many important safety messages in this manual and on your appliance. Always read and obey all safety messages. This is the safety alert symbol. This symbol alerts you to potential hazards that can kill or hurt you and others. All safety messages will follow the safety alert symbol and either the word DANGER or WARNING. These words mean: DANGER: You can be killed or seriously injured if you don’t immediately follow instructions. WARNING: You can be killed or seriously injured if you don’t follow instructions. All safety messages will tell you what the potential hazard is, tell you how to reduce the chance of injury, and tell you what can happen if the instructions are not followed. BASIC SAFETY PRECAUTIONS WARNING: To reduce the risk of fire, electric shock, or injury to persons when using this appliance, follow basic precautions, including the following: • Read all instructions before using the dryer. discarded, remove the door to the drying • Before use, the dryer must be properly installed as compartment. described in this manual. • Do not allow children to play on or in the dryer. • Do not place items exposed to cooking oils in your Close supervision of children is necessary when dryer. Items contaminated with cooking oils may the dryer is used near children. contribute to a chemical reaction that could cause • Do not use fabric softeners or products to a load to catch fire. eliminate static unless recommended by the • Do not dry articles that have been previously manufacturer of the fabric softener or product. cleaned in, washed in, soaked in, or spotted with • Do not use heat to dry articles containing foam gasoline, dry-cleaning solvents, or other rubber or similarly textured rubber-like materials. flammable or explosive substances as they give • Keep area around the exhaust opening and off vapors that could ignite or explode. adjacent surrounding areas free from the • Do not reach into the dryer if the drum or any other accumulation of lint, dust, and dirt. part is moving. • The interior of the dryer and exhaust vent should • Do not repair or replace any part of the dryer or be cleaned periodically by qualified service attempt any servicing unless specifically personnel. recommended in this Use and Care Guide or in • Do not install or store the dryer where it will be published user-repair instructions that you exposed to the weather. understand and have the skills to carry out. • Always check the inside of the dryer for foreign • Do not tamper with controls. objects. • Before the dryer is removed from service or • Clean lint screen before or after each load. 4
  • 6. READ ALL INSTRUCTIONS BEFORE USE WARNING For your safety, the information in this manual must be followed to minimize the risk of fire or explosion, electric shock, or to prevent property damage, injury to persons, or death. • Do not store or use gasoline or other flammable • Installation and service must be performed by a vapors and liquids in the vicinity of this appliance or qualified installer, service agency, or the gas any other appliances. supplier. WHAT TO DO IF YOU SMELL GAS: 1. Do not try to light a match or cigarette, or turn on 4. Immediately call your gas supplier from a any gas or electrical appliance. neighbor’s phone. Follow the gas supplier’s 2. Do not touch any electrical switches. Do not use instructions carefully. any phone in your building. 5. If you cannot reach your gas supplier, call the fire 3. Clear the room, building, or area of all occupants. department. CALIFORNIA SAFE DRINKING WATER AND TOXIC ENFORCEMENT ACT This act requires the governor of California to publish a list of substances known to the state to cause cancer, birth defects, or other reproductive harm and requires businesses to warn customers of potential exposure to such substances. Gas appliances can cause minor exposure to four of these substances, namely benzene, carbon monoxide, formaldehyde, and soot, caused primarily by the incomplete combustion of natural gas or LP fuels. Properly adjusted dryers will minimize incomplete combustion. Exposure to these substances can be minimized further by properly venting the dryer to the outdoors. 5
  • 7. READ ALL INSTRUCTIONS BEFORE USE WARNING For your safety, the information in this manual must be followed to minimize the risk of fire or explosion, electric shock, or to prevent property damage, injury to persons, or death. GROUNDING INSTRUCTIONS This appliance must be grounded. In the event of person if you are in doubt as to whether the malfunction or breakdown, grounding will reduce the appliance is properly grounded. risk of electric shock by providing a path of least Do not modify the plug provided with the appliance. resistance for electric current. This appliance must If it will not fit the outlet, have a proper outlet be equipped with a cord having an equipment- installed by a qualified electrician. grounding conductor and a grounding plug. The plug must be plugged into an appropriate outlet that is This appliance must be connected to a grounded properly installed and grounded in accordance with metal, permanent wiring system or an equipment- all local codes and ordinances. grounding conductor must be run with the circuit conductors and connected to the equipment- WARNING — Improper connection of grounding terminal or lead on the appliance. the equipment-grounding conductor can result in a Electric shock can result if the dryer is not properly risk of electric shock. Check with a qualified grounded. electrician or service SAFETY INSTRUCTIONS FOR INSTALLATION WARNING To reduce the risk of fire, electric shock, or injury to persons when using this appliance, follow basic precautions, including the following: • Properly ground dryer to conform with all • To reduce the risk of electric shock, do not governing codes and ordinances. Follow details install the dryer in humid spaces. Failure to in the installation instructions. Electric shock can follow this warning can cause serious injury, fire, result if the dryer is not properly grounded. electric shock, or death. • Before use, the dryer must be properly • Connect to a properly rated, protected, and installed as described in this manual. sized power circuit to avoid electrical overload. Electric shock can result if the dryer is not properly Improper power circuit can melt, creating electric grounded. shock and/or fire hazard. • Install and store the dryer where it will not be • Remove all packing items and dispose of all exposed to temperatures below freezing or shipping materials properly. Failure to do so can exposed to the weather. result in death, explosion, fire, or burns. • All repairs and servicing must be performed by • Place dryer at least 18 in. above the floor for a an authorized servicer unless specifically garage installation. Failure to do so can result in recommended in this Owner’s Guide. Use only death, explosion, fire, or burns. authorized factory parts. Failure to follow this • Keep all packaging from children. Packaging warning can cause serious injury, fire, electric material can be dangerous for children. There is a shock, or death. risk of suffocation. 6
  • 8. READ ALL INSTRUCTIONS BEFORE USE WARNING For your safety, the information in this manual must be followed to minimize the risk of fire or explosion, electric shock, or to prevent property damage, injury to persons, or death. SAFETY INSTRUCTIONS FOR INSTALLATION Exhaust/Ducting: • Gas dryers MUST be exhausted to the outside. • The openings must not beobstructed by a carpet. Failure to follow these instructions can result in fire or • Rigid or semi rigid metal ducting is recommended death. for use between the dryer and the wall. In special • The dryer exhaust system must be exhausted to installations when it is impossible to make a the outside of the dwelling. If the dryer is not connection with the above recommendations, a exhausted outdoors, some fine lint and large UL-listed flexible metal transition duct may be amounts of moisture will be expelled into the used between the dryer and wall connection only. laundry area. An accumulation of lint in any area of The use of this ducting will affect drying time. the home can create a health and fire hazard. Failure to follow these instructions can result in fire or • Use only rigid metal or flexible metal 4-in. death. diameter ductwork inside the dryer cabinet or for • Do not use sheet metal screws or other fasteners exhausting to the outside. Use of plastic or other which extend into the duct that could catch lint combustible ductwork can cause a fire. Punctured and reduce the efficiency of the exhaust system. ductwork can cause a fire if it collapses or becomes Secure all joints with duct tape. For complete otherwise restricted in use or during installation. details, follow the Installation Instructions. Failure • Ductwork is not provided with the dryer, and you to follow these instructions can result in fire or death. should obtain the necessary ductwork locally. • Keep the area underneath and around your The end cap should have hinged dampers to appliances free of combustible materials such as prevent backdraft when the dryer is not in use. lint, paper, rags, chemicals, etc. Failure to do so Failure to follow these instructions can result in fire or can result in fire. death. • The exhaust duct must be 4 in. (10 cm) in diameter with no obstructions. The exhaust duct should be kept as short as possible. Make sure to clean any old ducts before installing your new dryer. Failure to follow these instructions can result in fire or death. 7
  • 9. READ ALL INSTRUCTIONS BEFORE USE WARNING For your safety, the information in this manual must be followed to minimize the risk of fire or explosion, electric shock, or to prevent property damage, injury to persons, or death. SAFETY INSTRUCTIONS FOR CONNECTING ELECTRICITY WARNING: To reduce the risk of fire, electric shock, or injury to persons when using this appliance, follow basic precautions, including the following: • Do not, under any circumstances, cut or • Never unplug your dryer by pulling on the remove the ground prong from the power cord. power cord. Always grip plug firmly and pull To prevent injury to persons or damage to the straight out from the outlet. The power cord can dryer, the electrical power cord must be plugged be damaged, resulting in a risk of fire and electric into a properly grounded outlet. shock. • For personal safety, this dryer must be • Repair or replace immediately all power cords properly grounded. Failure to do so can result in that have become frayed or otherwise electric shock or injury. damaged. Do not use a cord that shows cracks • Refer to the installation instructions in this or abrasion damage along its length or at manual for specific electrical requirements for either end. The power cord can melt, creating your model. Failure to follow these instructions electric shock and/or fire hazard. can create an electric shock hazard and/or a fire • When installing or moving the dryer, be careful hazard. not to pinch, crush, or damage the power cord. • This dryer must be plugged into a properly This will prevent injury and prevent damage to the grounded outlet. Electrical shock can result if dryer from fire and electric shock. the dryer is not properly grounded. Have the • To reduce the risk of injury to persons, wall outlet and circuit checked by a qualified adhere to all industry recommended safety electrician to make sure the outlet is properly procedures including the use of long sleeved grounded. Failure to follow these instructions can gloves and safety glasses. Failure to follow all of create an electric shock hazard and/or a fire the safety warnings in this manual could result in hazard. property damage, injury to persons or death. • The dryer should always be plugged into its • Connect the power cord to the terminal block. own individual electrical outlet which has a Each colored wire should be connected to voltage rating that matches the rating plate. same color screw. Wire color indicated on This provides the best performance and also manual is connected to the same color screw prevents overloading house wiring circuits which in block. Failure to follow these instructions may could cause a fire hazard from overheated wires. result in a short or overload. SAVE THESE INSTRUCTIONS 8
  • 10. 2 SPECIFICATIONS ■ Type : Electric and Gas Dryer ■ Rating : Please refer to the rating label regarding detailed information. ■ Size : 686mm(W) x 764mm(D) x 983mm(H) ■ Capacity : 10Kg ■ Weight : 59.4 kg ❋ Specifications are subject to change by manufacturer. 9
  • 11. RV1329AN1 RN1329AN1 RV1329AN4 RN1329AN4 RV1329AN7 RN1329AN7 RV1329AD6 RN1329AD6 ITEM RV1329AD1 RN1329AD1 REMARK RV1329AD5 RN1329AD5 RV1329A1 RN1329A1 RV1329A4 RN1329A4 RV1329A7 RN1329A7 TYPE Electric Gas (LNG) POWER SUPPLY 240V, 17Amps - Color Blue white Porcelain :RV1329AN4/RN1329AN4 RV1329AD1/RN1329AD1 Top Plate Painted MATERIAL & RV1329A4/RN1329A4 FINISH Door Trim Stainless Deco (Hair line) Door Frame Chrom C/Panel Color Blue white MOTOR 250W (4.5V) AC 240V ELECTRICITY CONSUMPTION HEATER 4000W (17A) - AC 240V GAS VALVE - - CONTROL TYPE Electronic DRUM CAPACITY 10Kg Weight (lbs.) - Net/Gross 126/144 No. of Programs 4 Audible End of Cycle Beeper Available Time dry Available Reversible Door Available Drum Stainless Steel Product (WxHxD) 686mm(W) x 764mm(D) x 983mm(H) Packing (WxHxD) 744mm(W) x 385mm(D) x 1140mm(H) 10
  • 12. 3 FEATURES AND BENEFITS ■ CARD TYPE - SIDE BY SIDE(RN1329AD1, RV1329AD1) - STACK UPPER(RN1329AD5, RV1329AD5) - STACK LOWER(RN1326AD6, RV1326AD6) 4 1 2 3 ■ OPL TYPE - SIDE BY SIDE(RN1329A4, RV1329A4) - STACK UPPER(RN1329A7, RV1329A7) - STACK LOWER(RN1326A1, RV1326A1) 4 1 2 3 1. DISPLAY LED 3. START BUTTON 2. CYCLE BUTTON 4. STATUS LED 11
  • 13. ■ COIN TYPE - SIDE BY SIDE(RN1329AN4, RV1329AN4) 4 1 2 3 ■ COIN TYPE - STACK UPPER(RN1329AN7, RV1329AN7) 4 1 2 3 ■ COIN TYPE - STACK LOWER(RN1329AN1, RV1329AN1) 4 1 2 3 1. DISPLAY LED 3. START BUTTON 2. CYCLE BUTTON 4. STATUS LED 12
  • 14. 4 INITIAL STEPS FOR INSTALLING YOUR DRYER The following instructions will help guide you through the initial steps of setting up your dryer for use. Please note that every section of this manual provides important information regarding the preparation and use of your dryer, and it is important that you review this entire manual before proceeding with any installation or use. More detailed instructions concerning electrical connections, gas connections, and exhaust requirements are provided at other parts of this manual. STEP 1 Positioning the Dryer. Certain minimum clearances are required above, behind, and to the sides of the unit, as Choose a location with a solid floor for your dryer. shown below. Those required minimum clearances Place the dryer at least eighteen inches above the are set forth in the picture below. Please also keep the floor for a garage installation. After placing the following instructions in mind when installing in a dryer in the desired location, please make sure that closet or recessed area: it has the required clearances shown below, and Consider allowing additional clearance for sections on Exhaust and Maintenance requirements. installation and servicing. Wall, door and floor molding may force additional clearances. An additional inch of clearance is recommended to 49.8¡± minimize noise transfer . (126.4 cm) Consider space needed for companion appliances. 38.7¡± For closet installations, the picture below shows the (98.3 cm) minimum required ventilation openings for the door. A louvered door with comparable ventilation openings is also acceptable. ventilation 27¡± 29.96¡± hole (68.6 cm) (76.1 cm) * Most installations require a minimum 5 1/2 in. (14 cm) clearance behind the dryer for the exhaust vent with elbow. Note Level the dryer using the leveling legs and tighten ventilation the adjusting nuts to hold them in place. hole r. Closet door Closet-Side view If the d ryer is not level, the clothes will not tumble properly and the sensor will not be able to de tect the dryness level accurately. Adjust the le veling legs carefully to avoid injury. Note No other fuel-burning appliance shall be installed in the same closet as the drye r. This applies only to dryers suitable for installation in a closet. WARNING The applian ces are he avy. Two or more people a re requi red when moving or installing the appliance. 13 Closet-Front view There is a risk of serious back injury or other injuries.
  • 15. Once in position, adjust the leveling legs of the dryer All four leveling feet must rest solidl y on the until it is level from left to right and from front to floo r. Gently push on the top co rners of the back. The leveling legs must remain firmly on the dryer to make sure that the dryer doe s not rock f rom co rner to co rner. floor and the dryer should not rock. The maximum If you are installing the dryer on the optional slope of the dryer from left to right or from front to pedestal, you must use the leveling feet on the back should not exceed 2.5 cm (1 inch). If the dryer pedestal to level the dryer. The dryer leveling feet is not level, and if the slope exceeds 2.5 cm (1 inch), should be fully retracted. a load may not tumble properly and internal sensors may malfunction. Note: Other sections of this manual also provide important information concerning the placement of and clearances for your dryer. Please review this entire manual before STEP 2 Leveling the Dryer. wWARNING Use an adjustable or open ended spanner to turn the leveling feet. Turn clockwise to raise To ensure that the dryer provides optimal drying the dryer or counte rclockwise to lower it. performance, it must be level. To minimize Raise or lower the leveling feet until dryer is vibration, noise, and unwanted movement, the level from floor must be a perfectly level, solid surface. side to side and front to back. NOTE: Adjust the leveling feet only as far as Make sure that all 4 leveling feet are in firm necessary to level the dryer. Extending the contact with the floo r. leveling feet more than necessary can cause the dryer to vibrate. Level Leveling Feet Position the dryer in the final location. Place a level across the top of the dryer. 14
  • 16. STEP 3 Procedure for Reversing the Door The door on your dryer can be installed to open either to the left or the right. Follow these procedures to reverse the direction in which your door opens: Note Door and l atch should be ali gned at the center when closed. O the rwise, the door will not open, close, or latch prope rly. ! 15
  • 17. STEP 4 Connecting the Exhaust ° ALTERNATE EXHAUST DIRECTIONS and Venting System. 1. Remove the screw that attaches the duct's tab to the dryer. ! WARNING Use a heavy metal vent. Do not use plastic or thin foil duct. Clean old ducts before installing this dryer Failure to follow these instructions can result in death or fire. 2-1. Detach and remove the knockout that matches the desired venting direction Note (Right side not available on Gas Dryers) V Follow steps 1, 2, and 3, as shown smaller endsfacing away from the dryer. below. Incorrect installation of the vent and imp roper taping of the joi nts will interfere with correct d ryer and vent fun ction. In addition to the following warnings, please refer to manual section on Exhaust Requirements and Maintenance. IMPORTANT: To reduce the risk of fire, combustion, and gas accumulation, the dryer must be vented to the outdoors. Please follow the instructions (and all others in this manual) very carefully. 2-2. Reconnect the duct to the blower housing and attach the duct to the base. The side vent kit is available as a service part, #383EEL9001B. Do not use plastic or thin foil duct. 3-1. Pre-assemble a 4 elbow with a 4 duct. Use 4 (10.2 cm) diameter rigid or semi-rigid Wrap duct tape around joint. metal duct (note: venting materials are not supplied with the dryer, and you must obtain the venting materials necessary for proper installation) Position the dryer so the exhaust duct run is as short as possible. Clean old ducts before installing this dryer The male end of each section of exhaust duct must point away from the dryer Use as few elbow joints as possible. 3-2. Insert the elbow duct assembly first through Use duct tape on all duct joints the side opening and connect the elbow to Insulate ductwork that runs through unheated the internal duct. areas in order to reduce condensation and lint build-up on pipe walls; and PLEASE BE AWARE THAT FAILURE TO EXHAUST THE DRYER CORRECTLY WILL VOID THE DRYER’S WARRANTY. 16
  • 18. STEP 5 Connection of Gas Supply STEP 6 Electrical Plug Connection (Gas dryer only). In addition to the following, Following are several warnings and instructions please refer to manual section on Gas Requirements concerning making the electrical connection for electric and Instructions. dryers. More detailed information concerning the electrical connection is provided at the manual section entitled Electrical Requirements for Electric Dryer. 1 It is important that you thoroughly review that section, and the remainder of this manual before taking any 2 steps to install or use this dryer. 5 3 1. Use only a new U.L. listed No. 10 (copper wire only) three conductor power supply cord kit rated 240 4 1. New stainless steel flexible connector. Use this type of Volts (minimum) 30 Amperes and labeled as suitable connector only if allowed by local codes. Use Design AGA for use in a clothes dryer. Certified Connector. 2. Four-wire cord is required for manufactured (mobile) 2. 1/8 NPT Pipe Plug (for checking inlet gas pressure) home installations and use and where local codes do 3. Equipment Shut-Off Valve- not allow grounding of this appliance through Installed within 6'(1.8m) of dryer neutral. 4. Iron Pipe. Shorter than 20'(6.1m) Use 3/8 pipe. Longer than 20'(6.1m) - Use 1/2 pipe. 3. Electrical Plug Connections. 5. 3/8 N.P.T. Gas Connection 4. For additional instruction on connecting the dryer to 6. Apply pipe joint compound or about 1 1/2 wraps of Teflon an electrical power source, please refer to this tape over all threaded connection manual’s section on Electrical Requirements and Note Electric Dryer. gas you are pr ovided with. Note Burner input requirements: Adjusting burner input setting is not needed (at the dryer will not have a ny problem with the BTU rating. If your house is at ab ove 10,000 feet, you are required to adjust a four percent (4%) reduction of the burner BTU rating indicated on the model/serial rating plate. 1. Confirm that the type of gas available in your laundry WARNING room is appropriate for the dryer. The dryer is prepared for Natural Gas with a 3/8 NPT gas connection. ! 2. Remove the shipping cap from the gas connection at the • Use a new UL approved 30 amp power back of the dryer. Make sure that you don’t damage the supply cord or 10 gauge solid copper wire. threads of the gas connection pipe when you remove the • Use a UL approved strain relief. shipping cap. • Disconnect power before making electrical 3. Connect the dryer to your laundry room’s gas supply connections. using a new flexible stainless steel connector (as noted • Connect neutral wire (white or center wire) below, only use a new stainless steel flexible connector if to center terminal. allowed by your local codes). • Ground wire (green or bare wire) must be 4. Securely tighten all connections between the dryer and connected to green ground connector. your laundry room’s gas supply. Turn on your laundry • Securely tighten all electrical connections room’s gas supply and check all pipe connections (both • See installation instructions for complete internal and external) for gas leaks with a non-corrosive instructions. leak detection fluid. Refer to Part 7 (page 20) • Failure to do so can result in fire or electrical shock. 5. For LP (Liquefied Petroleum) gas connection, refer to 17 this manual’s section entitled Gas Requirements and Instructions.
  • 19. STEP 7 Preparation of the Dryer STEP 9 Dryer Airflow Prior to the first use of this appliance, use all- Effective dryer operation requires appropriate dryer purpose cleaning products or a solution of detergent airflow. The adequacy of the airflow can be and water, with damp clothes to remove from the measured by evaluating the static pressure. Static inside of the dryer drum/drying compartment any pressure in the exhaust duct can be measured with a dust or dirt that may have accumulated the inside of manometer, placed on the exhaust duct the dryer. Plug-in your dryer after reviewing the approximately 2 ft. (60.9 cm) from the dryer. Static following parts on your dryer’s Electrical pressure in the exhaust duct should not exceed 0.6 Requirements. inches (1.5 cm). The dryer should be checked with the dryer running with no load. Measuring Static Pressure STEP 8 Confirming Heat Source Operation Confirming Heat Source in Gas Dryers Manometer Close the door to the dryer drum/drying compartment and, after completing all steps in this manual for proper installation of this dryer, start the dryer on a heat setting, as described more fully in the operating instructions that accompany the dryer. After the dryer starts, the igniter will glow red and the main burner will ignite. Note If all air is not purged from the gas line, main burner have ignited. If this happens, the igniter will re-attempt gas ignition after approximately two minutes. Exhaust Duct MAXIMUM STATIC PRESSURE IN Confirming Heat Source in Electric Dryers WATER COLUMN Close the door to the dryer drum/drying 0.6 inche (1.5 cm) WARNING compartment and, after completing all steps in this manual for proper installation of this dryer, start the ! dryer on a heat setting, as described more fully in • The dryer must be disconnected from the the operating instructions that accompany the dryer. gas supply piping system during pressure The exhaust air or the exhaust pipe should be warm testing. after the dryer has been operating for three minutes. • Failure to do so can result in death, explosion, or fire. 18
  • 20. 4) Electric dryers may be vented to the outside STEP 9 Additional Instructions using the back, left, right, or bottom panel. for Installation of Your 5) Gas dryers may be vented to the outside using the Dryer in a Manufactured back, left, or bottom panel. Gas dryer may not be or Mobile Home. vented to the outside using the right side panel because of the burner housing. 6) The dryer exhaust duct must be affixed securely The following instructions are applicable to to the manufactured or mobile home structure, installations of the dryer in a manufactured or and the exhaust duct must be made of a material mobile home. Any installation in a manufactured or that will resist fire and combustion, and it is mobile home must comply with the Manufactured recommended that you use a rigid or flexible Home Construction and Safety Standards Title 24 metal pipe. CFR, Part 32-80 or Standard CAN/CSA0Z240 MH and local codes and ordinances. If you are 7) DO NOT connect the exhaust duct with any other uncertain whether your proposed installation will duct, vent, chimney, or other exhaust duct. comply with these standards, please contact a 8) Make sure the dryer has adequate access to service and installation professional for assistance. outside fresh air to ensure proper operation. The opening for outside fresh air must be at least 25 in2 (163 cm2). The following instructions apply to any installation of the dryer in a manufactured or mobile home: 9) It is important that the clearance of the duct from any combustible construction be at least 2 inches (5 cm), and, when venting the dryer to the 1) The gas dryer must be permanently attached to outdoors, the dryer can be installed with a the floor. clearance of 1 inch at the sides and back of the 2) The electrical connection for an electric dryer dryer. must be a 4-wire connection. More detailed 10) Please be aware that venting materials are not information concerning the electrical connection supplied with the dryer. You should obtain the is provided at the manual section entitled venting materials necessary for proper Electrical Requirements for Electric Dryer installation. 3) To reduce the risk of combustion and fire, the dryer must be vented to the outside. WARNING WARNING Do not connect exhaust ducts with Do not vent the exhaust duct under the metal screws or fasteners that extend manufactured or mobile home. into the duct. 19
  • 21. 5 INSTALLATION INSTRUCTIONS Single Coin Card 1 Coin/Card housing How to connect the housing The dryer has a connector for both a coin collector and a card reader. Use the one you need and tuck the other one away safely. 2 COIN TYPE When power on the machine at ❇ first time without connecting card reader or coin housing ,display will show LqC1 Coin housing Card reader housing 3 CARD TYPE (Single) WARNING • Disconnect power before service. • Failure to follow these instructions can result in death or electric shock. Note The Coin drop assembly operates on DC12V in dryer. The Card reader assembly operates on DC12V in dryer. 20
  • 22. 4 STACK TYPE Installation Method (Dryer) - Coin Type Lower Stacking Coin Disassemble the control plate Disconnect the connectors. Remove 2 screws Disassemble the top plate Remove 4 pieces 21
  • 23. Installation Method (Dryer) – Coin Type Lower Stacking Coin Coin Harness – provided by Munzprufer Assemble the switch Insert the switch into the recess on the The connectors should be visible on the back of the coin box. Face it toward the rear of the box for connection to the front so the coin box will press the button harness later. Connect the coin box switch when it is in place. at this time. Use an adhesive tie fastener and a cable tie to affix the service switch to the front panel. 22
  • 24. Assemble the security bracket Attach the security lock bracket if it wasn’t Installed at the factory. Assemble the top plate Install the top plate on the dryer. 23
  • 25. Installation Method (Dryer) – Coin Type Upper Stacking Coin Disassemble the control plate Remove the lower control panel. (Remember, this is the TOP dryer when they are stacked.) Stack the machine Disassemble the lower Stack the upper dryer onto panel frame Connect the bolt the lower dryer. Remove the lower panel from the upper dryer. 24
  • 26. Disassemble the lower panel frame Remove the lower control panel. (Remember, this is the TOP dryer when they are stacked.) Coin Harness – provided by Munzprufer 25
  • 27. Installation Method (Dryer) – Coin Type Stacking Coin Coin Drop – provided by Munzprufer Install the double coin drop mechanism onto the back of the upper dryer control panel. Attach the bolts using the nuts provided. Connect the harness to the upper dryer and secure the wiring harness. Route the wiring to the lower control panel. Be careful to avoid confusing the upper and lower harness. After installing the coin drop module and coin box, replace the front panels on both machine. Be sure to secure all wiring harness parts to avoid vibration, pinching, chafing, or other Damage using adhesive blocks and cable ties. 26
  • 28. Assemble the control plate (Upper) Attach the control panel with the dual coin drop module to the bottom of top dryer. Assemble the control plate (Lower) Install security lock Attach the control panel with coin drop box module to the top of the bottom dryer. 27
  • 29. Install the stacking bracket at the rear of the stacked dryers There are six (6) screws that hold the assembly in place. Installation Method (Dryer) – Card Type Stacking Card Different point between Coin type and Card type 28
  • 30. Connect Gas Supply Pipe (Gas Dryer ONLY) For further assistance, refer to section on Gas Requirements. 1. Make certain your dryer is equipped for use with the 3. Connect to gas supply pipe using a new flexible type of gas in your laundry room. Dryer is equipped stainless steel connector. at the factory for natural gas with a 3/8” NPT gas 4. Tighten all connections securely. Turn on gas and connection. check all pipe connections (internal external) for 2. Remove the shipping cap from the gas connection gas leaks with a non-corrosive leak detection fluid. at the rear of the dryer. Make sure you do not 5. For L.P. (Liquefied Petroleum) gas connection, refer damage the pipe thread when removing the cap. to section on Gas Requirements. 1 2 5 3 4 1 New Stainless Steel Flexible Connector - Use 4 Black Iron Pipe only if allowed by local codes (Use Design Shorter than 20¡fl (6.1 m) - Use 3/8¡– pipe A.G.A. Certified Connector) Longer than 20¡fl (6.1 m) - Use 1/2¡– pipe 2 1/8¡– N.P.T. Pipe Plug 5 3/8¡– N.P.T. Gas Connection (for checking inlet gas pressure) 3 Equipment Shut-Off Valve-Installed within 6¡fl (1.8 m) of dryer 29
  • 31. 6 ELECTRICAL REQUIREMENTS FOR ELECTRIC DRYERS CONNECTING ELECTRIC DRYERS ! WARNING: To help prevent fire, electric shock, serious injury or death, the wiring and grounding must conform to the latest edition of the National Electrical Code, ANSI/NFPA 70 and all applicable local regulations. Please contact a qualified electrician to check your home’s wiring and fuses to ensure that your home has adequate electrical power to operate the dryer. Electrical Requirements for Electric Models Only ! WARNING: To reduce the risk of fire, electric shock, or injury to persons when using this appliance, follow basic precautions, including the following: • This dryer must be connected to a grounded • If branch circuit to dryer is 15 ft. (4.5 m) metal, permanent wiring system, or an or less in length, use UL (Underwriters equipment- rounding conductor must be run Laboratories) listed No.-10 AWG wire with the circuit conductors and connected (copper wire only), or as required by local to the equipment-grounding terminal or lead codes. If over 15 ft. (4.50 m), use UL-listed on the dryer. Failure to do so can result in fire, No.-8 AWG wire (copper wire only), or as explosion, or death. required by local codes. Allow sufficient • The dryer has its own terminal block that slack in wiring so dryer can be moved from must be connected to a separate 240V AC its normal location when necessary. Failure 50-Hertz, single-phase circuit, fused at 30 to do so can result in fire, explosion, or death. amperes (the circuit must be fused on both • The power cord (pigtail) connection between sides of the line). ELECTRICAL SERVICE wall receptacle and dryer terminal block FOR THE DRYER SHOULD BE OF THE IS NOT supplied with dryer. Type of pigtail MAXIMUM RATE VOLTAGE LISTED ON THE and gauge of wire must conform to local NAMEPLATE. DO NOT CONNECT DRYER TO codes and with instructions on the following 110-, 115-, OR 120-VOLT CIRCUIT. Heating pages. Failure to follow these instructions can elements are available for field installation result in fire, explosion, or death. in dryers which are to be connected to an • A 4-wire connection is required for all mobile electrical service of a different voltage than and manufactured home installations, as that listed on the rating plate. Failure to follow well as all new construction after January these instructions can result in fire, explosion, 1, 1996. A 4-wire connection must be used or death. where local codes do not permit grounding through the neutral wire. Failure to do so can result in fire, explosion, or death. Special Electrical Requirements for Mobile or Manufactured Homes ! WARNING: To reduce the risk of fire, electric shock, or injury to persons when using this appliance, follow basic precautions, including the following: • Any installation in a manufactured or mobile • A 4-wire connection is required for all mobile home must comply with the Manufactured and manufactured home installations, as well Home Construction and Safety Standards as all new construction after January 1, 1996. Title 24 CFR, Part 32-80 or Standard CAN/ Failure to do so can result in fire, explosion, or CSA0Z240 MH and local codes and ordinances. death. 30
  • 32. WARNING ' 31
  • 33. WARNING ' 32
  • 34. WARNING 33
  • 35. WARNING 34
  • 36. 35
  • 37. 36
  • 38. 7 ELECTRICAL REQUIREMENTS FOR GAS DRYERS 240 Volt, 50 Hertz, 60 Hertz, with 3-Prong Grounding Plug Following are additional instructions regarding electrical connections and requirements for gas dryers. WARNING: The wiring and grounding must conform to the latest edition of the National Electrical Code, ANSI/NFPA 70, or the Canadian Electrical Code, CSA C22.1, and all applicable local regulations. Please contact a qualified electrician to check your home's wiring and fuses to ensure that your home has adequate electrical power to operate the dryer. Failure to do so can result in fire or electric shock. Electrical Requirements for Your Dryer: a) Please note that the wiring diagram is provided inside the dryer control hood. Label all wires prior to disconnection when servicing the dryer, because wiring errors can cause serious injury to you and your dryer. b) Your dryer is designed to be used on a separate branch, polarized, three-wire, effectively grounded, 240 Volt, 50 Hertz, AC (alternating current) circuit protected by a 17 Ampere fuse, equivalent fuse or circuit breaker. c) Use separately fused circuits for washers and STANDARD 240V Volt, 50 Hertz, 3-WIRE dryers, and DO NOT operate a washer and a EFFECTIVELY GROUNDED CIRCUIT dryer on the same circuit. 1 L1 WARNING 2 Ground • Do not overload the circuit by operating 3 Neutral Side 4 Round Grounding Prong other appliances on the same circuit 5 Neutral when this appliance is operating, by using an extension cord to connect the a) The dryer has a three-prong plug to help guard dryer to the power source, or by using against shock. The plug should be plugged any adapter to allow additional cords to directed into a properly grounded three-prong connect to the same outlet. receptacle that is rated 240Volts AC (alternating • Failure to do so can result in fire or current) 17 Amps. This plug, in order to be electric shock. properly and fully effective, must be plugged into a properly installed outlet that is grounded in accordance with all local codes and ordinances. b) The dryer must be grounded in order to reduce WARNING the risk of electric shock, including a • Do not modify the plug provided with malfunction or breakdown. the dryer. If it does not fit the outlet in c) If your laundry room does not meet the your laundry room, a proper outlet will specifications required by this manual, or if you need to be installed in your laundry are uncertain whether or not your laundry room room by a qualified service person or meets these specifications, please have a company. qualified service person or company. • Failure to do so can result in fire or Review your laundry room’s electrical supply for electric shock. any problems. 37
  • 39. 8 GAS REQUIREMENTS AND INSTRUCTIONS Following are important instructions and information concerning the requirements for the gas supply and service for gas dryers. IMPORTANT WARNING: The gas supply and service for a gas dryer must comply with all local codes and ordinances. In the absence of any local codes or ordinances in your area, the gas supply and service for your gas dryer must comply with the latest edition of the National Fuel Gas Code, ANSI Z223.1/NFPA 54(USA) or Canadian gas installation code CAS B149.1(Canada). 1. Gas supply requirements: Liquefied Petroleum 5. If using a rigid pipe, the rigid pipe should be 1/2 (L.P.) Gas (2,500 Btu/ft3 (93.1 MJ/m3)) service inch IPS. If acceptable under local codes and must be provided at 10 + 1.5 in. water column ordinances and when acceptable to your gas pressure. supplier, 3/8 inch approved tubing may be used where lengths are less than 20 feet (6.1 m). 2. Do not attempt to connect the dryer to Liquified Larger tubing should be used for lengths in Petroleum (LP Gas) Gas service without a excess of 20 feet (6.1 m). It is also important that qualified professional. you use pipe joint compound that is insoluble in 3. Isolate the dryer from the gas supply piping LP gas. system by closing its individual manual shut-off 6. To reduce the danger of gas leaks, explosion, and valve during any pressure testing of the gas fire, please follow and observe the following supply system at test pressure equal to or less instructions and WARNINGS. than 1/2 psi (3.45 kPa). • Connect the dryer to the type of gas shown on the 4. Supply Line Requirements. Your laundry room nameplate. must have a rigid gas supply line to your dryer. In the United States, an individual manual shutoff • Use new flexible stainless steel connectors. valve MUST be installed within at least 6 feet • Use Teflon tape and pipe joint compound (1.8 m) of the dryer, in accordance with the insoluble in LP gas on all pipe threads. National Fuel Gas Code ANSI Z223.1 or • Purge gas supply of air and sediment before Canadian gas installation code CSA B149.1. connecting the gas supply to the dryer in order to A 1/8 in. N.P.T. pipe plug must be installed as prevent gas valve contamination. Before shown. tightening connection between gas supply and dryer, purge remaining air until odor of gas is identified. • DO NOT use an open flame to inspect for gas leaks; instead use a non-corrosive leak detection fluid. WARNING WARNING • Do not attempt any disassembly of the • Use a new AGA or CSA approved gas dryer. Any disassembly requires the supply line. attention and tools of an authorized • Install a shut-off valve. and qualified service person or • Securely tighten all gas connections. company. • If connected to LP, have a qualified • Failure to do so can result in person make sure gas pressure does not death,explosion, or fire. exceed 13 in. water column. • Examples of a qualified person include licensed heating personnel, authorized gas company personnel, and authorized service personnel. • Failure to do so can result in death, explosion, or fire. 38
  • 40. 9 EXHAUST REQUIREMENTS AND MAINTENANCE 39
  • 41. NATURAL MULTIPLE VENTING SYSTEM Over sum of area Over sum of area Over sum of area A + B+ C+ D A + B+ C A+B Over area A Exit Inspection Cap * Lg exhaust Duct Diameter: 100mm Use the exhaust duct over the inner diameter of exhaust pipe. Do not use too small inner diameter of exhaust pipe or too long exhaust duct, Because it makes bad ventilation and low drying performance and it will be cause of trouble. Follow the below guide in case of using gathering exhaust duct installed with over 2 duct. Incline the exhaust duct toward exit about an 45 angle when exhaust duct from dryer is connected to main exhaust duct. ( If you don’t make perpendicular connection, airflow is disturbed.) 40
  • 42. FORCED MULTIPLE VENTING SYSTEM Use adjust damper to fit airflow velocity 5m/s at exit Blower Gas (Suction fan) Outdoor Dryer (Exit) Air flow velocity Adjust :5m/s Exhaust duct Damper Exhaust Main duct Exhaust Duct 41
  • 43. Exhaust and Dryer Maintenance Cleaning the Lint Screen 1. Clean the lint filter either before drying each load or after drying each load. Always make sure the WARNING lint filter is clean before starting a new load, • Disconnect the dryer’s electric power because a clogged lint filter may increase drying prior to any cleaning or maintenance. times. • Failure to do so can result in fire or 2. To clean, pull the lint screen straight up and roll electric shock. any lint off the screen with your fingers. Do not rinse or wash screen to remove lint. Push 1. After one year of use, the interior and complete exhaust the lint screen firmly back into place. system of the dryer should be examined and cleaned if necessary. 3. Always ensure the lint screen is firmly secured before running the dryer. Running the dryer with 2. Before one year of use, when drying performance has a loose lint screen may cause overheating and become unsatisfactory, please examine and clean the damage to the dryer and articles being dried. exhaust duct for better drying performance. 3. Check the weather hoods frequently to ensure the 4. Some articles of clothing may shed more lint than dampers are moving freely, that the dampers are not others (towels for example), causing the lint pushed in and that nothing has been set against the screen to fill rapidly. Remove lint from the lint dampers. screen before and after drying these articles, such 4. A qualified service person or company should be used as new towels. to perform this maintenance. 5. In the event lint falls off of the lint screen and 5. A Flexible Metal Vent Kit, available at extra cost, can into the dryer during removal, inspect the exhaust be used to exhaust the dryer when it is placed in hard to hood and remove any lint. reach places. This Kit comes in two pieces, one of 6. Laundry detergent and fabric softener residue can which is attached to the dryer and the other is attached build up on the lint screen, causing longer drying to the wall exhaust outlet. Following attachment of the times. The screen is likely blocked if lint falls off two separate pieces to the dryer and the wall, the dryer the screen. In order to prevent this type of build may be returned to its final position, after which the up, and help ensure proper operation of your two pieces themselves can be connected. dryer, clean the lint screen with a nylon brush 7. Ordinarily, the dryer drum will need no care. Wipe the every six months or, if necessary, more exterior of the dryer as required, and always wipe the frequently. The lint filter can also be washed as exterior of the dryer in the event any detergent, bleach, follows: or other washing products is spilled on the dryer. a) After rolling the lint off of the screen with your 8. Clean the control panel with a damp cloth as fingers, wet both sides of the screen with hot or necessary. Warning: spray pre-wash products may warm water. damage the finish of the control panel. 9. Please clean the lint filter either before drying each b) Wet a nylon brush with hot water and liquid load or after drying each load. detergent and scrub the lint screen with the brush 10. Always make sure the lint filter is clean before to remove the buildup of detergent and fabric starting a new load, because a clogged lint filter may softener. increase drying times. c) After the residue has been removed, rinse screen 11. Annually remove the lint filter and attach it to the with hot water. vacuum duct. See item #2 above. d) After drying the lint screen with a clean towel, 12. Please note that the wiring diagram is provided inside firmly replace the lint screen in your dryer. the dryer control hood. Label all wires prior to disconnection when servicing the dryer, because wiring errors can cause serious injury to you and your dryer. 42
  • 44. 10 DRYER CYCLE PROCESS Default Conditions of operation and termination Drying Cooling Cycle Temp- Dry Display erature Level time Electro- Temp- Default Temp- sensor Control time Control ** WHITES AND HIGH More Dry 50 min Saturation 68±4°C 2 min. 47±5°C COLORS Time PERMANENT MEDIUM More Dry 50 min Saturation 60±4°C 2 min. 47±5°C Dry PRESS PRICE DELICATES Electric Model:52±3°C LOW More Dry 50 min Saturation 2 min. 38±5°C PRICE Gas Model:47±3°C Temperature Control for each cycle MOTOR LOAD HEATER 43
  • 45. 11 COMPONENT TESTING INFORMATION 44
  • 46. 45
  • 47. 46
  • 48. 12 MOTOR DIAGRAM AND SCHEMATIC 47
  • 49. 13 CONTROL LAY - OUT PWB ASSEMBLY DISPLAY LAY-OUT PWB ASSEMBLY LAY-OUT 48
  • 50. 14 WIRING DIAGRAM CAUTION: Label all wires prior to disconnection when servicing controls. Wiring errors can cause improper and dangerous operation. Verify proper Operation after servicing. ELECTRIC DRYER WIRING DIAGRAM 49
  • 51. 15 DIAGNOSTIC TEST 1.This TEST should be used for Factory test /Service test. Do not use this DIAGNOSTIC TEST other than specified. 2.Activating the heater manually with the door open may trip the thermostat attached to the heater, therefore do not activate it manually. (Do not press the door switch to operate the heater while the door is open). Diagnostic test: (display) This program has been added for testing the dryer and detecting errors. Entering the test mode Machine Data Name Button Display Description 1. Entering programming mode Insert service card (card type), Turn on/off toggle switch (Coin type). CARD 2. WHITES COLORS Press the WHITES COLORS button. /COIN Then appears in the display. Entering 3. START Enter the diagnostic test mode. the test mode Push and hold the WHITES COLORS and DELICATES at the same time. 1. Entering programming mode. After that push PERM. PRESS button for 3 times. Push START button. OPL 2. WHITES COLORS Press the WHITES COLORS button. Then appears in the display. 3. START Enter the diagnostic test mode. 1 Pressing the START button cycles to the next test function. Number of times the START Checking point Display button is pressed None LqC 1 1 time Check the version and code of machine. Version and code of machine (All LED on) ELECTRIC TYPE : US:OE CA:OE or CA:Og and gU:XX GAS TYPE : US:Og alternately. OPL machine-Display CA:PE or CA:Pg and gU:XX alternately. XX is the version number 2 times Motor runs. Measured moisture value (70~239) 3 times ELECTRIC TYPE: Heater runs. Current temperature (5~70) Motor + Heater 1 (2700W) (Displays the temperature inside the drum in GAS TYPE: GAS valve runs. ° Celsius.) Motor + Valve ELECTRIC TYPE: Heater runs. Current temperature (5~70) 4 times Motor + Heater 1 +Heater 2 (5400W) (Displays the temperature inside the drum in GAS TYPE: GAS valve runs. ° Celsius.) Motor+Valve LED KEY CHECK Press WHITES COLORS button. Version and code of machine 5 times Press PERM.PRESS button. Press DELICATES button. 6 times Test ends. LqC 1 During check, if the door is open. Door switch dE (Motor Heater Off, Buzzer beeps seven (The door is open. Please close the door times) completely) During check, if the door is closed Test goes back at step 2. Measured moisture value (70~239) (Motor on Heater Off) Note During LqC1 test, if no buttons are pressed for 4 minutes, machine will be turned off automatically. Do not use . 50
  • 52. Test 1 240V Electrical Supply WARNING • When measuring power, be sure to wear insulated gloves to avoid an electric shock. • Failure to follow these instructions can result in death or electric shock. Trouble Symptom No power was applied to controller. (LED, LCD Display off) Measurement Condition With Dryer Power On; connector linked to controller. Check the outlet, is the voltage • Check the fuse or NO 240V AC? circuit breaker. YES BK2 or WH2 YL3 Check if the voltage measured between • Check if power Connector BK2 or WH2- 2 (Black Wire) NO cord is properly Linked to the Controller and YL3- 1 connected. (White Wire) Is 240V? YES 1 Check if the controller wire is disconnected. 2 Check if terminal block and power cord • Reconnect the NO controller. are connected (Check Plug). - Does Power Cord N (Natural) line match to Terminal Center N (Natural) line? YES Replace controIler. 51
  • 53. WARNING 52
  • 54. 53
  • 55. Test 2 Thermistor Test --- Measure with Power Off 54
  • 56. Test 3 Motor Test WARNING • Before measuring resistance, be sure to turn power off, and do voltage discharge. (When discharging, contact the metal plug of power cord with the earth line.) • Failure to follow these instructions can result in death or electric shock. Trouble Symptom Drum does not turn, fan does not blow, and heater does not operate. Measurement Condition Turn the dryer’s power off, then measure resistance. YL3 BL2 • Replace control. Is resistance below 3Ω between connector YL3- 1 (White wire) and BL2- 2 (Brown wire)? YES (Relay check) Measure while door is closed. • Check controller connector. NO • Check if door frame Is resistance below 3Ω between Connector presses door NO switch knob. YL3- 1 (White wire) and BL2- 2 Measure • Check door switch. while door is closed.(Yellow wire)? • Check harness YES connection. Is resistance below 3Ω between Connector • Replace control. BL2- 1 (Yellow wire) and BL2- 2 (Brown wire)? YES (Relay check) • Check controller connector. NO • Replace outlet Is resistance below 1Ω between terminals of • Thermostat. NO (Refer to outlet thermostat attached to blower housing? component) YES • Check idler assembly Does idle switch attached to motor bracket • Drum belt cuts off operate level by drum belt? YES • Drum belt takes off (Not operating lever is normal.) from motor pulley. Is resistance below 1Ω between idler switch • Replace idler NO switch. terminals? YES • Check motor. (Refer to Motor Diagram and Check) • Check if control connector is contacted. 55
  • 57. Test 4 Moisture Sensor WARNING 56
  • 58. Test 5 Door switch test WARNING • Before measuring resistance, be sure to turn power off, and do voltage discharge. (When discharging, contact the metal plug of power cord with the earth line.) • Failure to follow these instructions can result in death or electric shock. Door opening is not sensed. (During operation, when opening door, drum motor and Trouble Symptom Heater run continuously) Door close is not sensed. (Drum motor will not operate. Display will flash at 1/ Measurement Condition Turn the dryer’s power off, then measure resistance. BK2 YL3 Measure while door is closed. Check it resistance is • Door switch below 2500 Ω between YL3- 1 (White wire) and check (Refer to BK2- 2 Connector YES component YL3,BL2 after taking WH1,BL2 out from Controller. testing.) NO • Check lamp. (When Measure while door is open. Check it resistance is opening lamp, 300~60 Ω between YL3- 1 (White wire) and BK2- 2 replace then NO measure again.) (Black wire). Connector YL3,BL2 after taking YL3,BL2 out from controller. • Door switch check (Refer to YES component testing.) YL3 BL2 Measure while door is open. Check it resistance is • Door switch below 1 Ω between BL2- 1 (Yellow wire) and check (Refer to YES component YL3- 1 (White wire) after taking connector YL3,BL2 out from controller. testing.) NO Measure while door is closed. Check it resistance is • Door switch below 1 Ω between BL2- 1 (Yellow wire) and NO check (Refer to YL3- 1 (White wire) after taking connector YL3,BL2 component out from controller. testing.) YES Check hontroller. Check harness-linking connector. 57
  • 59. Test 6 Heater switch test - Electric Type WARNING 58
  • 60. Test 7 GAS valve test - Gas Type WARNING 59
  • 61. 16 ERROR MODE Meaning of Error Codes that LED displays during occurrence or problem. Dryer error code PROBLEM POSSIBLE CAUSE SOLUTION It is displayed when thermistor is opened or shorted Thermistor should be replaced. It is displayed when thermistor temperature have Thermistor should be replaced. increased about 17 degrees for 10 seconds Disconnection of card reader wire. Check the card reader wire. 60
  • 62. 17 CHANGE GAS SETTING (NATURAL GAS, PROPANE GAS) WARNING 61
  • 63. 62
  • 64. 18 DISASSEMBLY INSTRUCTIONS WARNING • Disassemble and repair the unit only after pulling out power plug from the outlet. • Failure to follow these instructions can result in death or electrical shock. CONTROL PANEL ASSEMBLY WARNING • When you disassemble the control panel, be sure to take gloves and careful panel frame’s edge. Failure to do so can cause serious injury. 1. Remove 2 screws on the control panel assembly. 2. Pull the control panel assembly upward and then forward. 3. Disconnct the connectors. 63
  • 65. TOP PLATE WARNING • When you disassemble the top plate, be sure to take gloves and careful plate’s edge. Failure to do so can cause serious injury. 1. Remove 2 screws on the control panel frame. 2. Push the top plate backward forcefully. 3. Lift the plate. 64
  • 66. LOWER COVER 1. Remove 2 screw on the lower cover. 2. Take out of the lower cover. COVER CABINET WARNING • When you disassemble the door switch connector, be sure to take gloves and careful cabinet edge. Failure to do so can cause serious injury. 1. Open the door assembly. 2. Remove 2 screws. 3. Remove 4 screws from the top of cabinet cover. 4. Disconnect the harness of door switch. 5. Disassemble the cover cabinet. 65
  • 67. PANEL FRAME 1. Disconnect the housing of the panel frame. 2. Remove 4 screws on the panel frame. 3. Disassemble panel frame from pulling upside. Push Push LOWER FRAME 1. Disconnect the housing of the panel frame. 2. Remove 4 screw on the panel frame. 3. Disassemble lower frame from pulling forward with pushing down. Push Push 66
  • 68. TUB DRUM [FRONT] 1. Disassemble the top plate. 2. Remove cover cabinet. 3. Disconnect the door lamp and electrode sensor connector. 4. Remove 4 screws. 5. Disassemble the tub drum front. DRUM ASSEMBLY -1 1. Disassemble the top plate. -1 2. Remove the cabinet cover and drum front. -2 3. Loosen belt from motor and idler pulleys. 4. Carefully remove the drum. 67
  • 69. DRYER EXHAUST CHANGE 1. Remove the screw. 2-1. Detach and remove a knockout at the botton, left or right side as desired. (Right side vent not available on gas dryer) , , the order of work. 2-2. Replace it with an 11-inch (28 cm) duct DUCT TAPE connected to the blower housing, and attach the duct to the base. (The side vent kit is available as a service part, # 383EEL9001B.) 3-1. Pre-assemble a 4-inch elbow to a piece of duct. Wrap duct tape around the joint. DUCT TAPE 3-2. Insert the elbow duct assembly through the side opening and connect the elbow to the internal duct. 68
  • 70. FILTER ASSEMBLY 1. Remove the filter. 2. Remove 3 screws. 3. Remove the cover grid. 4. Disconnect the electrode sensor. BLOWER HOUSING 1. Disassemble the top plate. 2. Remove the cabinet cover and drum front. 3. Remove the Drum assembly. 4. Remove 2 screws and cover (air guide). 5. Remove the bolt and washer. 6. Remove the fan. 7. Disconnect the motor clamp and motor. BACK COVER 1. Disassemble the top plate. 2. Remove the cabinet cover and drum front. 3. Remove the drum assembly. 4. Remove 7 screws. 5. Remove the back cover. 69