Lavigne aug11 bsdmag
•
0 gostou•523 visualizações

Article on getting started with FreeNAS 8 for the August issue of BSD Magazine.

Recomendados
Mais conteúdo relacionado
Mais procurados
Semelhante a Lavigne aug11 bsdmag
Semelhante a Lavigne aug11 bsdmag (20)
Mais de Dru Lavigne
Último
Último (20)
Lavigne aug11 bsdmag
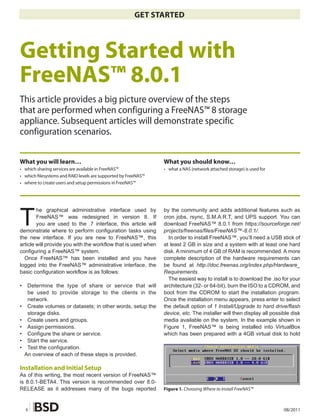
- 1. GET STARTED Getting Started with FreeNAS™ 8.0.1 This article provides a big picture overview of the steps that are performed when configuring a FreeNAS™ 8 storage appliance. Subsequent articles will demonstrate specific configuration scenarios. What you will learn… What you should know… • which sharing services are available in FreeNAS™ • what a NAS (network attached storage) is used for • which �lesystems and RAID levels are supported by FreeNAS™ • where to create users and setup permissions in FreeNAS™ T he graphical administrative interface used by by the community and adds additional features such as FreeNAS™ was redesigned in version 8. If cron jobs, rsync, S.M.A.R.T, and UPS support. You can you are used to the .7 interface, this article will download FreeNAS™ 8.0.1 from https://sourceforge.net/ demonstrate where to perform configuration tasks using projects/freenas/files/FreeNAS™-8.0.1/. the new interface. If you are new to FreeNAS™, this In order to install FreeNAS™, you’ll need a USB stick of article will provide you with the workflow that is used when at least 2 GB in size and a system with at least one hard configuring a FreeNAS™ system. disk. A minimum of 4 GB of RAM is recommended. A more Once FreeNAS™ has been installed and you have complete description of the hardware requirements can logged into the FreeNAS™ administrative interface, the be found at http://doc.freenas.org/index.php/Hardware_ basic configuration workflow is as follows: Requirements. The easiest way to install is to download the .iso for your • Determine the type of share or service that will architecture (32- or 64-bit), burn the ISO to a CDROM, and be used to provide storage to the clients in the boot from the CDROM to start the installation program. network. Once the installation menu appears, press enter to select • Create volumes or datasets; in other words, setup the the default option of 1 Install/Upgrade to hard drive/flash storage disks. device, etc. The installer will then display all possible disk • Create users and groups. media available on the system. In the example shown in • Assign permissions. Figure 1, FreeNAS™ is being installed into VirtualBox • Configure the share or service. which has been prepared with a 4GB virtual disk to hold • Start the service. • Test the configuration. An overview of each of these steps is provided. Installation and Initial Setup As of this writing, the most recent version of FreeNAS™ is 8.0.1-BETA4. This version is recommended over 8.0- RELEASE as it addresses many of the bugs reported Figure 1. Choosing Where to Install FreeNAS™ 6 08/2011
- 2. Getting Started with FreeNAS™ 8.0.1 the operating system and a 20GB virtual disk to provide AFP data storage. Typically, one would install FreeNAS™ onto FreeNAS™ uses Netatalk to provide sharing services to a USB stick – be sure not to install onto a disk drive as Apple clients. This type of share is a good choice if all of the operating system will take over that disk, making it your computers run Mac OS X. unavailable for data storage, regardless of the disk’s size. CIFS Once you select where to install FreeNAS™, you’ll FreeNAS™ uses Samba to provide the SMB/CIFS sharing receive a warning message reminding you that any service. This type of share is accessible by Windows, Mac existing data on the destination media will be destroyed. OS X, Linux, and BSD computers, but it is slower than Once you confirm your selection, the installer will extract an NFS share. If your network contains only Windows the image to the device and indicate when you can reboot. systems, this is a good choice. The entire installation takes only a few minutes. The first time you boot into FreeNAS™, make sure that NFS it is connected to the network. It will automatically try to This type of share is accessible by Mac OS X, Linux, BSD, obtain an IP address from a DHCP server and will indicate and professional/enterprise versions of Windows. It is a its IP address, as seen Figure 2. good choice if there are many different operating systems In this example, typing http://10.0.2.15 into a web in your network. browser will access the FreeNAS™ graphical login. Input admin for the username and freenas for the password. You FTP should then have access to the graphical configuration This service provides fast access from any operating interface shown in Figure 3. system, using a cross-platform FTP and file manager Since the initial FreeNAS™ password is a known value, client application such as Filezilla. FreeNAS™ supports you should change it by going to Account->My Account-> encryption and chroot for FTP. Change Password. SSH Determining Which Type of Share or Service to This service provides encrypted connections from any Configure operating system using SSH command line utilities or the FreeNAS™ supports several types of shares and sharing graphical WinSCP application for Windows clients. services for providing storage data to the clients in a network. It is recommended that you select only one type iSCSI to configure in order to prevent possible conflicts between FreeNAS™ uses istgt to export disk drives that are different types of shares. The type of share you choose accessible by clients running iSCSI initiator software. will depend upon the types of operating systems in your network, your security needs, and your expectations Creating Volumes and Datasets for network transfer speeds. You can choose from the When configuring the data storage disks, FreeNAS™ following types of shares and services: supports the following: Figure 2. Determining the IP Address Figure 2. FreeNAS™ Graphical Con�guration Interface www.bsdmag.org 7
- 3. GET STARTED • The creation of UFS and ZFS volumes. • create a new volume • The ability to import existing UFS, NTFS, MSDOS, • create a new ZFS dataset and EXT2 volumes. • create a new ZFS volume (zvol) • The ability to create or import existing UFS gstripe • import a volume (RAID0), gmirror (RAID1), and graid3 (RAID3) • auto import a volume configurations. • The ability to create or import existing ZFS RAIDs 0, If a ZFS volume has been created, it will contain 6 1, 5, 10, 60 and RAIDZ1 configurations. configuration icons specific to that volume. They allow • The ability to create ZFS datasets. Each dataset you to (reading from left to right): can be assigned its own user/group, compression level, and disk quota, allowing for complex sharing • destroy the volume and all of its data scenarios. • edit ZFS options such as compression level and disk • The ability to create ZFS zvols. A zvol allows a portion quota of a volume to be exported as an iSCSI device extent • change permissions to the volume rather than having to export the entire raw disk. • create a ZFS snapshot • The ability to create ZFS snapshots which can be • view the disks that comprise the volume; for each disk used to restore the volume to a specific point in you can view its device name, serial number, device time. ID, tranfer mode, standby mode, power management, • The ability to prepare a ZFS volume (export) so that it acoustic level, and S.M.A.R.T options can be removed and installed into another system. • export the ZFS volume All disk and volume management can be performed in More information about volume management can be Storage->Volumes. Figure 4 shows a screenshot of this found at http://doc.freenas.org/index.php/Volumes. menu on a system that has one ZFS volume already created. Creating Users and Groups In the tree menu in the left frame, one can: FreeNAS™ supports a variety of user access scenarios: • change the permissions of an existing volume • the use of an anonymous or guest account that • auto import an existing software RAID everyone in the network uses to access the stored • create a new UFS or ZFS volume with or without data RAID • the creation of individual user accounts where each • create a ZFS dataset (requires a ZFS volume to be user has access to their own ZFS dataset created first) • the addition of individual user accounts to groups • import a disk containing an existing filesystem where each group has access to their own volume or • view all configured volumes ZFS dataset • support for existing accounts through the OpenLDAP Several configuration icons appear in the right frame. or Active Directory directory service The top 5 icons allow you to (from left to right): When configuring your FreeNAS™ system, you need to decide how many users will be accessing the system and if all of the data should be accessible to all of the users. For example, if your home network uses FreeNAS™ to store photos and home videos, you may decide to create a guest account that is used by all family members. This is very easy to setup as it only requires the creation of one volume and one user account. If you require a more complex scenario you will need to create the required number of volumes/ datasets and user accounts. User accounts are created in Account->Users->Add Figure 4. Volume Management Screen User. This opens the screen shown in Figure 5. 8 08/2011
- 4. Getting Started with FreeNAS™ 8.0.1 When creating a user account, keep the following points To do so, go to Storage->Volumes->View All Volumes. in mind: Click the permissions icon for the volume or dataset that you wish to configure. This will open the screen shown in • the user ID will be automatically generated and can Figure 6. be left as-is Check that the owner for both user and group is • the username can be descriptive (e.g. guest, anony- correct and review the mode to ensure that the desired mous, ftp) or should match an existing username on a permissions are checked. FreeNAS™ supports both Unix client operating system ACLs, which are understood by all operating systems, • the primary group should be left blank as this will and Windows ACLs which add a superset of permissions create a group with the same name as the username; to the Unix ACLs but are only understood by Windows if you wish to add users to groups in order to manage systems. permissions, use Account->Groups to create custom The only time you should change to Windows ACLs groups and add existing users as members of your is when your entire network is comprised of Windows custom groups operating systems. • permissions will not work if you do not change the You should check the set permission recursively box to default home directory; the home directory needs to ensure that your selected permissions are inherited by all be changed to the path of the volume or dataset that subdirectories within the volume/dataset. you wish the user to have access to (e.g. /mnt/volume1 in the example shown in Figure 4) Creating Shares and Configuring Services • the shell can be left as-is unless the user will be Once your volumes have been configured with logging in and has a shell preference permissions, you are ready to configure the type of share • the full name can either be a description (e.g. or service that you determine is suitable for your network. anonymous access) or the user’s full name The locations within the administrative interface and the • if the user is to have login access, input and confirm documentation for setting the various types of shares and their password; otherwise, check the box to disable services are as follows: logins • AFP shares are configured in Sharing->AFP Shares- Setting Permissions >Add AFP Share and are described at http:// Once you have created your volumes/datasets and users/ doc.freenas.org/index.php/AFP_Shares groups, you need to associate each volume or dataset • CIFS shares are configured in Sharing->CIFS with the users/groups that will have permission to the data Shares->Add CIFS Share and are described at http:// stored on that volume/dataset. doc.freenas.org/index.php/CIFS_Shares Figure 5. Creating a User Account Figure 6. Setting Permissions www.bsdmag.org 9
- 5. GET STARTED messages. If everything appears to be working, try to make a connection to the service from a client system. For example, use Windows Explorer to try to connect to a CIFS share, use an FTP client such as Filezilla to try to connect to an FTP share, or use Finder on a Mac OS X system to try to connect to an AFP share. If the service starts correctly and you can make a connection but receive permissions errors, check that the user has permissions to the volume/dataset being accessed. Summary This article described the basic workflow when configuring a FreeNAS™ system. It demonstrated how to: install version 8.0.1, determine the type of sharing service that is appropriate for your network’s needs, create volumes and datasets to manage storage, create users and groups to manage permissions, and configure and test a sharing service. The next article in this series will demonstrate some Figure 7. Starting the Service common configuration scenarios. • NFS shares are configured in Sharing->NFS Shares-> Add NFS Share and are described at http:// doc.freenas.org/index.php/NFS_Shares • the FTP service is configured in Services->FTP and is described at http://doc.freenas.org/index.php/FTP • the SSH service is configured in Services->SSH and is described at http://doc.freenas.org/index.php/SSH • the iSCSI service is configured in Services->iSCSI and is described at http://doc.freenas.org/index.php/ ISCSI Starting Services and Testing Your Configuration Once you have configured your share or service you will need to start its associated service in order to implement your configuration. Before doing so, you should enable console messages within the administrative interface so DRU LAVIGNE that you can view any error messages that occur when Dru Lavigne is author of BSD Hacks, The Best of FreeBSD starting the service. To do so, go to System->Settings-> Basics, and The De�nitive Guide to PC-BSD. As Director of Advanced, check the box Show console messages in the Community Development for the PC-BSD Project, she leads the footer (Requires UI reload), and click OK. Refresh your documentation team, assists new users, helps to �nd and �x browser and a text console will appear at the bottom of bugs, and reaches out to the community to discover their needs. your screen. She is the former Managing Editor of the Open Source Business Then, go to Services->Control Services which will open Resource, a free monthly publication covering open source and the screen shown in Figure 7. the commercialization of open source assets. She is founder and To start a service, click its red OFF button. After a second current Chair of the BSD Certi�cation Group Inc., a non-pro�t or so, it will change to a blue ON, indicating that the organization with a mission to create the standard for certifying service has been enabled. Watch the console messages BSD system administrators, and serves on the Board of the as the service starts to determine if there are any error FreeBSD Foundation. 10 08/2011