

Recomendados
Mais conteúdo relacionado
Destaque
Destaque (18)
Semelhante a Airliner Presentation
Semelhante a Airliner Presentation (20)
Último
Último (20)
Airliner Presentation
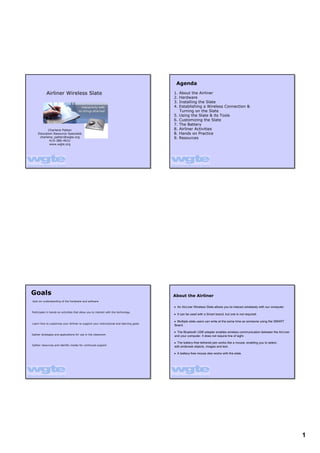
- 1. Agenda Airliner Wireless Slate 1. About the Airliner 2. Hardware 3. Installing the Slate 4. Establishing a Wireless Connection & Turning on the Slate 5. Using the Slate & its Tools 6. Customizing the Slate 7. The Battery Charlene Patten 8. Airliner Activities Education Resource Specialist 8. Hands on Practice charlene_patten@wgte.org 9. Resources 4193804631 www.wgte.org Goals About the Airliner Gain an understanding of the hardware and software • An AirLiner Wireless Slate allows you to interact wirelessly with our computer. Participate in handson activities that allow you to interact with the technology • It can be used with a Smart board, but one is not required. • Multiple slate users can write at the same time as someone using the SMART Learn how to customize your Airliner to support your instructional and learning goals Board. • The Bluetooth USB adapter enables wireless communication between the AirLiner Gather strategies and applications for use in the classroom and your computer. It does not require line of sight. • The batteryfree tethered pen works like a mouse, enabling you to select, Gather resources and identify modes for continued support edit anderase objects, images and text. • A batteryfree mouse also works with the slate. 1
- 2. Front View Back View Customizable Connect Button Function Buttons Power Button Pen Storage Battery Charging Indicator Power Indicator Workspace Installing the USB adapter driver Installing the Slate 1. Make sure the slate’s battery is charged. 2. The first time you create a connection between the AirLiner and your computer, it is helpful to position the slate as close to your computer as possible and to ensure that there is a direct, • Install the battery unobstructed line of sight between the slate and the Bluetooth USB adapter. Move or turn off equipment such as a microwave or because they can interfere. • Recharge the Battery • Install Notebook Software 3. To enable the wireless connection, you must install the Bluetooth USB adapter’s driver. Do not insert the Bluetooth USB adapter into a USB port until the software asks you to do so during the installation • Install Underlay process. • Install antislip feet 4. First, insert the Bluetooth USB Adapter Installation CD into your computer. 5. The installation should start automatically. If it doesn’t, select Start>Run and type x:Setup.exe ﴾where x is the CD Drive﴿, and press Enter. 6. Follow the installation prompts. 7. When the box is displayed saying “No Bluetooth device was detected…” insert the USB Adapter. If the Windows Found New Hardware wizard pop up, close it. 8. Click the Finish button at the end of the installation. A Bluetooth places icon will appear on your desktop and in your task tray. 2
- 3. Establishing a Wireless Connection & Turning on the Slate 4. When the Welcome box appears, choose the 2nd Creating a Connection radio button, “I want to find a specific Bluetooth device…” Between the AirLiner and Your Computer 5. Click Next. 1. Right click on the Bluetooth icon in the task tray and choose Bluetooth Setup Wizard. 2. Turn on the slate by pressing the power button in the top left corner. 3. Press the Connect button on the back. The power indicator flashes quickly, indicating that the slate is in discovery mode. 8. When this box appears Use the slate’s pen or 6. Select the SMART Wireless Slate with one click. mouse to click on the “Click here” button. 7. Click Next. 9. The power indicator on the slate turns solid blue to indicate connection. The Bluetooth icon in the system tray is now green, instead of white. If you are unable to create a wireless connection within 3 minutes, the slate turns off. 3
- 4. Power Indicator Power Indicator Status Let's Connect! Steady Blue The slate is active, but the pen tip, side switch, mouse buttons and fuction buttons aren't in use. Green The slate is active, and either the pen tip, a side switch, a mouse button or a function button is in use. Slowly Flashing Blue The battery has a low charge and needs to be recharged. Quickly Flashing Blue The slate is attempting to establish a Bluetooth wireless connection. Off Off Using the Slate & its Tools Pointing • Pointing • EyeHand Coordination The workspace is a mapped representation of your computer screen and every point on the workspace corresponds exactly to one point on the display screen. Wherever you place the pen on the workspace, the pointer jumps to the corresponding point on the screen. 4
- 5. EyeHand Coordination Customizing the Slate Gerry Davis, NWOET • Customize the Pen • Customize the Function Buttons • Customize the Tool Strip & Underlay Customize the Pen 5. Select the desired functions for each switch. Options include: Print page, Next page, Previous page, Clear screen, Right click, Middle click, Floating 1. Start the Smart Board software Control Panel. mouse, keyboard, Floating tools Notebook software, Screen capture toolbar, 2. Click SMART Board Settings. Pen, Eraser, Disabled. 3. Click the AirLiner icon. 4. Select Pen and Button Settings from the drop down menu. 6. If you select Pen or Eraser, click the Customize button to select the attributes for your pen or the size of your eraser. 5
- 6. Customize the Function Buttons Pen Customize Options Eraser Customize Options There are two customizable function buttons located at the top of the slate. The Left button is set to start Floating Tools and the Right button to start Notebook software 1. Start the Smart Board software Control Panel. 2. Click SMART Board Settings. 3. Click the AirLiner. 4. Then select Pen and Button Settings from the drop down menu. 5. Select the desired functions for each button. Options include: Print page, Next page, Previous page, Clear screen, Rightclick, Floating mouse, Keyboard, Floating 7. Click OK. tools, Notebook software, Screen capture 8. Click OK. toolbar, Disabled. 9. Close the Control Panel. 6. Click OK. 7. Close the Control Panel. Customizing the Underlay & Tool Strip Practice Underlay A paper underlay, installed in the workspace, allows you to select customizable tools and start programs by pressing the icons on the tool strip with the pen. You can customize and print new underlays. • Customize the Pen Buttons • Customize the Function Buttons 1. Start the Smart Board software Control Panel. • Restore to Defaults 2. Click SMART BoardSettings. 3. Choose AirLiner. 4. Select Display Properties from the drop down menu. 5. Select the underlay template in the Select a color scheme list. 6. Click the Customize and Print button. 7. Customize your underlay: background properties, colors, transparency, and position the toolbar strip. 6
- 7. Tool Strip The next time you open the Customize and Print Underlays box, your latest To customize the icons in the toolbar, click the Configure Icon Strip button. configuration choices appear. Select items in the Available Tools area and click the Add button • To remove an item, select it in the Current Toolbar area and then click the Remove button. To install an underlay • Use the Move Up and Move Down buttons to rearrange the icons. 1. Release the locking sliders on the sides of the slate by • Click the Browse button to select an executable file from your hard drive, ﴾ie Word.exe﴿. • Click the Link to website button to add a website link to your underlay. 2. Then lift the plastic cover away from slate by the upper edges. 3. After positioning the new underlay, insert the plastic tabs on the overlay’s lower edge into their slots on the slate. 4. Lower the overlay. 5. Finish by pushing the sliders towards the bottom of the slate. 9. Click OK. 10. Click the Print button to print your customized underlay. 11. Click the Close button. The Control Panel saves your most recent underlay. The Battery • You can also check the battery status using the Smartboard software. 1. Start the Smart board software control panel. 2. Select Smartboard settings. • A new, fully charged battery lasts for approximately 25 hours of constant use. 3. Click the AirLiner slate. The battery status is displayed in the bottom right corner: Green=fully charged; Partial Red: low charge; Green Arrows: recharging. • The AirLiner slate continues to draw a small amount of battery charge, even when it is turned off. • When the battery charge falls below 20% a notification area balloon tip appears indicating you should connect the slate to a power outlet. • When the AirLiner slate battery charge is nearly empty, the power indicator on the slate slowly flashes blue. 7
- 8. • Charging indicator displays the battery status when the power adapter is connected: • Recharge the battery as often as possible so that it does not lose all of its charge. Green=charged Orange=recharging. • If the AirLiner slate battery charge is nearly empty and you do not connect the slate to a power • A builtin protection circuit prevents the battery from overcharging. outlet, you risk draining the battery completely. A battery that has lost all of its charge can no longer be recharged. If the charging indicator remains off when you connect the slate to a power • If you will not be using the slate for an extended period of time ﴾one month or outlet then the battery is completely drained and must be replaced longer﴿, fully recharge the battery, and then remove it from the slate. • The time required to fully recharge the battery varies. If the battery is low, it takes approximately five to six hours to fully recharge the battery. • To recharge the battery, insert the power adapter’s round connector into the DC IN receptacle located on the right side of the slate. Insert the power adapter’s prongs into a power outlet. You do not have to turn on the AirLiner slate to recharge the battery. • Charging indicator displays the battery status Airliner Activities Airliner Instructional Strategies Middle School You can also move around the classroom, Math and individual students can use the slate to Science participate in or take control of the lesson. You can present a concept to the whole Language Arts class and then transition seamlessly into group instruction. High School The wireless slate connects to a computer, Language Arts allowing both teachers or students to control lessons by highlighting material and launching applications. The wireless slate supports simultaneous Science interaction, so multiple slate users can write Social Studies notes at the same time someone is using the SMART Board interactive whiteboard. 8
- 9. Resources www.wgte.org In Your Classroom... K12 Education Troubleshooting AND Activities Technology & Teaching Resource How can you integrate the Airliner into your current lessons? http://www2.smarttech.com/st/enUS/Products/AirLiner/default.htm http://www2.smarttech.com/st/enUS/Support/Airliner/WS100.htm? • In your groups, come up with 3 specific ways that you can use the Airliner productFamily=Airliner&modelVersion=WS100&type=Troubleshooting% within your classroom. 20articles&command=ShowAll • Choose one out of the three. http://www.willard.k12.mo.us/co/tech/smartbrd.htm • Be prepared to share out. http://technology.usd259.org/resources/whiteboards/smartlessons.htm Questions? Charlene Patten Education Resource Specialist 1270 South Detroit Toledo, OH 43614 4193804631 www.wgte.org 9
- 10. Attachments WGTE hand eye coordination.notebook TUT_Airliner_practice[1].notebook 10th12thGradeEconomicsSupplyandDemand.notebook 3rd5thGradeLanguageArtsAdverbs.notebook 3rd6thGradeScienceWaterCycleInABag.notebook 6th8thAnglesLesson.notebook HighSchoolScienceClassifyingVertibrates.notebook 12th_grade_Language_Arts_Magical_Realism.notebook