SlideShare uma empresa Scribd logo
1 de 118
Baixar para ler offline
104853 / 118

OXYMAT 61

The Oxygen Analyzer For Standard Applications
7MB2001

Manual

09/01
The reproduction, transmission or use of this document or its contents is
not permitted without express written authority. Offenders will be liable for
damages. All rights created by the granting of patents or registration of a
design are reserved.Technical data subject to change without notice
Weitergabe sowie Vervielfältigung dieser Unterlage, Verwertung und
Mitteilung ihres Inhaltes nicht gestattet, soweit nicht ausdrücklich
zugestanden.
Zuwiderhandlungen verpflichten zu Schadenersatz. Alle Rechte
vorbehalten, insbesondere für den Fall der Patenterteilung oder
GM-Eintragung. Technische Änderungen vorbehalten.
Toute communication ou reproduction de ce document, toute exploitation
ou communication de son contenu sont interdites, sauf autorisation
expresse. Tout manquement à cette règle est illicite et expose son auteur
au versement de dommages et intérêts. Tours nos droits sont réservés
pour le cas de la délivrance d’un brevet ou celui de l’enregistrement d’un
modèle d’utilité.Modifications techniques sont réservées
La divulgación y reproducción de este documento asi como el
aprovechamiento de su contenido, no están autorizados, a no ser que se
obtenga el consentimiento expreso, para ello. Los infractores quedan
obligados a la indemnización por daños y perjucios. Se reservan todos los
derechos, en particular para el caso de concesion de Patente o de Modelo
de Utilidad.
Salvo modificaciones ténicas
La trasmissione a terzi e la riproduzione di questa documentazione,
cosiccome lo sfruttamento del suo contenuto non è permesso, se non
autorizzato per iscritto. Le infrazioni comporteranno una richiesta di danni.
Tutti i diritti sono riservati, in particolare nel caso di brevetti.Modifiche
tecniche possibili.

ULTRAMAT, OXYMAT, SIPAN
are Siemens registered trademarks.
All other product or system names are (registered) trademarks of their
respective owners and must be treated accordingly.
According to the German law on units in measuring technology, data in
inches only apply to devices for export.
ULTRAMAT, OXYMAT, SIPAN
sind Marken von Siemens.
Die übrigen Bezeichnungen in diesem Handbuch können Marken sein,
deren Benutzung durch Dritte für deren Zwecke die Rechte der Inhaber
verletzen können.
Die Angaben in Zoll (inch) gelten gemäß dem Gesetz über Einheiten im
Meßwesen” nur für den Export.
ULTRAMAT, OXYMAT, SIPAN
sont des marques déposées de Siemens.
D’autres dénominations utilisées dans ce document peuvent également
être des marques déposées dont l’utilisation par des tiers à leurs propres
fins peut enfreindre les droits des propriétaires desdites marques.
ULTRAMAT, OXYMAT, SIPAN
son marcas registradas de Siemens.
Las otras designaciones que figuran en este documento puenden ser
marcas cuya utilización por terceros para sus propios fines puede violar
los derechos de los proprietarios de dichas marcas.
Conforma a la ”Ley sobre las unidades de medida”, las dimensiones en
pulgadas sólo son válidas para la exportación.
ULTRAMAT, OXYMAT, SIPAN
sono marchi registrati Siemens.
Le denominazioni di altri prodotti menzionati in questa documentazione
possono essere marchi il cui uso da parte di terzi può violare i diritti di
proprietà.
Conformemente alla ”Legge sulle unità di misura” i dati in pollici valgono
soltanto per l’esportazione.
Contents
Information for the User . . . . . . . . . . . . . . . . . . . . . . . . . . . . . . . . . . . . . . . . . . . . . . 1- 1
1.1

Information for our Customers . . . . . . . . . . . . . . . . . . . . . . . . . . . . . . . . . . . . . 1--2

1.2

General Information . . . . . . . . . . . . . . . . . . . . . . . . . . . . . . . . . . . . . . . . . . . . . . 1--2

1.3

Notes on Using this Manual . . . . . . . . . . . . . . . . . . . . . . . . . . . . . . . . . . . . . . . 1--3

1.4

Danger Information . . . . . . . . . . . . . . . . . . . . . . . . . . . . . . . . . . . . . . . . . . . . . . 1--3

1.5

Approved Use . . . . . . . . . . . . . . . . . . . . . . . . . . . . . . . . . . . . . . . . . . . . . . . . . . . 1--4

1.6

Qualified Personnel . . . . . . . . . . . . . . . . . . . . . . . . . . . . . . . . . . . . . . . . . . . . . . 1--4

1.7

Warranty Information . . . . . . . . . . . . . . . . . . . . . . . . . . . . . . . . . . . . . . . . . . . . . 1--5

1.8

Supply and Delivery . . . . . . . . . . . . . . . . . . . . . . . . . . . . . . . . . . . . . . . . . . . . . . 1--5

1.9

Standards and Regulations . . . . . . . . . . . . . . . . . . . . . . . . . . . . . . . . . . . . . . . 1--5

1.10

Conformity Declaration . . . . . . . . . . . . . . . . . . . . . . . . . . . . . . . . . . . . . . . . . . . 1--6

Installation Guidelines . . . . . . . . . . . . . . . . . . . . . . . . . . . . . . . . . . . . . . . . . . . . . . . . 2- 1
2.1

Safety Information . . . . . . . . . . . . . . . . . . . . . . . . . . . . . . . . . . . . . . . . . . . . . . . 2--2

2.2

Installation Requirements . . . . . . . . . . . . . . . . . . . . . . . . . . . . . . . . . . . . . . . . . 2--2

2.3

Gas Connections and Internal Gas Paths . . . . . . . . . . . . . . . . . . . . . . . . . . . 2--3

2.3.1

Sample Gas Line . . . . . . . . . . . . . . . . . . . . . . . . . . . . . . . . . . . . . . . . . . . . . . . . 2--3

2.3.2

Reference Gas Line . . . . . . . . . . . . . . . . . . . . . . . . . . . . . . . . . . . . . . . . . . . . . 2--4

2.3.3

Pressure Sensor . . . . . . . . . . . . . . . . . . . . . . . . . . . . . . . . . . . . . . . . . . . . . . . . 2--4

2.4

Gas Conditioning . . . . . . . . . . . . . . . . . . . . . . . . . . . . . . . . . . . . . . . . . . . . . . . . 2--5

2.5

Electric Connection . . . . . . . . . . . . . . . . . . . . . . . . . . . . . . . . . . . . . . . . . . . . . . 2--6

2.5.1

Power Supply Connection . . . . . . . . . . . . . . . . . . . . . . . . . . . . . . . . . . . . . . . . 2--6

2.5.2

Connection of Signal Cables . . . . . . . . . . . . . . . . . . . . . . . . . . . . . . . . . . . . . . 2--7

2.5.3

Pin Assignments . . . . . . . . . . . . . . . . . . . . . . . . . . . . . . . . . . . . . . . . . . . . . . . . 2--9

2.5.4

Example of Autocal Circuit . . . . . . . . . . . . . . . . . . . . . . . . . . . . . . . . . . . . . . . 2--11

2.6

Dimensional Drawings . . . . . . . . . . . . . . . . . . . . . . . . . . . . . . . . . . . . . . . . . 2--12

Technical Description . . . . . . . . . . . . . . . . . . . . . . . . . . . . . . . . . . . . . . . . . . . . . . . . 3- 1
3.1

Application . . . . . . . . . . . . . . . . . . . . . . . . . . . . . . . . . . . . . . . . . . . . . . . . . . . . . 3--2

3.2

Design . . . . . . . . . . . . . . . . . . . . . . . . . . . . . . . . . . . . . . . . . . . . . . . . . . . . . . . . . 3--3

3.3

Communications Interface . . . . . . . . . . . . . . . . . . . . . . . . . . . . . . . . . . . . . . . . 3--4

3.4

Mode of Operation . . . . . . . . . . . . . . . . . . . . . . . . . . . . . . . . . . . . . . . . . . . . . . . 3--5

3.5

Technical Data . . . . . . . . . . . . . . . . . . . . . . . . . . . . . . . . . . . . . . . . . . . . . . . . . . 3--6

3.6

Reference Gases, Zero Error . . . . . . . . . . . . . . . . . . . . . . . . . . . . . . . . . . . . . 3--7

3.7

Materials in the Sample Gas Path . . . . . . . . . . . . . . . . . . . . . . . . . . . . . . . . . 3--8
Start-up . . . . . . . . . . . . . . . . . . . . . . . . . . . . . . . . . . . . . . . . . . . . . . . . . . . . . . . . . . . . . 4- 1
4.1

Safety Information . . . . . . . . . . . . . . . . . . . . . . . . . . . . . . . . . . . . . . . . . . . . . . . 4--2

4.2

Preparation for Start-up . . . . . . . . . . . . . . . . . . . . . . . . . . . . . . . . . . . . . . . . . . 4--2

4.2.1

General Information . . . . . . . . . . . . . . . . . . . . . . . . . . . . . . . . . . . . . . . . . . . . . . 4--2

4.2.2

Special Preparations for Startup . . . . . . . . . . . . . . . . . . . . . . . . . . . . . . . . . . . 4--2

4.3

Start-up and Operation . . . . . . . . . . . . . . . . . . . . . . . . . . . . . . . . . . . . . . . . . . . 4--5

Operation . . . . . . . . . . . . . . . . . . . . . . . . . . . . . . . . . . . . . . . . . . . . . . . . . . . . . . . . . . . . 5-1
5.1

General . . . . . . . . . . . . . . . . . . . . . . . . . . . . . . . . . . . . . . . . . . . . . . . . . . . . . . . . 5--2

5.2

Summary of Input Functions . . . . . . . . . . . . . . . . . . . . . . . . . . . . . . . . . . . . . . 5--7

5.2.1

Analyzer Status . . . . . . . . . . . . . . . . . . . . . . . . . . . . . . . . . . . . . . . . . . . . . . . . . 5--8

5.2.2

Calibration . . . . . . . . . . . . . . . . . . . . . . . . . . . . . . . . . . . . . . . . . . . . . . . . . . . . . . 5--9

5.2.3

Measuring Ranges . . . . . . . . . . . . . . . . . . . . . . . . . . . . . . . . . . . . . . . . . . . . . 5--16

5.2.4

Parameters . . . . . . . . . . . . . . . . . . . . . . . . . . . . . . . . . . . . . . . . . . . . . . . . . . . 5--18

5.2.5

Configuration . . . . . . . . . . . . . . . . . . . . . . . . . . . . . . . . . . . . . . . . . . . . . . . . . 5--24

Maintenance . . . . . . . . . . . . . . . . . . . . . . . . . . . . . . . . . . . . . . . . . . . . . . . . . . . . . . . . . 6- 1
6.1

Analyzer Section . . . . . . . . . . . . . . . . . . . . . . . . . . . . . . . . . . . . . . . . . . . . . . . . 6--3

6.1.1

Design of Analyzer Section . . . . . . . . . . . . . . . . . . . . . . . . . . . . . . . . . . . . . . . 6--3

6.1.2

Dismantling the Analyzer Section . . . . . . . . . . . . . . . . . . . . . . . . . . . . . . . . . . 6--4

6.1.3

Adjustment of Reference Gas Pressure Switch (3000 ... 4000 hPa) . . . . 6--7

6.1.4

Removal of Sample Gas Restrictor . . . . . . . . . . . . . . . . . . . . . . . . . . . . . . . . 6--8

6.2

Replacement of Motherboard and Option Board . . . . . . . . . . . . . . . . . . . . . 6--9

6.3

Replacement of Fuses . . . . . . . . . . . . . . . . . . . . . . . . . . . . . . . . . . . . . . . . . 6--10

6.4

Cleaning the Analyzer . . . . . . . . . . . . . . . . . . . . . . . . . . . . . . . . . . . . . . . . . . 6--10

6.5

Maintenance Request and Fault Messages . . . . . . . . . . . . . . . . . . . . . . . . 6--11

6.5.1

Maintenance Request . . . . . . . . . . . . . . . . . . . . . . . . . . . . . . . . . . . . . . . . . . 6--12

6.5.2

Faults . . . . . . . . . . . . . . . . . . . . . . . . . . . . . . . . . . . . . . . . . . . . . . . . . . . . . . . . 6--14

6.5.3

Further Errors . . . . . . . . . . . . . . . . . . . . . . . . . . . . . . . . . . . . . . . . . . . . . . . . . 6--17

List of Spare Parts . . . . . . . . . . . . . . . . . . . . . . . . . . . . . . . . . . . . . . . . . . . . . . . . . . . 7- 1
7.1

General . . . . . . . . . . . . . . . . . . . . . . . . . . . . . . . . . . . . . . . . . . . . . . . . . . . . . . . . 7-2

7.2

Analyzer Section . . . . . . . . . . . . . . . . . . . . . . . . . . . . . . . . . . . . . . . . . . . . . . . . 7-4

7.3

Electronics . . . . . . . . . . . . . . . . . . . . . . . . . . . . . . . . . . . . . . . . . . . . . . . . . . . . . 7-6

7.4

Gas Path . . . . . . . . . . . . . . . . . . . . . . . . . . . . . . . . . . . . . . . . . . . . . . . . . . . . . . . 7-8

Appendix . . . . . . . . . . . . . . . . . . . . . . . . . . . . . . . . . . . . . . . . . . . . . . . . . . . . . . . . . . . . 8- 1
8.1

List of Abbreviations . . . . . . . . . . . . . . . . . . . . . . . . . . . . . . . . . . . . . . . . . . . . . 8--2

8.2

Returned Deliveries / Form . . . . . . . . . . . . . . . . . . . . . . . . . . . . . . . . . . . . . . . 8--3
Information for the User

1

1.1

Information for Our Customers . . . . . . . . . . . . . . . . . . . . . . . . . . . . . . . . . . . . 1--2

1.2

General Information . . . . . . . . . . . . . . . . . . . . . . . . . . . . . . . . . . . . . . . . . . . . . . 1--2

1.3

Notes on Using this Manual . . . . . . . . . . . . . . . . . . . . . . . . . . . . . . . . . . . . . . . 1--3

1.4

Danger Information . . . . . . . . . . . . . . . . . . . . . . . . . . . . . . . . . . . . . . . . . . . . . . 1--3

1.5

Approved Use . . . . . . . . . . . . . . . . . . . . . . . . . . . . . . . . . . . . . . . . . . . . . . . . . . . 1--4

1.6

Qualified Personnel . . . . . . . . . . . . . . . . . . . . . . . . . . . . . . . . . . . . . . . . . . . . . . 1--4

1.7

Warranty Information . . . . . . . . . . . . . . . . . . . . . . . . . . . . . . . . . . . . . . . . . . . . . 1--5

1.8

Supply and Delivery . . . . . . . . . . . . . . . . . . . . . . . . . . . . . . . . . . . . . . . . . . . . . . 1--5

1.9

Standards and Regulations . . . . . . . . . . . . . . . . . . . . . . . . . . . . . . . . . . . . . . . 1--5

1.10

Conformity Declaration . . . . . . . . . . . . . . . . . . . . . . . . . . . . . . . . . . . . . . . . . . . 1--6

OXYMAT 61 Instruction Manual
A5E00123067-01

1--1
Information for the User
1.1

Information for our Customers

!

Please read this Manual before you start work!
It contains important information and data whose observance
will guarantee correct functioning of the analyzer and also save
you servicing costs. The information will significantly help you
when using the equipment and will lead to reliable results.
This Manual refers to the software release version 4.2.1.

1.2

General Information
The product described in this Manual has left the factory in a
perfect and tested condition as regards safety. In order to retain
this state and to achieve correct and safe operation of this
product, it must only be used in the manner described by the
manufacturer. In addition, correct and safe operation of this
product is dependent on proper transport, storage and
installation as well as careful operation and maintenance.
This Manual contains the information required for approved use
of the product described in it. The Manual has been prepared
for technically qualified personnel who have been specially
trained or who possess appropriate knowledge in the field of
instrumentation and control, referred to further as automation
technology.
Knowledge of the safety information and warnings present in
this Manual and their technically correct implementation are
prerequisites for danger-free installation and commissioning
and for safety during operation and maintenance of the described product. Only a qualified person possesses the required
specialist knowledge to correctly interpret the general safety
information and warnings present in this Manual and to apply
them to the specific case.
This Manual is included in the delivery of the analyzer, even if
separate ordering has been made possible for logistic reasons.
For clarity reasons this Manual cannot cover all possible details
for all versions of the described product and cannot describe
every possible case in connection with installation, operation,
maintenance or the use in systems. Should you require further
information, or should particular problems occur which are not
handled in sufficient depth in this Manual, help can be requested through your local Siemens office or representative.
Note

.
1--2

When considering use of the analyzer for new research and
development applications, we recommend that you discuss
your application with our specialist department.

OXYMAT 61 Instruction Manual
A5E00123067-01
Information for the User
1.3

Notes on Using this Manual

!

.
1.4

This Manual describes the applications of the equipment and
how you can start it up, operate and service it.
Of particular importance are the warning and information
texts. These are separated from the remaining text, specially
identified by appropriate pictograms (see examples on left), and
provide valuable tips on how to avoid maloperations.

Danger Information
The following information serves on the one hand for your personal safety and also to protect the described product or connected devices from damage.
Safety information and warnings to prevent danger to the life
and health of users or maintenance personnel or to prevent
damage to property are emphasized in this Manual by the
terms defined here. They are additionally identified by warning
symbols (pictograms) matched to the significance of the accompanying text and which may therefore deviate from the examples shown here. The terms used in this Manual and the information on the product itself have the following meaning:

!

Danger
means that death, severe personal injury and/or substantial
damage to property will occur if the appropriate safety precautions are not observed.

!

Warning
means that death, severe personal injury and/or substantial
damage to property can occur if the appropriate safety precautions are not observed.

!

Caution
with a warning triangle means that slight personal injury can
occur if the appropriate safety precautions are not observed.
Caution
without a warning triangle means that damage to property can
occur if the appropriate safety precautions are not observed.
Attention
means that an undesirable effect or state can occur if the
corresponding information is not observed.

.
OXYMAT 61 Instruction Manual
A5E00123067-01

Note
is important information on the product itself, the handling of the
product or the respective part of the Manual to which particular
attention should be paid.

1--3
Information for the User
Danger of burns
means that severe personal injury can occur if the appropriate
safety precautions are not observed.

1.5

Approved Use
Approved use in the sense of this Manual means that this
product may only be used for the applications described in the
Catalog and in the Technical Description (see also Chapter 3 of
this Manual) and only in conjunction with other devices and
components which have been recommended or approved of by
Siemens.
The product described in this Manual has been developed,
manufactured, tested and documented taking into account the
appropriate safety standards. No danger therefore exists in the
normal case with respect to damage to property or the health of
persons if the handling guidelines and safety information described for configuring, assembly, approved use and maintenance are observed. This device has been designed such that
safe isolation is guaranteed between the primary and secondary circuits. Low voltages which are connected must also be
generated using safe isolation.

!

1.6

Warning
Following removal of the housing or guard, or after opening the
system cabinet, certain parts of these devices/systems are accessible which may carry dangerous voltages. Therefore only
suitably qualified personnel may work on this device. These
individuals must be thoroughly acquainted with all sources of
danger and the maintenance measures as described in this
Manual.

Qualified Personnel
Severe personal injury and/or extensive damage to property
may occur following unqualified work on the device/system or
the failure to observe the warnings described in the Manual or
on the device/system cabinet. Therefore only suitably qualified
personnel may work on this device/system.

1--4

OXYMAT 61 Instruction Manual
A5E00123067-01
Information for the User
Qualified persons in the sense of the safety information present
in this Manual or on the product itself are persons who
D are either familiar as configuring engineers with the safety
concepts of automation technology
D or have been trained as operators in the use of automation
technology equipment and are acquainted with the contents
of this Manual which refer to operation
D or have been appropriately trained as commissioning and/or
maintenance personnel for such automation technology
equipment or are authorized to energize, ground and tag
circuits and devices/systems in accordance with established
safety practices.

1.7

Warranty Information
Your attention is drawn to the fact that the contents of this product documentation are not part of a previous or existing agreement, commitment or statutory right and do not change these.
All commitments on the part of Siemens are contained in the
respective sales contract which also contains the complete and
solely applicable warranty conditions. The warranty conditions
in the contract are neither extended nor limited by the contents
of this Instruction Manual.

1.8

Supply and Delivery
The respective scope of delivery according to the valid contract
is listed on the shipping documents accompanying the delivery.
When opening the packaging, please observe the corresponding information on the packaging material. Check that the delivery is complete and undamaged. In particular, compare the
Order Nos. on the labels (if present) with the ordering data.
Please retain the packaging material if possible so that you can
reuse it if it is necessary to return the device. A form for this
purpose can be found in Chapter 8.3.

1.9

Standards and Regulations
The harmonized European standards have been applied as far
as possible to the specification and production of this device. If
no harmonized European standards have been applied, the
standards and regulations for the Federal Republic of Germany
apply (see also the technical data in Chapter 3).
When using this product outside the range of applicability of
these standards and regulations, the appropriate standards and
regulations in the country of use must be observed.

OXYMAT 61 Instruction Manual
A5E00123067-01

1--5
Information for the User
1.10 Conformity Declaration
EG-Konformitätserklärung
EC Declaration of conformity
Déclaration ”CE” de conformité
Declaración CE de conformidad
Declaração CE de conformidade
Dichiarazione CE di conformità

EG-Verklaring van overeenstemming
EF-konformitetserklæring
Dhlwsh snmmorfwshsz EOK
EU Försäkran om överensstämmelse
EU-vaatimustenmukaisuusvakuutus

Hiermit erklären wir, daß unser Produkt, Typ:
We hereby declare that our product, type;
Nous déclarons par la présente que notre produit, type:
Por la presente declaramos que nuestro producto, tipo:
Com a presente, declaramos que o nosso produto, tipo:
Con la presente dichiariamo che il nostro prodotto tipo:
Hiermee verklaren wij dat ons produkt, type:
Hermed erklaerer vi, at vores produkt af typen:
Me thn parsusa dhlwnoume, oti to proion maj, tupou:
Härmed försäkrar vi att var produkt, typ:
Taten vkuutamme, että tuotteemme, tyyppi:
OXYMAT 61
7MB2001--xxxxx--xxxx
folgenden einschlägigen Bestimmungen entspricht:
complies with the following relevant provisions:
correspond aux dispositions pertinentes suivantes:
satisface las disposiciones pertinentes siguientes:
esta em conformidade com as disposições pertinentes, a saber:
è conforme alle seguenti disposizioni pertinenti:
voldoet aan de eisen van de in het vervolg genoemde bepalingen:
overholder fØlgende relevante bestemmelser:
autapokpietai stsuj akolouqouj sxetikouj kanonismouj:
uppfyller följande tillämpliga bestämmelser:
täyttää seuraavat asiaankuuluvat vaatimukset:
Niederspannungsrichtlinie (72/23/EWG und 93/68/EWG)
Low voltage guidlines (72/23/EEC and 93/68/EEC)
Directive sur les basses tensions (72/23/CEE et 93/68/CEE)
Reglamento de baja tensión (72/23/MCE y 93/68/MCE)
Directriz relativa à baixa tensão (72/23/EWG e 93/68/EWG)
Direttiva sulla bassa tensione (72/23/CEE e 93/68/CEE)
Laagspanningsrichtlijn (72/23/EEG en 93/68/EEG)
Lavspændingsdirektiv (73/23/EØF og 93/68/EØF)
Kateuquthpia odhga pepi xamhlhz tashz (72/23/EOK kai 93/68/EOK)
Lågspänningsdirektiv (72/23/EEG ja 93/68/EEG)
Pienjännitedirektivi (72/23/ETY ja 93/68/ETY)
EMV-Richtlinie (89/336/EWG, 91/263/EWG, 92/31/EWG und 93/68/EWG)
EMC guideline (89/336/EWC, 91/263/EWC, 92/31/EWC and 93/68/EWC)
Directive CEM (89/336/CEE, 91/263/CEE, 92/31/CEE et 93/68/CEE)
Reglamento de compatibilidad electromagnética (89/336/MCE, 91/263/MCE, 92/31/MCE y 93/68/MCE)
Directriz relativa à compatibilidade electro-magnética (89/336/EWG, 91/263/EWG, 92/31/EWG e
93/68/EWG)
Direttiva sulla compatibilità elettromagnetica (89/336/CEE, 91/263/CEE, 92/31/CEE e 93/68/CEE)
EMV-richtlijn (89/336/EEG, 91/263/EEG, 92/31/EEG en 93/68/EEG)
Direktiv om elektromagnetisk forligelighed (89/336/EØF, 91/263/EØF, 92/31/EØF og 93/68/EØF)
Kateuquthpia odhga pepi hlektpomagnhtikhz snmbatothtaz (89/336/EOK, 91/263/EOK, 92/31/EO
kai 93/68/EOK)
EMV-direktiv (89/336/EEG, 91/263/EEG, 92/31/EEG ja 93/68/EEG)
Sähkömagneettisen mukautuvuuden direktivi (89/336/ETY, 91/263/ETY, 92/31/ETY en 93/68/ETY)
1--6
OXYMAT 61 Instruction Manual
A5E00123067-01
Information for the User
Angewendete harmonisierte Normen, insbesondere:
Applied harmonized standards, in particular:
Normes harmonisées, notamment:
Normas armonizadas utilizadas, particularmente:
Nomas harmonizadas utilizadas, em particular:
Norme armonizzate applicate, particolarmente:
Grbruikte gehamiseerde normen, in het bijzondere:
Anvendte hasrmoniserede normer, især:
Efapmdseqenta enapmonismena ppotn pa, eidikotepa:
Tillämpade harmoniserade standarder, särskilt:
Käytetyt yhdenmukaiset standardit, etenkin:
EN50081-1
EN50082-2
EN61010

Siemens Aktiengesellschaft
Automation Group
Process Analysis Division
PI 2
D--76181 Karlsruhe
Karlsruhe, September 2001

(signed) Dr. Diedrich

OXYMAT 61 Instruction Manual
A5E00123067-01

(signed) van Dycke

(head of department)

(factory manager)

1--7
Information for the User

1--8

OXYMAT 61 Instruction Manual
A5E00123067-01
Installation Guidelines

2

2.1

Safety Information . . . . . . . . . . . . . . . . . . . . . . . . . . . . . . . . . . . . . . . . . . . . . . . 2--2

2.2

Installation Requirements . . . . . . . . . . . . . . . . . . . . . . . . . . . . . . . . . . . . . . . . . 2--2

2.3

Gas Connections and Internal Gas Paths . . . . . . . . . . . . . . . . . . . . . . . . . . . 2--3

2.3.1

Sample Gas Line . . . . . . . . . . . . . . . . . . . . . . . . . . . . . . . . . . . . . . . . . . . . . . . . 2--3

2.3.2

Reference Gas Line . . . . . . . . . . . . . . . . . . . . . . . . . . . . . . . . . . . . . . . . . . . . . 2--4

2.3.3

Pressure Sensor . . . . . . . . . . . . . . . . . . . . . . . . . . . . . . . . . . . . . . . . . . . . . . . . 2--4

2.4

Gas Conditioning . . . . . . . . . . . . . . . . . . . . . . . . . . . . . . . . . . . . . . . . . . . . . . . . 2--5

2.5

Electric Connection . . . . . . . . . . . . . . . . . . . . . . . . . . . . . . . . . . . . . . . . . . . . . . 2--6

2.5.1

Power Supply Connection . . . . . . . . . . . . . . . . . . . . . . . . . . . . . . . . . . . . . . . . 2--6

2.5.2

Connection of Signal Cables . . . . . . . . . . . . . . . . . . . . . . . . . . . . . . . . . . . . . . 2--7

2.5.3

Pin Assignments . . . . . . . . . . . . . . . . . . . . . . . . . . . . . . . . . . . . . . . . . . . . . . . . 2--9

2.5.4

Example of Autocal Circuit . . . . . . . . . . . . . . . . . . . . . . . . . . . . . . . . . . . . . . . 2--11

2.6

Dimensional Drawings . . . . . . . . . . . . . . . . . . . . . . . . . . . . . . . . . . . . . . . . . 2--12

OXYMAT 61 Instruction Manual
A5E00123067-01

2--1
Installation Guidelines
2.1

Safety Information

!

Warning
Certain parts in this analyzer carry dangerous voltages. The housing
must be closed and grounded before switching on the analyzer.
Death, personal injury and/or damage to property may result if this is
not observed. Also refer to Section 2.5.
A standard analyzer must not be used in potentially explosive atmospheres. Use with gases with flammable components at concentrations above the lower explosion limit (LEL) must be clarified with the
responsible Ex authorities, and is finally the responsibility of the
owner.
Note with an internal supply of reference gas that the reference gas is
mixed at approx. 0.5 l/min with the sample gas. Since this can lead to
explosive mixtures in the case of flammable sample gases, only an
external reference gas supply with nitrogen may be used in this case.

2.2

Installation Requirements
A location should be selected which is as free as possible from
vibration.
The OXYMAT 61 must be placed on supporting rails if it is to be fitted
in a cabinet or desktop housing. Assembly only at the front is
insufficient because the weight of the analyzer would place too great a
load on the chassis.
When installing in switchgear cabinets, ensure that there is sufficient
ventilation between the devices.
If the device is to be installed outdoors, ensure that it is protected
from direct solar irradiation.
Make sure during operation that the permissible ambient temperature
of 5 to 45 °C is retained (see Section 3.5 ”Technical data”).

OXYMAT 61

2--2

Magnetically sensitive devices should not be installed in the
immediate vicinity of the OXYMAT 61 since this analyzer emits
magnetic stray fields as a result of its principle. Depending on the
sensitivity, distances up to 50 cm are necessary (see also
function 57).

OXYMAT 61 Instruction Manual
A5E00123067-01
Installation Guidelines
2.3
2.3.1

Gas Connections and Internal Gas Paths
Sample Gas Line
All gas connections are couplings with a diameter of 6 mm or 1/4”.
Select a material which is suitable for the sample gas for the inlet and
outlet piping.

!

.

Caution
The OXYMAT 61 analyzers should normally be operated such that
the sample gas pressure cannot build up in the analyzer section. If
several analyzers are connected in series, make sure that the
series-connected analyzer does not have a restrictor in the gas path
(unrestricted exhaust outlet). The restrictor present in the gas path of
the OXYMAT 61 depending on the version may have to be removed.
A restrictor may only be present between the sample gas inlet line
and the first gas analyzer section.

Note!
Sample gas monitoring (pressure switch) for the series-connected
analyzer sections has no function following removal of the sample gas
restrictors. To avoid error messages, deactivate the corresponding
messages (”Sample gas flow too low”) in the configuration function of
the software (Section 5.2.5, function 87, error S16). Also note in this
case that the assignment of a relay with the error message ”Flow of
sample gas” has no function.
If the sample gas flows into an exhaust gas line, observe the following
points:
D The flow resistance in the exhaust gas line should be kept small by
using as short a line as possible or by adapting to a larger diameter.
D The exhaust gas line must be free of rapid changes in pressure. If
this is not the case, either use a separate exhaust line or fit a
surge tank with restrictor (> 1 l) between the analyzer and the
exhaust line (pneumatic lowpass).
Warning

!

OXYMAT 61 Instruction Manual
A5E00123067-01

In the case of toxic or corrosive gases, or those which can lead to
explosive gas mixtures, the exhaust should be routed such that there
is no danger to persons or equipment and that the environment is not
polluted.

2--3
Installation Guidelines
2.3.2

Reference Gas Line
The OXYMAT 61 is always equipped with reference gas connections.
Couplings are present with a diameter of 6 mm or 1/4”. Select a
material which is suitable for the reference gas for the inlet and outlet
piping.
A metal pipe must be used for the reference gas inlet if N2 and O2 are
used as reference gases. The pipe must be as short as possible and
have a small cross-section.
If air is used as the reference gas, it is recommendable to use an auxiliary drier in the suction line to prevent a volume error on the reference gas side caused by moisture.
When subsequently converting the analyzer to a different reference
gas supply, the couplings and the reference gas restrictor (low-pressure operation 0.1 bar) must be replaced by trained servicing
personnel.

2.3.3

Pressure Sensor
The OXYMAT 61 has an internal pressure sensor for correction of the
influence of pressure on the measured value.
This is fitted on the analyzer section, and directly measures the sample gas pressure using the reference gas supply. It need not be considered further during the installation.

2--4

OXYMAT 61 Instruction Manual
A5E00123067-01
Installation Guidelines
2.4

Gas Conditioning
The sample gas must be sufficiently conditioned to prevent contamination of the parts through which it flows and the associated errors in
measurement.
The ULTRAMAT 6E/F and OXYMAT 6E/F are usually preceded by
D a gas sampling device,
D a sample gas cooler,
D a filter and
D a gas suction pump (see Fig. 2--1).
Depending on the composition of the sample gas, additional equipment may be necessary such as e.g. a washbottle, additional filters
and a pressure regulator.
Corrosive components or those which interfere with the
measurement should be eliminated by appropriate series-connected absorption filters.

8
3
2
5

4

6

7

1

1
2
3
4
5
6
7

9

8
9

Gas sampling device (heated if necessary)
Sample gas line (heated if necessary)
Gas cooler
Filter/trap (as required)
Sample gas pump
Flow regulator
Flowmeter (if sample gas monitoring is not provided
in the OXYMAT 61)
To sample gas inlet
Condensation drain

Fig. 2--1 Gas conditioning, example (not included in delivery)

OXYMAT 61 Instruction Manual
A5E00123067-01

2--5
Installation Guidelines
2.5

Electric Connection

!

Warning
The following must be observed during the electric installation:
The respective country-specific standard for the installation of power
systems with rated voltages below 1000 V (in Germany: VDE 0100).
The requirements of VDE 0165 (EN 60079--14) or equivalent
international standards must be observed when installing gas-proof
analyzers. Special care must be taken with the cable inlets (PG
screwed glands) since the gas-proof function may be endangered if
carried out improperly.
Torque and permissible diameter for the PG screwed glands:
-- PG 13.5:
-- PG 16:

3.8 ±0.2 Nm; diameter 6 ... 12 mm
5.0 ±0.2 Nm; diameter 10 ... 14 mm

Failure to observe these regulations may result in death, personal
injury and/or damage to property.

2.5.1

Power Supply Connection
D The analyzer is supplied with an appliance plug which may only be
connected to the power supply by qualified personnel (see Section
1.5). The power supply cable must include a protective earth
conductor which must be connected to the chassis potential. The
cross-section of the conductors must be ³1 mm2. The phase
conductor must be connected to the identified position in the plug.
D The power cable must be routed separately from the signal cables.
D A circuit-breaker must be provided in the immediate vicinity of the
analyzer (see rating plate for loading capacity). It must be readily
accessible in this case.
D Check that the local mains voltage agrees with that specified on
the label on the analyzer.

2--6

OXYMAT 61 Instruction Manual
A5E00123067-01
Installation Guidelines
2.5.2

Connection of Signal Cables

!

Warning
The signal voltages must be electrically isolated extra-low voltages
(SELV).

If signals (e.g. analog output 4 ... 20 mA) are to be routed into a
potentially explosive atmosphere of zone 1, they must be
intrinsically-safe. Supplementary retrofitting of the analyzer with
energy-limiting modules is necessary.
The Ex identification of these modules must be clearly visible on the
housing.
D The signal cables in the rack mount analyzer are connected to the
D-SUB plugs at the rear.
D RC elements must be connected according to Fig. 2--2 as a measure to suppress the generation of sparks across the relay contacts (e.g. limit relays). Note that the RC element results in a
drop-out delay for an inductive component (e.g. solenoid valve).
The RC element should therefore be dimensioned according to the
following rule-of-thumb:
R [Ω] ≈ 0.2 x R L [Ω]

C [μF] ≈ I L [A]

Additionally make sure that you only use a non-polarized capacitor
C.
When using direct current, it is possible to fit a spark
suppression diode instead of the RC element.
D The cables to the relay outputs and binary inputs as well as the
analog inputs and outputs must be screened. They must be connected to the corresponding trapezoidal plug (D-SUB plug) according to the pin assignment diagrams (Figs. 2--3 and 2--4). The
conductor cross-section should be ³0.5 mm2. Cables of type
JE-LiYCY ... BD are recommended. The cable length of the analog
outputs depends on the load.

OXYMAT 61 Instruction Manual
A5E00123067-01

2--7
Installation Guidelines

Function in analyzer

Connection side

Plug DSUB 25F
M

13
25

12

24
23

11

(-)

Power supply unit
24 V' max.

(+)

IL
R

RL

10
22

9

21

C

8
20
19
18

7
6
5

17
4
16
15
14
M

3
2

R [ W ] » 0,2 x RL [ W ]
C [ mF ] » IL [ A ]

1

Fig. 2--2 Example of measure to suppress sparks on a relay contact (rack mount analyzer)
D The reference ground of the analog inputs is the housing potential.
D The analog outputs are floating, also with respect to one another.
D The interface cable (RS 485) must be screened and connected to
housing potential. The cable screen must be connected with a
large-area contact to the screen of the D-SUB plug. The conductor
cross-section should be ³0.5 mm2. The interface cable must not
be longer than 500 m.

2--8

OXYMAT 61 Instruction Manual
A5E00123067-01
Installation Guidelines
2.5.3

Pin Assignments

Function in device

Pin assignment

Plug SUB-D 9F (RS 485)
M

9

GND

8
7

+5 V

6

M

5
4
3
2
1

GND
R_level-NNC
RD/TD-N
RD/TD-P
R_level-PNC
NC
GND

The plug and cable must be
shielded and connected to
housing potential. Bus terminators
can be connected to pins 7 and 9.

Plug SUB-D 15F
M

8
15
14
13

M

12

M

11

M

10
9

M

7
6
5
4
3
2
1

GND
NC
NC
Analog output 1-P
Analog output 1-N
NC
GND
Analog input 2-P
Analog input 2-N
Analog input 1-P
Analog input 1-N
Binary input 6-P
Binary input 5-P
Binary inputs 5 to 6-N
GND

Analog outputs: floating
(also to one another), R L : ≤ 750 Ω
Pressure correction
Pressure correction
Correction of interf. gas

Non-floating
analog inputs,
0 to 20 mA/500 Ω
or 0 to 10 V
(low impedance)

Plug SUB-D 25F
M

13
25
24
23
22
21
20
19
18
17
16
15

M

14

12
11
10

GND
Binary
Binary
Binary
Binary
Binary

input 4-P
input 3-P
input 2-P
input 1-P
inputs 1 to 4-N

"1" = 24 V (13 to 33 V)
"0" = 0 V (0 to 4,5 V)
floating via opto isolator

Relay 6

9
8
7

Relay 5
Relay 4

6
5
4

Relay 3

Contact loading
max. 24 V/1 A, AC/DC;
relays are de-energized
in shown contact position

Relay 2

3
2

Relay 1

1

GND

Fig. 2--3 Pin assignments of OXYMAT 61
OXYMAT 61 Instruction Manual
A5E00123067-01

2--9
Installation Guidelines

Function in device

Pin assignment
Plug SUB-D 37F (option)

M

37
36
35
34
33
32
31
30
29
28
27
26
25
24
23
22
21
M

20

19
18
17
16
15
14
13
12
11

GND
NC
NC
Binary input 14-P
Binary input 13-P
Binary input 12-P
Binary input 11-P
Binary input 10-P
Binary input 9-P
Binary input 8-P
Binary input 7-P
Binary inputs 7 to 14-N

"1" = 24 V (13 to 33 V)
"0" = 0 V (0 to 4,5 V)
floating via opto isolator

Relay 14
Relay 13

10
Relay 12

9
8

Relay 11

7
6
5

Relay 10

Contact loading
max. 24 V/1 A, AD/DC
relays are de-energized
in shown contact position

Relay 9

4
3

Relay 8

2

Relay 7

1

GND

Fig. 2--4 Pin assignments of Autocal module OXYMAT 61

Other supplementary electronics (AK interface, Profibus, ...) are
described in the supplied documents.

2--10

OXYMAT 61 Instruction Manual
A5E00123067-01
Installation Guidelines
2.5.4

Example of Autocal Circuit

Function in device

Connection side

Plug DSUB 37- F (optional)
-

M

V0 (s.o.)

19
37

Zero gas

18
36

V1 (s.g.)

17
35
34
33

16
15

Cal. gas 1

14

V2 (s.g.)

32
13
31
30
29
28

12
11

Cal. gas 2

Relay 12

V3 (s.g.)

10
9

27
8
26

7

25
6
24
23
22

5

3
2

M

V4 (s.g.)
Relay 10
Relay 9

Cal. gas 4

4

21
20

Cal. gas 3

Relay 11

1

Relay 8
Relay 7

Power
supply unit
24 V≃ max.

The relay is de-energized in the
shown contact position
s.o. ≙ de-energized: open
s.g. ≙ de-energized: closed

Sample gas

VM (s.g.)

Sample gas inlet

Gas conditioning
units

Fig. 2--5 Pin assignments and valve diagram ”Autocal”

OXYMAT 61 Instruction Manual
A5E00123067-01

2--11
Installation Guidelines
2.6

Dimensional Drawings

OXYMAT 61

465

9

483

384,5

351,5

440

Fig. 2--6 Installation dimensions (front and plan views)

2--12

OXYMAT 61 Instruction Manual
A5E00123067-01
Installation Guidelines

384,5
351,5
27,5
15,6

4
173

128

M4

4

2

1

Fig. 2--7 Dimensional drawing for 7MB2001 (OXYMAT 61)

OXYMAT 61 Instruction Manual
A5E00123067-01

2--13
Installation Guidelines

2--14

OXYMAT 61 Instruction Manual
A5E00123067-01
Technical Description

3

3.1

Application . . . . . . . . . . . . . . . . . . . . . . . . . . . . . . . . . . . . . . . . . . . . . . . . . . . . . . . . . . . . . . . . . . . . . . 3--2

3.2

Design . . . . . . . . . . . . . . . . . . . . . . . . . . . . . . . . . . . . . . . . . . . . . . . . . . . . . . . . . . . . . . . . . . . . . . . . . . 3--3

3.3

Communications Interface . . . . . . . . . . . . . . . . . . . . . . . . . . . . . . . . . . . . . . . . . . . . . . . . . . . . . . . . . 3--4

3.4

Mode of Operation . . . . . . . . . . . . . . . . . . . . . . . . . . . . . . . . . . . . . . . . . . . . . . . . . . . . . . . . . . . . . . . 3--5

3.5

Technical Data . . . . . . . . . . . . . . . . . . . . . . . . . . . . . . . . . . . . . . . . . . . . . . . . . . . . . . . . . . . . . . . . . . 3--6

3.6

Reference Gases, Zero Error . . . . . . . . . . . . . . . . . . . . . . . . . . . . . . . . . . . . . . . . . . . . . . . . . . . . . . 3--7

3.7

Materials in the Sample Gas Path . . . . . . . . . . . . . . . . . . . . . . . . . . . . . . . . . . . . . . . . . . . . . . . . . . 3--8

OXYMAT 61 Instruction Manual
A5E00123067-01

3--1
Technical Description
3.1

Application

The OXYMAT 61 gas analyzers operate according to the
paramagnetic alternating pressure principle and are used
to measure oxygen in gases.

D

Low long-term drift

D

Reference gas supply either externally (N2, O2 or air,
approx. 3000 hPa) or using built-in reference gas pump
(ambient air)

Application examples

D

Two-stage access code to prevent unintentional and
unauthorized inputs

D

Internal pressure sensor for correction of variations in
sample gas pressure in the range from 700 to 1200 hPa
(absolute)

D

Automatic range calibration can be parameterized

Measurement of O2
D

For boiler control in combustion plants

D

In safety-relevant areas

D

As reference variable for statutory emission
measurements

D

Operation based on NAMUR recommendations

D

Automotive industry (test bay systems)

D

Fieldbus connection (option)

D

Packaging industry

D

Monitoring of sample gas (option)

D

In warning equipment

D

D

In chemical plants

Monitoring of reference gas with reference gas
connection 3000 to 4000 hPa

D

In ultra-pure gases for quality monitoring

D

Different smallest spans, depending on version 2.0 %
or 5.0 % O2

D

Customer-specific analyzer options such as:
- Customer acceptance
- TAG labels
- Drift recording
-

Special characteristics
D

Four freely-programmable measuring ranges, also with
suppressed zero, all measuring ranges linear
Electrically isolated signal output 0/2/4 to 20 mA (also
inverted)

D

D

Simple replacement of analyzer since electrical
connections can be simply disconnected from it

Autoranging, remote switching or manual range
selection possible

D

D

19” unit with 4 HU, for installation in hinged bays

D

19” unit with 4 HU, for installation in cabinets, with or
without telescopic rails

D

Front panel can be swung down for servicing
(laptop connection)

D

Internal gas paths: FKM (Viton) tubing

D

Gas connections for sample gas: pipe diameter 6 mm
or 1/4”

D

Sample chamber made of stainless steel (mat. No.
1.4571)

D

Storage of measured values possible during calibration

D

Time constants selectable within wide limits
(static/dynamic noise suppression); i.e. the response
time of each component can be matched to the
respective application

D

einfache Handhabung durch menügesteuerte
Bedienung

D

Fast response time

3--2

OXYMAT 61 Instruction Manual
A5E00123067-01
Technical Description
3.2

Design

Display and control panel
D

D
D
D
D
D
D
D

D

Large LCD panel for simultaneous display of:
- Measured value (digital and analog displays)
- Status line
- Measuring ranges
Contrast of LCD panel adjustable using menu
Permanent LED backlighting
Five-digit measured-value display (decimal point
counts as digit)
Washable membrane keyboard with five softkeys
Menu-based operation for configuration, test functions,
calibration
User help in plain text
Graphic display of concentration trend; programmable
time intervals

D
D

Communication
D

D

Six freely-configurable binary inputs (e.g. range
switching, processing of external signals from sample
conditioning system)

LED backlit display
and membrane keyboard with noticeable
click

RS 485 present in basic unit (connection at rear)

Options:
D

Inputs and outputs

Six freely-configurable relay outputs (failure,
maintenance request, maintenance switch, limit alarm,
external solenoid valves)
Two configurable analog inputs (e.g. correction of
cross-interferences, external pressure sensor)
Expandable by eight additional binary inputs and eight
additional relay outputs for automatic calibration with
up to four calibration gases

D
D
D

AK interface for the automotive industry with extended
functions
Converter to RS 232
Incorporation into networks via PROFIBUS DP/PA
interface
Siprom GA software as service and maintenance tool

Status line
for display of analyzer
status
(parameterizable)

two code levels according to NAMUR
(maintenance and
specialist levels)
easy operation with
menu control using
five softkeys

Display of concentration as numbers and
bargraph

Display of active
measuring ranges

Display of start- -ofscale and full-scale
value
ESC key to abort inputs
Number block to enter values
INFO key for help in
plain text

CLEAR key to delete
an input

Fig. 3- 1
-

ENTER key to accept
input values

MEAS key to return to
measurement mode

Membrane keyboard and graphic display

OXYMAT 61 Instruction Manual
A5E00123067-01

3--3
Technical Description
3.3

Communications Interface

Container A

PC
Sample gas
pressure, O2

Remote control
OXYMAT 6E

CO2, CH4

(Laptop)

SIPROM GA
CO, NO

Service control
center

Local
control

ULTRAMAT 6E
(dual-channel)

13

2

3

1

14

RS485/ELAN

4

5

Sample gas
pressure, O2

6

7

CO2

CO, SO2,
NO, O2

O2 sample gas
pressure

OXYMAT 6F

ULTRAMAT/OXYMAT 6E

Container B

ULTRAMAT 23

Container C

J ELANÒ: Economical Local Area Network

J Remote communication via modem

J Networking of ULTRAMAT 6, OXYMAT 6 and
ULTRAMAT 23 analyzers

J Up to 12 channel addresses (interfaces) for
measured values (concentration, sample gas
pressure etc.)

J Central service control by coupling to a host
computer
J Measured data available in ASCII format for
further processing
J Remote operation and downloading of data via
PC
Fig. 3- 2
-

3--4

J SIPROM GA
J Profibus
J Technology: RS 485 / 9600 baud / data refresh
0.5 s / distance up to 500 m
J

1 ...... 12 = channel addresses
13 and 14 = control addresses for PC etc.

Various analyzers networked via RS 485

OXYMAT 61 Instruction Manual
A5E00123067-01
Technical Description
3.4

Mode of Operation

In contrast to almost all other gases, oxygen is paramagnetic. This property is utilized as the measuring principle
by the OXYMAT channel.

1

Oxygen molecules in an inhomogeneous magnetic field
are drawn in the direction of increased field strength due to
their paramagnetism. When two gases with different
oxygen concentrations meet in a magnetic field, a pressure difference is produced between them.

2

2

4

For the OXYMAT channel, one of the gases (1, Fig. 3- is a
-3)
reference gas (N2, O2 or air), the other is the sample gas (5,
Fig. 3-3). The reference gas is introduced into the sample
chamber (6) through two channels (3). One of these reference gas streams meets the sample gas within the area of a
magnetic field (7). Because the two channels are connected,
the pressure, which is proportional to the oxygen concentration, causes a flow. This flow is converted into an electric
signal by a microflow sensor (4).

3

3

∆P

5
6

The microflow sensor consists of two nickel grids heated to
approx. 120 ºC which form a Wheatstone bridge together
with two supplementary resistors. The pulsating flow
results in a change in the resistance of the Ni grids. This
results in a bridge offset which depends on the oxygen
concentration in the sample gas.

7

8

O2
O2
O2
O2
O2

Because the flow sensor is located in the reference gas
stream, the measurement is not influenced by the thermal
conductivity, the specific heat or the internal friction of the
sample gas. This also provides a high degree of corrosion
resistance because the flow sensor is not exposed to the
direct influence of the sample gas.
By using a magnetic field with alternating strength (8), the
effect of the background flow in the microflow sensor is not
detected, and the measurement is thus independent of the
instrument orientation.
The sample chamber is directly in the sample path and has a
small volume. There is therefore a very short response time
for the OXYMAT 61.

OXYMAT 61 Instruction Manual
A5E00123067-01

9
1 Reference gas input
2 Restrictors
3 Reference gas channels
4 Microflow sensor for measurement signal
5 Sample gas input
6 Sample chamber
7 Paramagnetic measuring effect
8 Electromagnet with alternating flux density
9 Sample gas and reference gas outputs
Fig. 3- 3
-

Mode of operation

3--5
Technical Description
3.5

Technical Data

General technical data
Measuring ranges
Smallest possible span 3)
Largest possible span
Measuring ranges with
suppressed zero
Electromagnetic
compatibility

4, switchable internally and
externally; autoranging is also
possible
2% v/v or 5% v/v O2
100 % v/v O2
Any zero point is possible
between 0 and 100% v/v as long
as a suitable calibration gas is
used (see also Table 3.1)
Conforms to standard
requirements of NAMUR NE21
(05/93)
EN 50081- 1, EN 50082- 1
-

Degree of protection

IP 20 to EN 60529

Electrical safety

According to EN 61010-1
Category of overload III

Position of use

Front panel vertical

Dimensions

See Figs. 2- 6 and 2- 7
-

Weight

Measuring response 3)
Output signal variation

Zero drift

<  0.75 % of smallest possible
measuring range according to rating
plate with electronic damping constant
of 1 s (this corresponds to  0.25 %
at 2s)
< 0.5% / month of smallest possible
span acc. to rating plate

Measured-value drift

< 0.5% / month of respective span

Repeatability

< 1% of respective span

Linearity deviation

< 1% of respective span

Influencing variables 3)
Ambient temperature

Approx. 13 kg

< 0.5% / 10 K, referred to the smallest
possible span according to rating
plate

Power consumption
Fuse ratings

Gas inlet conditions
Permitted sample gas
pressure
Sample gas flow
Sample gas temperature
Sample gas humidity
Time response
Warm-up time
Response time (T90 time)
Damping
(electric time constant)

AC 100 to 120 V (rated range:
90 to 132 V), 48 to 63 Hz or
AC 200 to 240 V (rated range:
180 to 264 V), 48 to 63 Hz
approx. 37 VA

With pressure compensation switched
off: 2% of span with 1% change in
pressure
With pressure compensation switched
on: < 0.2% of span with 1% change in
pressure

Residual gases

Deviation in zero point corresponding
to paramagnetic/diamagnetic
deviation of residual gas (see
Table 3.2)

Sample gas flow

< 1% of smallest possible span
according to rating plate with a
change in flow of 0.1 l/min within the
permissible flow range

Power supply

Power supply
Power connection
(see rating plate)

Sample gas pressure

< 0.1% of output signal span with
rated voltage ¦10%

100 ... 120 V
1T/250
200 ... 240 V 0.63T/250

700 to 1200 hPa
(external reference gas supply)
atm. pressure range
(with built-in pump)
18 to 60 l/h (0.3 to 1 l/min)
0 to 50 °C
< 90% RH 1)

Electric inputs and outputs

Dead time (purging time
of gas path in analyzer
at 1 l/min)

Approx. 0.5 to 2.5 s depending
on version

Time for internal signal
processing

0 / 2 / 4 to 20 mA. floating,
max. load 750 W

Relay outputs

6, with changeover contacts,
freely-parameterizable e.g. for range
identification; loading capacity: AC/DC
24 V / 1 A floating

Analog inputs
< 30 min 2) at room temperature
3.5 s
0 to 100 s parameterizable

Analog output

2, designed for 0 / 2 / 4 to 20 mA, for
external pressure sensor and
correction of influence of residual gas
(correction of cross-interference)

Binary inputs

6, designed for 24 V, floating, freely
selectable e.g. for range switching

<1s

Pressure correction range
Pressure sensor
(internal or external)

Serial interface

RS 485

Options

Supplementary electronics with 8
additional binary inputs and 8
additional relay outputs, e.g. for
triggering automatic calibration;
supplementary electronics for
PROFIBUS PA and PROFIBUS DP

700 to 1200 hPa absolute
Climatic conditions
Permissible ambient
temperature

- 30 to +70 °C during storage and
transport
+5 to +45 °C during operation

Permissible humidity

< 90% RH 1) as annual average
for storage and transport 4)

1) RH: relative humidity
2) Maximum accuracy achieved after 2 hours
3) Referred to 1 bar sample gas pressure, 0.5 l/min sample gas flow and 25 °C

ambient temperature

4) Dew point must not be fallen below
*) Based on DIN EN 61207/IEC 1207

3--6

OXYMAT 61 Instruction Manual
A5E00123067-01
Technical Description
3.6

Reference Gases, Zero Error
Measuring range

Recommended reference gas

0 to . . . % v/v O2

N2, 4.6

. . . to 100% v/v O2
(suppressed zero with
full-scale value
100% v/v O2)

O2

Around 21% O2
(suppressed zero with
21% v/v O2 within
the span)

Air

Table 3.1:

Reference gas pressure

Remarks

3000 to 4000 hPa absolute

The reference gas flow is set
automatically to
5 to 10 ml/min
(up to 20 ml/min when also
flowing through
compensation branch)

Atmospheric pressure with internal reference gas pump

Reference gases for OXYMAT channel

Residual gas
(concentration 100 % v/v)

Zero deviation
in % v/v O2 absolute

Organic gases
Acetic acid

Residual gas
(concentration 100 % v/v)

Zero deviation
in % v/v O2 absolute

Noble gases
CH3COOH

- 0.64

Argon

Ar

- 0.25

Acetylene

C2H2

- 0.29

Helium

He

+0.33

1,2 Butadiene

C4H6

- 0.65

Krypton

Kr

- 0.55

1,3 Butadiene

C4H6

- 0.49

Neon

Ne

+0.17

iso-Butane

C4H10

- 1.30

Xenon

Xe

- 1.05

n-Butane

C4H10

- 1.26

1-Butene

C4H8

- 0.96

Inorganic gases

iso-Butene

C4H8

- 1.06

Ammonia

NH3

- 0.20

cyclo-Hexane

C6H12

- 1.84

Carbon dioxide

CO2

- 0.30

Ethene

C2H6

- 0.49

Carbon monoxide

CO

+0.07

Ethylene

C2H4

- 0.22

Chlorine

Cl2

- 0.94

Dichlorodifluoromethane (R12) CCl2F2

- 1.32

Dinitrogen monoxide

n-Heptane

C7H16

- 2.4

Hydrogen

n-Hexane

N2O

- 0.23

H2

+0.26

C6H14

- 2.02

Hydrogen bromide

HBr

- 0.76

Methane

CH4

- 0.18

Hydrogen chloride

HCl

- 0.35

Methanol

CH3OH

- 0.31

Hydrogen fluoride

HF

+0.10

n-Octane

C8H18

- 2.78

Hydrogen iodide

n-Pentane

C5H12

- 1.68

Hydrogen sulphide

iso-Pentane

HI

- 1.19

H2S

- 0.44

C5H12

- 1.49

Oxygen

O2

+100

Propane

C3H8

- 0.87

Nitrogen

N2

0.00

Propylene

C3H6

- 0.64

Nitrogen dioxide

Trichlorofluoromethane (R11)

+20.00

CCl3F

- 1.63

Nitrogen oxide

NO

+42.94

C2H3Cl

- 0.77

Sulphur dioxide

SO2

- 0.20

C2H3F

- 0.55

Sulphur hexafluoride

SF6

- 1.05

C2H2Cl2

- 1.22

Water

H2O

- 0.03

Vinyl chloride
Vinyl fluoride
1,1 Vinylidene chloride

NO2

Table 3.2

Zero error due to diamagnetism and paramagnetism of residual gases with nitrogen as the reference gas at 60 °C and
1000 hPa absolute (according to IEC 1207/3)
Conversion to other temperatures:
The zero deviations listed in Table 3.2 must be multiplied by the correction factor (k):

D
D

For diamagnetic gases:
k = 333 K / q [°C] + 273 K)
For paramagnetic gases
k = [333 K / q ( [°C) + 273 K)]2
(diamagnetic gases are all those with a negative zero deviation)

OXYMAT 61 Instruction Manual
A5E00123067-01

3--7
Technical Description
3.7

Materials in the Sample Gas Path

Standard
Gas path
Gas path with hose

19” rack unit
Bushing
Hose
Sample chamber
Sample chamber pipe
socket
Restrictor
O-rings
Hose connector

1.4571 titanium
FKM (Viton)
1.4571
1.4571

Flowmeter

Metering pipe
Float
Float limit
Elbows

Duran glass
Duran glass
PTFE (Teflon)
FKM (Viton)

Sample gas
pressure switch

Diaphragm
Housing

FKM (Viton)
PA 6.3 T

PTFE (Teflon)
FKM (Viton)
Polyamide 6

Options

3--8

OXYMAT 61 Instruction Manual
A5E00123067-01
4

Start-up
4.1

Safety Information . . . . . . . . . . . . . . . . . . . . . . . . . . . . . . . . . . . . . . . . . . . . . . . . . . 4--2

4.2

Preparation for Start-up . . . . . . . . . . . . . . . . . . . . . . . . . . . . . . . . . . . . . . . . . . . . . 4--2

4.2.1

General Information . . . . . . . . . . . . . . . . . . . . . . . . . . . . . . . . . . . . . . . . . . . . . . . . 4--2

4.2.2

Special Preparations for Startup . . . . . . . . . . . . . . . . . . . . . . . . . . . . . . . . . . . . . . 4--2

4.3

Start-up and Operation . . . . . . . . . . . . . . . . . . . . . . . . . . . . . . . . . . . . . . . . . . . . . . 4--5

OXYMAT 61 Instruction Manual
A5E00123067-01

4--1
Start-up
4.1

Safety Information

!

Caution
Certain parts in this analyzer carry dangerous voltages. The housing
must be closed and grounded before switching on the analyzer. Death,
personal injury and/or damage to property may result if this is not
observed. Also refer to Section 2.5.
A standard analyzer must not be used in potentially explosive atmospheres. Use with gases with flammable components at concentrations
above the lower explosion limit (LEL) must be clarified with the responsible Ex authorities, and is finally the responsibility of the owner.
When measuring toxic or corrosive gases, it may occur that sample
gas collects in the analyzer as a result of leaks in the gas path. To
prevent the danger of poisoning, or also of damage to parts of the
device, the analyzer or the system must be purged with inert gas (e.g.
nitrogen). The gas displaced by purging must be collected using
suitable equipment and routed for environmentally-friendly disposal via
an exhaust line.

4.2
4.2.1

Preparation for Start-up
General Information

Gas conditioning

!

Gas sampling devices, gas cooler, condensation vessel, filters
and any controllers, recorders or indicators (if connected)
should be made ready for operation (refer to respective Instruction Manuals).
Caution
Please observe the notes in Section 2.5 ”Electric Connection”!

Operation

Before connecting and switching on the analyzer, make yourself
acquainted with operation (Chapter 5 of this Manual).

Interfaces

Prior to start-up, connect and parameterize the interfaces.

4.2.2

Special Preparations for Startup

Selection of
reference gas

4--2

It should always be ensured that the various spans have at
least one common point. This point is then defined as the
”physical zero” and applies to all measuring ranges. The reference gas can be selected once this point has been found.
OXYMAT 61 Instruction Manual
A5E00123067-01
Start-up
The following example clarifies this:
Assume there are four measuring ranges:
17 -- 22 %O2
15 -- 25 %O2
0 -- 25 %O2
0 --100 %O2

The range 17--22 % O2 is common to all these
measuring ranges. The physical zero must be
present in this range. Air (20.95% O2) is
suitable as the reference gas in this case.

An exception can be made if the smallest measuring range is
≥ 5 % O2 and the difference from the reference gas is not
more than 20 % O2. In this case the physical zero can also be
outside the measuring range. The pressure correction (see
function 82 in Chapter 5) must be activated in this case since a
pressure dependence exists as a result of the large zero offset.
The purity of the reference gas must be appropriate to the task.
Assembly of reference
gas connection

The reference gas connection has a different design depending on the order:
D Air (low-pressure version)
The reference gas (air) is sucked in by the internal pump.
When fitting within a cabinet, ensure that the sucked air
comes from outside the cabinet.
D Nitrogen, oxygen, air (high-pressure version)
Check that the gas purity is appropriate (4.6)!
The supply is from a cylinder with a pressure setting of 3000
to 4000 hPa above the sample gas pressure
A sintered metal filter (porous filter) has been pressed into
the coupling to prevent the entry of dirt into the gas path.

Application of
reference gas

The reference gas must always be flowing for a certain time
before measuring is started. The reference gas should continue
to flow even if there is a temporary interruption in measuring.
The resulting additional consumption is insignificant if there are
no leaks in the reference gas line.

Compressed gas
cylinder

If the reference gas is supplied from a cylinder, the reference
gas line should be purged prior to start-up. Then check the line
for leaks, since these are often greater than the actual consumption of reference gas. To do this, shut off the valve on the
cylinder. The gas connection is sufficiently leak-proof if the
pressure gauge on the reduction valve of the cylinder does not
drop by more than 1000 hPa/min (15 psi/min). The reference
gas pressure must always be more than 2000 hPa (30 psi)
above the sample gas pressure.

Checking the reference gas pressure

Check the flow of the reference gas:
If the option ”Reference gas pressure switch” is present, note
that the switching point of the pressure switch is factory-set to
2000 hPa (30 psi) above atmospheric pressure.

OXYMAT 61 Instruction Manual
A5E00123067-01

4--3
Start-up
Checking the flow
of reference gas

Check the flow as follows:
D Close sample gas inlet coupling.
D Connect a hose with an ID of 4 mm to the sample gas outlet
coupling and dip into a beaker filled with water. The reference gas must escape slowly from the hose (1...2 bubbles/
sec., or 2...4 bubbles/sec. with a flow-type compensation
circuit).

Checking for leaks
Hosed analyzers

Check for leaks in the sample gas path as follows:
D Block off the reference gas connection.
D Apply approx. 100 hPa (1.5 psi) to the sample gas path and
close off pressure source.
D Wait for approx. 1 min. During this time, the inflowing sample gas has assumed the temperature of its environment.
D Note the pressure (can be read using function 2).
D Wait 15 minutes, and note the pressure again. The sample
gas path is sufficiently leak-proof if the pressure has
changed by a maximum of 1 hPa (1 mbar) within the 15
minutes.

4--4

OXYMAT 61 Instruction Manual
A5E00123067-01
Start-up
4.3

Start-up and Operation

Switching on the
power supply

The measured-value display appears after a short delay in the
LCD. The status display appears above this in the top line (see
Section 5.1 for more details).
The measuring head is in the warming-up phase for the first five
minutes. The message CTRL (function check) is displayed
during this time.

Spans

Define the desired spans (full-scale value -- start-of-scale value)
using function 41. The 0(2/4) and 20 mA of the analog output
are assigned to the start-of-scale and full-scale values respectively.
In the case of several measuring ranges it is recommendable to
assign the smallest span to range 1 etc. The following then
applies: span1<span2<span3<span4.

Setting the
physical zero

If the composition of the calibration and reference gases is the
same, i.e. their O2 difference is zero, a signal is not present.
This is referred to as the physical zero. Depending on the
reference gas, the physical zero can thus have a value of 0 to
100 % O2. The setpoint of the physical value is entered using
function 22.

Setpoint for
sensitivity
adjustment

The setpoints should be as far as possible away from the
physical zero (at least 60 % of the respective span). The corresponding calibration gases should be available, and the setpoint
is entered using function 22.

Single/total
calibration

Set a total or single calibration using function 23 or 52.
A single calibration means that each range is calibrated with
its own calibration gas.
With a total calibration, only the master range is calibrated
(selected using function 22), the other ranges are determined
according to the switching ratio.
Make sure that the gas flow is between 0.3 and 1 l/min.

Calibrating the
zero

The physical zero is calibrated using function 20. It applies to all
parameterized measuring ranges.

Calibrating the
sensitivity

The sensitivity is calibrated in a similar manner using function
21.

OXYMAT 61 Instruction Manual
A5E00123067-01

4--5
Start-up
Calibration
examples

a) O2 monitoring in gases
Oxygen is to be measured in N2.
Measuring range: 0--0.5 % O2;
reference gas N2;
calibration gas: 0.43% O2

Procedure

Function No.

Input

Remarks

Selection of start-of-scale and
full-scale values of range

41

0 - 0.5
-

0 Þ 0(2/4)mA
0.5 Þ 20 mA

Input of setpoints for physical zero
and sensitivity

22

0

Setpoint for physical zero

0.43

Setpoint for sensitivity

Calibration of zero

20

Flow of N2

Calibration of sensitivity

21

Flow of calibration gas

b) Room air monitoring
Measuring range 15 to 21% O2;
reference gas: air (20.95% O2);
calibration gas: 15.3% O2
Procedure

Function No.

Input

Remarks

Selection of start-of-scale and
full-scale values of range

41

15 - 21
-

15 Þ 0(2/4)mA
21 Þ 20 mA

Input of setpoints for physical zero
and sensitivity

22

20.95

Setpoint for physical zero

15.3

Setpoint for sensitivity

Calibration of zero

20

Flow of air

Calibration of sensitivity

21

Flow of calibration gas

c) O2 measurement in flue gas
Measuring range: 0 --10% O2 ;
reference gas: air;
calibration gas: N2
Note:
The O2 concentration of the reference gas is not in the
measuring range 0 --10% O2. However, since the span is
> 5% it is permissible to violate this selection criterion of
the reference gas. Please ensure that the pressure
correction (see function 82 in Chapter 5) is activated!
Procedure

Function No.

Input

Remarks

Selection of start-of-scale and
full-scale values of range

41

0-10

0 Þ 0(2/4)mA
10 Þ 20 mA

Input of setpoints for physical zero
and sensitivity

22

20.95

Setpoint for physical zero

0

Setpoint for sensitivity

Calibration of zero

20

Flow of air

Calibration of sensitivity

21

Flow of N2

4--6

OXYMAT 61 Instruction Manual
A5E00123067-01
Start-up
d) Monitoring of oxygen purity
Measuring range 95 -- 100 % O2;
reference gas: O2;
calibration gas: 95.6 % O2
Procedure

Function No.

Input

Remarks

Selection of start-of-scale and
full-scale values of range

41

95 - 100
-

95 Þ 0(2/4)mA
100 Þ 20 mA

Input of setpoints for physical zero
and sensitivity

22

100

Setpoint for physical zero

95.6

Setpoint for sensitivity

Calibration of zero

20

Flow of pure O2 (100 %)

Calibration of sensitivity

21

Flow of calibration gas

Please refer to Chapter 5 (Operation) for exact instructions
concerning operation of the above-mentioned functions.

Compensation of
temperature
influence

Compensation of the influence of temperature is a fixed component in the software (firmware) of the OXYMAT 61.

Noise suppression

Noise on the input signal can be suppressed using function 50.
This function permits the setting of a lowpass filter which can be
assigned a time constant up to 100 s.

OXYMAT 61 Instruction Manual
A5E00123067-01

4--7
Start-up

4--8

OXYMAT 61 Instruction Manual
A5E00123067-01
Operation

5

5.1

General . . . . . . . . . . . . . . . . . . . . . . . . . . . . . . . . . . . . . . . . . . . . . . . . . . . . . . . . 5--2

5.2

Summary of Input Functions . . . . . . . . . . . . . . . . . . . . . . . . . . . . . . . . . . . . . . 5--7

5.2.1

Analyzer Status . . . . . . . . . . . . . . . . . . . . . . . . . . . . . . . . . . . . . . . . . . . . . . . . . 5--8

5.2.2

Calibration . . . . . . . . . . . . . . . . . . . . . . . . . . . . . . . . . . . . . . . . . . . . . . . . . . . . . . 5--9

5.2.3

Measuring Ranges . . . . . . . . . . . . . . . . . . . . . . . . . . . . . . . . . . . . . . . . . . . . . 5--16

5.2.4

Parameters . . . . . . . . . . . . . . . . . . . . . . . . . . . . . . . . . . . . . . . . . . . . . . . . . . . 5--18

5.2.5

Configuration . . . . . . . . . . . . . . . . . . . . . . . . . . . . . . . . . . . . . . . . . . . . . . . . . 5--24

OXYMAT 61 Instruction Manual
A5E00123067-01

5--1
Operation
5.1

General
1

2

4

5

9

V LIM V STO

3

V AR

63,28

% VOL

V CODE
CO2

¡©¢£

6

0,0

100
7

8

+/--

1.
2.
3.
4.
5.
6.
7.
8.
9.

8

9

4
0

7

5

6

1

2

3

CLEAR

ESC
INFO

ENTER

MEAS

Status line (parameterizable using function 53)
Status display
(e.g. j LIM means: limit (alarm) signalling is active;
J LIM means: limit (alarm) has been triggered)
Measured value
Display of dimension
Display of measured component
Analog measured-value display
(display of measured value with start-of-scale and full-scale values of current range)
Display of activated measuring ranges with identification of current range
Limit mark on bargraph
Function keys with varying meaning (softkeys)

Fig. 5--1 Display and control panel

5--2

OXYMAT 61 Instruction Manual
A5E00123067-01
Operation
Switches/keys and their meanings
Key

Meaning

CLEAR

Deletes a commenced number input

ENTER

Every digit input (except fast selection of a function) must be
confirmed using ENTER

ESC

Return by one step in the input structure.
Modifications are imported

INFO

Help information
Return from any position in the input structure to display mode
(possibly with request whether to import the entered data).
Pressing the MEAS key again results in locking of analyzer;

MEAS

i.e. changing to input mode again is only possible following input
of the code.
Varying meaning; possible in this case:
· Selection of item in menu tree
· Selection function
· Switch function ON/OFF

Softkey

Editing of inputs

The values in the menus shown in Chapter 5 should be understood as examples.

D An active input field is represented with colons (:10:) as limiters. The cursor is positioned as a flashing line underneath
the number to be entered (e.g. :23.45:).

D The input is terminated by pressing the ENTER key, and the
value stored. If several input fields are present in a menu,
the cursor is automatically positioned to the next input field.

.

Caution
Each input value must be confirmed with ENTER before you
leave the menu. Also the last of several values in a menu.

D The CLEAR key can be used to delete an input. The cursor
then returns to the first position of the input field.

Switching function (ON status)
Switching function (OFF status,
also status display in the status line)
Entry into a subsequent menu

D

OXYMAT 61 Instruction Manual
A5E00123067-01

J
j

"

Graphic styling elements

Triggering of a function (e.g. start calibration, ...)

5--3
A

CO2

Start from
measuring mode

CODE

1 2 3 4

"

Yes
No

Import
modifications?

Query (only following modifications)

Meas. mode

LIM

100

CODE

Y

0.0

63,28 % vol

LIM

Display mode

Relay
”Function check”
(CTRL,
Function 71)

Input

Code

Function menu

Store for
analog output
(Function 77)

YYYY Y

YY

Only following modifications

Y Y Y YY

Analyzer status
Calibration
Meas. ranges
Parameters
Configuration

Main menu
-----------------------------------------------------------------------

imported

Function

Hard keysSoft keys

-----------------------------------------------------------------------

5--4
Modifications are

Measuring mode: analyzer is coded / Display mode: analyzer is not coded; signals are activated according to functions 71 and 77

Operation

Coding of analyzer

Fig. 5--2 Input sequence

OXYMAT 61 Instruction Manual
A5E00123067-01
Operation
Input sequence
The analyzer is in measuring mode. The measured component is shown on the right of the display, together with an arrow
pointing to the right ("). A softkey is assigned to this component. The main menu is called by pressing this softkey.

Entry into main menu

Main menu

O2

Analyzer status

"

Calibration

"

Measuring ranges

"

Parameters

"

Configuration

"

The main menu consists of the following items (followed by the
associated code level):
Analyzer status
Calibration
Measuring ranges
Parameters
Configuration

Not coded
Code of level 1
Code of level 1
Code of level 1
Code of level 2

The code for level 1 is factory-set to the value ”111”, that for
level 2 to the value ”222”.

Entering a submenu

Following the selection of a submenu, you will be asked to enter
the code of the input level (exception: submenu ”Analyzer status” is not coded and is thus freely-accessible). Decoding of
level 2 also decodes level 1. External signalling via a relay contact is possible when decoding if a corresponding relay has
been configured with CTRL under function 71. The warming-up
and calibration phases of the analyzer or the channel are then
also signalled via this relay contact. The measured-value
memory becomes active together with the decoding if it has
been switched on under function 77. The coding of a channel
can be recognized by the symbol J CODE in the display (display mode), and decoding by the symbol j CODE.

Return to measuring
mode

MEAS key:

Return to meas. mode

O2

Accept modifications?
YES

F

NO

F

Returns immediately to display mode
from any position in the menu structure.
A commenced input is aborted.

The adjacent question is displayed before the return is carried
out.
Pressing either the YES or NO softkey returns to display
mode. The modifications are finally imported into the working
area of the parameter memory if you press YES, or rejected
with NO.
Pressing the ESC key returns to the last function display.
ESC key:

OXYMAT 61 Instruction Manual
A5E00123067-01

Leads back step-by-step to display mode.
Modifications are imported without questioning.

5--5
Operation
Coding of analyzer

After returning to display mode using ESC or MEAS, the analyzer can be coded again (j CODE) by pressing the MEAS key
again, thus entering measuring mode. All statuses produced
by the decoding (see above) are cancelled by this.

Fast selection of
functions

A ”Power user” input has been introduced to permit immediate
switching from the measuring display to the desired function
display if frequent inputs are necessary. It is then possible to
directly access the desired function by bypassing the menu
levels. The ”Power user” input can only be started from
measuring mode and comprises the following input steps:

D Enter number of desired function in measuring display using
the digit keys.

D Press the softkey next to the desired component.
D You will then be requested to enter the code if the desired
function is protected by a code.

5--6

OXYMAT 61 Instruction Manual
A5E00123067-01
Operation
5.2

Summary of Input Functions
The following list summarizes the analyzer functions. This list
corresponds to software release version 4.

Main menu item
(section)

Function
number

Function designation

1
2
3
4

Analyzer configuration
Diagnostics values
Logbook
Display measuring ranges

5.2.2 Calibration
(code 1)

20
21
22
23
24

Zero calibration
Span calibration
Setpoints for zero/span
Total/single range calibration
Autocal

5.2.3 Measuring
ranges
(code 1)

40
41

Select ranges
Define ranges

5.2.4 Parameters
(code 1)

50
51
52
53
54
55
56
57
58
59
60
61

Electric time constants
Limits
On/off configurations
Status messages
Graphic signal display
Select display digits
LCD contrast
Magnetic field frequency
Date/time
Sample point selection
Setup logbook
Shock compensation (not active)

5.2.5 Configuration
(code 2)

70
71
72
73
74
75
76
77
78
79
80
81
82
83
84
85
86
87
88
89
90

Analog output
Relay outputs
Binary inputs
ELAN configuration
Reset
Save data, load data
Suppress noise signals
Store analog output
Calibration tolerances
Codes for input levels
Analyzer test
Select language
Pressure correction
Interference correction
Phase adjust
Switch valves
Linear temperature compensation
Error On/Off
AK configuration
Sample chamber heater (not with OXYMAT 61)
PROFIBUS configuration

5.2.1 Analyzer
status

Table 5--1

Summary of input functions

OXYMAT 61 Instruction Manual
A5E00123067-01

5--7
Operation
5.2.1

Analyzer Status

Analyzer status

O2

1 Analyzer config.

"

2 Diagnostics values

"

3 Logbook

"

The adjacent display appears following selection of the diagnostics functions in the main menu by pressing the first softkey
(”Analyzer status”).
The diagnostics functions are freely-accessible. You will not be
asked to enter a code.

4 Display meas. ranges "

1 Analyzer configuration

Important manufacturing data of the analyzer are visible when
you select this function:

D Firmware No.

Order No. of software stored in the EPROM

D Order No.

Information on ordering data of analyzer

D Serial No.

Information on date of manufacture and consecutive number
of analyzer

D Hardware version

Information on hardware design of analyzer

D Software version and date

Information on scope of analyzer functions

2 Diagnostics values

The most important internal values are listed under function 2.
They may be of interest for assessing faults or adjustment operations.

3 Logbook

All faults which led to a maintenance request (W) or fault message (S) are listed in the logbook (see also Section 6.6).
Limit alarms (LIM) and function check (CTRL) are also
recorded. However, these do not trigger a maintenance request
or fault message.
The logbook contains a maximum of eight pages, each of which
can accommodate four messages. It operates according to the
principle of a circulating buffer, i.e. the oldest message is
overwritten when all eight pages are full.
The logbook entries can be deleted or blocked (function 60), or
also switched off individually (function 87).

4 Display measuring ranges The measuring ranges defined using function 41 are listed
using function 4. However, they cannot be modified in this
menu.
Note

.
5--8

If a fault occurs whose error message is switched off by
function 87, there is no reaction at the interface which may be
configured. This applies to the ELAN interface as well as to the
analog and relay outputs.
OXYMAT 61 Instruction Manual
A5E00123067-01
Operation
5.2.2

Calibration
The OXYMAT 61 permits either a manual or automatic
calibration. The latter (autocal: function 24) is only possible with
an option board which contains 8 additional binary inputs and 8
additional relay outputs.
The setpoints for the zero and sensitivity adjustments must be
set under function 22.
The corresponding gases must be applied manually for
functions 20 and 21.

20 Zero calibration
20 Zero calib.
Setpoint

O2
% v/v

15.388

% v/v

Act. val.

0.000

The zero is calibrated simultaneously for all measuring ranges,
even if the sensitivity is calibrated individually for the ranges.

Start calibration
CANCEL

The calibration procedure should only be triggered when the
measured value (actual value) has stabilized following application of the zero gas.
F
F

A single or total calibration is carried out depending on the setting of function 23 (component-specific).

21 Span calibration

21 Span calib.

If the measured value is unsteady, increase the time constant
(function 50) prior to the calibration.

O2

Calibrate MR 1

"

Calibrate MR 2

"

Calibrate MR 3

"

Calibrate MR 4

"

Span calib. MR 3

O2

Single calibration:
The display lists the ranges which were previously defined using function 41. The adjacent display is therefore an example of
the single calibration of four ranges.

Setpoint

: 20.000 vpm

Act. val. 1

: 20.200 vpm

Start calibration

F

Cancel calibration

If you now wish to calibrate e.g. range 3, press the corresponding softkey.

The display lists the setpoint and the current value of range 3.
Once the actual value has stabilized, the calibration procedure
can be triggered by pressing 4th softkey. The actual value is
then set to coincide with the setpoint.
If an incorrect calibration has been carried out by mistake (e.g.
with an incorrect calibration gas), the original value can be
loaded again by pressing the softkey ”Cancel calibration”.

F

OXYMAT 61 Instruction Manual
A5E00123067-01

5--9
Operation
Total calibration:
21 Sp. calib. all MRs
Setpoint :

20.000 % v/v

Act. val.:

O2

20.200 % v/v

Start calibration
CANCEL

With a total calibration, all measuring ranges are calibrated
together. The ”master” range is defined using function 22. It is
advisable to select the largest range for this.
The display lists the setpoint and the current value of the
”master” range.

F
F

Once the actual value has stabilized, the calibration procedure
can be triggered by pressing 4th softkey. The actual value is
then set to coincide with the setpoint.
If an incorrect calibration has been carried out by mistake (e.g.
with an incorrect calibration gas), the original value can be
loaded again by pressing the softkey ”Cancel calibration”.

22 Setpoints total
22 Setpoints total

O2

Setpoint for zero
: 0.000: % v/v
Setpoint for MR 1
: 2.500 % v/v

j

Setpoint for MR 2
: 5.000 % v/v

It is not possible to select a master range for a single calibration.

j

Setpoint for MR 3
: 10.000 % v/v

The adjacent example shows the setpoint input for a total calibration. The third measuring range has been selected as the
master range.

J

5--10

OXYMAT 61 Instruction Manual
A5E00123067-01
Operation
23 Total/single range
calibration
23 Total/single cal.

O2
j

Total calibration

These functions are used to select a total or single calibration of
the measuring ranges.
A total calibration means that a ”master range” is calibrated and
that all other ranges are calculated by means of a ratio.
If this function is not activated, each range is calibrated
individually.

24 Autocal
24 Autocal

O2

Autocal mode

"

Autocal sequence

"

Autocal cyclic param.

"

Autocal check

The automatic calibration (Autocal) can only be carried out
if the analyzer contains the supplementary electronics (option).

"

If this is not the case, a corresponding warning is output
on the display when you select an autocal parameter.

Autocal mode
Autocal mode

O2

Autocal on/off

j

Start autocal
cyclically

j

Start autocal via
binary input

j

Trigger autocal once

F

Abort autocal

You can use this subfunction to parameterize the various operating modes of the autocal function.

F

In mode “Start autocal cyclically”, an autocal is started after a
specific time (see “Autocal cyclic parameter” for details).

Autocal on/off

In the status ”Autocal off” (representation j), the switches
”Start autocal cyclically” and ”Start autocal via binary input” can
no longer be activated. ”Trigger autocal once” is also switched
off. The cycle time continues, but an automatic calibration is not
triggered.

Start autocal cyclically

Autocal can be activated in a regular, repetitive cycle if the
”Time from autocal to autocal” has been previously set.

Start autocal via
binary input

Autocal can be activated via a binary input if you have
configured this using function 72.

OXYMAT 61 Instruction Manual
A5E00123067-01

5--11
Operation
The modes ”Start cyclically” and ”Start via binary input” can be
activated simultaneously in order e.g. to check a weekly
calibration and to control this check via a binary input.
In addition, an autocal sequence can be started in the status
“Autocal on” at any time using the softkey ”Trigger autocal
once” providing the analyzer is ready for measurement (i.e.
calibration or warming-up phase not currently running). A
sequence triggered in this manner has no influence whatsoever
on the time cycle of an autocal, i.e. the cycle time continues
irrespective of this.

Trigger autocal once

When triggered, the point disappears until the process has
been finished.
An automatic calibration procedure can be interrupted at any
time when being carried out using the key ”Abort autocal”. All
calibration data which have been determined so far are rejected, and the calibration data (zero and sensitivity) prior to
starting the autocal are used further.

Abort autocal

The abort has no influence on the time cycle. All valid adjustment procedures are retained.
This subfunction can be used to combine several calibration
phases into one autocal sequence.

Autocal sequence

Autocal sequence

O2

1. Zero gas : 1.0: min F
2. Cal.gas 1: 2.0: min F
3. Cal.gas 2: 1.0: min F
4. Cal.gas 3: 2.0: min F
Continue

"

The sequence of the automatic calibration can be freely defined. It is possible to ”compose” a sequence from up to 12 different phases.
In addition to the connection of one zero gas and up to four
calibration gases per component, it is also possible to program
purging with sample gas, an intermediate sample gas mode,
and a signalling contact. This signalling contact is available if it
has been previously assigned to a relay output using function
71.

Intermediate
sample gas mode

An intermediate sample gas mode may be necessary if the system is only permitted to leave measuring mode for a specific
period. If the total time then required for purging is greater than
the permissible loss time, a return must be made to measuring
mode between the calibrations (intermediate sample gas
mode).

Signalling contact

The signalling contact can be used e.g. to trigger the automatic
calibration of a second analyzer or to signal the start or end of
the autocal function.

Relay outputs

If relay outputs have been assigned for sample gas, zero gas,
calibration gases and/or measure/calibrate (function 71), these
are switched to trigger the corresponding solenoid valves. The
same also applies to the signalling contact ”Autocal”; this is
closed for approx. one second when the command is executed.

5--12

OXYMAT 61 Instruction Manual
A5E00123067-01
Operation
The following sequence is to programmed:

Example
Autocal sequence
1.Zero gas

O2

:15.0:min F

2.Calib.gas 1:10.0:min F
3.SG purging : 8.0:min F
4.Int.SG mode:30.0:min F
...Continue "

Autocal sequence

O2

5.Calib.gas 2: 8.0:min F

1. Zero gas calibration following 15 minutes purging with zero
gas
2. Calibration with gas 1 following purging for 10 minutes
3. Purging with sample gas for 8 minutes
4. Intermediate sample gas mode for 30 minutes
5. Calibration with gas 2 following purging for 8 minutes
6. Calibration with gas 3 following purging for 8 minutes
7. Calibration with gas 4 following purging for 10 minutes
8. Purging with sample gas for 8 minutes
9. Brief signalling contact in order to start ”Autocal” on a further
analyzer or channel
The defined autocal sequence is shown in the adjacent displays.

6.Calib.gas 3: 8.0:min F
7.Calib.gas 4: 8.0:min F
8.SG purging : 8.0:min F
...Continue "

Autocal sequence

O2

9.Sig.cont:I::I::I:min F
10.

:I::I::I:min F

11.

:I::I::I:min F

12.

:I::I::I:min F
...Continue "

OXYMAT 61 Instruction Manual
A5E00123067-01

5--13
Operation
List for the Autocal sequence:
Step

Component

Autocal sequence

Zero gas 1

Component 1

Function code 1

Zero gas 2

-- “ --

Function code 2

Calibration gas 1

-- “ --

Function code 3

Calibration gas 2

-- “ --

Function code 4

Calibration gas 3

-- “ --

Function code 5

Calibration gas 4

-- “ --

Function code 6

Purge sample gas
Immediate sample
gas mode

Autocal cyclic parameter
Autocal cycle

O2

Time from autocal to autocal (cycle time):
2:[h]
Time up to first autocal
cycle
: 15:[min]
Carry out span calibration
for each 8th cycle
Total range calibration
calib. gas 1

Function code 8

Signalling contact

.

Function code 7

Function code 9

Note!
Zero gas 2: only required with Autocal in absorber mode

This subfunction can be used to parameterize various time
constants for activating a cyclic, repetitive autocal.

D Time from autocal to autocal (cycle time).

Any setting between 0 and 1000 (hours) is accepted by the
analyzer.

D Time up to first autocal cycle (starting at time of setting).

If “0” is entered here and if autocal is switched on (see ”Autocal on/off”), the analyzer commences immediately with the
autocal sequence.

If autocal is switched off, the analyzer only starts an autocal
sequence if autocal is switched on within one minute of entering
the “0”. If this is not the case, the complete time between two
autocal sequences elapses starting with input of the “0”.
The internal clock continues even when autocal is
switched off! It starts at ”01.01.1995 00:00” when the
analyzer is switched on, and must be set to the current
time using function 58.

5--14

OXYMAT 61 Instruction Manual
A5E00123067-01
Operation
D Number of cycles until the span calibration is carried out.
The zero is calibrated with each autocal. If it is unnecessary
to also calibrate the sensitivity each time the zero is calibrated -- e.g. in order to save calibration gas -- a value >1
must be entered in the line ”Carry out calibration with calibration gas every : : cycle”.
The information in the last lines indicates that the entered
parameters refer to a total calibration with calibration gas for
measuring range 3. This range has been previously selected
using function 22.
Note

.

Access to functions 20 and 21 is blocked as long as autocal is
active (Autocal J). A corresponding message is output in the
display if this function is then selected.
The “Autocal check” is used to check the calibration. The
sequence parameterized in the menu “Autocal sequence” is
executed as for “Autocal”. However, in contrast to “Autocal”, no
new calibrations are triggered, only the deviations with respect
to selectable calibration tolerances are checked.

Autocal check

O2

Calibr. tolerance for 0 :6:
in % of smallest span
Calibr. tolerance for span
in % of current span
:6:
Start Autocal check

F

Cancel Autocal check

F

Autocal check sequence:
1. Enter the desired calibration tolerances in the menu “Autocal
check”. If necessary, select the relay output and the binary
input for “Autocal check”.
2. Start the “Autocal check” using the button in the menu
“Autocal check” or via the binary input.
3. The analyzer then carries out a sequence as parameterized
in the menu “Autocal sequence”.
4. If a calibration limit is violated, the maintenance request
W10 is set and, if parameterized, also the relay “AcalChk
Dif.”.
5. Both of these are reset following a fault-free Autocal.

OXYMAT 61 Instruction Manual
A5E00123067-01

5--15
Operation
5.2.3

Measuring Ranges

Meas. ranges

O2

40 Select ranges

"

41 Define ranges

The adjacent display appears following selection of the range
functions in the main menu by pressing the third softkey (”Measuring ranges”).

"

40 Select ranges
40 Select ranges

O2

It is possible to select one measuring range or to switch to autoranging. All selection possibilities are subject to mutual interlocking.

MR1

0.0 -

5.0

vpm

j

MR2

0.0 -

10.0

vpm

j

Autoranging is only possible under the following conditions:

MR3

0.0 -

25.0

vpm

J

MR4

0.0 -

100.0

vpm

j

D At least two ranges must be available. A range is considered
as present if the start-of-scale value is not equal to the
full-scale value.

Autoranging

j

D The spans must become greater.
D The ranges must be adjacent to one another or overlap.
This results in the following permissible constellations:

Type A:

a.)

FSV [i] < FSV [i+1]

b.)

c.)

Type B:

FSV [i] ³ FSV [i+1]

d.)

e.)

SSV: start-of-scale value
FSV: full-scale value

5--16

OXYMAT 61 Instruction Manual
A5E00123067-01
Operation
A differentiation is made between two types of range::
Type A:

The full-scale value must be smaller than the
subsequent full-scale value.
The following applies to autoranging:

--20% --10%

of span subtracted from full-scale value

Range 1

Range 2

Type B:

The start-of-scale value must be greater than or
equal to the subsequent full-scale value. Since the
spans must become larger at the same time, the
start-of-scale values of the subsequent ranges
are always smaller.
The following applies to autoranging:

0% +10%

of span subtracted from start-of-scale value
Range 1

Range 2

41 Define ranges
41 Define ranges
No.

Start value

O2
End value

1

: 0.000 :

: 10.0: % v/v

2

: 0.000 :

: 50.0: % v/v

3

: 0.000 :

:100.0: % v/v

4

: 0.000 :

:500.0: % v/v

Up to four measuring ranges can be defined whose start-ofscale values are assigned to the bottom value (0/2/4 mA) and
whose full-scale values are assigned to the top value (20 mA)
of the analog output.
If the message “Ranges not plausible” is displayed, this means
that autoranging is not possible.

Ranges not plausible!

OXYMAT 61 Instruction Manual
A5E00123067-01

5--17
Operation
5.2.4

Parameters

Parameters

O2

50 El. time constants

"

51 Limits

"

The adjacent display with selection of the parameter functions
50 to 53 appears following selection of the parameter functions.
You can branch to the parameter functions 54 to 61 by pressing
the fifth softkey (... Continue).

52 On/off configuration "
53 Status messages
Continue

"
"

50 Electric time constants
50 Electr. time con

O2

Effective bandwidth in
% of smallest MR:: 6.0:%
Time constant within
bandwidth ti:
: 10.0:s
Time constant outside
bandwidth ta:
: 1.0:s
Actual measured
value: 0.982

vpm

This function can be used to set various time constants to reduce the noise superimposed on the measured value. The reduction in noise approximately corresponds to that of a lowpass filter with a corresponding time constant.
The time constant ti is effective within a parameterizable
interval defined in % of the smallest measuring range. On the
one hand, this dampens small changes in measured value (e.g.
noise), but becomes immediately ineffective when the signal
passes through the effective interval. In this case, the signal is
dampened by the external time constant ta.
You can set values up to 100 % for the effective interval, and
values up to 100 s for the time constants ti and ta. Appropriate
combination of these three parameters permits the implementation of a low display delay (90 % time) despite high noise
suppression.
The effect of the set damping parameters can be observed in
the bottom line in which the ”real” measured value is displayed
(in % of full-scale value).

51 Limits
51

Limits

O2

Limit 1 : 22.125: % v/v
on relay 3
Alarms at decrease
signal

F

B
Valid for range ¡©¢£

F

Limit alarm on/off

j

Limit 2

"

The analyzer can monitor up to 4 limits which you can assign to
the measuring ranges as desired.
Any relay can be assigned to each limit (see function 71). If this
has not been configured, ”--” appears in the limit display.
Only positive limit values up to 100 % can be parameterized.
It is additionally possible to select whether an alarm is to be
output when the entered limit is exceeded or fallen below.
The assignment of the limit to the measuring ranges is
achieved by repeatedly pressing the third softkey. Pointers
above the bordered range numbers move in the process and
show the ranges in which the limit monitoring is to be active (all
ranges in the adjacent example).
Limit monitoring can be switched off individually for each limit
(see also function 52).

5--18

OXYMAT 61 Instruction Manual
A5E00123067-01
Operation
Resetting of limit alarm:
If the limit relay has been triggered, this status is also retained if
the measured value returns to the permissible range again. The
triggering of a limit relay is registered in the logbook (function
3). The limit relay is automatically reset as soon as the cause
for its setting is no longer present.
The program jumps to limit display 2 etc. when you press the
fifth softkey (”...Continue”).
52 On/off configurations
52 On/off config.

O2

Autoranging

J

Stored value

j

Temperature compensation j
Pressure compensation

j

...Continue "

Channel-specific on/off configurations (e.g. flow check for sample gas) can only be called using the first component.
This function permits simple switching on and off of the functions listed in the adjacent display.
This simplified input means that it is not necessary to pass
through the various menu levels for these functions.
It is possible to switch up to four functions on and off in each of
the displays which can be called. Switched-on configurations
are identified by J , switched-off ones by j. The next display
can be selected in each case using the fifth softkey (”...Continue”).
The following configurations can be switched on and off using
function 52:

Designation

Total calibration

Remarks

No.
23

Autocal

24

Autoranging

40

Limit monitoring 1

51

Limit monitoring 2

51

Limit monitoring 3

51

Limit monitoring 4

51

Blocking of logbook

60

Suppression of negative measured values

70

Store analog output

77

Signalling of tolerance violation

78

Temperature compensation of zero

86

Temperature compensation of sensitivity

Only with supplementary electronics

86

Flow check for sample gas
Flow check for reference gas
Fault / maintenance request / CTRL to NAMUR

72

Measuring head heater

Table 5--2

Functions accessible using function 52

OXYMAT 61 Instruction Manual
A5E00123067-01

5--19
Operation
Apart from the functions listed in Table 5--2, further service
functions can be addressed using function 52. These are
reserved for servicing personnel and are only visible following
input of the service code (code stage 3).
53 Status messages
50 Status messages

This function can be used to display -- in the status line -- up to
four different statuses which can be assumed by the analyzer.

O2

Display automat.
calibration [CAL]

j

Display stored
value [STO]

J

Display
limits [LIM]

j

Display
autorange

J
[AR]

Display control
function [CTRL]

Status

j

Output in display depending on functions 52 and 53
Fct. 53 j

Fct. 52 j
Fct. 53 J

Calibration: CAL

None

CAL

j CAL

J CAL

Calibration running

Stored value : STO

None

STO

j STO

J STO

Analog output connected to
memory
(see also function 77)

Limit: LIM

None

LIM

j LIM

J LIM

Upward or downward violation
of limit
(see also function 51)

Autoranging: AR

None

AR

j AR

J AR

During switching over of
ranges

Function check: CTRL

None

CTRL

j CTRL

J CTRL

Analyzer is decoded
Warming-up phase
Calibration running

Table 5--3

Fct. 52 J
Fct. 53 J

Status messages
The type of status ”Code” is always present in the status line.
If a fault occurs during operation, the message ”Maintenance
request” or ”Fault” appears in the status line depending on the
importance of the fault. This message is output alternately with
the status messages.

5--20

OXYMAT 61 Instruction Manual
A5E00123067-01
Oxymat 61  o2 analyzer

Mais conteúdo relacionado

Semelhante a Oxymat 61 o2 analyzer

350209_NGU-2000 BB (799020).pdf
350209_NGU-2000 BB (799020).pdf350209_NGU-2000 BB (799020).pdf
350209_NGU-2000 BB (799020).pdfGerson37561
 
KTA, Pinjaman Tanpa Jaminan, Dana Pinjaman Tanpa Jaminan
KTA, Pinjaman Tanpa Jaminan, Dana Pinjaman Tanpa JaminanKTA, Pinjaman Tanpa Jaminan, Dana Pinjaman Tanpa Jaminan
KTA, Pinjaman Tanpa Jaminan, Dana Pinjaman Tanpa JaminanPinjamanTanpaJaminan
 
Siemens s7 300-400-simatic couter module cm35
Siemens s7 300-400-simatic couter module cm35Siemens s7 300-400-simatic couter module cm35
Siemens s7 300-400-simatic couter module cm35Dien Ha The
 
Philips Respironics V60 - Service manual.pdf
Philips Respironics V60 - Service manual.pdfPhilips Respironics V60 - Service manual.pdf
Philips Respironics V60 - Service manual.pdfFatiEspindola
 
Simocode dp = manual de parametrização e operação
Simocode dp = manual de parametrização e operaçãoSimocode dp = manual de parametrização e operação
Simocode dp = manual de parametrização e operaçãoconfidencial
 
Caterpillar cat th255 c telehandler service repair manual sn jk200150 to present
Caterpillar cat th255 c telehandler service repair manual sn jk200150 to presentCaterpillar cat th255 c telehandler service repair manual sn jk200150 to present
Caterpillar cat th255 c telehandler service repair manual sn jk200150 to presentfjjsekksemmx
 
Caterpillar cat th255 c telehandler service repair manual sn jk300150 to present
Caterpillar cat th255 c telehandler service repair manual sn jk300150 to presentCaterpillar cat th255 c telehandler service repair manual sn jk300150 to present
Caterpillar cat th255 c telehandler service repair manual sn jk300150 to presentjfjskekdhnejd
 
Caterpillar cat th255 c telehandler service repair manual sn jk300150 to present
Caterpillar cat th255 c telehandler service repair manual sn jk300150 to presentCaterpillar cat th255 c telehandler service repair manual sn jk300150 to present
Caterpillar cat th255 c telehandler service repair manual sn jk300150 to presentfjjskdmnenemm
 
Caterpillar cat th255 c telehandler service repair manual sn jk200150 to present
Caterpillar cat th255 c telehandler service repair manual sn jk200150 to presentCaterpillar cat th255 c telehandler service repair manual sn jk200150 to present
Caterpillar cat th255 c telehandler service repair manual sn jk200150 to presentfjjskekrtfsmem
 
Caterpillar cat th255 c telehandler service repair manual sn jk300150 to present
Caterpillar cat th255 c telehandler service repair manual sn jk300150 to presentCaterpillar cat th255 c telehandler service repair manual sn jk300150 to present
Caterpillar cat th255 c telehandler service repair manual sn jk300150 to presentufsjekfksmem
 
Caterpillar cat th255 c telehandler service repair manual sn jk200150 to present
Caterpillar cat th255 c telehandler service repair manual sn jk200150 to presentCaterpillar cat th255 c telehandler service repair manual sn jk200150 to present
Caterpillar cat th255 c telehandler service repair manual sn jk200150 to presentfjjsjekksemm
 
Caterpillar cat th255 c telehandler service repair manual sn jk200150 to present
Caterpillar cat th255 c telehandler service repair manual sn jk200150 to presentCaterpillar cat th255 c telehandler service repair manual sn jk200150 to present
Caterpillar cat th255 c telehandler service repair manual sn jk200150 to presentuudjjekdmme
 
Caterpillar cat th255 c telehandler service repair manual sn jk200150 to present
Caterpillar cat th255 c telehandler service repair manual sn jk200150 to presentCaterpillar cat th255 c telehandler service repair manual sn jk200150 to present
Caterpillar cat th255 c telehandler service repair manual sn jk200150 to presentfjjskdmnenemm
 
Caterpillar cat th255 c telehandler service repair manual sn jk300150 to present
Caterpillar cat th255 c telehandler service repair manual sn jk300150 to presentCaterpillar cat th255 c telehandler service repair manual sn jk300150 to present
Caterpillar cat th255 c telehandler service repair manual sn jk300150 to presentfjjsjekksemm
 
Caterpillar cat th255 c telehandler service repair manual sn jk200150 to present
Caterpillar cat th255 c telehandler service repair manual sn jk200150 to presentCaterpillar cat th255 c telehandler service repair manual sn jk200150 to present
Caterpillar cat th255 c telehandler service repair manual sn jk200150 to presentufsjekfksmem
 
Caterpillar cat th255 c telehandler service repair manual sn jk300150 to present
Caterpillar cat th255 c telehandler service repair manual sn jk300150 to presentCaterpillar cat th255 c telehandler service repair manual sn jk300150 to present
Caterpillar cat th255 c telehandler service repair manual sn jk300150 to presentfjjsekksemmx
 
Caterpillar cat th255 c telehandler service repair manual sn jk200150 to present
Caterpillar cat th255 c telehandler service repair manual sn jk200150 to presentCaterpillar cat th255 c telehandler service repair manual sn jk200150 to present
Caterpillar cat th255 c telehandler service repair manual sn jk200150 to presentfujsjfkskemm
 

Semelhante a Oxymat 61 o2 analyzer (20)

In ultramat 23
In ultramat  23In ultramat  23
In ultramat 23
 
350209_NGU-2000 BB (799020).pdf
350209_NGU-2000 BB (799020).pdf350209_NGU-2000 BB (799020).pdf
350209_NGU-2000 BB (799020).pdf
 
KTA, Pinjaman Tanpa Jaminan, Dana Pinjaman Tanpa Jaminan
KTA, Pinjaman Tanpa Jaminan, Dana Pinjaman Tanpa JaminanKTA, Pinjaman Tanpa Jaminan, Dana Pinjaman Tanpa Jaminan
KTA, Pinjaman Tanpa Jaminan, Dana Pinjaman Tanpa Jaminan
 
Service Manual.pdf
Service Manual.pdfService Manual.pdf
Service Manual.pdf
 
Siemens s7 300-400-simatic couter module cm35
Siemens s7 300-400-simatic couter module cm35Siemens s7 300-400-simatic couter module cm35
Siemens s7 300-400-simatic couter module cm35
 
Philips Respironics V60 - Service manual.pdf
Philips Respironics V60 - Service manual.pdfPhilips Respironics V60 - Service manual.pdf
Philips Respironics V60 - Service manual.pdf
 
Coulter manual de usos
Coulter manual de usosCoulter manual de usos
Coulter manual de usos
 
Simocode dp = manual de parametrização e operação
Simocode dp = manual de parametrização e operaçãoSimocode dp = manual de parametrização e operação
Simocode dp = manual de parametrização e operação
 
Caterpillar cat th255 c telehandler service repair manual sn jk200150 to present
Caterpillar cat th255 c telehandler service repair manual sn jk200150 to presentCaterpillar cat th255 c telehandler service repair manual sn jk200150 to present
Caterpillar cat th255 c telehandler service repair manual sn jk200150 to present
 
Caterpillar cat th255 c telehandler service repair manual sn jk300150 to present
Caterpillar cat th255 c telehandler service repair manual sn jk300150 to presentCaterpillar cat th255 c telehandler service repair manual sn jk300150 to present
Caterpillar cat th255 c telehandler service repair manual sn jk300150 to present
 
Caterpillar cat th255 c telehandler service repair manual sn jk300150 to present
Caterpillar cat th255 c telehandler service repair manual sn jk300150 to presentCaterpillar cat th255 c telehandler service repair manual sn jk300150 to present
Caterpillar cat th255 c telehandler service repair manual sn jk300150 to present
 
Caterpillar cat th255 c telehandler service repair manual sn jk200150 to present
Caterpillar cat th255 c telehandler service repair manual sn jk200150 to presentCaterpillar cat th255 c telehandler service repair manual sn jk200150 to present
Caterpillar cat th255 c telehandler service repair manual sn jk200150 to present
 
Caterpillar cat th255 c telehandler service repair manual sn jk300150 to present
Caterpillar cat th255 c telehandler service repair manual sn jk300150 to presentCaterpillar cat th255 c telehandler service repair manual sn jk300150 to present
Caterpillar cat th255 c telehandler service repair manual sn jk300150 to present
 
Caterpillar cat th255 c telehandler service repair manual sn jk200150 to present
Caterpillar cat th255 c telehandler service repair manual sn jk200150 to presentCaterpillar cat th255 c telehandler service repair manual sn jk200150 to present
Caterpillar cat th255 c telehandler service repair manual sn jk200150 to present
 
Caterpillar cat th255 c telehandler service repair manual sn jk200150 to present
Caterpillar cat th255 c telehandler service repair manual sn jk200150 to presentCaterpillar cat th255 c telehandler service repair manual sn jk200150 to present
Caterpillar cat th255 c telehandler service repair manual sn jk200150 to present
 
Caterpillar cat th255 c telehandler service repair manual sn jk300150 to present
Caterpillar cat th255 c telehandler service repair manual sn jk300150 to presentCaterpillar cat th255 c telehandler service repair manual sn jk300150 to present
Caterpillar cat th255 c telehandler service repair manual sn jk300150 to present
 
Caterpillar cat th255 c telehandler service repair manual sn jk200150 to present
Caterpillar cat th255 c telehandler service repair manual sn jk200150 to presentCaterpillar cat th255 c telehandler service repair manual sn jk200150 to present
Caterpillar cat th255 c telehandler service repair manual sn jk200150 to present
 
Caterpillar cat th255 c telehandler service repair manual sn jk300150 to present
Caterpillar cat th255 c telehandler service repair manual sn jk300150 to presentCaterpillar cat th255 c telehandler service repair manual sn jk300150 to present
Caterpillar cat th255 c telehandler service repair manual sn jk300150 to present
 
Caterpillar cat th255 c telehandler service repair manual sn jk200150 to present
Caterpillar cat th255 c telehandler service repair manual sn jk200150 to presentCaterpillar cat th255 c telehandler service repair manual sn jk200150 to present
Caterpillar cat th255 c telehandler service repair manual sn jk200150 to present
 

Último

My Hashitalk Indonesia April 2024 Presentation
My Hashitalk Indonesia April 2024 PresentationMy Hashitalk Indonesia April 2024 Presentation
My Hashitalk Indonesia April 2024 PresentationRidwan Fadjar
 
Key Features Of Token Development (1).pptx
Key  Features Of Token  Development (1).pptxKey  Features Of Token  Development (1).pptx
Key Features Of Token Development (1).pptxLBM Solutions
 
Understanding the Laravel MVC Architecture
Understanding the Laravel MVC ArchitectureUnderstanding the Laravel MVC Architecture
Understanding the Laravel MVC ArchitecturePixlogix Infotech
 
The 7 Things I Know About Cyber Security After 25 Years | April 2024
The 7 Things I Know About Cyber Security After 25 Years | April 2024The 7 Things I Know About Cyber Security After 25 Years | April 2024
The 7 Things I Know About Cyber Security After 25 Years | April 2024Rafal Los
 
Integration and Automation in Practice: CI/CD in Mule Integration and Automat...
Integration and Automation in Practice: CI/CD in Mule Integration and Automat...Integration and Automation in Practice: CI/CD in Mule Integration and Automat...
Integration and Automation in Practice: CI/CD in Mule Integration and Automat...Patryk Bandurski
 
Pigging Solutions Piggable Sweeping Elbows
Pigging Solutions Piggable Sweeping ElbowsPigging Solutions Piggable Sweeping Elbows
Pigging Solutions Piggable Sweeping ElbowsPigging Solutions
 
Enhancing Worker Digital Experience: A Hands-on Workshop for Partners
Enhancing Worker Digital Experience: A Hands-on Workshop for PartnersEnhancing Worker Digital Experience: A Hands-on Workshop for Partners
Enhancing Worker Digital Experience: A Hands-on Workshop for PartnersThousandEyes
 
Scaling API-first – The story of a global engineering organization
Scaling API-first – The story of a global engineering organizationScaling API-first – The story of a global engineering organization
Scaling API-first – The story of a global engineering organizationRadu Cotescu
 
Salesforce Community Group Quito, Salesforce 101
Salesforce Community Group Quito, Salesforce 101Salesforce Community Group Quito, Salesforce 101
Salesforce Community Group Quito, Salesforce 101Paola De la Torre
 
GenCyber Cyber Security Day Presentation
GenCyber Cyber Security Day PresentationGenCyber Cyber Security Day Presentation
GenCyber Cyber Security Day PresentationMichael W. Hawkins
 
Factors to Consider When Choosing Accounts Payable Services Providers.pptx
Factors to Consider When Choosing Accounts Payable Services Providers.pptxFactors to Consider When Choosing Accounts Payable Services Providers.pptx
Factors to Consider When Choosing Accounts Payable Services Providers.pptxKatpro Technologies
 
SIEMENS: RAPUNZEL – A Tale About Knowledge Graph
SIEMENS: RAPUNZEL – A Tale About Knowledge GraphSIEMENS: RAPUNZEL – A Tale About Knowledge Graph
SIEMENS: RAPUNZEL – A Tale About Knowledge GraphNeo4j
 
How to Troubleshoot Apps for the Modern Connected Worker
How to Troubleshoot Apps for the Modern Connected WorkerHow to Troubleshoot Apps for the Modern Connected Worker
How to Troubleshoot Apps for the Modern Connected WorkerThousandEyes
 
Slack Application Development 101 Slides
Slack Application Development 101 SlidesSlack Application Development 101 Slides
Slack Application Development 101 Slidespraypatel2
 
Human Factors of XR: Using Human Factors to Design XR Systems
Human Factors of XR: Using Human Factors to Design XR SystemsHuman Factors of XR: Using Human Factors to Design XR Systems
Human Factors of XR: Using Human Factors to Design XR SystemsMark Billinghurst
 
Swan(sea) Song – personal research during my six years at Swansea ... and bey...
Swan(sea) Song – personal research during my six years at Swansea ... and bey...Swan(sea) Song – personal research during my six years at Swansea ... and bey...
Swan(sea) Song – personal research during my six years at Swansea ... and bey...Alan Dix
 
From Event to Action: Accelerate Your Decision Making with Real-Time Automation
From Event to Action: Accelerate Your Decision Making with Real-Time AutomationFrom Event to Action: Accelerate Your Decision Making with Real-Time Automation
From Event to Action: Accelerate Your Decision Making with Real-Time AutomationSafe Software
 
WhatsApp 9892124323 ✓Call Girls In Kalyan ( Mumbai ) secure service
WhatsApp 9892124323 ✓Call Girls In Kalyan ( Mumbai ) secure serviceWhatsApp 9892124323 ✓Call Girls In Kalyan ( Mumbai ) secure service
WhatsApp 9892124323 ✓Call Girls In Kalyan ( Mumbai ) secure servicePooja Nehwal
 
Tech-Forward - Achieving Business Readiness For Copilot in Microsoft 365
Tech-Forward - Achieving Business Readiness For Copilot in Microsoft 365Tech-Forward - Achieving Business Readiness For Copilot in Microsoft 365
Tech-Forward - Achieving Business Readiness For Copilot in Microsoft 3652toLead Limited
 
Injustice - Developers Among Us (SciFiDevCon 2024)
Injustice - Developers Among Us (SciFiDevCon 2024)Injustice - Developers Among Us (SciFiDevCon 2024)
Injustice - Developers Among Us (SciFiDevCon 2024)Allon Mureinik
 

Último (20)

My Hashitalk Indonesia April 2024 Presentation
My Hashitalk Indonesia April 2024 PresentationMy Hashitalk Indonesia April 2024 Presentation
My Hashitalk Indonesia April 2024 Presentation
 
Key Features Of Token Development (1).pptx
Key  Features Of Token  Development (1).pptxKey  Features Of Token  Development (1).pptx
Key Features Of Token Development (1).pptx
 
Understanding the Laravel MVC Architecture
Understanding the Laravel MVC ArchitectureUnderstanding the Laravel MVC Architecture
Understanding the Laravel MVC Architecture
 
The 7 Things I Know About Cyber Security After 25 Years | April 2024
The 7 Things I Know About Cyber Security After 25 Years | April 2024The 7 Things I Know About Cyber Security After 25 Years | April 2024
The 7 Things I Know About Cyber Security After 25 Years | April 2024
 
Integration and Automation in Practice: CI/CD in Mule Integration and Automat...
Integration and Automation in Practice: CI/CD in Mule Integration and Automat...Integration and Automation in Practice: CI/CD in Mule Integration and Automat...
Integration and Automation in Practice: CI/CD in Mule Integration and Automat...
 
Pigging Solutions Piggable Sweeping Elbows
Pigging Solutions Piggable Sweeping ElbowsPigging Solutions Piggable Sweeping Elbows
Pigging Solutions Piggable Sweeping Elbows
 
Enhancing Worker Digital Experience: A Hands-on Workshop for Partners
Enhancing Worker Digital Experience: A Hands-on Workshop for PartnersEnhancing Worker Digital Experience: A Hands-on Workshop for Partners
Enhancing Worker Digital Experience: A Hands-on Workshop for Partners
 
Scaling API-first – The story of a global engineering organization
Scaling API-first – The story of a global engineering organizationScaling API-first – The story of a global engineering organization
Scaling API-first – The story of a global engineering organization
 
Salesforce Community Group Quito, Salesforce 101
Salesforce Community Group Quito, Salesforce 101Salesforce Community Group Quito, Salesforce 101
Salesforce Community Group Quito, Salesforce 101
 
GenCyber Cyber Security Day Presentation
GenCyber Cyber Security Day PresentationGenCyber Cyber Security Day Presentation
GenCyber Cyber Security Day Presentation
 
Factors to Consider When Choosing Accounts Payable Services Providers.pptx
Factors to Consider When Choosing Accounts Payable Services Providers.pptxFactors to Consider When Choosing Accounts Payable Services Providers.pptx
Factors to Consider When Choosing Accounts Payable Services Providers.pptx
 
SIEMENS: RAPUNZEL – A Tale About Knowledge Graph
SIEMENS: RAPUNZEL – A Tale About Knowledge GraphSIEMENS: RAPUNZEL – A Tale About Knowledge Graph
SIEMENS: RAPUNZEL – A Tale About Knowledge Graph
 
How to Troubleshoot Apps for the Modern Connected Worker
How to Troubleshoot Apps for the Modern Connected WorkerHow to Troubleshoot Apps for the Modern Connected Worker
How to Troubleshoot Apps for the Modern Connected Worker
 
Slack Application Development 101 Slides
Slack Application Development 101 SlidesSlack Application Development 101 Slides
Slack Application Development 101 Slides
 
Human Factors of XR: Using Human Factors to Design XR Systems
Human Factors of XR: Using Human Factors to Design XR SystemsHuman Factors of XR: Using Human Factors to Design XR Systems
Human Factors of XR: Using Human Factors to Design XR Systems
 
Swan(sea) Song – personal research during my six years at Swansea ... and bey...
Swan(sea) Song – personal research during my six years at Swansea ... and bey...Swan(sea) Song – personal research during my six years at Swansea ... and bey...
Swan(sea) Song – personal research during my six years at Swansea ... and bey...
 
From Event to Action: Accelerate Your Decision Making with Real-Time Automation
From Event to Action: Accelerate Your Decision Making with Real-Time AutomationFrom Event to Action: Accelerate Your Decision Making with Real-Time Automation
From Event to Action: Accelerate Your Decision Making with Real-Time Automation
 
WhatsApp 9892124323 ✓Call Girls In Kalyan ( Mumbai ) secure service
WhatsApp 9892124323 ✓Call Girls In Kalyan ( Mumbai ) secure serviceWhatsApp 9892124323 ✓Call Girls In Kalyan ( Mumbai ) secure service
WhatsApp 9892124323 ✓Call Girls In Kalyan ( Mumbai ) secure service
 
Tech-Forward - Achieving Business Readiness For Copilot in Microsoft 365
Tech-Forward - Achieving Business Readiness For Copilot in Microsoft 365Tech-Forward - Achieving Business Readiness For Copilot in Microsoft 365
Tech-Forward - Achieving Business Readiness For Copilot in Microsoft 365
 
Injustice - Developers Among Us (SciFiDevCon 2024)
Injustice - Developers Among Us (SciFiDevCon 2024)Injustice - Developers Among Us (SciFiDevCon 2024)
Injustice - Developers Among Us (SciFiDevCon 2024)
 

Oxymat 61 o2 analyzer

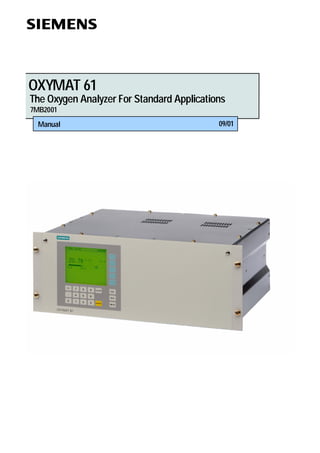
  • 1. 104853 / 118 OXYMAT 61 The Oxygen Analyzer For Standard Applications 7MB2001 Manual 09/01
  • 2. The reproduction, transmission or use of this document or its contents is not permitted without express written authority. Offenders will be liable for damages. All rights created by the granting of patents or registration of a design are reserved.Technical data subject to change without notice Weitergabe sowie Vervielfältigung dieser Unterlage, Verwertung und Mitteilung ihres Inhaltes nicht gestattet, soweit nicht ausdrücklich zugestanden. Zuwiderhandlungen verpflichten zu Schadenersatz. Alle Rechte vorbehalten, insbesondere für den Fall der Patenterteilung oder GM-Eintragung. Technische Änderungen vorbehalten. Toute communication ou reproduction de ce document, toute exploitation ou communication de son contenu sont interdites, sauf autorisation expresse. Tout manquement à cette règle est illicite et expose son auteur au versement de dommages et intérêts. Tours nos droits sont réservés pour le cas de la délivrance d’un brevet ou celui de l’enregistrement d’un modèle d’utilité.Modifications techniques sont réservées La divulgación y reproducción de este documento asi como el aprovechamiento de su contenido, no están autorizados, a no ser que se obtenga el consentimiento expreso, para ello. Los infractores quedan obligados a la indemnización por daños y perjucios. Se reservan todos los derechos, en particular para el caso de concesion de Patente o de Modelo de Utilidad. Salvo modificaciones ténicas La trasmissione a terzi e la riproduzione di questa documentazione, cosiccome lo sfruttamento del suo contenuto non è permesso, se non autorizzato per iscritto. Le infrazioni comporteranno una richiesta di danni. Tutti i diritti sono riservati, in particolare nel caso di brevetti.Modifiche tecniche possibili. ULTRAMAT, OXYMAT, SIPAN are Siemens registered trademarks. All other product or system names are (registered) trademarks of their respective owners and must be treated accordingly. According to the German law on units in measuring technology, data in inches only apply to devices for export. ULTRAMAT, OXYMAT, SIPAN sind Marken von Siemens. Die übrigen Bezeichnungen in diesem Handbuch können Marken sein, deren Benutzung durch Dritte für deren Zwecke die Rechte der Inhaber verletzen können. Die Angaben in Zoll (inch) gelten gemäß dem Gesetz über Einheiten im Meßwesen” nur für den Export. ULTRAMAT, OXYMAT, SIPAN sont des marques déposées de Siemens. D’autres dénominations utilisées dans ce document peuvent également être des marques déposées dont l’utilisation par des tiers à leurs propres fins peut enfreindre les droits des propriétaires desdites marques. ULTRAMAT, OXYMAT, SIPAN son marcas registradas de Siemens. Las otras designaciones que figuran en este documento puenden ser marcas cuya utilización por terceros para sus propios fines puede violar los derechos de los proprietarios de dichas marcas. Conforma a la ”Ley sobre las unidades de medida”, las dimensiones en pulgadas sólo son válidas para la exportación. ULTRAMAT, OXYMAT, SIPAN sono marchi registrati Siemens. Le denominazioni di altri prodotti menzionati in questa documentazione possono essere marchi il cui uso da parte di terzi può violare i diritti di proprietà. Conformemente alla ”Legge sulle unità di misura” i dati in pollici valgono soltanto per l’esportazione.
  • 3. Contents Information for the User . . . . . . . . . . . . . . . . . . . . . . . . . . . . . . . . . . . . . . . . . . . . . . 1- 1 1.1 Information for our Customers . . . . . . . . . . . . . . . . . . . . . . . . . . . . . . . . . . . . . 1--2 1.2 General Information . . . . . . . . . . . . . . . . . . . . . . . . . . . . . . . . . . . . . . . . . . . . . . 1--2 1.3 Notes on Using this Manual . . . . . . . . . . . . . . . . . . . . . . . . . . . . . . . . . . . . . . . 1--3 1.4 Danger Information . . . . . . . . . . . . . . . . . . . . . . . . . . . . . . . . . . . . . . . . . . . . . . 1--3 1.5 Approved Use . . . . . . . . . . . . . . . . . . . . . . . . . . . . . . . . . . . . . . . . . . . . . . . . . . . 1--4 1.6 Qualified Personnel . . . . . . . . . . . . . . . . . . . . . . . . . . . . . . . . . . . . . . . . . . . . . . 1--4 1.7 Warranty Information . . . . . . . . . . . . . . . . . . . . . . . . . . . . . . . . . . . . . . . . . . . . . 1--5 1.8 Supply and Delivery . . . . . . . . . . . . . . . . . . . . . . . . . . . . . . . . . . . . . . . . . . . . . . 1--5 1.9 Standards and Regulations . . . . . . . . . . . . . . . . . . . . . . . . . . . . . . . . . . . . . . . 1--5 1.10 Conformity Declaration . . . . . . . . . . . . . . . . . . . . . . . . . . . . . . . . . . . . . . . . . . . 1--6 Installation Guidelines . . . . . . . . . . . . . . . . . . . . . . . . . . . . . . . . . . . . . . . . . . . . . . . . 2- 1 2.1 Safety Information . . . . . . . . . . . . . . . . . . . . . . . . . . . . . . . . . . . . . . . . . . . . . . . 2--2 2.2 Installation Requirements . . . . . . . . . . . . . . . . . . . . . . . . . . . . . . . . . . . . . . . . . 2--2 2.3 Gas Connections and Internal Gas Paths . . . . . . . . . . . . . . . . . . . . . . . . . . . 2--3 2.3.1 Sample Gas Line . . . . . . . . . . . . . . . . . . . . . . . . . . . . . . . . . . . . . . . . . . . . . . . . 2--3 2.3.2 Reference Gas Line . . . . . . . . . . . . . . . . . . . . . . . . . . . . . . . . . . . . . . . . . . . . . 2--4 2.3.3 Pressure Sensor . . . . . . . . . . . . . . . . . . . . . . . . . . . . . . . . . . . . . . . . . . . . . . . . 2--4 2.4 Gas Conditioning . . . . . . . . . . . . . . . . . . . . . . . . . . . . . . . . . . . . . . . . . . . . . . . . 2--5 2.5 Electric Connection . . . . . . . . . . . . . . . . . . . . . . . . . . . . . . . . . . . . . . . . . . . . . . 2--6 2.5.1 Power Supply Connection . . . . . . . . . . . . . . . . . . . . . . . . . . . . . . . . . . . . . . . . 2--6 2.5.2 Connection of Signal Cables . . . . . . . . . . . . . . . . . . . . . . . . . . . . . . . . . . . . . . 2--7 2.5.3 Pin Assignments . . . . . . . . . . . . . . . . . . . . . . . . . . . . . . . . . . . . . . . . . . . . . . . . 2--9 2.5.4 Example of Autocal Circuit . . . . . . . . . . . . . . . . . . . . . . . . . . . . . . . . . . . . . . . 2--11 2.6 Dimensional Drawings . . . . . . . . . . . . . . . . . . . . . . . . . . . . . . . . . . . . . . . . . 2--12 Technical Description . . . . . . . . . . . . . . . . . . . . . . . . . . . . . . . . . . . . . . . . . . . . . . . . 3- 1 3.1 Application . . . . . . . . . . . . . . . . . . . . . . . . . . . . . . . . . . . . . . . . . . . . . . . . . . . . . 3--2 3.2 Design . . . . . . . . . . . . . . . . . . . . . . . . . . . . . . . . . . . . . . . . . . . . . . . . . . . . . . . . . 3--3 3.3 Communications Interface . . . . . . . . . . . . . . . . . . . . . . . . . . . . . . . . . . . . . . . . 3--4 3.4 Mode of Operation . . . . . . . . . . . . . . . . . . . . . . . . . . . . . . . . . . . . . . . . . . . . . . . 3--5 3.5 Technical Data . . . . . . . . . . . . . . . . . . . . . . . . . . . . . . . . . . . . . . . . . . . . . . . . . . 3--6 3.6 Reference Gases, Zero Error . . . . . . . . . . . . . . . . . . . . . . . . . . . . . . . . . . . . . 3--7 3.7 Materials in the Sample Gas Path . . . . . . . . . . . . . . . . . . . . . . . . . . . . . . . . . 3--8
  • 4. Start-up . . . . . . . . . . . . . . . . . . . . . . . . . . . . . . . . . . . . . . . . . . . . . . . . . . . . . . . . . . . . . 4- 1 4.1 Safety Information . . . . . . . . . . . . . . . . . . . . . . . . . . . . . . . . . . . . . . . . . . . . . . . 4--2 4.2 Preparation for Start-up . . . . . . . . . . . . . . . . . . . . . . . . . . . . . . . . . . . . . . . . . . 4--2 4.2.1 General Information . . . . . . . . . . . . . . . . . . . . . . . . . . . . . . . . . . . . . . . . . . . . . . 4--2 4.2.2 Special Preparations for Startup . . . . . . . . . . . . . . . . . . . . . . . . . . . . . . . . . . . 4--2 4.3 Start-up and Operation . . . . . . . . . . . . . . . . . . . . . . . . . . . . . . . . . . . . . . . . . . . 4--5 Operation . . . . . . . . . . . . . . . . . . . . . . . . . . . . . . . . . . . . . . . . . . . . . . . . . . . . . . . . . . . . 5-1 5.1 General . . . . . . . . . . . . . . . . . . . . . . . . . . . . . . . . . . . . . . . . . . . . . . . . . . . . . . . . 5--2 5.2 Summary of Input Functions . . . . . . . . . . . . . . . . . . . . . . . . . . . . . . . . . . . . . . 5--7 5.2.1 Analyzer Status . . . . . . . . . . . . . . . . . . . . . . . . . . . . . . . . . . . . . . . . . . . . . . . . . 5--8 5.2.2 Calibration . . . . . . . . . . . . . . . . . . . . . . . . . . . . . . . . . . . . . . . . . . . . . . . . . . . . . . 5--9 5.2.3 Measuring Ranges . . . . . . . . . . . . . . . . . . . . . . . . . . . . . . . . . . . . . . . . . . . . . 5--16 5.2.4 Parameters . . . . . . . . . . . . . . . . . . . . . . . . . . . . . . . . . . . . . . . . . . . . . . . . . . . 5--18 5.2.5 Configuration . . . . . . . . . . . . . . . . . . . . . . . . . . . . . . . . . . . . . . . . . . . . . . . . . 5--24 Maintenance . . . . . . . . . . . . . . . . . . . . . . . . . . . . . . . . . . . . . . . . . . . . . . . . . . . . . . . . . 6- 1 6.1 Analyzer Section . . . . . . . . . . . . . . . . . . . . . . . . . . . . . . . . . . . . . . . . . . . . . . . . 6--3 6.1.1 Design of Analyzer Section . . . . . . . . . . . . . . . . . . . . . . . . . . . . . . . . . . . . . . . 6--3 6.1.2 Dismantling the Analyzer Section . . . . . . . . . . . . . . . . . . . . . . . . . . . . . . . . . . 6--4 6.1.3 Adjustment of Reference Gas Pressure Switch (3000 ... 4000 hPa) . . . . 6--7 6.1.4 Removal of Sample Gas Restrictor . . . . . . . . . . . . . . . . . . . . . . . . . . . . . . . . 6--8 6.2 Replacement of Motherboard and Option Board . . . . . . . . . . . . . . . . . . . . . 6--9 6.3 Replacement of Fuses . . . . . . . . . . . . . . . . . . . . . . . . . . . . . . . . . . . . . . . . . 6--10 6.4 Cleaning the Analyzer . . . . . . . . . . . . . . . . . . . . . . . . . . . . . . . . . . . . . . . . . . 6--10 6.5 Maintenance Request and Fault Messages . . . . . . . . . . . . . . . . . . . . . . . . 6--11 6.5.1 Maintenance Request . . . . . . . . . . . . . . . . . . . . . . . . . . . . . . . . . . . . . . . . . . 6--12 6.5.2 Faults . . . . . . . . . . . . . . . . . . . . . . . . . . . . . . . . . . . . . . . . . . . . . . . . . . . . . . . . 6--14 6.5.3 Further Errors . . . . . . . . . . . . . . . . . . . . . . . . . . . . . . . . . . . . . . . . . . . . . . . . . 6--17 List of Spare Parts . . . . . . . . . . . . . . . . . . . . . . . . . . . . . . . . . . . . . . . . . . . . . . . . . . . 7- 1 7.1 General . . . . . . . . . . . . . . . . . . . . . . . . . . . . . . . . . . . . . . . . . . . . . . . . . . . . . . . . 7-2 7.2 Analyzer Section . . . . . . . . . . . . . . . . . . . . . . . . . . . . . . . . . . . . . . . . . . . . . . . . 7-4 7.3 Electronics . . . . . . . . . . . . . . . . . . . . . . . . . . . . . . . . . . . . . . . . . . . . . . . . . . . . . 7-6 7.4 Gas Path . . . . . . . . . . . . . . . . . . . . . . . . . . . . . . . . . . . . . . . . . . . . . . . . . . . . . . . 7-8 Appendix . . . . . . . . . . . . . . . . . . . . . . . . . . . . . . . . . . . . . . . . . . . . . . . . . . . . . . . . . . . . 8- 1 8.1 List of Abbreviations . . . . . . . . . . . . . . . . . . . . . . . . . . . . . . . . . . . . . . . . . . . . . 8--2 8.2 Returned Deliveries / Form . . . . . . . . . . . . . . . . . . . . . . . . . . . . . . . . . . . . . . . 8--3
  • 5. Information for the User 1 1.1 Information for Our Customers . . . . . . . . . . . . . . . . . . . . . . . . . . . . . . . . . . . . 1--2 1.2 General Information . . . . . . . . . . . . . . . . . . . . . . . . . . . . . . . . . . . . . . . . . . . . . . 1--2 1.3 Notes on Using this Manual . . . . . . . . . . . . . . . . . . . . . . . . . . . . . . . . . . . . . . . 1--3 1.4 Danger Information . . . . . . . . . . . . . . . . . . . . . . . . . . . . . . . . . . . . . . . . . . . . . . 1--3 1.5 Approved Use . . . . . . . . . . . . . . . . . . . . . . . . . . . . . . . . . . . . . . . . . . . . . . . . . . . 1--4 1.6 Qualified Personnel . . . . . . . . . . . . . . . . . . . . . . . . . . . . . . . . . . . . . . . . . . . . . . 1--4 1.7 Warranty Information . . . . . . . . . . . . . . . . . . . . . . . . . . . . . . . . . . . . . . . . . . . . . 1--5 1.8 Supply and Delivery . . . . . . . . . . . . . . . . . . . . . . . . . . . . . . . . . . . . . . . . . . . . . . 1--5 1.9 Standards and Regulations . . . . . . . . . . . . . . . . . . . . . . . . . . . . . . . . . . . . . . . 1--5 1.10 Conformity Declaration . . . . . . . . . . . . . . . . . . . . . . . . . . . . . . . . . . . . . . . . . . . 1--6 OXYMAT 61 Instruction Manual A5E00123067-01 1--1
  • 6. Information for the User 1.1 Information for our Customers ! Please read this Manual before you start work! It contains important information and data whose observance will guarantee correct functioning of the analyzer and also save you servicing costs. The information will significantly help you when using the equipment and will lead to reliable results. This Manual refers to the software release version 4.2.1. 1.2 General Information The product described in this Manual has left the factory in a perfect and tested condition as regards safety. In order to retain this state and to achieve correct and safe operation of this product, it must only be used in the manner described by the manufacturer. In addition, correct and safe operation of this product is dependent on proper transport, storage and installation as well as careful operation and maintenance. This Manual contains the information required for approved use of the product described in it. The Manual has been prepared for technically qualified personnel who have been specially trained or who possess appropriate knowledge in the field of instrumentation and control, referred to further as automation technology. Knowledge of the safety information and warnings present in this Manual and their technically correct implementation are prerequisites for danger-free installation and commissioning and for safety during operation and maintenance of the described product. Only a qualified person possesses the required specialist knowledge to correctly interpret the general safety information and warnings present in this Manual and to apply them to the specific case. This Manual is included in the delivery of the analyzer, even if separate ordering has been made possible for logistic reasons. For clarity reasons this Manual cannot cover all possible details for all versions of the described product and cannot describe every possible case in connection with installation, operation, maintenance or the use in systems. Should you require further information, or should particular problems occur which are not handled in sufficient depth in this Manual, help can be requested through your local Siemens office or representative. Note . 1--2 When considering use of the analyzer for new research and development applications, we recommend that you discuss your application with our specialist department. OXYMAT 61 Instruction Manual A5E00123067-01
  • 7. Information for the User 1.3 Notes on Using this Manual ! . 1.4 This Manual describes the applications of the equipment and how you can start it up, operate and service it. Of particular importance are the warning and information texts. These are separated from the remaining text, specially identified by appropriate pictograms (see examples on left), and provide valuable tips on how to avoid maloperations. Danger Information The following information serves on the one hand for your personal safety and also to protect the described product or connected devices from damage. Safety information and warnings to prevent danger to the life and health of users or maintenance personnel or to prevent damage to property are emphasized in this Manual by the terms defined here. They are additionally identified by warning symbols (pictograms) matched to the significance of the accompanying text and which may therefore deviate from the examples shown here. The terms used in this Manual and the information on the product itself have the following meaning: ! Danger means that death, severe personal injury and/or substantial damage to property will occur if the appropriate safety precautions are not observed. ! Warning means that death, severe personal injury and/or substantial damage to property can occur if the appropriate safety precautions are not observed. ! Caution with a warning triangle means that slight personal injury can occur if the appropriate safety precautions are not observed. Caution without a warning triangle means that damage to property can occur if the appropriate safety precautions are not observed. Attention means that an undesirable effect or state can occur if the corresponding information is not observed. . OXYMAT 61 Instruction Manual A5E00123067-01 Note is important information on the product itself, the handling of the product or the respective part of the Manual to which particular attention should be paid. 1--3
  • 8. Information for the User Danger of burns means that severe personal injury can occur if the appropriate safety precautions are not observed. 1.5 Approved Use Approved use in the sense of this Manual means that this product may only be used for the applications described in the Catalog and in the Technical Description (see also Chapter 3 of this Manual) and only in conjunction with other devices and components which have been recommended or approved of by Siemens. The product described in this Manual has been developed, manufactured, tested and documented taking into account the appropriate safety standards. No danger therefore exists in the normal case with respect to damage to property or the health of persons if the handling guidelines and safety information described for configuring, assembly, approved use and maintenance are observed. This device has been designed such that safe isolation is guaranteed between the primary and secondary circuits. Low voltages which are connected must also be generated using safe isolation. ! 1.6 Warning Following removal of the housing or guard, or after opening the system cabinet, certain parts of these devices/systems are accessible which may carry dangerous voltages. Therefore only suitably qualified personnel may work on this device. These individuals must be thoroughly acquainted with all sources of danger and the maintenance measures as described in this Manual. Qualified Personnel Severe personal injury and/or extensive damage to property may occur following unqualified work on the device/system or the failure to observe the warnings described in the Manual or on the device/system cabinet. Therefore only suitably qualified personnel may work on this device/system. 1--4 OXYMAT 61 Instruction Manual A5E00123067-01
  • 9. Information for the User Qualified persons in the sense of the safety information present in this Manual or on the product itself are persons who D are either familiar as configuring engineers with the safety concepts of automation technology D or have been trained as operators in the use of automation technology equipment and are acquainted with the contents of this Manual which refer to operation D or have been appropriately trained as commissioning and/or maintenance personnel for such automation technology equipment or are authorized to energize, ground and tag circuits and devices/systems in accordance with established safety practices. 1.7 Warranty Information Your attention is drawn to the fact that the contents of this product documentation are not part of a previous or existing agreement, commitment or statutory right and do not change these. All commitments on the part of Siemens are contained in the respective sales contract which also contains the complete and solely applicable warranty conditions. The warranty conditions in the contract are neither extended nor limited by the contents of this Instruction Manual. 1.8 Supply and Delivery The respective scope of delivery according to the valid contract is listed on the shipping documents accompanying the delivery. When opening the packaging, please observe the corresponding information on the packaging material. Check that the delivery is complete and undamaged. In particular, compare the Order Nos. on the labels (if present) with the ordering data. Please retain the packaging material if possible so that you can reuse it if it is necessary to return the device. A form for this purpose can be found in Chapter 8.3. 1.9 Standards and Regulations The harmonized European standards have been applied as far as possible to the specification and production of this device. If no harmonized European standards have been applied, the standards and regulations for the Federal Republic of Germany apply (see also the technical data in Chapter 3). When using this product outside the range of applicability of these standards and regulations, the appropriate standards and regulations in the country of use must be observed. OXYMAT 61 Instruction Manual A5E00123067-01 1--5
  • 10. Information for the User 1.10 Conformity Declaration EG-Konformitätserklärung EC Declaration of conformity Déclaration ”CE” de conformité Declaración CE de conformidad Declaração CE de conformidade Dichiarazione CE di conformità EG-Verklaring van overeenstemming EF-konformitetserklæring Dhlwsh snmmorfwshsz EOK EU Försäkran om överensstämmelse EU-vaatimustenmukaisuusvakuutus Hiermit erklären wir, daß unser Produkt, Typ: We hereby declare that our product, type; Nous déclarons par la présente que notre produit, type: Por la presente declaramos que nuestro producto, tipo: Com a presente, declaramos que o nosso produto, tipo: Con la presente dichiariamo che il nostro prodotto tipo: Hiermee verklaren wij dat ons produkt, type: Hermed erklaerer vi, at vores produkt af typen: Me thn parsusa dhlwnoume, oti to proion maj, tupou: Härmed försäkrar vi att var produkt, typ: Taten vkuutamme, että tuotteemme, tyyppi: OXYMAT 61 7MB2001--xxxxx--xxxx folgenden einschlägigen Bestimmungen entspricht: complies with the following relevant provisions: correspond aux dispositions pertinentes suivantes: satisface las disposiciones pertinentes siguientes: esta em conformidade com as disposições pertinentes, a saber: è conforme alle seguenti disposizioni pertinenti: voldoet aan de eisen van de in het vervolg genoemde bepalingen: overholder fØlgende relevante bestemmelser: autapokpietai stsuj akolouqouj sxetikouj kanonismouj: uppfyller följande tillämpliga bestämmelser: täyttää seuraavat asiaankuuluvat vaatimukset: Niederspannungsrichtlinie (72/23/EWG und 93/68/EWG) Low voltage guidlines (72/23/EEC and 93/68/EEC) Directive sur les basses tensions (72/23/CEE et 93/68/CEE) Reglamento de baja tensión (72/23/MCE y 93/68/MCE) Directriz relativa à baixa tensão (72/23/EWG e 93/68/EWG) Direttiva sulla bassa tensione (72/23/CEE e 93/68/CEE) Laagspanningsrichtlijn (72/23/EEG en 93/68/EEG) Lavspændingsdirektiv (73/23/EØF og 93/68/EØF) Kateuquthpia odhga pepi xamhlhz tashz (72/23/EOK kai 93/68/EOK) Lågspänningsdirektiv (72/23/EEG ja 93/68/EEG) Pienjännitedirektivi (72/23/ETY ja 93/68/ETY) EMV-Richtlinie (89/336/EWG, 91/263/EWG, 92/31/EWG und 93/68/EWG) EMC guideline (89/336/EWC, 91/263/EWC, 92/31/EWC and 93/68/EWC) Directive CEM (89/336/CEE, 91/263/CEE, 92/31/CEE et 93/68/CEE) Reglamento de compatibilidad electromagnética (89/336/MCE, 91/263/MCE, 92/31/MCE y 93/68/MCE) Directriz relativa à compatibilidade electro-magnética (89/336/EWG, 91/263/EWG, 92/31/EWG e 93/68/EWG) Direttiva sulla compatibilità elettromagnetica (89/336/CEE, 91/263/CEE, 92/31/CEE e 93/68/CEE) EMV-richtlijn (89/336/EEG, 91/263/EEG, 92/31/EEG en 93/68/EEG) Direktiv om elektromagnetisk forligelighed (89/336/EØF, 91/263/EØF, 92/31/EØF og 93/68/EØF) Kateuquthpia odhga pepi hlektpomagnhtikhz snmbatothtaz (89/336/EOK, 91/263/EOK, 92/31/EO kai 93/68/EOK) EMV-direktiv (89/336/EEG, 91/263/EEG, 92/31/EEG ja 93/68/EEG) Sähkömagneettisen mukautuvuuden direktivi (89/336/ETY, 91/263/ETY, 92/31/ETY en 93/68/ETY) 1--6 OXYMAT 61 Instruction Manual A5E00123067-01
  • 11. Information for the User Angewendete harmonisierte Normen, insbesondere: Applied harmonized standards, in particular: Normes harmonisées, notamment: Normas armonizadas utilizadas, particularmente: Nomas harmonizadas utilizadas, em particular: Norme armonizzate applicate, particolarmente: Grbruikte gehamiseerde normen, in het bijzondere: Anvendte hasrmoniserede normer, især: Efapmdseqenta enapmonismena ppotn pa, eidikotepa: Tillämpade harmoniserade standarder, särskilt: Käytetyt yhdenmukaiset standardit, etenkin: EN50081-1 EN50082-2 EN61010 Siemens Aktiengesellschaft Automation Group Process Analysis Division PI 2 D--76181 Karlsruhe Karlsruhe, September 2001 (signed) Dr. Diedrich OXYMAT 61 Instruction Manual A5E00123067-01 (signed) van Dycke (head of department) (factory manager) 1--7
  • 12. Information for the User 1--8 OXYMAT 61 Instruction Manual A5E00123067-01
  • 13. Installation Guidelines 2 2.1 Safety Information . . . . . . . . . . . . . . . . . . . . . . . . . . . . . . . . . . . . . . . . . . . . . . . 2--2 2.2 Installation Requirements . . . . . . . . . . . . . . . . . . . . . . . . . . . . . . . . . . . . . . . . . 2--2 2.3 Gas Connections and Internal Gas Paths . . . . . . . . . . . . . . . . . . . . . . . . . . . 2--3 2.3.1 Sample Gas Line . . . . . . . . . . . . . . . . . . . . . . . . . . . . . . . . . . . . . . . . . . . . . . . . 2--3 2.3.2 Reference Gas Line . . . . . . . . . . . . . . . . . . . . . . . . . . . . . . . . . . . . . . . . . . . . . 2--4 2.3.3 Pressure Sensor . . . . . . . . . . . . . . . . . . . . . . . . . . . . . . . . . . . . . . . . . . . . . . . . 2--4 2.4 Gas Conditioning . . . . . . . . . . . . . . . . . . . . . . . . . . . . . . . . . . . . . . . . . . . . . . . . 2--5 2.5 Electric Connection . . . . . . . . . . . . . . . . . . . . . . . . . . . . . . . . . . . . . . . . . . . . . . 2--6 2.5.1 Power Supply Connection . . . . . . . . . . . . . . . . . . . . . . . . . . . . . . . . . . . . . . . . 2--6 2.5.2 Connection of Signal Cables . . . . . . . . . . . . . . . . . . . . . . . . . . . . . . . . . . . . . . 2--7 2.5.3 Pin Assignments . . . . . . . . . . . . . . . . . . . . . . . . . . . . . . . . . . . . . . . . . . . . . . . . 2--9 2.5.4 Example of Autocal Circuit . . . . . . . . . . . . . . . . . . . . . . . . . . . . . . . . . . . . . . . 2--11 2.6 Dimensional Drawings . . . . . . . . . . . . . . . . . . . . . . . . . . . . . . . . . . . . . . . . . 2--12 OXYMAT 61 Instruction Manual A5E00123067-01 2--1
  • 14. Installation Guidelines 2.1 Safety Information ! Warning Certain parts in this analyzer carry dangerous voltages. The housing must be closed and grounded before switching on the analyzer. Death, personal injury and/or damage to property may result if this is not observed. Also refer to Section 2.5. A standard analyzer must not be used in potentially explosive atmospheres. Use with gases with flammable components at concentrations above the lower explosion limit (LEL) must be clarified with the responsible Ex authorities, and is finally the responsibility of the owner. Note with an internal supply of reference gas that the reference gas is mixed at approx. 0.5 l/min with the sample gas. Since this can lead to explosive mixtures in the case of flammable sample gases, only an external reference gas supply with nitrogen may be used in this case. 2.2 Installation Requirements A location should be selected which is as free as possible from vibration. The OXYMAT 61 must be placed on supporting rails if it is to be fitted in a cabinet or desktop housing. Assembly only at the front is insufficient because the weight of the analyzer would place too great a load on the chassis. When installing in switchgear cabinets, ensure that there is sufficient ventilation between the devices. If the device is to be installed outdoors, ensure that it is protected from direct solar irradiation. Make sure during operation that the permissible ambient temperature of 5 to 45 °C is retained (see Section 3.5 ”Technical data”). OXYMAT 61 2--2 Magnetically sensitive devices should not be installed in the immediate vicinity of the OXYMAT 61 since this analyzer emits magnetic stray fields as a result of its principle. Depending on the sensitivity, distances up to 50 cm are necessary (see also function 57). OXYMAT 61 Instruction Manual A5E00123067-01
  • 15. Installation Guidelines 2.3 2.3.1 Gas Connections and Internal Gas Paths Sample Gas Line All gas connections are couplings with a diameter of 6 mm or 1/4”. Select a material which is suitable for the sample gas for the inlet and outlet piping. ! . Caution The OXYMAT 61 analyzers should normally be operated such that the sample gas pressure cannot build up in the analyzer section. If several analyzers are connected in series, make sure that the series-connected analyzer does not have a restrictor in the gas path (unrestricted exhaust outlet). The restrictor present in the gas path of the OXYMAT 61 depending on the version may have to be removed. A restrictor may only be present between the sample gas inlet line and the first gas analyzer section. Note! Sample gas monitoring (pressure switch) for the series-connected analyzer sections has no function following removal of the sample gas restrictors. To avoid error messages, deactivate the corresponding messages (”Sample gas flow too low”) in the configuration function of the software (Section 5.2.5, function 87, error S16). Also note in this case that the assignment of a relay with the error message ”Flow of sample gas” has no function. If the sample gas flows into an exhaust gas line, observe the following points: D The flow resistance in the exhaust gas line should be kept small by using as short a line as possible or by adapting to a larger diameter. D The exhaust gas line must be free of rapid changes in pressure. If this is not the case, either use a separate exhaust line or fit a surge tank with restrictor (> 1 l) between the analyzer and the exhaust line (pneumatic lowpass). Warning ! OXYMAT 61 Instruction Manual A5E00123067-01 In the case of toxic or corrosive gases, or those which can lead to explosive gas mixtures, the exhaust should be routed such that there is no danger to persons or equipment and that the environment is not polluted. 2--3
  • 16. Installation Guidelines 2.3.2 Reference Gas Line The OXYMAT 61 is always equipped with reference gas connections. Couplings are present with a diameter of 6 mm or 1/4”. Select a material which is suitable for the reference gas for the inlet and outlet piping. A metal pipe must be used for the reference gas inlet if N2 and O2 are used as reference gases. The pipe must be as short as possible and have a small cross-section. If air is used as the reference gas, it is recommendable to use an auxiliary drier in the suction line to prevent a volume error on the reference gas side caused by moisture. When subsequently converting the analyzer to a different reference gas supply, the couplings and the reference gas restrictor (low-pressure operation 0.1 bar) must be replaced by trained servicing personnel. 2.3.3 Pressure Sensor The OXYMAT 61 has an internal pressure sensor for correction of the influence of pressure on the measured value. This is fitted on the analyzer section, and directly measures the sample gas pressure using the reference gas supply. It need not be considered further during the installation. 2--4 OXYMAT 61 Instruction Manual A5E00123067-01
  • 17. Installation Guidelines 2.4 Gas Conditioning The sample gas must be sufficiently conditioned to prevent contamination of the parts through which it flows and the associated errors in measurement. The ULTRAMAT 6E/F and OXYMAT 6E/F are usually preceded by D a gas sampling device, D a sample gas cooler, D a filter and D a gas suction pump (see Fig. 2--1). Depending on the composition of the sample gas, additional equipment may be necessary such as e.g. a washbottle, additional filters and a pressure regulator. Corrosive components or those which interfere with the measurement should be eliminated by appropriate series-connected absorption filters. 8 3 2 5 4 6 7 1 1 2 3 4 5 6 7 9 8 9 Gas sampling device (heated if necessary) Sample gas line (heated if necessary) Gas cooler Filter/trap (as required) Sample gas pump Flow regulator Flowmeter (if sample gas monitoring is not provided in the OXYMAT 61) To sample gas inlet Condensation drain Fig. 2--1 Gas conditioning, example (not included in delivery) OXYMAT 61 Instruction Manual A5E00123067-01 2--5
  • 18. Installation Guidelines 2.5 Electric Connection ! Warning The following must be observed during the electric installation: The respective country-specific standard for the installation of power systems with rated voltages below 1000 V (in Germany: VDE 0100). The requirements of VDE 0165 (EN 60079--14) or equivalent international standards must be observed when installing gas-proof analyzers. Special care must be taken with the cable inlets (PG screwed glands) since the gas-proof function may be endangered if carried out improperly. Torque and permissible diameter for the PG screwed glands: -- PG 13.5: -- PG 16: 3.8 ±0.2 Nm; diameter 6 ... 12 mm 5.0 ±0.2 Nm; diameter 10 ... 14 mm Failure to observe these regulations may result in death, personal injury and/or damage to property. 2.5.1 Power Supply Connection D The analyzer is supplied with an appliance plug which may only be connected to the power supply by qualified personnel (see Section 1.5). The power supply cable must include a protective earth conductor which must be connected to the chassis potential. The cross-section of the conductors must be ³1 mm2. The phase conductor must be connected to the identified position in the plug. D The power cable must be routed separately from the signal cables. D A circuit-breaker must be provided in the immediate vicinity of the analyzer (see rating plate for loading capacity). It must be readily accessible in this case. D Check that the local mains voltage agrees with that specified on the label on the analyzer. 2--6 OXYMAT 61 Instruction Manual A5E00123067-01
  • 19. Installation Guidelines 2.5.2 Connection of Signal Cables ! Warning The signal voltages must be electrically isolated extra-low voltages (SELV). If signals (e.g. analog output 4 ... 20 mA) are to be routed into a potentially explosive atmosphere of zone 1, they must be intrinsically-safe. Supplementary retrofitting of the analyzer with energy-limiting modules is necessary. The Ex identification of these modules must be clearly visible on the housing. D The signal cables in the rack mount analyzer are connected to the D-SUB plugs at the rear. D RC elements must be connected according to Fig. 2--2 as a measure to suppress the generation of sparks across the relay contacts (e.g. limit relays). Note that the RC element results in a drop-out delay for an inductive component (e.g. solenoid valve). The RC element should therefore be dimensioned according to the following rule-of-thumb: R [Ω] ≈ 0.2 x R L [Ω] C [μF] ≈ I L [A] Additionally make sure that you only use a non-polarized capacitor C. When using direct current, it is possible to fit a spark suppression diode instead of the RC element. D The cables to the relay outputs and binary inputs as well as the analog inputs and outputs must be screened. They must be connected to the corresponding trapezoidal plug (D-SUB plug) according to the pin assignment diagrams (Figs. 2--3 and 2--4). The conductor cross-section should be ³0.5 mm2. Cables of type JE-LiYCY ... BD are recommended. The cable length of the analog outputs depends on the load. OXYMAT 61 Instruction Manual A5E00123067-01 2--7
  • 20. Installation Guidelines Function in analyzer Connection side Plug DSUB 25F M 13 25 12 24 23 11 (-) Power supply unit 24 V' max. (+) IL R RL 10 22 9 21 C 8 20 19 18 7 6 5 17 4 16 15 14 M 3 2 R [ W ] » 0,2 x RL [ W ] C [ mF ] » IL [ A ] 1 Fig. 2--2 Example of measure to suppress sparks on a relay contact (rack mount analyzer) D The reference ground of the analog inputs is the housing potential. D The analog outputs are floating, also with respect to one another. D The interface cable (RS 485) must be screened and connected to housing potential. The cable screen must be connected with a large-area contact to the screen of the D-SUB plug. The conductor cross-section should be ³0.5 mm2. The interface cable must not be longer than 500 m. 2--8 OXYMAT 61 Instruction Manual A5E00123067-01
  • 21. Installation Guidelines 2.5.3 Pin Assignments Function in device Pin assignment Plug SUB-D 9F (RS 485) M 9 GND 8 7 +5 V 6 M 5 4 3 2 1 GND R_level-NNC RD/TD-N RD/TD-P R_level-PNC NC GND The plug and cable must be shielded and connected to housing potential. Bus terminators can be connected to pins 7 and 9. Plug SUB-D 15F M 8 15 14 13 M 12 M 11 M 10 9 M 7 6 5 4 3 2 1 GND NC NC Analog output 1-P Analog output 1-N NC GND Analog input 2-P Analog input 2-N Analog input 1-P Analog input 1-N Binary input 6-P Binary input 5-P Binary inputs 5 to 6-N GND Analog outputs: floating (also to one another), R L : ≤ 750 Ω Pressure correction Pressure correction Correction of interf. gas Correction of interf. gas Non-floating analog inputs, 0 to 20 mA/500 Ω or 0 to 10 V (low impedance) Plug SUB-D 25F M 13 25 24 23 22 21 20 19 18 17 16 15 M 14 12 11 10 GND Binary Binary Binary Binary Binary input 4-P input 3-P input 2-P input 1-P inputs 1 to 4-N "1" = 24 V (13 to 33 V) "0" = 0 V (0 to 4,5 V) floating via opto isolator Relay 6 9 8 7 Relay 5 Relay 4 6 5 4 Relay 3 Contact loading max. 24 V/1 A, AC/DC; relays are de-energized in shown contact position Relay 2 3 2 Relay 1 1 GND Fig. 2--3 Pin assignments of OXYMAT 61 OXYMAT 61 Instruction Manual A5E00123067-01 2--9
  • 22. Installation Guidelines Function in device Pin assignment Plug SUB-D 37F (option) M 37 36 35 34 33 32 31 30 29 28 27 26 25 24 23 22 21 M 20 19 18 17 16 15 14 13 12 11 GND NC NC Binary input 14-P Binary input 13-P Binary input 12-P Binary input 11-P Binary input 10-P Binary input 9-P Binary input 8-P Binary input 7-P Binary inputs 7 to 14-N "1" = 24 V (13 to 33 V) "0" = 0 V (0 to 4,5 V) floating via opto isolator Relay 14 Relay 13 10 Relay 12 9 8 Relay 11 7 6 5 Relay 10 Contact loading max. 24 V/1 A, AD/DC relays are de-energized in shown contact position Relay 9 4 3 Relay 8 2 Relay 7 1 GND Fig. 2--4 Pin assignments of Autocal module OXYMAT 61 Other supplementary electronics (AK interface, Profibus, ...) are described in the supplied documents. 2--10 OXYMAT 61 Instruction Manual A5E00123067-01
  • 23. Installation Guidelines 2.5.4 Example of Autocal Circuit Function in device Connection side Plug DSUB 37- F (optional) - M V0 (s.o.) 19 37 Zero gas 18 36 V1 (s.g.) 17 35 34 33 16 15 Cal. gas 1 14 V2 (s.g.) 32 13 31 30 29 28 12 11 Cal. gas 2 Relay 12 V3 (s.g.) 10 9 27 8 26 7 25 6 24 23 22 5 3 2 M V4 (s.g.) Relay 10 Relay 9 Cal. gas 4 4 21 20 Cal. gas 3 Relay 11 1 Relay 8 Relay 7 Power supply unit 24 V≃ max. The relay is de-energized in the shown contact position s.o. ≙ de-energized: open s.g. ≙ de-energized: closed Sample gas VM (s.g.) Sample gas inlet Gas conditioning units Fig. 2--5 Pin assignments and valve diagram ”Autocal” OXYMAT 61 Instruction Manual A5E00123067-01 2--11
  • 24. Installation Guidelines 2.6 Dimensional Drawings OXYMAT 61 465 9 483 384,5 351,5 440 Fig. 2--6 Installation dimensions (front and plan views) 2--12 OXYMAT 61 Instruction Manual A5E00123067-01
  • 25. Installation Guidelines 384,5 351,5 27,5 15,6 4 173 128 M4 4 2 1 Fig. 2--7 Dimensional drawing for 7MB2001 (OXYMAT 61) OXYMAT 61 Instruction Manual A5E00123067-01 2--13
  • 26. Installation Guidelines 2--14 OXYMAT 61 Instruction Manual A5E00123067-01
  • 27. Technical Description 3 3.1 Application . . . . . . . . . . . . . . . . . . . . . . . . . . . . . . . . . . . . . . . . . . . . . . . . . . . . . . . . . . . . . . . . . . . . . . 3--2 3.2 Design . . . . . . . . . . . . . . . . . . . . . . . . . . . . . . . . . . . . . . . . . . . . . . . . . . . . . . . . . . . . . . . . . . . . . . . . . . 3--3 3.3 Communications Interface . . . . . . . . . . . . . . . . . . . . . . . . . . . . . . . . . . . . . . . . . . . . . . . . . . . . . . . . . 3--4 3.4 Mode of Operation . . . . . . . . . . . . . . . . . . . . . . . . . . . . . . . . . . . . . . . . . . . . . . . . . . . . . . . . . . . . . . . 3--5 3.5 Technical Data . . . . . . . . . . . . . . . . . . . . . . . . . . . . . . . . . . . . . . . . . . . . . . . . . . . . . . . . . . . . . . . . . . 3--6 3.6 Reference Gases, Zero Error . . . . . . . . . . . . . . . . . . . . . . . . . . . . . . . . . . . . . . . . . . . . . . . . . . . . . . 3--7 3.7 Materials in the Sample Gas Path . . . . . . . . . . . . . . . . . . . . . . . . . . . . . . . . . . . . . . . . . . . . . . . . . . 3--8 OXYMAT 61 Instruction Manual A5E00123067-01 3--1
  • 28. Technical Description 3.1 Application The OXYMAT 61 gas analyzers operate according to the paramagnetic alternating pressure principle and are used to measure oxygen in gases. D Low long-term drift D Reference gas supply either externally (N2, O2 or air, approx. 3000 hPa) or using built-in reference gas pump (ambient air) Application examples D Two-stage access code to prevent unintentional and unauthorized inputs D Internal pressure sensor for correction of variations in sample gas pressure in the range from 700 to 1200 hPa (absolute) D Automatic range calibration can be parameterized Measurement of O2 D For boiler control in combustion plants D In safety-relevant areas D As reference variable for statutory emission measurements D Operation based on NAMUR recommendations D Automotive industry (test bay systems) D Fieldbus connection (option) D Packaging industry D Monitoring of sample gas (option) D In warning equipment D D In chemical plants Monitoring of reference gas with reference gas connection 3000 to 4000 hPa D In ultra-pure gases for quality monitoring D Different smallest spans, depending on version 2.0 % or 5.0 % O2 D Customer-specific analyzer options such as: - Customer acceptance - TAG labels - Drift recording - Special characteristics D Four freely-programmable measuring ranges, also with suppressed zero, all measuring ranges linear Electrically isolated signal output 0/2/4 to 20 mA (also inverted) D D Simple replacement of analyzer since electrical connections can be simply disconnected from it Autoranging, remote switching or manual range selection possible D D 19” unit with 4 HU, for installation in hinged bays D 19” unit with 4 HU, for installation in cabinets, with or without telescopic rails D Front panel can be swung down for servicing (laptop connection) D Internal gas paths: FKM (Viton) tubing D Gas connections for sample gas: pipe diameter 6 mm or 1/4” D Sample chamber made of stainless steel (mat. No. 1.4571) D Storage of measured values possible during calibration D Time constants selectable within wide limits (static/dynamic noise suppression); i.e. the response time of each component can be matched to the respective application D einfache Handhabung durch menügesteuerte Bedienung D Fast response time 3--2 OXYMAT 61 Instruction Manual A5E00123067-01
  • 29. Technical Description 3.2 Design Display and control panel D D D D D D D D D Large LCD panel for simultaneous display of: - Measured value (digital and analog displays) - Status line - Measuring ranges Contrast of LCD panel adjustable using menu Permanent LED backlighting Five-digit measured-value display (decimal point counts as digit) Washable membrane keyboard with five softkeys Menu-based operation for configuration, test functions, calibration User help in plain text Graphic display of concentration trend; programmable time intervals D D Communication D D Six freely-configurable binary inputs (e.g. range switching, processing of external signals from sample conditioning system) LED backlit display and membrane keyboard with noticeable click RS 485 present in basic unit (connection at rear) Options: D Inputs and outputs Six freely-configurable relay outputs (failure, maintenance request, maintenance switch, limit alarm, external solenoid valves) Two configurable analog inputs (e.g. correction of cross-interferences, external pressure sensor) Expandable by eight additional binary inputs and eight additional relay outputs for automatic calibration with up to four calibration gases D D D AK interface for the automotive industry with extended functions Converter to RS 232 Incorporation into networks via PROFIBUS DP/PA interface Siprom GA software as service and maintenance tool Status line for display of analyzer status (parameterizable) two code levels according to NAMUR (maintenance and specialist levels) easy operation with menu control using five softkeys Display of concentration as numbers and bargraph Display of active measuring ranges Display of start- -ofscale and full-scale value ESC key to abort inputs Number block to enter values INFO key for help in plain text CLEAR key to delete an input Fig. 3- 1 - ENTER key to accept input values MEAS key to return to measurement mode Membrane keyboard and graphic display OXYMAT 61 Instruction Manual A5E00123067-01 3--3
  • 30. Technical Description 3.3 Communications Interface Container A PC Sample gas pressure, O2 Remote control OXYMAT 6E CO2, CH4 (Laptop) SIPROM GA CO, NO Service control center Local control ULTRAMAT 6E (dual-channel) 13 2 3 1 14 RS485/ELAN 4 5 Sample gas pressure, O2 6 7 CO2 CO, SO2, NO, O2 O2 sample gas pressure OXYMAT 6F ULTRAMAT/OXYMAT 6E Container B ULTRAMAT 23 Container C J ELANÒ: Economical Local Area Network J Remote communication via modem J Networking of ULTRAMAT 6, OXYMAT 6 and ULTRAMAT 23 analyzers J Up to 12 channel addresses (interfaces) for measured values (concentration, sample gas pressure etc.) J Central service control by coupling to a host computer J Measured data available in ASCII format for further processing J Remote operation and downloading of data via PC Fig. 3- 2 - 3--4 J SIPROM GA J Profibus J Technology: RS 485 / 9600 baud / data refresh 0.5 s / distance up to 500 m J 1 ...... 12 = channel addresses 13 and 14 = control addresses for PC etc. Various analyzers networked via RS 485 OXYMAT 61 Instruction Manual A5E00123067-01
  • 31. Technical Description 3.4 Mode of Operation In contrast to almost all other gases, oxygen is paramagnetic. This property is utilized as the measuring principle by the OXYMAT channel. 1 Oxygen molecules in an inhomogeneous magnetic field are drawn in the direction of increased field strength due to their paramagnetism. When two gases with different oxygen concentrations meet in a magnetic field, a pressure difference is produced between them. 2 2 4 For the OXYMAT channel, one of the gases (1, Fig. 3- is a -3) reference gas (N2, O2 or air), the other is the sample gas (5, Fig. 3-3). The reference gas is introduced into the sample chamber (6) through two channels (3). One of these reference gas streams meets the sample gas within the area of a magnetic field (7). Because the two channels are connected, the pressure, which is proportional to the oxygen concentration, causes a flow. This flow is converted into an electric signal by a microflow sensor (4). 3 3 ∆P 5 6 The microflow sensor consists of two nickel grids heated to approx. 120 ºC which form a Wheatstone bridge together with two supplementary resistors. The pulsating flow results in a change in the resistance of the Ni grids. This results in a bridge offset which depends on the oxygen concentration in the sample gas. 7 8 O2 O2 O2 O2 O2 Because the flow sensor is located in the reference gas stream, the measurement is not influenced by the thermal conductivity, the specific heat or the internal friction of the sample gas. This also provides a high degree of corrosion resistance because the flow sensor is not exposed to the direct influence of the sample gas. By using a magnetic field with alternating strength (8), the effect of the background flow in the microflow sensor is not detected, and the measurement is thus independent of the instrument orientation. The sample chamber is directly in the sample path and has a small volume. There is therefore a very short response time for the OXYMAT 61. OXYMAT 61 Instruction Manual A5E00123067-01 9 1 Reference gas input 2 Restrictors 3 Reference gas channels 4 Microflow sensor for measurement signal 5 Sample gas input 6 Sample chamber 7 Paramagnetic measuring effect 8 Electromagnet with alternating flux density 9 Sample gas and reference gas outputs Fig. 3- 3 - Mode of operation 3--5
  • 32. Technical Description 3.5 Technical Data General technical data Measuring ranges Smallest possible span 3) Largest possible span Measuring ranges with suppressed zero Electromagnetic compatibility 4, switchable internally and externally; autoranging is also possible 2% v/v or 5% v/v O2 100 % v/v O2 Any zero point is possible between 0 and 100% v/v as long as a suitable calibration gas is used (see also Table 3.1) Conforms to standard requirements of NAMUR NE21 (05/93) EN 50081- 1, EN 50082- 1 - Degree of protection IP 20 to EN 60529 Electrical safety According to EN 61010-1 Category of overload III Position of use Front panel vertical Dimensions See Figs. 2- 6 and 2- 7 - Weight Measuring response 3) Output signal variation Zero drift <  0.75 % of smallest possible measuring range according to rating plate with electronic damping constant of 1 s (this corresponds to  0.25 % at 2s) < 0.5% / month of smallest possible span acc. to rating plate Measured-value drift < 0.5% / month of respective span Repeatability < 1% of respective span Linearity deviation < 1% of respective span Influencing variables 3) Ambient temperature Approx. 13 kg < 0.5% / 10 K, referred to the smallest possible span according to rating plate Power consumption Fuse ratings Gas inlet conditions Permitted sample gas pressure Sample gas flow Sample gas temperature Sample gas humidity Time response Warm-up time Response time (T90 time) Damping (electric time constant) AC 100 to 120 V (rated range: 90 to 132 V), 48 to 63 Hz or AC 200 to 240 V (rated range: 180 to 264 V), 48 to 63 Hz approx. 37 VA With pressure compensation switched off: 2% of span with 1% change in pressure With pressure compensation switched on: < 0.2% of span with 1% change in pressure Residual gases Deviation in zero point corresponding to paramagnetic/diamagnetic deviation of residual gas (see Table 3.2) Sample gas flow < 1% of smallest possible span according to rating plate with a change in flow of 0.1 l/min within the permissible flow range Power supply Power supply Power connection (see rating plate) Sample gas pressure < 0.1% of output signal span with rated voltage ¦10% 100 ... 120 V 1T/250 200 ... 240 V 0.63T/250 700 to 1200 hPa (external reference gas supply) atm. pressure range (with built-in pump) 18 to 60 l/h (0.3 to 1 l/min) 0 to 50 °C < 90% RH 1) Electric inputs and outputs Dead time (purging time of gas path in analyzer at 1 l/min) Approx. 0.5 to 2.5 s depending on version Time for internal signal processing 0 / 2 / 4 to 20 mA. floating, max. load 750 W Relay outputs 6, with changeover contacts, freely-parameterizable e.g. for range identification; loading capacity: AC/DC 24 V / 1 A floating Analog inputs < 30 min 2) at room temperature 3.5 s 0 to 100 s parameterizable Analog output 2, designed for 0 / 2 / 4 to 20 mA, for external pressure sensor and correction of influence of residual gas (correction of cross-interference) Binary inputs 6, designed for 24 V, floating, freely selectable e.g. for range switching <1s Pressure correction range Pressure sensor (internal or external) Serial interface RS 485 Options Supplementary electronics with 8 additional binary inputs and 8 additional relay outputs, e.g. for triggering automatic calibration; supplementary electronics for PROFIBUS PA and PROFIBUS DP 700 to 1200 hPa absolute Climatic conditions Permissible ambient temperature - 30 to +70 °C during storage and transport +5 to +45 °C during operation Permissible humidity < 90% RH 1) as annual average for storage and transport 4) 1) RH: relative humidity 2) Maximum accuracy achieved after 2 hours 3) Referred to 1 bar sample gas pressure, 0.5 l/min sample gas flow and 25 °C ambient temperature 4) Dew point must not be fallen below *) Based on DIN EN 61207/IEC 1207 3--6 OXYMAT 61 Instruction Manual A5E00123067-01
  • 33. Technical Description 3.6 Reference Gases, Zero Error Measuring range Recommended reference gas 0 to . . . % v/v O2 N2, 4.6 . . . to 100% v/v O2 (suppressed zero with full-scale value 100% v/v O2) O2 Around 21% O2 (suppressed zero with 21% v/v O2 within the span) Air Table 3.1: Reference gas pressure Remarks 3000 to 4000 hPa absolute The reference gas flow is set automatically to 5 to 10 ml/min (up to 20 ml/min when also flowing through compensation branch) Atmospheric pressure with internal reference gas pump Reference gases for OXYMAT channel Residual gas (concentration 100 % v/v) Zero deviation in % v/v O2 absolute Organic gases Acetic acid Residual gas (concentration 100 % v/v) Zero deviation in % v/v O2 absolute Noble gases CH3COOH - 0.64 Argon Ar - 0.25 Acetylene C2H2 - 0.29 Helium He +0.33 1,2 Butadiene C4H6 - 0.65 Krypton Kr - 0.55 1,3 Butadiene C4H6 - 0.49 Neon Ne +0.17 iso-Butane C4H10 - 1.30 Xenon Xe - 1.05 n-Butane C4H10 - 1.26 1-Butene C4H8 - 0.96 Inorganic gases iso-Butene C4H8 - 1.06 Ammonia NH3 - 0.20 cyclo-Hexane C6H12 - 1.84 Carbon dioxide CO2 - 0.30 Ethene C2H6 - 0.49 Carbon monoxide CO +0.07 Ethylene C2H4 - 0.22 Chlorine Cl2 - 0.94 Dichlorodifluoromethane (R12) CCl2F2 - 1.32 Dinitrogen monoxide n-Heptane C7H16 - 2.4 Hydrogen n-Hexane N2O - 0.23 H2 +0.26 C6H14 - 2.02 Hydrogen bromide HBr - 0.76 Methane CH4 - 0.18 Hydrogen chloride HCl - 0.35 Methanol CH3OH - 0.31 Hydrogen fluoride HF +0.10 n-Octane C8H18 - 2.78 Hydrogen iodide n-Pentane C5H12 - 1.68 Hydrogen sulphide iso-Pentane HI - 1.19 H2S - 0.44 C5H12 - 1.49 Oxygen O2 +100 Propane C3H8 - 0.87 Nitrogen N2 0.00 Propylene C3H6 - 0.64 Nitrogen dioxide Trichlorofluoromethane (R11) +20.00 CCl3F - 1.63 Nitrogen oxide NO +42.94 C2H3Cl - 0.77 Sulphur dioxide SO2 - 0.20 C2H3F - 0.55 Sulphur hexafluoride SF6 - 1.05 C2H2Cl2 - 1.22 Water H2O - 0.03 Vinyl chloride Vinyl fluoride 1,1 Vinylidene chloride NO2 Table 3.2 Zero error due to diamagnetism and paramagnetism of residual gases with nitrogen as the reference gas at 60 °C and 1000 hPa absolute (according to IEC 1207/3) Conversion to other temperatures: The zero deviations listed in Table 3.2 must be multiplied by the correction factor (k): D D For diamagnetic gases: k = 333 K / q [°C] + 273 K) For paramagnetic gases k = [333 K / q ( [°C) + 273 K)]2 (diamagnetic gases are all those with a negative zero deviation) OXYMAT 61 Instruction Manual A5E00123067-01 3--7
  • 34. Technical Description 3.7 Materials in the Sample Gas Path Standard Gas path Gas path with hose 19” rack unit Bushing Hose Sample chamber Sample chamber pipe socket Restrictor O-rings Hose connector 1.4571 titanium FKM (Viton) 1.4571 1.4571 Flowmeter Metering pipe Float Float limit Elbows Duran glass Duran glass PTFE (Teflon) FKM (Viton) Sample gas pressure switch Diaphragm Housing FKM (Viton) PA 6.3 T PTFE (Teflon) FKM (Viton) Polyamide 6 Options 3--8 OXYMAT 61 Instruction Manual A5E00123067-01
  • 35. 4 Start-up 4.1 Safety Information . . . . . . . . . . . . . . . . . . . . . . . . . . . . . . . . . . . . . . . . . . . . . . . . . . 4--2 4.2 Preparation for Start-up . . . . . . . . . . . . . . . . . . . . . . . . . . . . . . . . . . . . . . . . . . . . . 4--2 4.2.1 General Information . . . . . . . . . . . . . . . . . . . . . . . . . . . . . . . . . . . . . . . . . . . . . . . . 4--2 4.2.2 Special Preparations for Startup . . . . . . . . . . . . . . . . . . . . . . . . . . . . . . . . . . . . . . 4--2 4.3 Start-up and Operation . . . . . . . . . . . . . . . . . . . . . . . . . . . . . . . . . . . . . . . . . . . . . . 4--5 OXYMAT 61 Instruction Manual A5E00123067-01 4--1
  • 36. Start-up 4.1 Safety Information ! Caution Certain parts in this analyzer carry dangerous voltages. The housing must be closed and grounded before switching on the analyzer. Death, personal injury and/or damage to property may result if this is not observed. Also refer to Section 2.5. A standard analyzer must not be used in potentially explosive atmospheres. Use with gases with flammable components at concentrations above the lower explosion limit (LEL) must be clarified with the responsible Ex authorities, and is finally the responsibility of the owner. When measuring toxic or corrosive gases, it may occur that sample gas collects in the analyzer as a result of leaks in the gas path. To prevent the danger of poisoning, or also of damage to parts of the device, the analyzer or the system must be purged with inert gas (e.g. nitrogen). The gas displaced by purging must be collected using suitable equipment and routed for environmentally-friendly disposal via an exhaust line. 4.2 4.2.1 Preparation for Start-up General Information Gas conditioning ! Gas sampling devices, gas cooler, condensation vessel, filters and any controllers, recorders or indicators (if connected) should be made ready for operation (refer to respective Instruction Manuals). Caution Please observe the notes in Section 2.5 ”Electric Connection”! Operation Before connecting and switching on the analyzer, make yourself acquainted with operation (Chapter 5 of this Manual). Interfaces Prior to start-up, connect and parameterize the interfaces. 4.2.2 Special Preparations for Startup Selection of reference gas 4--2 It should always be ensured that the various spans have at least one common point. This point is then defined as the ”physical zero” and applies to all measuring ranges. The reference gas can be selected once this point has been found. OXYMAT 61 Instruction Manual A5E00123067-01
  • 37. Start-up The following example clarifies this: Assume there are four measuring ranges: 17 -- 22 %O2 15 -- 25 %O2 0 -- 25 %O2 0 --100 %O2 The range 17--22 % O2 is common to all these measuring ranges. The physical zero must be present in this range. Air (20.95% O2) is suitable as the reference gas in this case. An exception can be made if the smallest measuring range is ≥ 5 % O2 and the difference from the reference gas is not more than 20 % O2. In this case the physical zero can also be outside the measuring range. The pressure correction (see function 82 in Chapter 5) must be activated in this case since a pressure dependence exists as a result of the large zero offset. The purity of the reference gas must be appropriate to the task. Assembly of reference gas connection The reference gas connection has a different design depending on the order: D Air (low-pressure version) The reference gas (air) is sucked in by the internal pump. When fitting within a cabinet, ensure that the sucked air comes from outside the cabinet. D Nitrogen, oxygen, air (high-pressure version) Check that the gas purity is appropriate (4.6)! The supply is from a cylinder with a pressure setting of 3000 to 4000 hPa above the sample gas pressure A sintered metal filter (porous filter) has been pressed into the coupling to prevent the entry of dirt into the gas path. Application of reference gas The reference gas must always be flowing for a certain time before measuring is started. The reference gas should continue to flow even if there is a temporary interruption in measuring. The resulting additional consumption is insignificant if there are no leaks in the reference gas line. Compressed gas cylinder If the reference gas is supplied from a cylinder, the reference gas line should be purged prior to start-up. Then check the line for leaks, since these are often greater than the actual consumption of reference gas. To do this, shut off the valve on the cylinder. The gas connection is sufficiently leak-proof if the pressure gauge on the reduction valve of the cylinder does not drop by more than 1000 hPa/min (15 psi/min). The reference gas pressure must always be more than 2000 hPa (30 psi) above the sample gas pressure. Checking the reference gas pressure Check the flow of the reference gas: If the option ”Reference gas pressure switch” is present, note that the switching point of the pressure switch is factory-set to 2000 hPa (30 psi) above atmospheric pressure. OXYMAT 61 Instruction Manual A5E00123067-01 4--3
  • 38. Start-up Checking the flow of reference gas Check the flow as follows: D Close sample gas inlet coupling. D Connect a hose with an ID of 4 mm to the sample gas outlet coupling and dip into a beaker filled with water. The reference gas must escape slowly from the hose (1...2 bubbles/ sec., or 2...4 bubbles/sec. with a flow-type compensation circuit). Checking for leaks Hosed analyzers Check for leaks in the sample gas path as follows: D Block off the reference gas connection. D Apply approx. 100 hPa (1.5 psi) to the sample gas path and close off pressure source. D Wait for approx. 1 min. During this time, the inflowing sample gas has assumed the temperature of its environment. D Note the pressure (can be read using function 2). D Wait 15 minutes, and note the pressure again. The sample gas path is sufficiently leak-proof if the pressure has changed by a maximum of 1 hPa (1 mbar) within the 15 minutes. 4--4 OXYMAT 61 Instruction Manual A5E00123067-01
  • 39. Start-up 4.3 Start-up and Operation Switching on the power supply The measured-value display appears after a short delay in the LCD. The status display appears above this in the top line (see Section 5.1 for more details). The measuring head is in the warming-up phase for the first five minutes. The message CTRL (function check) is displayed during this time. Spans Define the desired spans (full-scale value -- start-of-scale value) using function 41. The 0(2/4) and 20 mA of the analog output are assigned to the start-of-scale and full-scale values respectively. In the case of several measuring ranges it is recommendable to assign the smallest span to range 1 etc. The following then applies: span1<span2<span3<span4. Setting the physical zero If the composition of the calibration and reference gases is the same, i.e. their O2 difference is zero, a signal is not present. This is referred to as the physical zero. Depending on the reference gas, the physical zero can thus have a value of 0 to 100 % O2. The setpoint of the physical value is entered using function 22. Setpoint for sensitivity adjustment The setpoints should be as far as possible away from the physical zero (at least 60 % of the respective span). The corresponding calibration gases should be available, and the setpoint is entered using function 22. Single/total calibration Set a total or single calibration using function 23 or 52. A single calibration means that each range is calibrated with its own calibration gas. With a total calibration, only the master range is calibrated (selected using function 22), the other ranges are determined according to the switching ratio. Make sure that the gas flow is between 0.3 and 1 l/min. Calibrating the zero The physical zero is calibrated using function 20. It applies to all parameterized measuring ranges. Calibrating the sensitivity The sensitivity is calibrated in a similar manner using function 21. OXYMAT 61 Instruction Manual A5E00123067-01 4--5
  • 40. Start-up Calibration examples a) O2 monitoring in gases Oxygen is to be measured in N2. Measuring range: 0--0.5 % O2; reference gas N2; calibration gas: 0.43% O2 Procedure Function No. Input Remarks Selection of start-of-scale and full-scale values of range 41 0 - 0.5 - 0 Þ 0(2/4)mA 0.5 Þ 20 mA Input of setpoints for physical zero and sensitivity 22 0 Setpoint for physical zero 0.43 Setpoint for sensitivity Calibration of zero 20 Flow of N2 Calibration of sensitivity 21 Flow of calibration gas b) Room air monitoring Measuring range 15 to 21% O2; reference gas: air (20.95% O2); calibration gas: 15.3% O2 Procedure Function No. Input Remarks Selection of start-of-scale and full-scale values of range 41 15 - 21 - 15 Þ 0(2/4)mA 21 Þ 20 mA Input of setpoints for physical zero and sensitivity 22 20.95 Setpoint for physical zero 15.3 Setpoint for sensitivity Calibration of zero 20 Flow of air Calibration of sensitivity 21 Flow of calibration gas c) O2 measurement in flue gas Measuring range: 0 --10% O2 ; reference gas: air; calibration gas: N2 Note: The O2 concentration of the reference gas is not in the measuring range 0 --10% O2. However, since the span is > 5% it is permissible to violate this selection criterion of the reference gas. Please ensure that the pressure correction (see function 82 in Chapter 5) is activated! Procedure Function No. Input Remarks Selection of start-of-scale and full-scale values of range 41 0-10 0 Þ 0(2/4)mA 10 Þ 20 mA Input of setpoints for physical zero and sensitivity 22 20.95 Setpoint for physical zero 0 Setpoint for sensitivity Calibration of zero 20 Flow of air Calibration of sensitivity 21 Flow of N2 4--6 OXYMAT 61 Instruction Manual A5E00123067-01
  • 41. Start-up d) Monitoring of oxygen purity Measuring range 95 -- 100 % O2; reference gas: O2; calibration gas: 95.6 % O2 Procedure Function No. Input Remarks Selection of start-of-scale and full-scale values of range 41 95 - 100 - 95 Þ 0(2/4)mA 100 Þ 20 mA Input of setpoints for physical zero and sensitivity 22 100 Setpoint for physical zero 95.6 Setpoint for sensitivity Calibration of zero 20 Flow of pure O2 (100 %) Calibration of sensitivity 21 Flow of calibration gas Please refer to Chapter 5 (Operation) for exact instructions concerning operation of the above-mentioned functions. Compensation of temperature influence Compensation of the influence of temperature is a fixed component in the software (firmware) of the OXYMAT 61. Noise suppression Noise on the input signal can be suppressed using function 50. This function permits the setting of a lowpass filter which can be assigned a time constant up to 100 s. OXYMAT 61 Instruction Manual A5E00123067-01 4--7
  • 42. Start-up 4--8 OXYMAT 61 Instruction Manual A5E00123067-01
  • 43. Operation 5 5.1 General . . . . . . . . . . . . . . . . . . . . . . . . . . . . . . . . . . . . . . . . . . . . . . . . . . . . . . . . 5--2 5.2 Summary of Input Functions . . . . . . . . . . . . . . . . . . . . . . . . . . . . . . . . . . . . . . 5--7 5.2.1 Analyzer Status . . . . . . . . . . . . . . . . . . . . . . . . . . . . . . . . . . . . . . . . . . . . . . . . . 5--8 5.2.2 Calibration . . . . . . . . . . . . . . . . . . . . . . . . . . . . . . . . . . . . . . . . . . . . . . . . . . . . . . 5--9 5.2.3 Measuring Ranges . . . . . . . . . . . . . . . . . . . . . . . . . . . . . . . . . . . . . . . . . . . . . 5--16 5.2.4 Parameters . . . . . . . . . . . . . . . . . . . . . . . . . . . . . . . . . . . . . . . . . . . . . . . . . . . 5--18 5.2.5 Configuration . . . . . . . . . . . . . . . . . . . . . . . . . . . . . . . . . . . . . . . . . . . . . . . . . 5--24 OXYMAT 61 Instruction Manual A5E00123067-01 5--1
  • 44. Operation 5.1 General 1 2 4 5 9 V LIM V STO 3 V AR 63,28 % VOL V CODE CO2 ¡©¢£ 6 0,0 100 7 8 +/-- 1. 2. 3. 4. 5. 6. 7. 8. 9. 8 9 4 0 7 5 6 1 2 3 CLEAR ESC INFO ENTER MEAS Status line (parameterizable using function 53) Status display (e.g. j LIM means: limit (alarm) signalling is active; J LIM means: limit (alarm) has been triggered) Measured value Display of dimension Display of measured component Analog measured-value display (display of measured value with start-of-scale and full-scale values of current range) Display of activated measuring ranges with identification of current range Limit mark on bargraph Function keys with varying meaning (softkeys) Fig. 5--1 Display and control panel 5--2 OXYMAT 61 Instruction Manual A5E00123067-01
  • 45. Operation Switches/keys and their meanings Key Meaning CLEAR Deletes a commenced number input ENTER Every digit input (except fast selection of a function) must be confirmed using ENTER ESC Return by one step in the input structure. Modifications are imported INFO Help information Return from any position in the input structure to display mode (possibly with request whether to import the entered data). Pressing the MEAS key again results in locking of analyzer; MEAS i.e. changing to input mode again is only possible following input of the code. Varying meaning; possible in this case: · Selection of item in menu tree · Selection function · Switch function ON/OFF Softkey Editing of inputs The values in the menus shown in Chapter 5 should be understood as examples. D An active input field is represented with colons (:10:) as limiters. The cursor is positioned as a flashing line underneath the number to be entered (e.g. :23.45:). D The input is terminated by pressing the ENTER key, and the value stored. If several input fields are present in a menu, the cursor is automatically positioned to the next input field. . Caution Each input value must be confirmed with ENTER before you leave the menu. Also the last of several values in a menu. D The CLEAR key can be used to delete an input. The cursor then returns to the first position of the input field. Switching function (ON status) Switching function (OFF status, also status display in the status line) Entry into a subsequent menu D OXYMAT 61 Instruction Manual A5E00123067-01 J j " Graphic styling elements Triggering of a function (e.g. start calibration, ...) 5--3
  • 46. A CO2 Start from measuring mode CODE 1 2 3 4 " Yes No Import modifications? Query (only following modifications) Meas. mode LIM 100 CODE Y 0.0 63,28 % vol LIM Display mode Relay ”Function check” (CTRL, Function 71) Input Code Function menu Store for analog output (Function 77) YYYY Y YY Only following modifications Y Y Y YY Analyzer status Calibration Meas. ranges Parameters Configuration Main menu ----------------------------------------------------------------------- imported Function Hard keysSoft keys ----------------------------------------------------------------------- 5--4 Modifications are Measuring mode: analyzer is coded / Display mode: analyzer is not coded; signals are activated according to functions 71 and 77 Operation Coding of analyzer Fig. 5--2 Input sequence OXYMAT 61 Instruction Manual A5E00123067-01
  • 47. Operation Input sequence The analyzer is in measuring mode. The measured component is shown on the right of the display, together with an arrow pointing to the right ("). A softkey is assigned to this component. The main menu is called by pressing this softkey. Entry into main menu Main menu O2 Analyzer status " Calibration " Measuring ranges " Parameters " Configuration " The main menu consists of the following items (followed by the associated code level): Analyzer status Calibration Measuring ranges Parameters Configuration Not coded Code of level 1 Code of level 1 Code of level 1 Code of level 2 The code for level 1 is factory-set to the value ”111”, that for level 2 to the value ”222”. Entering a submenu Following the selection of a submenu, you will be asked to enter the code of the input level (exception: submenu ”Analyzer status” is not coded and is thus freely-accessible). Decoding of level 2 also decodes level 1. External signalling via a relay contact is possible when decoding if a corresponding relay has been configured with CTRL under function 71. The warming-up and calibration phases of the analyzer or the channel are then also signalled via this relay contact. The measured-value memory becomes active together with the decoding if it has been switched on under function 77. The coding of a channel can be recognized by the symbol J CODE in the display (display mode), and decoding by the symbol j CODE. Return to measuring mode MEAS key: Return to meas. mode O2 Accept modifications? YES F NO F Returns immediately to display mode from any position in the menu structure. A commenced input is aborted. The adjacent question is displayed before the return is carried out. Pressing either the YES or NO softkey returns to display mode. The modifications are finally imported into the working area of the parameter memory if you press YES, or rejected with NO. Pressing the ESC key returns to the last function display. ESC key: OXYMAT 61 Instruction Manual A5E00123067-01 Leads back step-by-step to display mode. Modifications are imported without questioning. 5--5
  • 48. Operation Coding of analyzer After returning to display mode using ESC or MEAS, the analyzer can be coded again (j CODE) by pressing the MEAS key again, thus entering measuring mode. All statuses produced by the decoding (see above) are cancelled by this. Fast selection of functions A ”Power user” input has been introduced to permit immediate switching from the measuring display to the desired function display if frequent inputs are necessary. It is then possible to directly access the desired function by bypassing the menu levels. The ”Power user” input can only be started from measuring mode and comprises the following input steps: D Enter number of desired function in measuring display using the digit keys. D Press the softkey next to the desired component. D You will then be requested to enter the code if the desired function is protected by a code. 5--6 OXYMAT 61 Instruction Manual A5E00123067-01
  • 49. Operation 5.2 Summary of Input Functions The following list summarizes the analyzer functions. This list corresponds to software release version 4. Main menu item (section) Function number Function designation 1 2 3 4 Analyzer configuration Diagnostics values Logbook Display measuring ranges 5.2.2 Calibration (code 1) 20 21 22 23 24 Zero calibration Span calibration Setpoints for zero/span Total/single range calibration Autocal 5.2.3 Measuring ranges (code 1) 40 41 Select ranges Define ranges 5.2.4 Parameters (code 1) 50 51 52 53 54 55 56 57 58 59 60 61 Electric time constants Limits On/off configurations Status messages Graphic signal display Select display digits LCD contrast Magnetic field frequency Date/time Sample point selection Setup logbook Shock compensation (not active) 5.2.5 Configuration (code 2) 70 71 72 73 74 75 76 77 78 79 80 81 82 83 84 85 86 87 88 89 90 Analog output Relay outputs Binary inputs ELAN configuration Reset Save data, load data Suppress noise signals Store analog output Calibration tolerances Codes for input levels Analyzer test Select language Pressure correction Interference correction Phase adjust Switch valves Linear temperature compensation Error On/Off AK configuration Sample chamber heater (not with OXYMAT 61) PROFIBUS configuration 5.2.1 Analyzer status Table 5--1 Summary of input functions OXYMAT 61 Instruction Manual A5E00123067-01 5--7
  • 50. Operation 5.2.1 Analyzer Status Analyzer status O2 1 Analyzer config. " 2 Diagnostics values " 3 Logbook " The adjacent display appears following selection of the diagnostics functions in the main menu by pressing the first softkey (”Analyzer status”). The diagnostics functions are freely-accessible. You will not be asked to enter a code. 4 Display meas. ranges " 1 Analyzer configuration Important manufacturing data of the analyzer are visible when you select this function: D Firmware No. Order No. of software stored in the EPROM D Order No. Information on ordering data of analyzer D Serial No. Information on date of manufacture and consecutive number of analyzer D Hardware version Information on hardware design of analyzer D Software version and date Information on scope of analyzer functions 2 Diagnostics values The most important internal values are listed under function 2. They may be of interest for assessing faults or adjustment operations. 3 Logbook All faults which led to a maintenance request (W) or fault message (S) are listed in the logbook (see also Section 6.6). Limit alarms (LIM) and function check (CTRL) are also recorded. However, these do not trigger a maintenance request or fault message. The logbook contains a maximum of eight pages, each of which can accommodate four messages. It operates according to the principle of a circulating buffer, i.e. the oldest message is overwritten when all eight pages are full. The logbook entries can be deleted or blocked (function 60), or also switched off individually (function 87). 4 Display measuring ranges The measuring ranges defined using function 41 are listed using function 4. However, they cannot be modified in this menu. Note . 5--8 If a fault occurs whose error message is switched off by function 87, there is no reaction at the interface which may be configured. This applies to the ELAN interface as well as to the analog and relay outputs. OXYMAT 61 Instruction Manual A5E00123067-01
  • 51. Operation 5.2.2 Calibration The OXYMAT 61 permits either a manual or automatic calibration. The latter (autocal: function 24) is only possible with an option board which contains 8 additional binary inputs and 8 additional relay outputs. The setpoints for the zero and sensitivity adjustments must be set under function 22. The corresponding gases must be applied manually for functions 20 and 21. 20 Zero calibration 20 Zero calib. Setpoint O2 % v/v 15.388 % v/v Act. val. 0.000 The zero is calibrated simultaneously for all measuring ranges, even if the sensitivity is calibrated individually for the ranges. Start calibration CANCEL The calibration procedure should only be triggered when the measured value (actual value) has stabilized following application of the zero gas. F F A single or total calibration is carried out depending on the setting of function 23 (component-specific). 21 Span calibration 21 Span calib. If the measured value is unsteady, increase the time constant (function 50) prior to the calibration. O2 Calibrate MR 1 " Calibrate MR 2 " Calibrate MR 3 " Calibrate MR 4 " Span calib. MR 3 O2 Single calibration: The display lists the ranges which were previously defined using function 41. The adjacent display is therefore an example of the single calibration of four ranges. Setpoint : 20.000 vpm Act. val. 1 : 20.200 vpm Start calibration F Cancel calibration If you now wish to calibrate e.g. range 3, press the corresponding softkey. The display lists the setpoint and the current value of range 3. Once the actual value has stabilized, the calibration procedure can be triggered by pressing 4th softkey. The actual value is then set to coincide with the setpoint. If an incorrect calibration has been carried out by mistake (e.g. with an incorrect calibration gas), the original value can be loaded again by pressing the softkey ”Cancel calibration”. F OXYMAT 61 Instruction Manual A5E00123067-01 5--9
  • 52. Operation Total calibration: 21 Sp. calib. all MRs Setpoint : 20.000 % v/v Act. val.: O2 20.200 % v/v Start calibration CANCEL With a total calibration, all measuring ranges are calibrated together. The ”master” range is defined using function 22. It is advisable to select the largest range for this. The display lists the setpoint and the current value of the ”master” range. F F Once the actual value has stabilized, the calibration procedure can be triggered by pressing 4th softkey. The actual value is then set to coincide with the setpoint. If an incorrect calibration has been carried out by mistake (e.g. with an incorrect calibration gas), the original value can be loaded again by pressing the softkey ”Cancel calibration”. 22 Setpoints total 22 Setpoints total O2 Setpoint for zero : 0.000: % v/v Setpoint for MR 1 : 2.500 % v/v j Setpoint for MR 2 : 5.000 % v/v It is not possible to select a master range for a single calibration. j Setpoint for MR 3 : 10.000 % v/v The adjacent example shows the setpoint input for a total calibration. The third measuring range has been selected as the master range. J 5--10 OXYMAT 61 Instruction Manual A5E00123067-01
  • 53. Operation 23 Total/single range calibration 23 Total/single cal. O2 j Total calibration These functions are used to select a total or single calibration of the measuring ranges. A total calibration means that a ”master range” is calibrated and that all other ranges are calculated by means of a ratio. If this function is not activated, each range is calibrated individually. 24 Autocal 24 Autocal O2 Autocal mode " Autocal sequence " Autocal cyclic param. " Autocal check The automatic calibration (Autocal) can only be carried out if the analyzer contains the supplementary electronics (option). " If this is not the case, a corresponding warning is output on the display when you select an autocal parameter. Autocal mode Autocal mode O2 Autocal on/off j Start autocal cyclically j Start autocal via binary input j Trigger autocal once F Abort autocal You can use this subfunction to parameterize the various operating modes of the autocal function. F In mode “Start autocal cyclically”, an autocal is started after a specific time (see “Autocal cyclic parameter” for details). Autocal on/off In the status ”Autocal off” (representation j), the switches ”Start autocal cyclically” and ”Start autocal via binary input” can no longer be activated. ”Trigger autocal once” is also switched off. The cycle time continues, but an automatic calibration is not triggered. Start autocal cyclically Autocal can be activated in a regular, repetitive cycle if the ”Time from autocal to autocal” has been previously set. Start autocal via binary input Autocal can be activated via a binary input if you have configured this using function 72. OXYMAT 61 Instruction Manual A5E00123067-01 5--11
  • 54. Operation The modes ”Start cyclically” and ”Start via binary input” can be activated simultaneously in order e.g. to check a weekly calibration and to control this check via a binary input. In addition, an autocal sequence can be started in the status “Autocal on” at any time using the softkey ”Trigger autocal once” providing the analyzer is ready for measurement (i.e. calibration or warming-up phase not currently running). A sequence triggered in this manner has no influence whatsoever on the time cycle of an autocal, i.e. the cycle time continues irrespective of this. Trigger autocal once When triggered, the point disappears until the process has been finished. An automatic calibration procedure can be interrupted at any time when being carried out using the key ”Abort autocal”. All calibration data which have been determined so far are rejected, and the calibration data (zero and sensitivity) prior to starting the autocal are used further. Abort autocal The abort has no influence on the time cycle. All valid adjustment procedures are retained. This subfunction can be used to combine several calibration phases into one autocal sequence. Autocal sequence Autocal sequence O2 1. Zero gas : 1.0: min F 2. Cal.gas 1: 2.0: min F 3. Cal.gas 2: 1.0: min F 4. Cal.gas 3: 2.0: min F Continue " The sequence of the automatic calibration can be freely defined. It is possible to ”compose” a sequence from up to 12 different phases. In addition to the connection of one zero gas and up to four calibration gases per component, it is also possible to program purging with sample gas, an intermediate sample gas mode, and a signalling contact. This signalling contact is available if it has been previously assigned to a relay output using function 71. Intermediate sample gas mode An intermediate sample gas mode may be necessary if the system is only permitted to leave measuring mode for a specific period. If the total time then required for purging is greater than the permissible loss time, a return must be made to measuring mode between the calibrations (intermediate sample gas mode). Signalling contact The signalling contact can be used e.g. to trigger the automatic calibration of a second analyzer or to signal the start or end of the autocal function. Relay outputs If relay outputs have been assigned for sample gas, zero gas, calibration gases and/or measure/calibrate (function 71), these are switched to trigger the corresponding solenoid valves. The same also applies to the signalling contact ”Autocal”; this is closed for approx. one second when the command is executed. 5--12 OXYMAT 61 Instruction Manual A5E00123067-01
  • 55. Operation The following sequence is to programmed: Example Autocal sequence 1.Zero gas O2 :15.0:min F 2.Calib.gas 1:10.0:min F 3.SG purging : 8.0:min F 4.Int.SG mode:30.0:min F ...Continue " Autocal sequence O2 5.Calib.gas 2: 8.0:min F 1. Zero gas calibration following 15 minutes purging with zero gas 2. Calibration with gas 1 following purging for 10 minutes 3. Purging with sample gas for 8 minutes 4. Intermediate sample gas mode for 30 minutes 5. Calibration with gas 2 following purging for 8 minutes 6. Calibration with gas 3 following purging for 8 minutes 7. Calibration with gas 4 following purging for 10 minutes 8. Purging with sample gas for 8 minutes 9. Brief signalling contact in order to start ”Autocal” on a further analyzer or channel The defined autocal sequence is shown in the adjacent displays. 6.Calib.gas 3: 8.0:min F 7.Calib.gas 4: 8.0:min F 8.SG purging : 8.0:min F ...Continue " Autocal sequence O2 9.Sig.cont:I::I::I:min F 10. :I::I::I:min F 11. :I::I::I:min F 12. :I::I::I:min F ...Continue " OXYMAT 61 Instruction Manual A5E00123067-01 5--13
  • 56. Operation List for the Autocal sequence: Step Component Autocal sequence Zero gas 1 Component 1 Function code 1 Zero gas 2 -- “ -- Function code 2 Calibration gas 1 -- “ -- Function code 3 Calibration gas 2 -- “ -- Function code 4 Calibration gas 3 -- “ -- Function code 5 Calibration gas 4 -- “ -- Function code 6 Purge sample gas Immediate sample gas mode Autocal cyclic parameter Autocal cycle O2 Time from autocal to autocal (cycle time): 2:[h] Time up to first autocal cycle : 15:[min] Carry out span calibration for each 8th cycle Total range calibration calib. gas 1 Function code 8 Signalling contact . Function code 7 Function code 9 Note! Zero gas 2: only required with Autocal in absorber mode This subfunction can be used to parameterize various time constants for activating a cyclic, repetitive autocal. D Time from autocal to autocal (cycle time). Any setting between 0 and 1000 (hours) is accepted by the analyzer. D Time up to first autocal cycle (starting at time of setting). If “0” is entered here and if autocal is switched on (see ”Autocal on/off”), the analyzer commences immediately with the autocal sequence. If autocal is switched off, the analyzer only starts an autocal sequence if autocal is switched on within one minute of entering the “0”. If this is not the case, the complete time between two autocal sequences elapses starting with input of the “0”. The internal clock continues even when autocal is switched off! It starts at ”01.01.1995 00:00” when the analyzer is switched on, and must be set to the current time using function 58. 5--14 OXYMAT 61 Instruction Manual A5E00123067-01
  • 57. Operation D Number of cycles until the span calibration is carried out. The zero is calibrated with each autocal. If it is unnecessary to also calibrate the sensitivity each time the zero is calibrated -- e.g. in order to save calibration gas -- a value >1 must be entered in the line ”Carry out calibration with calibration gas every : : cycle”. The information in the last lines indicates that the entered parameters refer to a total calibration with calibration gas for measuring range 3. This range has been previously selected using function 22. Note . Access to functions 20 and 21 is blocked as long as autocal is active (Autocal J). A corresponding message is output in the display if this function is then selected. The “Autocal check” is used to check the calibration. The sequence parameterized in the menu “Autocal sequence” is executed as for “Autocal”. However, in contrast to “Autocal”, no new calibrations are triggered, only the deviations with respect to selectable calibration tolerances are checked. Autocal check O2 Calibr. tolerance for 0 :6: in % of smallest span Calibr. tolerance for span in % of current span :6: Start Autocal check F Cancel Autocal check F Autocal check sequence: 1. Enter the desired calibration tolerances in the menu “Autocal check”. If necessary, select the relay output and the binary input for “Autocal check”. 2. Start the “Autocal check” using the button in the menu “Autocal check” or via the binary input. 3. The analyzer then carries out a sequence as parameterized in the menu “Autocal sequence”. 4. If a calibration limit is violated, the maintenance request W10 is set and, if parameterized, also the relay “AcalChk Dif.”. 5. Both of these are reset following a fault-free Autocal. OXYMAT 61 Instruction Manual A5E00123067-01 5--15
  • 58. Operation 5.2.3 Measuring Ranges Meas. ranges O2 40 Select ranges " 41 Define ranges The adjacent display appears following selection of the range functions in the main menu by pressing the third softkey (”Measuring ranges”). " 40 Select ranges 40 Select ranges O2 It is possible to select one measuring range or to switch to autoranging. All selection possibilities are subject to mutual interlocking. MR1 0.0 - 5.0 vpm j MR2 0.0 - 10.0 vpm j Autoranging is only possible under the following conditions: MR3 0.0 - 25.0 vpm J MR4 0.0 - 100.0 vpm j D At least two ranges must be available. A range is considered as present if the start-of-scale value is not equal to the full-scale value. Autoranging j D The spans must become greater. D The ranges must be adjacent to one another or overlap. This results in the following permissible constellations: Type A: a.) FSV [i] < FSV [i+1] b.) c.) Type B: FSV [i] ³ FSV [i+1] d.) e.) SSV: start-of-scale value FSV: full-scale value 5--16 OXYMAT 61 Instruction Manual A5E00123067-01
  • 59. Operation A differentiation is made between two types of range:: Type A: The full-scale value must be smaller than the subsequent full-scale value. The following applies to autoranging: --20% --10% of span subtracted from full-scale value Range 1 Range 2 Type B: The start-of-scale value must be greater than or equal to the subsequent full-scale value. Since the spans must become larger at the same time, the start-of-scale values of the subsequent ranges are always smaller. The following applies to autoranging: 0% +10% of span subtracted from start-of-scale value Range 1 Range 2 41 Define ranges 41 Define ranges No. Start value O2 End value 1 : 0.000 : : 10.0: % v/v 2 : 0.000 : : 50.0: % v/v 3 : 0.000 : :100.0: % v/v 4 : 0.000 : :500.0: % v/v Up to four measuring ranges can be defined whose start-ofscale values are assigned to the bottom value (0/2/4 mA) and whose full-scale values are assigned to the top value (20 mA) of the analog output. If the message “Ranges not plausible” is displayed, this means that autoranging is not possible. Ranges not plausible! OXYMAT 61 Instruction Manual A5E00123067-01 5--17
  • 60. Operation 5.2.4 Parameters Parameters O2 50 El. time constants " 51 Limits " The adjacent display with selection of the parameter functions 50 to 53 appears following selection of the parameter functions. You can branch to the parameter functions 54 to 61 by pressing the fifth softkey (... Continue). 52 On/off configuration " 53 Status messages Continue " " 50 Electric time constants 50 Electr. time con O2 Effective bandwidth in % of smallest MR:: 6.0:% Time constant within bandwidth ti: : 10.0:s Time constant outside bandwidth ta: : 1.0:s Actual measured value: 0.982 vpm This function can be used to set various time constants to reduce the noise superimposed on the measured value. The reduction in noise approximately corresponds to that of a lowpass filter with a corresponding time constant. The time constant ti is effective within a parameterizable interval defined in % of the smallest measuring range. On the one hand, this dampens small changes in measured value (e.g. noise), but becomes immediately ineffective when the signal passes through the effective interval. In this case, the signal is dampened by the external time constant ta. You can set values up to 100 % for the effective interval, and values up to 100 s for the time constants ti and ta. Appropriate combination of these three parameters permits the implementation of a low display delay (90 % time) despite high noise suppression. The effect of the set damping parameters can be observed in the bottom line in which the ”real” measured value is displayed (in % of full-scale value). 51 Limits 51 Limits O2 Limit 1 : 22.125: % v/v on relay 3 Alarms at decrease signal F B Valid for range ¡©¢£ F Limit alarm on/off j Limit 2 " The analyzer can monitor up to 4 limits which you can assign to the measuring ranges as desired. Any relay can be assigned to each limit (see function 71). If this has not been configured, ”--” appears in the limit display. Only positive limit values up to 100 % can be parameterized. It is additionally possible to select whether an alarm is to be output when the entered limit is exceeded or fallen below. The assignment of the limit to the measuring ranges is achieved by repeatedly pressing the third softkey. Pointers above the bordered range numbers move in the process and show the ranges in which the limit monitoring is to be active (all ranges in the adjacent example). Limit monitoring can be switched off individually for each limit (see also function 52). 5--18 OXYMAT 61 Instruction Manual A5E00123067-01
  • 61. Operation Resetting of limit alarm: If the limit relay has been triggered, this status is also retained if the measured value returns to the permissible range again. The triggering of a limit relay is registered in the logbook (function 3). The limit relay is automatically reset as soon as the cause for its setting is no longer present. The program jumps to limit display 2 etc. when you press the fifth softkey (”...Continue”). 52 On/off configurations 52 On/off config. O2 Autoranging J Stored value j Temperature compensation j Pressure compensation j ...Continue " Channel-specific on/off configurations (e.g. flow check for sample gas) can only be called using the first component. This function permits simple switching on and off of the functions listed in the adjacent display. This simplified input means that it is not necessary to pass through the various menu levels for these functions. It is possible to switch up to four functions on and off in each of the displays which can be called. Switched-on configurations are identified by J , switched-off ones by j. The next display can be selected in each case using the fifth softkey (”...Continue”). The following configurations can be switched on and off using function 52: Designation Total calibration Remarks No. 23 Autocal 24 Autoranging 40 Limit monitoring 1 51 Limit monitoring 2 51 Limit monitoring 3 51 Limit monitoring 4 51 Blocking of logbook 60 Suppression of negative measured values 70 Store analog output 77 Signalling of tolerance violation 78 Temperature compensation of zero 86 Temperature compensation of sensitivity Only with supplementary electronics 86 Flow check for sample gas Flow check for reference gas Fault / maintenance request / CTRL to NAMUR 72 Measuring head heater Table 5--2 Functions accessible using function 52 OXYMAT 61 Instruction Manual A5E00123067-01 5--19
  • 62. Operation Apart from the functions listed in Table 5--2, further service functions can be addressed using function 52. These are reserved for servicing personnel and are only visible following input of the service code (code stage 3). 53 Status messages 50 Status messages This function can be used to display -- in the status line -- up to four different statuses which can be assumed by the analyzer. O2 Display automat. calibration [CAL] j Display stored value [STO] J Display limits [LIM] j Display autorange J [AR] Display control function [CTRL] Status j Output in display depending on functions 52 and 53 Fct. 53 j Fct. 52 j Fct. 53 J Calibration: CAL None CAL j CAL J CAL Calibration running Stored value : STO None STO j STO J STO Analog output connected to memory (see also function 77) Limit: LIM None LIM j LIM J LIM Upward or downward violation of limit (see also function 51) Autoranging: AR None AR j AR J AR During switching over of ranges Function check: CTRL None CTRL j CTRL J CTRL Analyzer is decoded Warming-up phase Calibration running Table 5--3 Fct. 52 J Fct. 53 J Status messages The type of status ”Code” is always present in the status line. If a fault occurs during operation, the message ”Maintenance request” or ”Fault” appears in the status line depending on the importance of the fault. This message is output alternately with the status messages. 5--20 OXYMAT 61 Instruction Manual A5E00123067-01