

Recomendados
Mais conteúdo relacionado
Mais procurados
Destaque
Semelhante a 2b004fb98ae55d8986d6de1dceb1073c
Semelhante a 2b004fb98ae55d8986d6de1dceb1073c (20)
Último
Último (20)
2b004fb98ae55d8986d6de1dceb1073c
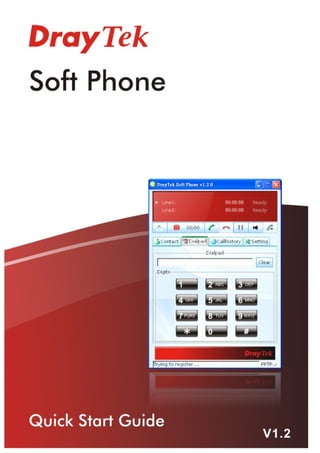
- 1. i Soft Phone Quick Start Guide
- 2. Soft Phone Quick Start Guide Version: 1.2 Firmware Version: V1.2.0 Date: 12/01/2011 Copyright Copyright 2011 All rights reserved. This publication contains information that is Declarations protected by copyright. No part may be reproduced, transmitted, transcribed, stored in a retrieval system, or translated into any language without written permission from the copyright holders. Trademarks The following trademarks are used in this document: Microsoft is a registered trademark of Microsoft Corp. Windows, Windows 95, 98, Me, NT, 2000, XP, Vista and Explorer are trademarks of Microsoft Corp. Other products may be trademarks or registered trademarks of their respective manufacturers. Vigor3200 Series Quick Start Guide ii
- 3. Table of Contents 1. Introduction................................................................................................................................... 1 2. Installation .................................................................................................................................... 1 3. Registration .................................................................................................................................. 5 Register Extensions to Vigor router......................................................................................... 5 4. Using Soft Phone ......................................................................................................................... 7 How to dial out via Soft Phone ................................................................................................ 9 How to create the Phone Book.............................................................................................. 11 How to create the Extension List........................................................................................... 12 5. Panel Explanation ...................................................................................................................... 13 Status Bar .............................................................................................................................. 13 Icons ...................................................................................................................................... 13 Contact .................................................................................................................................. 15 Dialpad................................................................................................................................... 16 CallHistory ............................................................................................................................. 17 Setting.................................................................................................................................... 18 iii Soft Phone Quick Start Guide
- 5. 1. Introduction Soft Phone delivering telephony capabilities to any PC provides ultimate mobility to employees and customers even on the road. Users can just dial the same number to reach their account manager / service representation even they are traveling. Soft Phone offers the functionality of ZRTP which is enabled in default to enhance the security of communication. Both ends with Soft Phone installed or devices with ZRTP feature can have the secure communication due to the voice data encrypted. 2. Installation Before using it, please follow the steps below to install Soft Phone onto your computer. 1. Run the DrayTek Soft Phone program, e.g., Setup by double clicking the installation icon. 2. When the following setup wizard appears, please click Next. 1 Soft Phone Quick Start Guide
- 6. 3. Choose “I accept the agreement” and click Next. 4. If you want to change destination location, simply click Browse to choose another destination. Then, click Next. Soft Phone Quick Start Guide 2
- 7. 5. Click Next. 6. Click Next, again. 3 Soft Phone Quick Start Guide
- 8. 7. Now, click Install to execute the installation procedure. 8. When the following screen appears, click Finish. Soft Phone Quick Start Guide 4
- 9. 3. Registration To use the soft phone via network, you have to register a SIP account to DrayTek VigorIPPBX 2820 or VigorIPPBX 3510 first. Below shows an example of registration for your reference. Register Extensions to Vigor router DrayTek VigorIPPBX 2820 supports Software based SIP phones. Here we will introduce how to use Soft Phone to register extension(s) to VigorIPPBX 2820. Refer to the following graphic. VigorIPPBX 2820 acts as an SIP server with WAN IP: 218.242.132.26 and LAN IP: 192.168.1.1. Jacky uses the Soft Phone registered to VigorIPPBX 2820 via LAN. Setup the extensions on VigorIPPBX 2820 1. Enter the IP PBX >> Extension Profile setup page and configure the relevant extension profile. 5 Soft Phone Quick Start Guide
- 10. 2. After finishing the settings, you may have the following table. Setup the VoIP clients to register extensions Jacky is using Soft Phone, a VoIP softphone, for registering his extension 101 to VigorIPPBX 2820. Start the Soft Phone. Click the Setting>>SIP tab from the DrayTek Soft Phone dialog. Click Add to open the following dialog. Type the information for Jacky. Soft Phone Quick Start Guide 6
- 11. 4. Using Soft Phone After finish the Soft Phone installation, the software will be popped up automatically. Register through PPTP VPN can ensure the security of the registration and also can solve NAT traversal issue when the Soft Phone is located behind NAT. In addition, data transmitted within the tunnel will be encrypted. Refer to the following figure. Configuring SIP Account After obtaining an account from a SIP proxy server, please keep the information which will be used for Soft Phone. Before making a phone call through Soft Phone, configure the SIP account will be required. 1. Click the Setting>>SIP tab from the DrayTek Soft Phone dialog. 7 Soft Phone Quick Start Guide
- 12. 2. Click Add to open the following dialog. Type the information that you obtained from the VigorIPPBX device administrator / ISP / ITSP / Voice provider. If encrypted registration (via VPN connection) is required, please configure the settings as the following: Soft Phone Quick Start Guide 8
- 13. 3. Click OK to save the configuration and exit the dialog. 4. When the registration is successful, a message stated with registration successfully will be shown on the bottom of the dialog. How to dial out via Soft Phone 1. Make sure your computer has been installed a microphone and headphones. 2. Open Setting>>SIP to make sure the SIP account has registered successfully. 9 Soft Phone Quick Start Guide
- 14. 3. Click the Contact >>Dialpad tab from the DrayTek Soft Phone dialog. Type the phone number that you want to contact in the input area. 4. Click the Start call button from the DrayTek Soft Phone dialog. 5. When the remote end picks up the phone, the call / conversation is established. Soft Phone Quick Start Guide 10
- 15. How to create the Phone Book 1. Click the Contact >>Phone Book tab from the DrayTek Soft Phone dialog. 2. Right click the mouse key to display the Add button. 3. Click Add to open the following dialog. 4. Type the name and SIP Address in the corresponding fields. When you finish the settings, please click OK to save them and exit the dialog. The new added will be displayed on the DrayTek Soft Phone dialog. 11 Soft Phone Quick Start Guide
- 16. Note: To make a quick call on Phone Book, simply choose the one (e.g., mark) you want to dial out and right click your mouse button. A popped up selections will appear. Chose Call mark. How to create the Extension List 1. Click the Contact >>Extension tab from the DrayTek Soft Phone dialog. 2. Right click the mouse key to display the Add button. 3. Click Add to open the following dialog. 4. Type the name and SIP Address in the corresponding fields. When you finish the settings, please click OK to save them and exit the dialog. The new added will be displayed on the DrayTek Soft Phone screen. Note: To make a quick call on Extension, simply choose the one (e.g., perry) you want to dial out and right click your mouse button. A popped up selections will appear. Soft Phone Quick Start Guide 12
- 17. 5. Panel Explanation This section provides the explanation for the control panel of Soft Phone. Status Bar Display current status for each line. Icons On the top of the panel, there are several icons used to dial out, cut off, voice message and so on. Status Transfer Voice Message Sound Volume Start Call Hold/Switch Terminate Call 13 Soft Phone Quick Start Guide
- 18. Status Click to check and change current status. Voice message Click to listen the voice message. Start Call Click to dial out. Terminate Call Click to terminate current phone call. Hold/Switch Click to hold on current call or switch back to the on-hold call. Sound Volume Click to adjust the volume level of microphone and speaker. Transfer Click it to transfer current call to another one. Soft Phone Quick Start Guide 14
- 19. Contact The Contact tab includes Extension (displaying the subscribed BLF status of remote end), and Phone Book. Extension With the function of Busy Lamp Field (BLF), Extension page can offer current status of the account you added. If the Status shown as Not Registered, it means that extension is not registered to the IPPBX and cannot be dialed. Name Display the extension number of the clients. Status Display the connection status for the clients. Not registered – it means that extension is not registered to the IPPBX and cannot be dialed. Available – such account has registered to VigorIPPBX already and can be dialed. Ringing – such account has registered to VigorIPPBX already and is ringing. Busy – such account has registered to VigorIPPBX already and in busy. 15 Soft Phone Quick Start Guide
- 20. Phone Book To make a quick dial for each time, simply add the one(s) that you will contact into the Phone Book. Such book allows you to make a direct call for selected name by using the right mouse button. In the pop up menu, you can call, edit and delete the selected item, or add another new account easily. Dialpad Such page simulates the telephone keypad for you to enter the number in the field of Dialpad. Besides, the phone number, account name, and full SIP account are also allowed to be entered in this field. Soft Phone Quick Start Guide 16
- 21. CallHistory This page provides a history for all the phone calls by Vigor Soft Phone. Click this icon to display all of the phone calls including incoming, outgoing and missed ones. Allcall Click this icon to display the incoming calls. Incoming Click this icon to display the outgoing calls. Outgoing Click this icon to display the missed calls. Missed Search call Type the phone number in this field for searching the corresponding information of that number. Phonenum Display the phone number. Type Display the type (e.g., outgoing, incoming, etc) of the phone call. Time Display the starting time of the phone call. Duration Display the duration time of the phone call. 17 Soft Phone Quick Start Guide
- 22. Setting Such tab allows you to configure SIP settings, check Codec information, change the Network connection, specify phone call forwarding, and configure speaker, ring sound and so on. SIP Set a SIP account is the first thing you have to do for using Soft Phone. Please type the required information that you applied from the proxy sever. You can change the server whenever you want. However, only one server is available for each time. Please use Add to specify the account server for the first time. Next time, please click Edit to change the server information whenever you want. Add Click this button to add an SIP account. If you have added one SIP account in Soft Phone, this button will be invalid. Edit If you want to change the SIP account, click this button to edit / modify the settings. Remove Click this button to remove the selected account. If Add can be clicked, you will see the following dialog. Soft Phone Quick Start Guide 18
- 23. SIP Proxy address Type the SIP proxy address for such SIP account. Outbound Proxy (optional) This is an optional setting. Just keep the default setting. Registration duration (sec) Type a number for the registration duration. The default setting is 3600. Display name (optional) Type a name for such SIP account to be seen by peer side. Extension number Type an extension number for such SIP account. Authentication ID Type a name for such SIP account for authentication. It must be set with the same name as set in SIP server or IPPBX router. Password Type a password for such SIP account. Register through PPTP VPN If data encryption is required, please check this box to register the SIP account via VPN connection. PPTP VPN Server Type the IP address of PPTP VPN server on IPPBX. Use SIP account Check this box to use the same account with SIP for PPTP VPN connection. Username Type the username specified for PPTP VPN server. 19 Soft Phone Quick Start Guide
- 24. Password Type the password specified for PPTP VPN server. PPP Authentication Choose one of the encryption selections. Codec This page offers voice compression format of voice for you to choose. Name Display the name of the codec. Rate Display the transmission rate for such compression format. Status Display the status (enabled or disabled) of such codec. Min bitrate Display the minimal bitrate of the codec. Up / Down Adjust the priority of codec. Enable Enable the selected codec. Disable Disable the selected codec. Soft Phone Quick Start Guide 20
- 25. Network This page can set the network connection for the Soft Phone by directly connecting to Internet or under NAT (STUN server is required to discover WAN IP and port). Direct connection to the Internet Choose this button to make a direct connection to the Internet after clicking OK. Behind NAT / Firewall (use Choose the option to solve the NAT traversal STUN) problem when the soft phone behind NAT. Please specify the IP address of STUN server. Later, click OK. 21 Soft Phone Quick Start Guide
- 26. FWD This function can forward the incoming phone call to the specified account / extension under different conditions. To Use the drop down list to specify the account who you want to forward the phone call. Never Do not forward the incoming call. Always Always forward the incoming call to the account/extension selected above. Onbusy Only forward the incoming call to the account/extension selected above when the status is busy. On No Answer for ….. sec Forward the incoming call to the account/extension selected above after passing the time specified here without any answer. Soft Phone Quick Start Guide 22
- 27. General It allows you to set speaker, ring device, microphone and ring sound for the Soft Phone. Speaker Choose the output device for the speaker. Ring device Choose the output device for ring. Microphone Choose the input device as your microphone. Ring sound Display the sound file for the phone ringing. You can click Open File icon to choose another sound file for your necessity. Language At present, there are three language interface, English, Simplified Chinese and Traditional Chinese for you to choose. If you change the language interface, please restart Soft Phone to activate new interface. Play Play the sound selected in Ring Sound. 23 Soft Phone Quick Start Guide
- 28. Soft Phone Quick Start Guide 24