SlideShare uma empresa Scribd logo
1 de 2
TPM Information (October 2013)
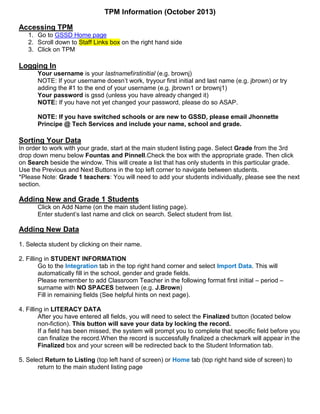
Accessing TPM
1. Go to GSSD Home page
2. Scroll down to Staff Links box on the right hand side
3. Click on TPM
Logging In
Your username is your lastnamefirstinitial (e.g. brownj)
NOTE: If your username doesn’t work, tryyour first initial and last name (e.g. jbrown) or try
adding the #1 to the end of your username (e.g. jbrown1 or brownj1)
Your password is gssd (unless you have already changed it)
NOTE: If you have not yet changed your password, please do so ASAP.
NOTE: If you have switched schools or are new to GSSD, please email Jhonnette
Principe @ Tech Services and include your name, school and grade.
Sorting Your Data
In order to work with your grade, start at the main student listing page. Select Grade from the 3rd
drop down menu below Fountas and Pinnell.Check the box with the appropriate grade. Then click
on Search beside the window. This will create a list that has only students in this particular grade.
Use the Previous and Next Buttons in the top left corner to navigate between students.
*Please Note: Grade 1 teachers: You will need to add your students individually, please see the next
section.
Adding New and Grade 1 Students
Click on Add Name (on the main student listing page).
Enter student’s last name and click on search. Select student from list.
Adding New Data
1. Selecta student by clicking on their name.
2. Filling in STUDENT INFORMATION
Go to the Integration tab in the top right hand corner and select Import Data. This will
automatically fill in the school, gender and grade fields.
Please remember to add Classroom Teacher in the following format first initial – period –
surname with NO SPACES between (e.g. J.Brown)
Fill in remaining fields (See helpful hints on next page).
4. Filling in LITERACY DATA
After you have entered all fields, you will need to select the Finalized button (located below
non-fiction). This button will save your data by locking the record.
If a field has been missed, the system will prompt you to complete that specific field before you
can finalize the record.When the record is successfully finalized a checkmark will appear in the
Finalized box and your screen will be redirected back to the Student Information tab.
5. Select Return to Listing (top left hand of screen) or Home tab (top right hand side of screen) to
return to the main student listing page
TPM Information (October 2013)
TROUBLESHOOTING
1. Accessing a finalized record (Read-Only)
- Select the student whose record you want to access.
- Go to the Recordstab (top right hand corner) and select Record History.
- Select the record you want to view by clicking on the description title.
Note: This is a read-only version of the record and you will not be able to make changes.
2. Making changes to a locked record
- Select the student whose record you want to access.
- Go to the Records tab (top right hand corner) and select Record History.
- Identify (do not click) which record you want to edit (refer to dates).
- In the first column, select the third icon (Edit Record History). It is the notepad and pencil visual.
- Click on the icon and a new window will open.
- Select 'Active' from the record status drop down menu. Then click save.
- This will take you back to the record history page. The record status will now state active.
- Select the record you want edit by clicking on the description title.
- Once you have made the necessary changes, click on the finalized button to save.
2. Deleting a Record
*If a record has been created in error or has no information, follow these steps to delete the record
- Select the student whose record you want to access.
- Go to the Records tab (top right hand corner) and select Record History.
- Identify by placing cursor over (do not click) which record you want to delete (refer to dates).
- In the first column, select the first icon (Delete). It is the red x visual.
- This will delete the record.
Note:This action will permanently delete the record.
Helpful Hints:
Descriptors Explanations
First Nations or Métis
Click on the box if the student is self-declared as noted by parents/guardians on
the school registration form.
English as an Additional
Language
Click on the box if Carol McCullough (EAL Co-ordinator) has assessed the
student.
SST Support for Reading
Click on the box if the student is receiving SST support for reading and/or has a
record of adaptations in the classroom.
Diagnosis or IIP Click on the box if the student has a diagnosis and/or is on an IIP.
Leveled Literacy Intervention Click on the box if the student is currently receiving LLI intervention
Retention Click on “Yes” if the student has been retained.
Attendance
Click on “Yes” if the student has missed 20% of school days as of the testing
date or has a history of attendance problems

Mais conteúdo relacionado

Semelhante a Tpm update march 2014

Pre-Nursing Registration Procedure
Pre-Nursing Registration ProcedurePre-Nursing Registration Procedure
Pre-Nursing Registration ProcedureTTC Webmaster
 
Creating student-progress-reports
Creating student-progress-reportsCreating student-progress-reports
Creating student-progress-reportsSusan Jenkins
 
Creating a-curriculum-report
Creating a-curriculum-reportCreating a-curriculum-report
Creating a-curriculum-reportSusan Jenkins
 
MICROSOFT WORD (ICTL)
MICROSOFT WORD (ICTL)MICROSOFT WORD (ICTL)
MICROSOFT WORD (ICTL)Nad0209
 
Gradebook working copy2
Gradebook working copy2Gradebook working copy2
Gradebook working copy2gsedwrds
 
Lincoln Interactive Orientation
Lincoln Interactive OrientationLincoln Interactive Orientation
Lincoln Interactive Orientationgo2qda
 
Microsoft word -_microsoft_word_exercise
Microsoft word -_microsoft_word_exerciseMicrosoft word -_microsoft_word_exercise
Microsoft word -_microsoft_word_exerciseSubeesh Up
 
Iris Overview
Iris OverviewIris Overview
Iris Overviewsdsltd
 

Semelhante a Tpm update march 2014 (15)

Ms word
Ms wordMs word
Ms word
 
Ms word
Ms wordMs word
Ms word
 
Using planbook
Using planbookUsing planbook
Using planbook
 
Pre-Nursing Registration Procedure
Pre-Nursing Registration ProcedurePre-Nursing Registration Procedure
Pre-Nursing Registration Procedure
 
Creating student-progress-reports
Creating student-progress-reportsCreating student-progress-reports
Creating student-progress-reports
 
Edmodo
EdmodoEdmodo
Edmodo
 
Edmodo
EdmodoEdmodo
Edmodo
 
Creating a-curriculum-report
Creating a-curriculum-reportCreating a-curriculum-report
Creating a-curriculum-report
 
MICROSOFT WORD (ICTL)
MICROSOFT WORD (ICTL)MICROSOFT WORD (ICTL)
MICROSOFT WORD (ICTL)
 
Gradebook working copy2
Gradebook working copy2Gradebook working copy2
Gradebook working copy2
 
Basic Data Handling
Basic Data HandlingBasic Data Handling
Basic Data Handling
 
Lincoln Interactive Orientation
Lincoln Interactive OrientationLincoln Interactive Orientation
Lincoln Interactive Orientation
 
Microsoft word -_microsoft_word_exercise
Microsoft word -_microsoft_word_exerciseMicrosoft word -_microsoft_word_exercise
Microsoft word -_microsoft_word_exercise
 
Iris Overview
Iris OverviewIris Overview
Iris Overview
 
New pagelayout
New pagelayoutNew pagelayout
New pagelayout
 

Mais de Susan Robertson

Mais de Susan Robertson (20)

Grade 1 letter (sept 2013)
Grade 1 letter (sept 2013)Grade 1 letter (sept 2013)
Grade 1 letter (sept 2013)
 
Assitive techpowerpoint
Assitive techpowerpointAssitive techpowerpoint
Assitive techpowerpoint
 
Gssd assistive technology agenda march 6th
Gssd assistive technology agenda march 6thGssd assistive technology agenda march 6th
Gssd assistive technology agenda march 6th
 
Summarizingtemplates
SummarizingtemplatesSummarizingtemplates
Summarizingtemplates
 
Thinkaloudguidesheet
ThinkaloudguidesheetThinkaloudguidesheet
Thinkaloudguidesheet
 
Thinkaloudguidesheet
ThinkaloudguidesheetThinkaloudguidesheet
Thinkaloudguidesheet
 
Fluencyscale
FluencyscaleFluencyscale
Fluencyscale
 
50nifty
50nifty50nifty
50nifty
 
Grouping survivaltips final[1]
Grouping survivaltips final[1]Grouping survivaltips final[1]
Grouping survivaltips final[1]
 
Summarizing rubric[1]
Summarizing rubric[1]Summarizing rubric[1]
Summarizing rubric[1]
 
Summarizing templatesnotes
Summarizing templatesnotesSummarizing templatesnotes
Summarizing templatesnotes
 
Summarizingtemplates
SummarizingtemplatesSummarizingtemplates
Summarizingtemplates
 
Summarizingtemplates
SummarizingtemplatesSummarizingtemplates
Summarizingtemplates
 
Lesson plan template
Lesson plan templateLesson plan template
Lesson plan template
 
Lesson plan template with examples
Lesson plan template with examplesLesson plan template with examples
Lesson plan template with examples
 
The seven minute year plan
The seven minute year planThe seven minute year plan
The seven minute year plan
 
Writingrubric2template
Writingrubric2templateWritingrubric2template
Writingrubric2template
 
Readingstrat.selfassess.
Readingstrat.selfassess.Readingstrat.selfassess.
Readingstrat.selfassess.
 
Sample assessmentchecklist
Sample assessmentchecklistSample assessmentchecklist
Sample assessmentchecklist
 
English language arts_5_2010[1]
English language arts_5_2010[1]English language arts_5_2010[1]
English language arts_5_2010[1]
 

Tpm update march 2014

  • 1. TPM Information (October 2013) Accessing TPM 1. Go to GSSD Home page 2. Scroll down to Staff Links box on the right hand side 3. Click on TPM Logging In Your username is your lastnamefirstinitial (e.g. brownj) NOTE: If your username doesn’t work, tryyour first initial and last name (e.g. jbrown) or try adding the #1 to the end of your username (e.g. jbrown1 or brownj1) Your password is gssd (unless you have already changed it) NOTE: If you have not yet changed your password, please do so ASAP. NOTE: If you have switched schools or are new to GSSD, please email Jhonnette Principe @ Tech Services and include your name, school and grade. Sorting Your Data In order to work with your grade, start at the main student listing page. Select Grade from the 3rd drop down menu below Fountas and Pinnell.Check the box with the appropriate grade. Then click on Search beside the window. This will create a list that has only students in this particular grade. Use the Previous and Next Buttons in the top left corner to navigate between students. *Please Note: Grade 1 teachers: You will need to add your students individually, please see the next section. Adding New and Grade 1 Students Click on Add Name (on the main student listing page). Enter student’s last name and click on search. Select student from list. Adding New Data 1. Selecta student by clicking on their name. 2. Filling in STUDENT INFORMATION Go to the Integration tab in the top right hand corner and select Import Data. This will automatically fill in the school, gender and grade fields. Please remember to add Classroom Teacher in the following format first initial – period – surname with NO SPACES between (e.g. J.Brown) Fill in remaining fields (See helpful hints on next page). 4. Filling in LITERACY DATA After you have entered all fields, you will need to select the Finalized button (located below non-fiction). This button will save your data by locking the record. If a field has been missed, the system will prompt you to complete that specific field before you can finalize the record.When the record is successfully finalized a checkmark will appear in the Finalized box and your screen will be redirected back to the Student Information tab. 5. Select Return to Listing (top left hand of screen) or Home tab (top right hand side of screen) to return to the main student listing page
  • 2. TPM Information (October 2013) TROUBLESHOOTING 1. Accessing a finalized record (Read-Only) - Select the student whose record you want to access. - Go to the Recordstab (top right hand corner) and select Record History. - Select the record you want to view by clicking on the description title. Note: This is a read-only version of the record and you will not be able to make changes. 2. Making changes to a locked record - Select the student whose record you want to access. - Go to the Records tab (top right hand corner) and select Record History. - Identify (do not click) which record you want to edit (refer to dates). - In the first column, select the third icon (Edit Record History). It is the notepad and pencil visual. - Click on the icon and a new window will open. - Select 'Active' from the record status drop down menu. Then click save. - This will take you back to the record history page. The record status will now state active. - Select the record you want edit by clicking on the description title. - Once you have made the necessary changes, click on the finalized button to save. 2. Deleting a Record *If a record has been created in error or has no information, follow these steps to delete the record - Select the student whose record you want to access. - Go to the Records tab (top right hand corner) and select Record History. - Identify by placing cursor over (do not click) which record you want to delete (refer to dates). - In the first column, select the first icon (Delete). It is the red x visual. - This will delete the record. Note:This action will permanently delete the record. Helpful Hints: Descriptors Explanations First Nations or Métis Click on the box if the student is self-declared as noted by parents/guardians on the school registration form. English as an Additional Language Click on the box if Carol McCullough (EAL Co-ordinator) has assessed the student. SST Support for Reading Click on the box if the student is receiving SST support for reading and/or has a record of adaptations in the classroom. Diagnosis or IIP Click on the box if the student has a diagnosis and/or is on an IIP. Leveled Literacy Intervention Click on the box if the student is currently receiving LLI intervention Retention Click on “Yes” if the student has been retained. Attendance Click on “Yes” if the student has missed 20% of school days as of the testing date or has a history of attendance problems