
Recomendados
Recomendados
Mais conteúdo relacionado
Mais de Sotirakou964
Mais de Sotirakou964 (20)
Último
Último (20)
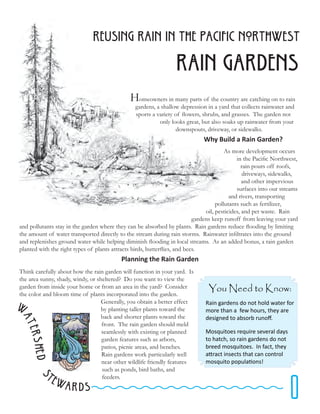
Clark County WA: Reusing Rain in the Pacific Northwest
- 1. REusing Rain in The pacific northwest Rain Gardens Homeowners in many parts of the country are catching on to rain gardens, a shallow depression in a yard that collects rainwater and sports a variety of flowers, shrubs, and grasses. The garden not only looks great, but also soaks up rainwater from your downspouts, driveway, or sidewalks. Why Build a Rain Garden? As more development occurs in the Pacific Northwest, rain pours off roofs, driveways, sidewalks, and other impervious surfaces into our streams and rivers, transporting pollutants such as fertilizer, oil, pesticides, and pet waste. Rain gardens keep runoff from leaving your yard and pollutants stay in the garden where they can be absorbed by plants. Rain gardens reduce flooding by limiting the amount of water transported directly to the stream during rain storms. Rainwater infiltrates into the ground and replenishes ground water while helping diminish flooding in local streams. As an added bonus, a rain garden planted with the right types of plants attracts birds, butterflies, and bees. Planning the Rain Garden Think carefully about how the rain garden will function in your yard. Is the area sunny, shady, windy, or sheltered? Do you want to view the garden from inside your home or from an area in the yard? Consider You Need to Know: the color and bloom time of plants incorporated into the garden. W Generally, you obtain a better effect by planting taller plants toward the Rain gardens do not hold water for more than a few hours, they are back and shorter plants toward the designed to absorb runoff. at front. The rain garden should meld ershe seamlessly with existing or planned Mosquitoes require several days garden features such as arbors, to hatch, so rain gardens do not patios, picnic areas, and benches. breed mosquitoes. In fact, they Rain gardens work particularly well attract insects that can control d S near other wildlife friendly features mosquito populations! such as ponds, bird baths, and 1 te feeders. wards
- 2. Shapes. A formal garden often forms a square or rectangle with carefully defined edges while informal gardens usually Do’s and Don’ts: feature curving lines and loosely defined edges. Consider Do not place the rain garden over a including evergreen shrubs from the recommended list in Table septic system! 2 to provide greenery and structure all year round. Gardens composed entirely of flowering perennials look wonderful during Do not build your rain garden where the summer, but can look barren in winter. water already ponds - runoff will not soak in. Choosing a Location Look for a relatively level site that is slightly downhill from Do locate your rain garden where your downspout(s) and at least 10 feet from the basement or plants get at least partial sun - you can foundation of the structure. Talk to your neighbor if the garden use a wider variety of plants. will be located on or near the property line. Do not locate a Do try to put your rain garden on flatter rain garden over a septic tank or its drain field. You should also ground - dig less! mark the underground utilities even when digging the garden by hand. Shape the rain garden to your personal taste, but make sure rainwater will flow and pool where needed. A kidney or horseshoe shape may be best in the middle of the yard, while a long, narrow garden usually works best along a property line. Testing the Absorption Rate of Your Soil Before investing the time and expense of building a rain garden, test your soil to determine its suitability. Some soils simply drain too slowly to adequately infiltrate rain water fast enough. Test your soil by digging a hole 6 inches deep. Thoroughly soak the ground around the hole and fill the hole completely with water. Water should drain completely from the hole within 24 hours. If it does not drain, the area will not support a rain garden. In this event, look for another site in your yard with better drainage. Determining Size Almost any size rain garden will help remove pollutants from storm water, improve groundwater recharge, and reduce your impact on the environment. However, you can accurately size your rain garden by following some simple guidelines. You will need to estimate how much W area will drain into the rain garden, the general type of soil you have, and the slope of the land where the rain garden will be. at Determining Area Draining to the Rain Garden. Using the example in Figure 1, first figure out the roof area that will drain to the downspouts ershe feeding the rain garden. For example, a roof measuring 45 feet by 50 feet drains 2250 square feet. However, you determine that only half that will drain to the downspouts watering the rain garden. This leaves 1125 square feet of d S area. Remember to count only those downspouts draining directly into the rain garden when determining the roof area. 2 te wards Reusing Rain in the Pacific Northwest: Rain Gardens
- 3. Measuring Slope. You can calculate the slope Figure 1: Calculating Drainage Area of the land by using the method shown in Figure 2. Run a string from a stake pounded into the ground at an uphill spot to a stake pounded into the ground downhill. The string should be level (a n inexpensive “line level” can be purchased from Figure 2: Calculating Slope a local home improvement store). Measure the length Uphill in inches of the string (your width measurement) and Downhill Stake then measure the height (in inches) from the string at the Stake downhill stake to the ground. Divide the height by the width to get the slope in decimal format. Multiply this times 100 to obtain the percent. (For example: a height Height Width String of 26 inches divided by width of 240 inches equals 0.108, which multiplied by 100 produces a slope of 10.8%, or rounded to 11%.) Sizing Your Rain Garden. A slope of 11% requires a rain garden depth of 8 inches as shown in Table 1. Using your soil type, you can then find the rain garden size factor from Table 1. For our example, if you have a clayey soil with the slope of 11%, then your size factor would be 0.20. Table 1: Factors for Sizing Raingardens Slope of land Less than 5% 5% - 8% 8%- 12% Raingarden Depth 3-5 inches 6-7 inches 8 inches Raingarden Sandy soils 0.19 0.15 0.08 Size Factors Silty soils 0.34 0.25 0.16 Clayey soils 0.43 0.32 0.20 Using our example, we multiply the area drained from Figure 1 (1125 sq. ft.) by the size factor of 0.20 to arrive at a rain garden area of 225 square feet (Figure 3). Figure 3: Sizing the Raingarden W Plant Selection A wide variety of plants work well in rain gardens as shown in the at recommended plant list. Vigorous perennials work great in sunny sites. Since native plants are adapted to the area and usually resistant to disease, consider ershe using these plants in your rain garden. When shopping for plants, look for specimens that tolerate a wide variety of conditions and do not require well drained soil. Go to a local, reputable nursery that knows conditions in your d S area. 3 te wards Reusing Rain in the Pacific Northwest: Rain Gardens
- 4. Table 2: Selected Rain Garden Plant List Common Name Botanical Name Sun Part Shade Bloom Bloom Size Soil Sun Time Color Type Bellflower Campanula sp. x x Varies Various Loam Black-eyed Susan Rudbeckia hirta x x Summer Yellow 3-5 ft. Loam Bleeding Heart Dicentra sp. x Spr/Sum Various 1-4 ft. Loam Blue Flag Iris Iris versicolor x x Summer Blue 2-3 ft. Any Butterfly Weed Asclepias tuberosa x Summer Orange 3 ft. Loam Camas Lily Camassia sp. x Summer Various 1-3 ft. Any Cardinal Flower Lobelia cardinalis x x Summer Red 2-4 ft. Loam Perrennials Coneflower Echinacea purpurea x x Summer Purple 1-5 ft. Loam Daylily Hemerocallis sp. x x Summer Various 1-4 ft. Any Gayfeather Liatris sp. x Varies Various 2-3 ft. Loam Goldenrod Solidago sp. x x Summer Yellow 1-3 ft. Loam Sunflower Helianthus sp. x x Sum/Fall Yellow 3-6 ft. Any Joe-Pye Weed Eupatorium sp. x x Summer Pink 4-6 ft. Loam Marsh Marigold Caltha palustris x x Summer Yellow 1-2 ft. Any Rush Scirpus sp. x x None None 1-3 ft. Clay Sedge Carex sp. x x None None 1-4 ft. Clay Sweet Flag Acorus gramineus x x x None None 1 ft. Any Andromeda Pieris sp. x x Spring White 3-10 ft. Loam Currant Ribes sp. x x Spring Pink 4-12 ft. Loam Elderberry Sambucus sp. x x x Spr/Sum White 6-10 ft. Any Huckleberry Vaccinum sp. x x Spring White 3-10 ft. Loam Shrubs Mock Orange Philadelphus sp. x x Summer White 2-10 ft. Loam Ninebark Physocarpus sp. x x x Spr/Sum White 4-8 ft. Any Oregon Grape Mahonia sp. x x x Spring Yellow 2-10 ft. Any Snowberry Symphoricarpos sp. x x x Spring Pink 2-6 ft. Loam Spirea Spirea sp. x x Spr/Sum Varies 2-8 ft. Any Site Preparation Define the edges of the garden using a hose, string, or marking paint. Dispose W of removed vegetation by transplanting, composting, or adding to the yard debris recycling bin. Dig the entire garden about 12 inches deep, sloping the at at sides at a 45 degree or less angle to reduce the incidence of sloughing. Make the main “basin” of your rain garden as level as possible to ensure water ershe ershe spreads evenly across the garden and infiltrates the soil. Use excess soil from the excavation to create a berm or dam around the downhill edge of the garden so water remains in the garden after a hard rain. Place an outlet in the berm to drain excess water from a particularly large storm into your yard d S d S without causing damage to your garden. This outlet is usually just a small dip 4 te in edge of the berm. wards Reusing Rain in the Pacific Northwest: Rain Gardens
- 5. Next, determine how you will divert water from your downspouts to the rain garden. Choosing to simply allow water to flow across Adapter the lawn toward the garden can create muddy areas in the yard. A corrugated (non-perforated) plastic drain pipe provides the simplest method to convey water to the rain garden Trench Outlet and can be found at many with home improvement stores. Rocks (Perforated pipes allow water to seep out and sediment may eventually block the pipe.) Attach the corrugated pipe to your downspout using an downspout adapter (available at home improvement stores) and bury it in a 12 inch deep trench at a two percent or greater slope to your garden. After testing the system, cover the pipe in the trench. Add a few rocks at the outlet of the pipe inside the rain garden to break up the flow during a heavy rain and prevent erosion. You may find it more interesting to convey water from the Newly Installed Rain Garden downspout to the garden by constructing a dry creek bed. Dig a 4 to 6 inch deep trench about 12 inches wide from your downspout to the rain garden. Line the trench with weed cloth Planted Rain Garden and cover with two or three inches of river rock. Add a meander or two to make your stream look more natural and complement your landscape. Test your layout by running water through the downspout. Be certain the water runs smoothly through the stream or pipe and spreads evenly across the bottom of your rain garden without eroding the sides. Once satisfied with the layout and function of the rain garden, work 3 to 5 inches of compost into the soil over the entire garden using a roto-tiller or shovel. This aids stormwater infiltration and gives the W at ershe d S 5 te wards Reusing Rain in the Pacific Northwest: Rain Gardens
- 6. plants a healthy start. Lay out plants according to your plan and plant. After finishing planting, mulch the entire garden with wood chips 2 to 3 inches deep. Avoid bark dust since it will likely float away during a heavy rain storm. The large surface area of wood chips captures and holds pollutants, keeping them out of our streams and lakes. Wood chips also reduce your garden’s water needs during the drier summer months. Maintenance Rain gardens require extra water during the first couple of summers to become established. Water thoroughly, deeply, once weekly to encourage deep roots and vigorous growth. The garden also requires more weeding during establishment. Weeds decrease considerably as the plants establish. After each growing season, stems and seed heads can be left for winter interest, wildlife cover, and bird food. They should be cut back in the early spring to allow room for new growth. As the rain garden becomes more established, the need for maintenance will decline and you can spend your time enjoying the benefits! References: Rain Gardens of West Michigan www.raingardens.org University of Wisconsin Extension http://clean-water.uwex.edu/pubs/raingarden/ Wisconsin Department of Natural Resources http://www.dnr.state.wi.us/org/water/wm/nps/rg/ City of Portland http://www.portlandonline.com/bes/ King County Yard and Garden web site http://dnr.metrokc.gov/topics/yard-and-garden/ Minnesota Rain Gardens http://www.mninter.net/~stack/rain/ Rain Garden Network http://www.raingardennetwork.com/ No endorsement is intended of any business listed here, nor is any criticism of unnamed businesses By Gary Bock and Douglas Stienbarger (December, 2005; Updated January 2008) For more information and classes, check out Watershed Stewards program http://clark.wsu.edu/volunteer/ws/index.html Watershed Stewards is sponsored in partnership by W WSU Extension Clark County and the Clark County Clean Water Program. at ershe Clean Water Program d S te 6 Extension programs are available to all without discrimination. wards Report evidence of noncompliance to your local Extension office. Reusing Rain in the Pacific Northwest: Rain Gardens