2. Contents
(This tutorial will be split into 3 different parts)
Part 1
• What is Tumblr?
• How to sign up for Tumblr
• Basics of Tumblr
• Create a new blog
• Help Centre
• Preferences
• Log out
• Creating your Avatar (Identity)
• How to follow people
• Searching for your interests
• Search for your interests in categories
• Navigation Bar
• What you can do with other peoples posts
• How to create Text Posts
• How to create Photo Posts
• How to create Quote Posts
• How to create Link Posts
• How to create Chat Posts
• How to create Audio Posts
• How to create Video Posts
3. Contents
(This tutorial will be split into 3 different parts)
Part 2
• Basics Of Personal Site
• Mass Post Editor
• Queue
• Drafts
• Posts
• Blog Settings
• Customize your webpage
•Theme
•Title & Description
•Appearance
•Advanced Extras
•Saving
•Visiting Published Website
4. Contents
(This tutorial will be split into 3 different parts)
Part 3
• The creating of my event on Fundraising for Poverty in Africa
• The website details
5.
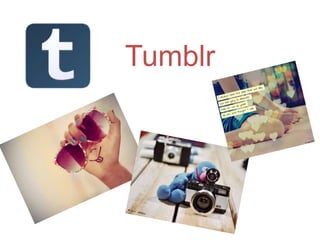
6. What is Tumblr?
• Tumblr is a social networking site involving
following people online that have the same
interests as you. You then blog your own
posts about your interests or you reblog
posts of other peoples interests. Blogging
or reblogging can be on any form of topic
you decide, whether it’s a celebrity you
have an interest in or a fundraiser that you
want to help with, it is completely your
choice.
7. Step 1- How to sign up
• When signing up for Tumblr, first you must
prepare
1. A email account
2. A password, minimum of 6 characters
3. A URL to create your personal webpage. The
URL can only use letters and dashes (-). The
ending of your URL will have
.tumblr.com
8. First we go to the computer desktop and double click on an internet search
engine.
I will be using Google Chrome however it is up to
you to choose an internet search engine that you
prefer.
9. The next step is to find the Tumblr homepage. There is two ways you can do this.
The first way is to type into Google the word Tumblr.
Type in
Tumblr
Then a page like so will appear
Simply click the page circled
in red and you will be
directed to the Tumblr
homepage.
10. The second way to go to Tumblr is through typing
www.tumblr.com into the URL bar.
So it looks like so
And then the Tumblr homepage will appear!
11. When the Tumblr homepage appears it will look like so
You must then put in your prepared
A Security Box will then appear and you have to copy what it says before you can
continue. You will now be sent to your Tumblr account’s dashboard.
Email Address, For Example
Password, For Example
URL Address, For Example
Once Finished Press the Start posting! Button
12. This is your Tumblr account. I now will explain the basics of Tumblr. To start off with we have
the Dashboard page. This is where you can find your new posts or new posts of other people
that you have been following
Before you
This is button
start, you must
for the
verify your
Dashboard
email address
This button
will lead you
to your
personal
posts, or
posts you
have
reblogged.
13. Basics of Tumblr- Creating a new blog
Once you click the Create New Blog This button is
button, this page will appear. You then to create a
type in a title and a new URL. We will go new blog
more into detail on creating a new blog page. This
later in the tutorial would be a
good way to
create an
event of your
choice.
17. Basics of Tumblr- Creating your avatar
As shown below
If you click the Pick Avatar
button you can upload a photo
of yourself, however if you click
the Picture, it will take you to
your webpage.
18. Basics of Tumblr- How to follow
If you like their
posts/webpage and
To follow Can find the peoplefollow interest into the Search
So firstto you
wish type your
someone want to follow byIfcopy then the little Search symbol
Tags box you their like
them, typing
and click URL
Once you have
who has the in their URL. thethen go backpost and shall type in
atand side. For example we
You can
someone's to
click the Follow
same also see who youwish to follow them.
Food.beginning screen
the are button a box like
interest as already following. Click on their name
and paste it into the this will appear
you, you nextlike their picture or
URL box, to so…..
that let’s you
simply paste click on their picture
know that you
their URL (Avatar) and their
have officially
(WebPages) Webpage will appear
added someone
into this box. to follow.
Paste URL into
box and click
Follow
19. The other way to follow
someone is to simply go onto
their webpage and in the top
right side click the follow
button. You can also unfollow
someone the same way as
shown here.
This button
will take you
back to your
dashboard
20. Basics of Tumblr Searching for your interests
For example if we type the word
Food, this page will appear
This is where we
If you like what someone has searched our
posted you can click their interest
name as shown here. Then
copy their URL and paste it in Search your
the Following Box as shown interest here.
previously
These are people that Tumblr
recommend you follow that also
have the same interest as you. To
follow simply click on the +. If you
want to look at their webpage, click
on their name
21. Basics of Tumblr- Search for categorised interests
Your interest could be categorised as shown
below. The enables you to search for your
interest easier as well as gives you people
that also share the same interest so that you
can follow them.
Categorizing
interests which
you can follow
22. Basics of Tumblr- Navigation Bar
Navigation Bar- You can pick
how you would like to
blog, as shown you have
many options
23. Navigation Bar- Basics
The publish now button
This box enables enables you to publish your
you to cite were you post now, or you can add
got your context to a queue which means
(text, photo etc) that you can save the blog
from. This DOES and it posts at a different
NOT have to be The next slide will show you what time. You can also save the
filled in. you can do with other people’s posts posts using the Save to
before showing you how to create Drafts button. This means
your own posts. that they are NOT
In the tags area you type in published to the public and
anything you have been if you want to post to the
typing about in your blog so public you have to go to
that if a person looks up that the Drafts button on your
keyword, your blog may Personal blog page. The
appear. For example, if in last thing you can do with
your blog you were writing your posts is make it a
about food then in the tag private post. This means
place you would type the that ONLY YOU can see this
word food in. post.
24. What you can do with someone else’s posts
This is the
This is someone’s photo post Like
button.
This is the name of Click if
the person who you like
posted the post. By the post.
clicking on their name
The next slide will show you to theirdifferent
it will take you all the
ways you canwebpage where you
create your own posts. The Notes
can see all their other button simply
posts lets you know
When you clickTheliked or
who Reblog
the
reblog buttonreblogged
this page
button
will appear where post
this youyou
allows
can then edit in the
to repost a
captions or putpost that
tags on
the post that you just
you like.
reblogged, it’s entirely up
to you.
25. Navigation Bar- How to Text Blog
The Title of your
blog
The context
of your blog
can be
written here
26. Navigation Bar- How to Photo Blog
You can upload the
photo you wish to
blog or you can take a
photo.
If you want, you
You then can either submit
can add some
your post or preview your
context to your
post
photo in this box
27. Navigation Bar- How to Quote Blog
You can copy &
paste your Quote
here
If you want, you
You then can either submit can add some
your post or preview your context to your
post photo in this box
28. Navigation Bar- How to Link Blog
Title of the Link
Paste the Link’s
URL in this box
You then can either submit
your post or preview your
post
29. Navigation Bar- How to Chat Blog
The Title for you
chat post
This is were you type
your chat. This is shown
like so
Me: I love the colour
green
Mum: I thought you
loved the colour blue
Me: That’s only
depending on my
mood.
30. Navigation Bar- How to Audio Blog
There Second way to post a Audio file is
The islast way to upload a Audio post
The three ways you can
upload an Audio File
using the searchExternal You simply
is by using the button. source. In
type the name of to upload an Audio file
The First way is the Audio file and
the external source, you simply
Tumblryour search the internet forclick
from will personal files. Simply it.
search on the internet for the
the Choose File button and select your
Audio File you want and then copy
Audio file you wish to upload.
and paste the URL in the box.
Be aware of the
URL Box
limits
The search results
are then shown The
below where you Description
Beware of Limits
have the choice of to your
listening to the audio Audio file
file (Play Button) or
selecting the Audio
file (Choose Button)
31. Navigation Bar- How to Video Blog
There is two ways you can upload a
The First way is by Embed uploading a
The Last way is by simply a Video.
video post
This means you simply type the URL in
video from your personal files. Simply
from a site that your video is and
click the Choose File button on.
search for the Video you wish to post.
Part one of the tutorial is finally completed. We are now going to move
onto part two of the tutorial. In this section we will be looking at how to
set up, customize and use your webpage to its fullest advantage.
Type in your
Beware of limits Description to the
video here
Example
32.
33. The Basics of Tumblr on your Personal Site
This page will then appear. I will
now go through the basics of this
page before we actually design
our page
So the first thing we have to do is click onto your
personal site which is shown here
34. The Basics of Tumblr on your Personal Site- Mass Post Editor
The Mass Post Editor is a form of timeline
that enables you to see all the posts you
have ever made or reblogged.
You also have the option to
change things about previous
posts as shown here.
First we will start with the Mass Post
Editor
35. The Basics of Tumblr on your Personal Site- Queue
Remember that if you
need to queue posts,
you goThisthewhere you
to is little
arrow can settop of time
at the up the
the right hand side posts
you want the
cornerto be published
when you are
creating/reblogging a
post and click the add
Queue button enables you to to queue option.
have your created posts or
reblog posts, put on hold, in
other words, queue them up
so that if you don’t want to
blog all at the same time you
can organise for when they can
be publish.
36. The Basics of Tumblr on your Personal Site- Drafts
The Drafts button is the
same as the queue button.
You need to go to the post
you are creating/reblogging
and choose the save to
drafts option. All the drafts
will then appear here.
37. The Basics of Tumblr on your Personal Site- Posts
This Posts button simply
shows you all the posts you
have ever created or
reblogged
38. The Basics of Tumblr on your Personal Site- Blog Settings
The Blog Settings page
looks like so
The Blog Settings button is
different to the Preference
button (Shown in yellow). The
Blog Setting button is to do
with the settings to your
posts, webpage and blogs
rather then to the account
itself (Preference button)
39. The Basics of Tumblr on your Personal Site- Customize Webpage
The First thing we do is
choose the theme for our
website. Every Theme has
different choices within
them, so unfortunately this
tutorial can’t show you how
to do everything with each
theme, but It will give you
the basics.
This is were we set up our
actual webpage. So first we
click on the Customize
Theme button and this page
will appear.
40. The Basics of Tumblr on your Personal Site- Customize Webpage
Once you have
chosen your
theme click the Once you have
Use button clicked on the theme
button many themes
will appear
If you click this button a list will appear that
can help narrow down your theme search.
You have the choice of
•Premium Theme
•Free Theme
•Single Column
•Two Columns
•Three Columns
•Grid
•Textual
•Minimalistic
•Vintage
•Super Customizable
•Hi-Res
41. The Basics of Tumblr on your Personal Site- Customize Webpage
You can then choose the title of your
homepage and a description of
yourself or of what your interests are
that you will be blogging about
Some webpage's enable you to change
your appearance but this depends on
what type of theme you use.
42. The Basics of Tumblr on your Personal Site- Customize Webpage
You then might have
extras (depending on
your theme) that will
allow you to create
more pages or have
advanced forms of
layouts
43. The Basics of Tumblr on your Personal Site- Customize Webpage
Once you have designed and
customized your webpage you
then simply press the save
button a couple of times and
your webpage will be published
44. The Basics of Tumblr on your Personal Site- Open Webpage
The other way to look at your published webpage is by
going to the URL Bar on the internet and pasting in your
URL address.
If you click on this button it will
take you to your published If you then remember
webpage (meaning that you can your URL. You can then
not make any changes to your simply type your URL
webpage unless you click the into the URL bar on the
button below that says Customize internet and your
Theme) webpage will appear
45.
46. The event I have created is a fundraiser on poverty in Africa. In the next few slides is
step by step development of creating this event. The images and text are cited and
none of the information is factual. This is NOT a proper fundraiser for poverty
therefore there is no address or contact details for money to be sent to.
47. First we go to
the Create a
new blog
button as
shown below
We then type in a
title, URL and click
the Create Blog
button. This will
look like so….
48. So now when we go back to were our personal site is and we
Because my fund raiser
willis about poverty I chosehas appeared
see that our blog page
this Image because
seeing a child crying is
suffering enough.
Then click Click the Choose
the Blog File button and
Settings select the picture
button to you would like as
change your your avatar.
There is also a new
Avatar
button appeared,
Picture.
Members. This
button enables you to
invite people to your
blog.
49. My next step is to now create some posts that can go on my webpage wall
(Let’s Destroy Poverty)
I simply click the
Choose File
button and
upload amy posts I shall be
For photo I
wantusing a Photo Post.
then click
the Create Post
button
As you can see, the picture I have
chosen has now appeared as a
post
50. Next I am going to design my webpage
Then click the USE button
Next I am going to give my Blog
I now go into Themes
a Description
We are now going to click
the Customize Theme
button I have decided to use the Solstice my
As you can see,
Theme in the Free Themes Section been
description has
typed into the
Description box
51. Next I go down to the Appearance section and
click on the Background button
I can then choose a form
of image I would like as
my background image. I
shall choose this one.
Then the
background will be
displayed
52. Then a page like so
will appear. You must
then add a ending to
Page URLpage’s URL.
your ending
A title to your page.
Page Title
And Information to
your page. This will
look like so……
I now want to create a page within
this blog where people can contact
this fund raiser or donate to this
fund raise
Information to the
page
Once done click Create Page
then click the Save Page
option after
53. The Description
We are now at the very end so what
This is the Page that we created we have to do is Save and then go
back to the homepage.
So now if we click the Open
button we will be sent to the
Webpage
Posts
Information displayed
The Page that
here
we created
54. That is the end of the Tumblr tutorial. To see my event page the link is
http://fundraiseforpoverty.tumblr.com/