Scaleform Mini-Games Tutorial 3/3
•
1 gostou•1,473 visualizações

Learn hoe to make a progress bar!

Recomendados
Mais conteúdo relacionado
Semelhante a Scaleform Mini-Games Tutorial 3/3
Semelhante a Scaleform Mini-Games Tutorial 3/3 (20)
Último
Último (20)
Scaleform Mini-Games Tutorial 3/3
- 1. APPENDIX B - SCALEFORM MINI-GAME TUTORIALS PART 3/3 48 1
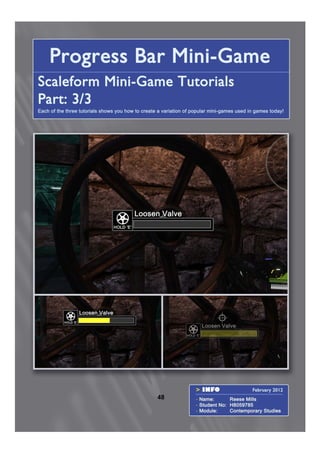
- 2. Creating a Progress Bar Mini-Game in UDK Replicate an often used gameplay mechanic, used in games like Lef4Dead! These tutorials are recommended for users that are familiar with UDK and Adobe Flash to an intermediate level. Also it is recommended that users have some knowledge of how to setup Scaleform in UDK. If unfamiliar with Scaleform, it is recommended to the user to at least complete the first two Scaleform tutorials by Mathew Doyle on the following link: http://gameware.autodesk.com/scaleform/support/documentation These tutorials show you how to install the Scaleform GFX previewer in Adobe Flash, so you can test your .swf files to see if they would work in UDK. They also show you what settings need to be adjusted for .swf compatibility and how to use custom images. 2
- 3. Setting Up The Tutorial Files To start these tutorials, the user first needs to open the “Tutorial CD Files” folder on the supplied disc and access the “Tutorial_Files” folder. This folder contains the flash files and UDK maps we require throughout these tutorials. Alternatively, you can download these folders from the following link: http://www.gamefront.com/files/21548379/Tutorial+CD+Files.rar The “Scaleform_Flash” folder needs to be copied and pasted to the following directory: [UDKUDK-2011-10UDKGameFlash] The “Scaleform_UDK_Maps” folder needs to be copied and pasted to the following directory: [UDKUDK-2011-10UDKGameContentMaps] To start this tutorial, we will use the files in the “ProgressBar” folder in the copied “Scaleform_Flash” folder. Here we will use the “ProgressBar_Start.fla” for this tutorial, but the user can view a completed version in the “ProgressBar_End.fla” for reference. Here we will use the “ProgressBar_Start.fla” for this tutorial, but the user can view a completed version in the “ProgressBar_End.fla” for reference. 3
- 4. Getting Started In Flash After opening “ProgressBar_Start.fla”, you can see that the image file “ProgressBox.png” has already been imported into the Library and the layers have already been named. Firstly the “ProgressBox.png” needs to be placed on the first and second keyframe on the “Animations” layer. Place them both in the same position and scale them to the same scale you want. On the second keyframe on the “AS2” layer, we want to name it “Complete” in the name section of the properties so we can reference it using Actionscript later. Now on the first keyframe in the “Animation” layer, we want to turn the image into a movieclip by pressing F8 to “Convert to Symbol”. We then want to name this movieclip “bar_MC” in the properties so we can control this movieclip later using Actionscript. 4
- 5. Progress Bar Animation Inside the movieclip, we need to extend the frames to 37. This layer can then be named “Image” and a layer called “Bar Progress” can be created underneath this frame. On this layer, a yellow box should be made to fill the empty progress bar fully. Now every frame on this layer should be made into a keyframes. The first keyframe should be empty and the yellow bar on the last keyframe should be full. The yellow bar image on the keyframes between the first and last keyframe should then be deleted bit by bit on every keyframe, so we have a “frame by frame animation” of the bar filling. Once this is done, create a new layer called “Background” under this layer and make a dark bar to be placed under the progress bar box, so the bar box is filled on this layer Next the “Actionscript” layer should be created and placed at the top. The first keyframe needs a “Stop();” script added to stop the rewind function we will add later. A keyframe should then be added to the last frame and the Actionscript in the screenshot should be added. This script is used make the main timeline stop on the second keyframe we named “Complete”, as well as removed the rewind and key listener we will add later. 5
- 6. Progress Complete Animation Now on the main timeline we need to turn the second keyframe image into a movieclip using “Convert to Symbol”. Inside the movieclip, we need to extend the timeline to 8 frames and then name the layer “Animation”. We then want to make a yellow bar to fill the progress bar and group it, then place it under the “ProgressBox.png”. With box images selected, they can then be converted into a graphic by pressing F8 to convert to symbol. Next we want to add a keyframe to the end of the timeline and place an “Alpha Colour Effect” on the graphics in both keyframes. The first keyframe should be “Visible” and the last should be “Invisible”. The second keyframe image can then be positioned lower, followed by making the whole timeline a classic tween. We now have our dropping fade animation. A new “Actionscript” layer should now be created in a layer above. A keyframe should then be added to the last frame and the Actionscript in the screenshot should be added. This stops the animation and triggers an “FSCommand” with a unique name, which we will reference in UDK later for a function. 6
- 7. Actionscript Key Listener We now have our animations, so we now need to add the key press function. To do this, we need to select the first keyframe on the “AS2” layer and add the Actionscript in the screenshot. This script adds a key listener for the “E Key”. When this key is held down, the “bar_MC” movieclip will play and when the key is up, the movieclip rewinds at x3 speed. Finally the second keyframe on the “AS2” layer needs to be selected and the Actionscript in the screenshot needs to be added. This script stops the animation, removes the key listener and removes the rewind function. The Flash side of this tutorial is now complete. The progress bar mini-game should now work perfectly, so give it a test to create the .swf. A test in the “Scaleform GFX Launcher” is also recommended to see if the images will appear in UDK and the FSCommand activates properly. With this done, we can now move on to the UDK side of this tutorial. 7
- 8. Getting Started in UDK To continue this tutorial, we will use the UDK map files in the copied “Scaleform_UDK_Maps” folder. The “ProgressBar_Tutorial_Start.udk” map will be used for this tutorial, but the user can view a completed version in the “ProgressBar_Tutorial_End.udk” map for reference. The “ProgressBar_Tutorial_Start.udk” map needs to be opened, which is a map with made up of two rooms. The small room is where we will setup the mini-game on the control console to open the door and a level complete script is already added past the door. The first task is to set a start “Trigger” next to the power console asset, place a “Player Start” in the small room and convert the door asset into a “Mover”, so it can be animated later. 8
- 9. Kismet Scripting Begins Now opening Kismet, a “Progress Bar Mini-Game” box is set for the player to place their kismet script. We need to add the “Touch Trigger” node with an unlimited max trigger count and create a “Matinee” cutscene for the door opening. At this point the user should import .swf created from the “ProgressBar_Start.fla” file into UDK using the content browser. A package called “Scaleform_Flash” will then be created from the folder structure. The task now is to communicate with the .swf from the package. To do this we need to add an “openGFXmovie” node and a “closeGFXmovie” node. The openGFXmovie node needs to be wired up to the trigger touched and connected to the closeGFXmovie node using the trigger untouched, using a variable wiring them both by their “Movie Player” connector. The .swf then needs to be applied to the openGFXmovie and the variable connected to the “Movie Player” connecters. We now have the mini-game “appearing” when the trigger is touched and “disappear” when it is untouched. 9
- 10. Kismet Scripting Continued The .swf file created earlier had an FSCommand called “Win”, which triggered when the progress bar was complete. Using UDK, we will now reference this FSCommand by adding an FSComamnd node and linking it to the .swf package in the “Movie” property. We then need to type “Win” in the FSCommand Property. We can now create a “Toggle” and wire the event to the trigger. With this we can now wire the FSCommand to set off events once the Progress Bar mini-game is completed. It should be wired to the toggle to turn off the trigger and then wired to the “Matinee” to open the door and the closeGFXmovie node, to close the mini-game. Finally we can add “Sound” nodes and tweak the timing using “Delays”. With this done, the mini-game is setup completely. Now the level should be “fully rebuilt and tested”. 10
- 11. Tutorial Completed This Progress Bar tutorial is now “complete” and you should now fully understand how to implement your own mini-game. You should also now be able to implement your own rendition of this progress bar and implement the Actionscript functions used in this tutorial. “Congratulations” on completing “all 3 parts” of the Scaleform Mini-Game Tutorial. You should now have enough experience in creating your own rendition of a popular mini-game. Give it a try, and remember that the “GameLevel_Demo.udk” can be found in the “Level Example” folder, in the “Tutorial CD Files” folder. It contains a good example of how “all three mini-games” can be used together in a level. 11