

Recomendados
Mais conteúdo relacionado
Semelhante a 40520 99 c
Semelhante a 40520 99 c (20)
Mais de Accurate Pool & Spa Services, llc
Mais de Accurate Pool & Spa Services, llc (20)
40520 99 c
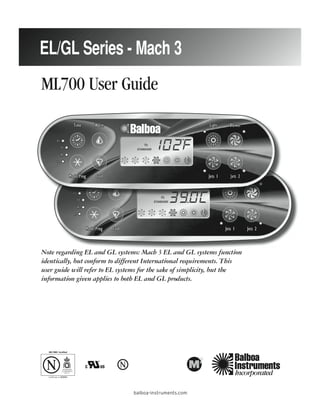
- 1. EL/GL Series - Mach 3 ML700 User Guide Time Warm Light Blower F1 F2 PL TL Mode/Prog Time Cool Warm Jets 1 Light 2 Jets F1 F2 PL TL Mode/Prog Cool Jets 1 Jets 2 Note regarding EL and GL systems: Mach 3 EL and GL systems function identically, but conform to different International requirements. This user guide will refer to EL systems for the sake of simplicity, but the information given applies to both EL and GL products. 900854
- 3. EL/GL SERIES (Mach 3) CONTROL WITH ML700 PANEL The ML700 panel can be used with the EL8000, EL5000, The pump responsible for heating and filtration (pump 1 EL2000 and EL1000 systems. This user guide lists all low on non-circ systems, or the circ pump on circ features that are available. Your spa may not respond as systems) will be referred to simply as the pump. described in this document as specific operation varies Timeouts refer to a preset length of time that a by system and equipment used. If your spa is not fully function is programmed to operate before shutting off equipped, the panel buttons on your spa control may not automatically. Certain conditions (filters or freeze) can be laid out as shown. Functions not accessible by this cause a function to operate longer, while faults can panel may be accessible by a larger panel such as the cause a function to operate for a shorter length of time. ML900. Example: The ML700 panel can be used with all The system keeps track of timeouts regardless of other EL8000 systems equipped with three pumps, but pump 3 conditions occurring. cannot be controlled with this panel unless the system does not have a blower and an additional Jets button is In multi-button sequences, if buttons are pressed too added to the panel in its place. In other cases, pump 3 quickly in sequence, they may not register. can be controlled with an optional auxiliary panel. Table of Contents EL/GL SERIES (Mach 3) CONTROL . . . . . 1 Freeze Protection . . . . . . . . . . . . . . . . . . 4 Initial Start-up . . . . . . . . . . . . . . . .. . . . . 1 Locking the Panel . . . . . . . . . . . . . . . . . . 4 Icon Legend . . . . . . . . . . . . . . . . .. . . . . 1 Locking the Set Temperature . . . . . . . . . . 4 Time . . . . . . . . . . . . . . . . . . . . . . .. . . . . 2 Clean-up Cycle . . . . . . . . . . . . . . . . . . . . 4 Setting the Time . . . . . . . . . . . . . .. . . . . 2 Circ Pump . . . . . . . . . . . . . . . . . . . . . . . . 4 Temp Set . . . . . . . . . . . . . . . . . . .. . . . . 2 Ozone . . . . . . . . . . . . . . . . . . . . . . . . . . . 4 Warm/Cool . . . . . . . . . . . . . . . . . .. . . . . 2 Displaying Information About Your Spa . . 5 Mode/Prog . . . . . . . . . . . . . . . . . . .. . . . . 2 User Preferences . . . . . . . . . . . . . . . . . . . 5 Standby Mode . . . . . . . . . . . . . . . .. . . . . 2 Editing User Preferences . . . . . . . . . . . . . 5 Jets 1 . . . . . . . . . . . . . . . . . . . . . .. . . . . 2 Diagnostic Messages . . . . . . . . . . . . . . 6-7 Jets 2 . . . . . . . . . . . . . . . . . . . . . .. . . . . 3 Periodic Reminder Messages . . . . . . . . . . 8 Blower . . . . . . . . . . . . . . . . . . . . .. . . . . 3 GFCI Protection . . . . . . . . . . . . . . . . . . . . 8 Invert . . . . . . . . . . . . . . . . . . . . . .. . . . . 3 GFCI Trip Test Procedure . . . . . . . . . . . . 8 Preset Filter Cycles . . . . . . . . . . . .. . . . . 3 Optional Auxiliary Panels . . . . . . . . . . . . 9 Optional Filter Cycle Programming . . . . . 3 Basic Installation Guidelines . . . . . . . . . 10 Light . . . . . . . . . . . . . . . . . . . . . . .. . . . . 4 CSA Compliance . . . . . . . . . . . . . . . . . . 10 Initial Start-up When your spa is first actuated, it will go into Priming The Priming mode will last for up to 4 minutes and mode (after displaying some configuration information). then the spa will begin to heat and maintain the water Please see the M-7 Installation Instruction Manual for temperature in the Standard mode. You can exit Priming complete instructions on Power-up and Pump Priming. mode early by pressing “Warm” or “Cool.” Icon Legend Heat Icon - Indicates different stages of heating. Fiber-Optic Light Icon - Spins when the wheel is on; stands still when wheel is off. Jets Icon - Spins fast on high speed; spins Light Icon - On dim, the LCD will show slow on low speed. the center circle plus one quarter of the light beams. Half of the light beams will Blower Icon - Biggest in highest speed; show on medium brightness, and all of smallest in lowest speed. the light beams will show on bright. Page 1
- 4. Time Setting the Time Once the spa has been properly connected the first time (every power When time hasn’t been programmed, the “ ” icon up on the EL1000 and some EL2000 systems), notice the “ ” icon flashes. To set the time, press “Time” then “Mode/Prog.” appearing on the screen. Use the “Warm” and “Cool” buttons to adjust time. See Time previous page for more detailed instructions. (Time Press Then Mode/Prog settings on EL1000 and some EL2000 systems are not Warm preserved in the event of power loss; time will have to be Select the hour by pressing (Each press changes the reprogrammed upon each power up.) Or time by 1 minute) Cool If your spa has an optional pH/ORP sensor (not Press to enter. Mode/Prog available on EL1000 and some EL2000 systems), pressing Warm “Time” twice will display the current pH level; pressing (Each press changes the Select minutes by pressing Or time by 1 minute) it three times will display the current ORP. Cool to exit the time setting procedure and enter Press the optional filter cycle programming. (Exits Mode/Prog Time programming on EL1000 and some EL2000 systems.) Press to exit programming. Temp Set (80°F - 104°F / 26.0°C - 40.0°C) Pressing “Jets 1” while in Economy mode puts the spa in Standard-In-Economy mode, which operates The last measured temperature is constantly displayed the same as Standard Mode, then reverts to Economy on the LCD. Your spa’s set temperature range may Mode automatically after 1 hour. Both the “ ” vary from range shown above depending on your and “ ” icons display in this mode. During this manufacturer’s settings. time, a press of the “Mode/Prog” button will revert to Note that the last measured spa temperature displayed is Economy Mode immediately. current only when the pump has been running for at least Sleep mode heats the spa to within 20°F (11°C) of the set 1 minute. temperature only during filter cycles. The “ ” icon will display until mode is changed. Warm/Cool Press the “Warm” or “Cool” button once to display the Standby Mode set temperature. Each time either button is pressed again, Pressing “Warm” or “Cool” then “Jets 2” will turn off all the set temperature will increase or decrease depending spa functions temporarily. This is helpful when changing on which button is pressed. After three seconds, a filter. Pressing any button resets the spa. On some the LCD will automatically display the last measured systems the “Jets 1” button will control the pump in spa temperature. Standby Mode (“Drain Mode”). In this case, press any other button to exit. System will revert to previous mode after 1 hour. Mode/Prog This button is used to switch between Standard, Economy, and Sleep modes. Press “Mode/Prog” to enter Jets 1 mode programming, press “Cool” to cycle through to Press the “Jets 1” button once to turn pump 1 on or off, desired mode (LCD flashes until confirmed), then press and to shift between low and high speeds if equipped. “Mode/Prog” to confirm selection. If left running, the pump will turn off after a timeout period. The pump 1 low speed timeout on some systems Standard mode maintains the desired temperature. Note may be as long as 4 hours. that the last measured spa temperature displayed is current only when the pump has been running for at On non-circ systems, the low speed of pump 1 runs least 1 minute. The “ ” icon will display until the when the blower or any other pump is on. It may also mode is changed. activate for at least 1 minute every 30 minutes to detect the spa temperature (polling) and then to heat to the Economy mode heats the spa to set temperature only set temperature if needed, depending upon mode. during filter cycles. The “ ” icon will display When the low speed turns on automatically, it cannot until mode is changed. be deactivated from the panel; however, the high speed may be started. Page 2
- 5. vary from system to system. To program, press “Warm” Jets 2 (optional on some systems) or “Cool,” then “Jets 1.” Press “Warm” or “Cool” to select Press the “Jets 2” button once to turn pump 2 on or the filter duration. Press “Jets 1” to select the number off, and to shift between low and high speeds if it is of filter cycles. The display will show “ ” (both “day” a two-speed pump. If left running, the pump will turn and “night” cycles); “ ” (day cycle only); or “ ” (“night” off after a timeout period. cycle only). Press “Warm” or “Cool” to adjust, then press “Jets 1” to exit the programming mode. For continuous filtration, use “ ” and “ ”. Blower Note: EL1000 and some EL2000 systems are capable of 1-speed operation: on/off; being programmed by time rather than by duration (see 2-speed operation: med/hi/off; or Preset Filter Cycles section). On EL2000 and EL1000 3-speed operation: lo/med/hi/off. systems with duration programming only, the spa powers If left on, the blower will automatically turn off after a up at 12:54, thus the first filter cycles begins 6 minutes timeout period. later at 1:00. If you would like your spa to begin filtering Note: If your system does not have a “Blower” button, and at another time, you may change the clock to align with is labeled as ”Jets 3” instead, please see page 9 “Jets 3”. your preferred filter time, rather than the actual time of day. Invert Optional Filter Cycle Programming Press the “Warm” or “Cool” button, then “Blower” to You are not required to set filter cycles; however, it change the numbers in the display to read upside down. is an option available to you. To change the filter Repeat sequence to return the display to its normal cycle settings: right-side-up display. Press “Time” “Mode/Prog” “Mode/Prog” “Mode/Prog” Note: If your system does not have a “Blower” button, use within 3 seconds. You will see the “PROGRAM,” ”Jets 3” instead. “FILTER 1” and “START TIME” icons appear on the display. Preset Filter Cycles Press “Warm” or “Cool” to choose the filter start On all systems, the pump and the ozone generator will time hour. Enter the hour by pressing “Mode/Prog”. run during filtration. At the start of each filter cycle, the Press “Warm” or “Cool” to choose the filter start blower will run briefly on its highest speed to purge the time minutes. Each press changes the start time by air channels. The lowest speed of any other pumps and 5 minutes. the mister will also run briefly. On some circ systems, pump 1 may also run for the duration of the filter. Enter the minutes by pressing “Mode/Prog.” (The following is specific to all systems that are Press “Mode/Prog” to see the “PROGRAM,” “FILTER 1” programmed according time) and “END TIME” icons. Adjust the time as There are two filter cycles per day. The start/end done above. times of each cycle are programmable. To program, Press “Mode/Prog” to see the “PROGRAM,” “FILTER 2” set time as instructed above, then press “Mode/Prog” and “START TIME” icons. Proceed as above. to advance to the next setting (or to exit after the last setting). Default filter cycles can vary from system to Press “Mode/Prog” to see “PROGRAM,” “FILTER 2” and system. A common default is 8:00 AM to 10:00 AM and “END TIME” icons. Adjust the time as done above. 8:00 PM to 10:00 PM. Press “Time” then “Mode/Prog” Pressing “Mode/Prog” will enter the new filter cycle to step through the filter settings to see how they are times into the system and display the current water currently set. temperature. Each filter cycle automatically operates the pump for the Pressing “Time” at any time during this programming duration of the filter cycle. The filter 1 “ F1 ” icon will sequence will save the values entered up to that point light when filter 1 is running. The filter 2 “ F2 ” icon and exit programming. will light when filter 2 is running. (The following is specific to EL2000 and EL1000 If you would like to select continuous filtration, set the systems that are programmed according to filter 1 start and end times to be the exact same time. duration rather than time) In this case, the filter 2 start time only controls when the second purge happens. Filter 2 end time will The first filter cycle (“day”) begins 6 minutes after the be unavailable. spa is powered up. The second filter cycle (“night”) begins 12 hours later. Filter duration is programmable for 1-12 hours (“ ”-“ ”). The default filter duration can Page 3
- 6. Locking the Set Temperature Light Press “Warm” or “Cool” then “Time,” “Jets 1,” and Some systems are equipped with both a spa light and a “Warm” within 3 seconds to activate the lock. The fiber optic light; however, only one can be accessed by this TL “ TL ” light will light when the set temperature panel. (Larger panels may be purchased so that both the is locked. spa light and fiber optic light can be utilized.) Depending upon how your spa is equipped and configured, the On some systems, locking the set temperature also locks “Light” button will operate in one of three ways: out Mode changes. 1) Press the “Light” button to turn the spa light on and To unlock the set temperature, press “Warm” or “Cool” off, and to shift between dim and bright settings if your then “Time,” “Jets 1” and “Cool.” light is dimmable. On dim, the LCD will show center circle plus one quarter of the light beams. Half of the Clean-up Cycle (optional) light beams will show on medium brightness, and all of When a pump or blower is turned on by a button the light beams will show on bright. press, a clean-up cycle begins 30 minutes after the 2) If a fiber-optic light with wheel is installed, press the pump or blower is turned off or times out. The pump “Light” button once to start the light and wheel, press and the ozone generator will run for one to four hours, it again to stop the wheel, and then again to turn the depending on the system (on some systems, you can light off. The fiber icon stands still when the fiber optic change this setting; see User Preferences section.) light is on by itself, and rotates when the color wheel is also on. Circ Pump (optional) 3) If a fiber-optic light without a separate wheel stop is If your system is equipped with a circ pump, it may be installed, press the “Light” button to turn it on and off. configured to work in one of three different ways: Again, both a spa light and a fiber optic light may be 1) The circ pump operates continuously (24 hours) with used simultaneously on the EL8000 and EL5000 systems the exception of turning off for 30 minutes at a time with a different panel. when the water temperature reaches 3°F (1.5°C) above If any light is left on, it will automatically turn off after a the set temperature (most likely to happen in very factory programmed time period. hot climates). 2) The circ pump stays on continuously, regardless of Note: If your spa has additional functions not listed water temperature. here, please refer to the section Optional Auxiliary 3) The circ pump will come on when the system is Panels as listed in the Table of Contents. checking temperature (polling), during filter cycles, Freeze Protection during freeze conditions, or when another pump is on. If the temperature sensors within the heater detect a low Ozone (optional) enough temperature, then the pump(s) and the blower automatically activate to provide freeze protection. The On most systems, the ozone generator (if installed) runs pump(s) and blower will run either continuously or during filter cycles (except when pump 1 is operating at periodically depending on conditions. high speed on a non-circ system) and during clean-up cycles. On some systems, the ozone generator operates In colder climates, an optional additional freeze sensor whenever the pump runs. may be added to protect against freeze conditions that may not be sensed by the standard sensors. Auxiliary If your system is configured with the optional ozone freeze sensor protection acts similarly except with the suppress feature, the ozone generator will turn off for temperature thresholds determined by the switch. See 1 hour any time a function button (Jets 1, Jets 2, Blower, your dealer for details. etc.) is pressed. Locking the Panel Press “Time” “Jets 1” then “Warm” within 3 seconds. When locked, the PL “ PL ” light will light. All buttons are frozen except the “Time” button. To unlock the panel, press “Time” “Jets 1” then “Cool.” Page 4
- 7. Displaying Information About Your Spa – Dolphin II Address When set to “ ”, no addressing is used. Use this There are several pieces of information about your setting for a Dolphin I, or for a Dolphin II which is spa that can be called up from the panel, but are only set for no address (which is the Dolphin II factory needed in special cases. default). When set to “ ” through “ ”, the To access this information, press “Warm” or “Cool” number is the address (see your Dolphin II manual then “Jets 1”, then “Light”. (Each press must be within for details). 3 seconds of the previous press.) Then press “Temp” until you see “ ” on the display. Press “Jets 1” to see Editing User Preferences the SSID (a series of 3 numbers, such as 100 133 10, which indicates the precise revision of the software View the setting. in your spa), followed by the Mach software version The left two characters (before the decimal point) tell number (such as 2.1), followed by “ ” and then your you what setting you’re viewing or editing, the right most spa’s network ID number (consisting of both letters and character (after the decimal point) tells you the value of digits displayed in 5 steps). that setting (for example, “ ” for Yes or “ ” for No). If you need to see this series of numbers again, If the value is flashing, you’re editing it. If the value is and “ ” is once again on the display, just press not flashing, you’re just viewing it. “Jets 1” again. Press “Jets 1” to switch editing of the value on (flashing) When done, press the “Light” button (more than once if or off (not flashing). necessary) until you see the normal temperature display. Once you’re editing the value (it’s flashing), use the “Warm” or “Cool” buttons to change the value to the one User Preferences you want. There are several aspects of spa operation that you can After you change the value, you must press “Jets 1” again customize using the User Preferences submenu. to stop the flashing before the change will register, and Press “Warm” or “Cool” then “Jets 1”, then “Light”. (Each before you can view or edit another setting. press must be within 3 seconds of the previous press.) If you don’t interact with the menu for more than At this point, if “ ” is not showing on the display, 30 seconds, it may time out. press “Temp” until you see “ ” on the display. Then press “Jets 1” to enter the User Preferences submenu. If you press “Light” to back out of the menu, or pause long enough for it to time out, while a value was Once in the User Preferences submenu, press “Warm” or flashing, the changes you were making to that setting “Cool” to cycle between these settings: are not remembered. But changes you previously made – Suppress Reminders to other settings will be in effect. When set to “ ”, reminders are never displayed Any User Preferences that you change will stay in on the panel. When set to “ ”, reminders are effect “forever” or until you change them again (unless displayed on the panel periodically. the spa’s “persistent memory” is reset by a service technician), and will override the factory defaults for – Temperature in Celsius those settings. When set to “ ”, temperatures are displayed on the panel in degrees Celsius. When set to “ ”, temperatures are displayed in Fahrenheit. – 24-hour Time Display When set to “ ”, time is displayed in 24-hour (military) format (00:00 is midnight, 23:00 is one hour before midnight). When set to “ ”, time is displayed in 12-hour (am/pm) format (12:00 is midnight, 11:00 pm is one hour before midnight). – Clean-up Cycle Duration (some systems only) When set to “ ”, Clean-up Cycles are disabled. When set to “ ” through “ ”, the number indicates how many hours each Clean-up Cycle will run. Page 5
- 8. Diagnostic Messages Message Meaning Action Required No message on display. The control panel will be disabled until power returns. Power has been cut off to the spa. Time of day will be preserved for 30 days with a battery back-up on EL8000 and EL5000 systems. EL1000 and some EL2000 systems reset the time of day on each power-up. Spa settings are preserved on all systems. “Overheat” - The spa has shut down. On DO NOT ENTER THE WATER. Remove the spa cover some systems, an alarm may sound. One of and allow water to cool. Once the heater has cooled, the sensors has detected 118°F (approximately reset by pushing any button. If spa does not reset, 47.8°C) at the heater. shut off the power to the spa and call your dealer or service organization. “Overheat” - The spa has shut down. One of DO NOT ENTER THE WATER. Remove the spa cover the sensors has detected that the spa water is and allow water to cool. At 107°F (approximately 41.7°C), 110°F (approximately 43.3°C). the spa should automatically reset. If spa does not reset, shut off the power to the spa and call your dealer or service organization. “Ice” - Potential freeze condition detected. No action required. The pumps and the blower will automatically activate regardless of spa status. Spa is shut down. The sensor that is plugged If the problem persists, contact your dealer or service into the Sensor “A” jack is not working. organization. (May appear temporarily in an overheat situation and disappear when the heater cools.) Spa is shut down. The sensor that is plugged If the problem persists, contact your dealer or service into the Sensor “B” jack is not working. organization. (May appear temporarily in an overheat situation and disappear when the heater cools.) Sensors are out of balance. If this is If the problem persists, contact your dealer or alternating with the temperature, it may just service organization. be a temporary condition. If the display shows only this message (periodically blinking), the spa is shut down.1 A substantial difference between the Check water level in spa. Refill if necessary. If the water temperature sensors was detected. This could level is okay, make sure the pumps have been primed. indicate a flow problem. Press any button to reset. Persistent low flow problems. (Displays on the Follow action required for “ ” message. Heating fifth occurrence of the “ ” message within capacity of the spa will not reset automatically; you may 24 hours.) Heater is shut down, but other spa press any button to reset. functions continue to run normally. Inadequate water detected in heater. Check water level in spa. Refill if necessary. If the water level is okay, make sure the pumps have been primed. Press any button to reset. Inadequate water detected in heater. (Displays Follow action required for “ ” message. Spa will not on third occurrence of “ ” message.) Spa is automatically reset; you may press any button to reset. shut down.1 When your spa is first actuated, it will go into See the M-7 Installation Instruction Manual for complete Priming mode. instructions on Power-up and Pump Priming. The Priming mode will last for up to 4 minutes and then the spa will begin to heat and maintain the water temperature in the Standard mode. 1 On some systems even when spa is shut down, some equipment may occasionally turn on to continue monitoring temperature or if freeze protection is needed. Page 6
- 9. Diagnostic Messages (continued) Message Meaning Action Required or Temperature unknown. After the pump has been running for 1 minute, the temperature will be displayed. Temperature not current in Economy or In Economy or Sleep mode, the pump may be off for Sleep mode. hours outside a filter. If you wish to see the current spa temperature, either switch to Standard mode or turn Jets 1 on for at least 1 minute. Standby Mode has been activated by pressing Press any button, except “Jets 1”, to leave Standby Mode a button combination on the user panel. and return to normal operation. pH is low. Add pH increaser according to manufacturer’s instructions. pH is high. Add pH reducer according to manufacturer’s instructions. Sanitizer is low. Add sanitizer according to manufacturer’s instructions. Sanitizer is high. Remove spa cover and allow sanitizer to dissipate. The pump is on during Standby Mode to Press “Jets 1” to turn off the pump when water has assist in draining the spa. drained (or power off the spa.) Hardware failure. Contact your dealer or service organization. Hardware failure. Contact your dealer or service organization if message appears on more than one power up. Firmware install problem. Contact your dealer or service organization if message appears on more than one power up. Configuration error. Spa cannot start up. Contact your dealer or service organization. Spa could not trip GFCI. Contact your dealer or service organization. Continued operation may be unsafe. A pump appears to be stuck on, causing the POWER DOWN SPA IMMEDIATELY. DO NOT ENTER water temperature to creep up, possibly to THE WATER. Contact your dealer or service organization. hazardous levels. A pump appears to have been stuck on the POWER DOWN SPA IMMEDIATELY. DO NOT ENTER last time spa was powered. THE WATER. Contact your dealer or service organization. Page 7
- 10. Periodic Reminder Messages (Press the “Mode” button to reset a displayed reminder.*) Message ** Frequency *** Action Required Every 7 days Test and adjust pH chemical levels per manufacturer’s instructions. Every 7 days Test and adjust sanitizer chemical levels per manufacturer’s instructions. Every 30 days Remove, clean, and reinstall filter per manufacturer’s instructions. Every 30 days Test & reset GFCI per manufacturer’s instructions. Every 90 days Drain and refill spa per manufacturer’s instructions. Every 180 days Clean and condition cover per manufacturer’s instructions. Every 180 days Clean and condition wood per manufacturer’s instructions. Every 365 days Install new filter. As needed Install new Mineral cartridge. * User can suppress all reminders in User Preferences. ** All of these Periodic Messages can be disabled individually by the spa manufacturer. *** Any of these frequencies may be changed by the spa manufacturer. Note: The GFCI section does not apply on EL systems used outside the United States. This GFCI section does not apply to GL Systems. GFCI Protection GFCI Trip Test Procedure Your spa may be equipped with a GFCI Protection The installer can cause the GFCI Trip Test to feature. If your spa does have this feature enabled, the occur sooner by initiating it with the following GFCI Trip Test must occur to allow proper spa function. button sequence. Within 1 to 7 days after startup, the spa will trip Press “Warm”, then “Jets 1”, then “Light.” (Each press the GFCI to test it. (The number of days is factory must be within 3 seconds of the previous press.) Press programmed.) The GFCI must be reset once it has been the “Warm” button repeatedly until “ ” is displayed. tripped. After passing the GFCI Trip Test, subsequent Press “Jets 1” to select it. Press the “Warm” button until GFCI trips will indicate a ground fault or other unsafe “ ” is displayed. Press “Jets 1” to initiate the GFCI condition requiring the power to the spa to be shut off. Trip Test. The GFCI should trip within several seconds and the spa Warning: The Owner should test and reset the GFCI should shut down. If it does not, shut down the power on a regular basis to verify its function. and manually verify that a GFCI breaker is installed and that the circuit and spa are wired correctly. Verify the function of the GFCI with its own test button. Restore power to the spa and repeat the GFCI Trip Test. Once the GFCI is tripped by the test, reset the GFCI and the spa will operate normally from that point. You can verify a successful test by navigating to the “ ” item as described above, pressing “Jets 1” and then pressing the “Warm” button until you see “ ”. The code signifies GFCI Status - Passed. The system will exit this menu in 30 seconds if no buttons are pressed. Page 8
- 11. Optional Auxiliary Panels Note: Below is a partial list of optional auxiliary panels and their basic functions. Please contact your local dealer for a complete list of options that will work with your spa. Jets 1 Jets 2 Blower Light Jets 1 Jets 1 Jets 2 Blower Jets 2 Jets 1 Jets 2 Blower Jets 3, Jets 4 (optional on some systems) Fiber (optional on some systems) Press the “Jets 3” button once to turn pump 3 on or If a fiber-optic light with wheel is installed, press the off, and to shift between low and high speeds if it is a “Fiber” button once to start the light and wheel, press two-speed pump. If left running, the pump will turn off it again to stop the wheel, and then again to turn the after a timeout period. “Jets 4” operates the same way light off. The fiber icon stands still when the fiber-optic as “Jets 3”. light is on by itself, and rotates when the color wheel is also on. Jets 5, Jets 6 (optional on some systems) Both spa light and fiber-optic light can be used Press the “Jets 5” button once to turn pump 5 on or off. simultaneously on systems that have both. If either light If left running, the pump will turn off after a timeout is left on, it will automatically turn off after a timeout period. “Jets 6” operates the same way as “Jets 5”. period (on some systems this timeout can be as long as 4 hours.) Mister (optional) Use the “Light” button if your fiber-optic system is on/off only (no separate wheel stop). Press the “Mister” button to turn the Mister on and off. If left on, the mister will automatically turn off after 15 minutes. Stir (optional on some systems) Press the “Stir” button after adding new chemicals into Option (optional) the spa. This will turn all pumps on at high-speed for 5 minutes to thoroughly mix in the chemicals. Press the “Option” button to turn optional equipment (such as TV or Stereo) on and off (with no timeout). TV Lift (optional) Press the “TV Lift” button to raise and lower the TV Lift device. There is no timeout for this feature. Page 9
- 12. Warning! Qualified technician required for service and installation. Basic Installation and Configuration Guidelines for Mach 3 CSA Compliance/Conformité EL-Series Spa Controllers. Caution: Use minimum 6AWG copper conductors only. • Test the ground fault circuit interrupter before each use of Torque field connections between 21 and 23 in lbs. the spa. Readily accessible disconnecting means to be provided at • Read the instruction manual. time of installation. • Adequate drainage must be provided if the equipment is to be installed in a pit. Permanently connected. • For use only within an enclosure rated CSA Enclosure 3. Connect only to a circuit protected by a Class A Ground Fault • Connect only to a circuit protected by a Class A ground Circuit Interrupter (GFCI) mounted at least 5’ (1.52M) from the fault circuit interrupter. inside walls of the spa/hot tub and in line of sight from the • To ensure continued protection against shock hazard, use equipment compartment. only identical replacement parts when servicing. CSA enclosure: Type 2 • Install a suitably rated suction guard to match the maximum flow rate marked. Typical field connections FOR W-WIRES for main power. WHITE AC (120 V) Warning: J23 J19 J28 J43 J42 J48 • Water temperature in excess of 38°C may be injurious to Refer to Wiring Diagram your health. inside the cover of the GREEN • Disconnect the electrical power before servicing. FROM GFCI control enclosure. WHITE Attention: BLACK Refer to Installation and RED • Toujours verifier l’efficacite du disjoncteur differentiel avant Safety Instructions provided FOR W-WIRES J53 J54 d’utiliser differentiel avant d’utiliser le bain. J55 J25 RED AC (240 V) by the spa manufacturer. J26 • Lire la notice technique. • Lorsque l’appareillage est installe dans une fosse, on doit Warning: People with infectious diseases should not use a assurer un drainage adequat. spa or hot tub. • Employer uniquement a l’interieur d’une cloture CSA Warning: To avoid injury, exercise care when entering or Enclosure 3. exiting the spa or hot tub. • Connecter uniquement a un circuit protege par un Warning: Do not use a spa or hot tub immediately following disjoncteur differentiel de Class A. strenuous exercise • Afin d’assurer une protection permanente contre le danger de shock electrique, lors de l’entretien employer seulement Warning: Prolonged immersion in a spa or hot tub may be des pieces de rechange identiques. injurious to your health • Les prises d’aspiration doivent etre equipees de grilles Caution: Maintain water chemistry in accordance with the convenant au debit maximal indique. Manufacturers instructions. Avertissement: Caution: The equipment and controls shall be located not • Des temperatures de l’eau superieures a 38°C peuvent less than 1.5 meters horizontally from the spa or hot tub. presenter un danger pour la sante. • Deconnecter du circuit d’alimentation electrique avante l’entretien. Warning! GFCI Protection. Warning/Advertissement: The Owner should test and reset the GFCI on a regular • Disconnect the electric power before servicing. Keep access basis to verify its function. door closed. • Deconnecter du circuit d’alimentation electrique avant l’entretien. Garder la porte fermer. Warning! Shock Hazard! No User Serviceable Parts. Do not attempt service of this control system. Contact your dealer or service organization for assistance. Follow all owner’s manual power connection instructions. Installation must be performed by a licensed electrician and all grounding connections must be properly installed. P/N 40520-99_C 04/26/2007