SlideShare uma empresa Scribd logo
1 de 24
Salford Quays Landscape Photo shoot
I went to Salford Quays to do a landscape shoot. The aim of this was to get a portfolio of photos and
so then I could pick 10 of them to edit. I used a digital camera. I went out in the daytime to do my
shoot so I didn’t use a flash. I was trying to show the main buildings in Salford Quays. I wanted to
take the pictures from different angles. I think I did what I said I wanted to and I defiantly got more
pictures than I needed to so I had a range and could choose which pictures I wanted to edit.
For this picture first I changed the brightness and
contrast. I turned the contrast up to give the picture a
black sharp effect. I then used the equalize effect on my
picture which gave my picture a darker look, so I turned
up he brightness a bit more. I then clicked on the
variations effect and chose to add more magenta to my
picture and this is what gave my final picture the pink
look. I also chose the lighter version of magenta so that
it kept my overall picture lighter. Because in the original
there was mainly only three main colours I picked this
out and made them more bright so that these would
stand out against the white for the building.
I wanted to make my picture more bright
and fun and I think I did this using the
magenta and making the sky more blue.


                              This made my picture
                              darker and picked up
                              on the shadows.


                                                              This made my picture darker on
                                                              one side and lighter on the other so
                                                              I liked the spreading effect it gave.
This was the effect that made my
                         picture more pink on the darker parts of
                         the original image. I think this effect
                         gave the picture a different look and
                         made the picture look a lot different. On
                         the right hand side I could pick whether
                         I wanted the pink lighter or darker or
                         just normal and I made it lighter so that
                         the sky would stand out more against
                         the darker pink. I think this worked.


This is my final edit.
First I selected the top area of
my picture so I could then
change the effects of just this
section of the picture. I did this
because the sky is a lot brighter
than the bottom of the picture so
when I added an effect the
picture got to dark. Then still with
section selected I used the
curves effect this made the top
half of my picture a lot darker
and the building turn into
silhouettes. Then I used the
black and white effect to make
the silhouettes look darker and
the sky more dramatic. Then I
selected the bottom part of the
picture and just added the black
and white effect. I think it worked
because to get the sky bright like
I wanted it, it had to be dark and
the bottom of the picture wouldn’t
of looked right because it
wouldn’t of shown anything.
I used this effect to make
                         the bottom of my picture
                         black and white.
This effect made
the top half of my
picture black and
white.


This is my final edit.
First I changed the brightness and contrast to make the sky look brighter. I changed the contrast
quite high so that the image would look sharper and the shadows would be darker on the image.
Then I just used the colour balance effect to make my picture more blue. I think this worked
because the building was already blue and so I just wanted to make it stand out more against the
white of the sky. I didn't want to change this picture to much because I liked the blue anyway so I
just enhanced it.
First I changed the brightness and contrast this was so that the sky looked bright. I put
the contrast high so that the crisscross effect on the bridge would show up better. . This
worked and the strings were much darker. Then I used an effect called curves which
gave the whole picture a darker look and made the bridge and other building s look like
silhouettes against the sky. I liked the effect and how it picked up on the clouds and
showed the shape of them more. Then the last effect I used was colour balance, I made
the picture more pink using this effect. I like what this effect did and I think it looks good
and makes the picture look like it was taken in the evening rather than the day.
First I changed the brightness and contrast. I turned the brightness up but not to
much because the picture was bright anyway because of the sun. Then I changed the
contrast to make sure some of the detail stood out against the brightness. Then I
used an effect called variations where I made my picture more yellow, I liked this
effect and it made my picture look more warm and later in the day. Then I used the
curves effect this made the corners and some of the buildings a bit darker and stand
out more. Then used an effect called vibrance to make the brighter colours stand out
on the picture. Then I used an effect called levels this made the sky look like it had
different layers of colour on top of each.
First I selected a part of the picture I
wanted to edit so only this bit would be
changed by the effects I used. I used
the effect colour balance on this section
to make it purple. Then I changed the
contrast to make it a darker purple.
Then I selected the bottom right of my
picture as my second section. Then I
used the colour balance effect again for
this section and made it the blue colour.
I think this worked because it enhanced
the colour the water already was.
Then I changed the contrast to a
bit higher so that it made the
water look darker. I then selected
the final part of my picture I
hadn’t edited. I changed the
contrast and brightness of this
part then. Then I used the colour
balance effect and turned up the
yellow effect to make it look like
the sun was shining on the path
way. Then I turned up the
contrast a bit more so the
shadows showed up more.
First I turned up the contrast of the picture to make the building sharper and darker
against the sun. then I turned the brightness up so the sun would look brighter. Then I
used the colour balance effect to make the whole picture a purple colour. Then I
changed the contrast and brightness again. I turned the contrast up more to make the
darker things in the picture stand out especially the shadows on the water. It think this
effect made the picture look better. The I turned the brightness up a bit more so the
sun rays would show up on my picture.
Capture log
                                  ISO – 80
                                  Shutter speed - 1/1000 sec
                                  Aperture - F/3.3
                                  Setting - 3D camera mode


      ISO – 80
      Shutter speed - 1/450 sec
      Aperture - F/10.4
      Setting – 3D camera mode


                                  ISO – 80
                                  Shutter speed – 1/680 sec
                                  Aperture – F/3.1
                                  Setting – 3D camera mode
ISO – 80
                            Shutter speed – 1/385 sec
                            Aperture - F/3.5
                            Setting - 3D camera mode


ISO – 80
Shutter speed – 1/250 sec
Aperture – F/10
Setting – 3D camera mode


                              ISO – 80
                              Shutter speed – 1/350 sec
                              Aperture – F/9.7
                              Setting – 3D camera mode
ISO – 80
                            Shutter speed – 1/200 sec
                            Aperture – F/9.7
                            Setting – 3D camera mode


ISO – 80
Shutter speed – 1/350 sec
Aperture – F/9.7
Setting – 3D camera mode


                            ISO – 80
                            Shutter speed – 1/188 sec
                            Aperture – F/9.7
                            Setting – 3D camera mode
Rejected images   These are three of the images I didn’t
                  pick. I didn’t like the first and second one
                  because of the angle I had taken the
                  picture on. It made the building look like
                  it was on a slant. I must have moved the
                  camera so the picture looked wonky. I
                  didn’t like all the building and other stuff
                  around the first two either. It looked like
                  I’d cropped the images and gotten rid of
                  bits. I didn't like the last one because of
                  the lighting in the picture I don’t think I
                  could of done much with it. I had some
                  better versions of this picture as well so I
                  used them.
Aims for next project
Next time if I was going to do this project again I would make sure I
took more pictures than this time. I didn’t need to but I would of liked to
have gone to some different places to get different angles of the same
view. I didn’t go everywhere around Salford Quays so I would do that
next time so that I photographed as much as I could. Next time I would
like to try different shutter speeds and move my camera to see what it
did to my pictures, also maybe do a shoot at night so I could use a flash
and see how it effected the picture. I didn’t use a flash in any of my
pictures because it was bright out but next time I could try and see of it
made my pictures look any better.

Mais conteúdo relacionado

Mais procurados

[Pro forma] 2 photography141016
[Pro forma] 2 photography141016[Pro forma] 2 photography141016
[Pro forma] 2 photography141016grace kennedy
 
Media evaluation on the effects that the cannon sx40 hs has
Media evaluation on the effects that the cannon sx40 hs hasMedia evaluation on the effects that the cannon sx40 hs has
Media evaluation on the effects that the cannon sx40 hs hasTanishaB
 
Media evaluation on the effects that the cannon sx40 hs has
Media evaluation on the effects that the cannon sx40 hs hasMedia evaluation on the effects that the cannon sx40 hs has
Media evaluation on the effects that the cannon sx40 hs hasTanishaB
 
[Pro forma] 2 photography141016
[Pro forma] 2 photography141016[Pro forma] 2 photography141016
[Pro forma] 2 photography141016grace kennedy
 
[Pro forma] 2 photography141016
[Pro forma] 2 photography141016[Pro forma] 2 photography141016
[Pro forma] 2 photography141016grace kennedy
 
Second Recreation Editing Butlins Photo
Second Recreation Editing Butlins PhotoSecond Recreation Editing Butlins Photo
Second Recreation Editing Butlins PhotoMystifyingproductions
 
[Pro forma] experimental photography
[Pro forma] experimental photography[Pro forma] experimental photography
[Pro forma] experimental photographyFinlay Jackson
 
Salford quays image edits
Salford quays image editsSalford quays image edits
Salford quays image editsBigCheese1
 
6. production reflection
6. production reflection6. production reflection
6. production reflectionAmelia France
 
4. production experiments(1) (2) (1)
4. production experiments(1) (2) (1)4. production experiments(1) (2) (1)
4. production experiments(1) (2) (1)kieran Beal
 
FMP production experiments
FMP production experiments FMP production experiments
FMP production experiments kieran Beal
 
FMP production experiments
FMP production experiments FMP production experiments
FMP production experiments kieran Beal
 
Evaluation Question 4
Evaluation Question 4Evaluation Question 4
Evaluation Question 4RobertWragg
 
Task 4 final images review work sheet potrait
Task 4 final images review work sheet potraitTask 4 final images review work sheet potrait
Task 4 final images review work sheet potraitAlexNesbit
 

Mais procurados (17)

Wedding Picture Editing Process
Wedding Picture Editing Process Wedding Picture Editing Process
Wedding Picture Editing Process
 
Light painting powerpoint
Light painting powerpointLight painting powerpoint
Light painting powerpoint
 
[Pro forma] 2 photography141016
[Pro forma] 2 photography141016[Pro forma] 2 photography141016
[Pro forma] 2 photography141016
 
Media evaluation on the effects that the cannon sx40 hs has
Media evaluation on the effects that the cannon sx40 hs hasMedia evaluation on the effects that the cannon sx40 hs has
Media evaluation on the effects that the cannon sx40 hs has
 
Media evaluation on the effects that the cannon sx40 hs has
Media evaluation on the effects that the cannon sx40 hs hasMedia evaluation on the effects that the cannon sx40 hs has
Media evaluation on the effects that the cannon sx40 hs has
 
[Pro forma] 2 photography141016
[Pro forma] 2 photography141016[Pro forma] 2 photography141016
[Pro forma] 2 photography141016
 
[Pro forma] 2 photography141016
[Pro forma] 2 photography141016[Pro forma] 2 photography141016
[Pro forma] 2 photography141016
 
Second Recreation Editing Butlins Photo
Second Recreation Editing Butlins PhotoSecond Recreation Editing Butlins Photo
Second Recreation Editing Butlins Photo
 
[Pro forma] experimental photography
[Pro forma] experimental photography[Pro forma] experimental photography
[Pro forma] experimental photography
 
Salford quays image edits
Salford quays image editsSalford quays image edits
Salford quays image edits
 
Jameel terminology
Jameel terminologyJameel terminology
Jameel terminology
 
6. production reflection
6. production reflection6. production reflection
6. production reflection
 
4. production experiments(1) (2) (1)
4. production experiments(1) (2) (1)4. production experiments(1) (2) (1)
4. production experiments(1) (2) (1)
 
FMP production experiments
FMP production experiments FMP production experiments
FMP production experiments
 
FMP production experiments
FMP production experiments FMP production experiments
FMP production experiments
 
Evaluation Question 4
Evaluation Question 4Evaluation Question 4
Evaluation Question 4
 
Task 4 final images review work sheet potrait
Task 4 final images review work sheet potraitTask 4 final images review work sheet potrait
Task 4 final images review work sheet potrait
 

Destaque

Artikel bpm en groepsdynamica vs1.0
Artikel bpm en groepsdynamica vs1.0Artikel bpm en groepsdynamica vs1.0
Artikel bpm en groepsdynamica vs1.0rloggen
 
Editing Process
Editing ProcessEditing Process
Editing ProcessKatkaKoci
 
Wimba Voice Board
Wimba Voice BoardWimba Voice Board
Wimba Voice Boardkimromero
 
1 hardware 22 agosto 2011
1 hardware 22 agosto 20111 hardware 22 agosto 2011
1 hardware 22 agosto 2011Ricardo Nieto
 
Product Research
Product ResearchProduct Research
Product Researchkatwatson96
 

Destaque (8)

Artikel bpm en groepsdynamica vs1.0
Artikel bpm en groepsdynamica vs1.0Artikel bpm en groepsdynamica vs1.0
Artikel bpm en groepsdynamica vs1.0
 
Editing Process
Editing ProcessEditing Process
Editing Process
 
Mac os
Mac osMac os
Mac os
 
Sreelal
SreelalSreelal
Sreelal
 
Wimba Voice Board
Wimba Voice BoardWimba Voice Board
Wimba Voice Board
 
1 hardware 22 agosto 2011
1 hardware 22 agosto 20111 hardware 22 agosto 2011
1 hardware 22 agosto 2011
 
Product Research
Product ResearchProduct Research
Product Research
 
Sistemas operativos
Sistemas operativosSistemas operativos
Sistemas operativos
 

Semelhante a Landscape Photoshoot

Experiments Evidence Template
Experiments Evidence TemplateExperiments Evidence Template
Experiments Evidence Templatehayleylou11
 
Reviewthingdothiscesca
ReviewthingdothiscescaReviewthingdothiscesca
ReviewthingdothiscescaWanderingHalle
 
Reviewthingdothiscesca
ReviewthingdothiscescaReviewthingdothiscesca
ReviewthingdothiscescaWanderingHalle
 
Task 4 final images review work sheet landscape
Task 4 final images review work sheet landscapeTask 4 final images review work sheet landscape
Task 4 final images review work sheet landscapeAlexNesbit
 
Experiments evidence template
Experiments evidence templateExperiments evidence template
Experiments evidence templateChloeandRachel
 
Intro to photography
Intro to photographyIntro to photography
Intro to photographybarneysamuel
 
6. fmp production reflection
6. fmp production reflection6. fmp production reflection
6. fmp production reflectionNathanMead3
 
Formal Elements Presentation
Formal Elements PresentationFormal Elements Presentation
Formal Elements Presentationtomotron
 
Horror Alice in Wonderland Edits
Horror Alice in Wonderland EditsHorror Alice in Wonderland Edits
Horror Alice in Wonderland EditsPaigeWard961
 
Experiments evidence template
Experiments evidence template Experiments evidence template
Experiments evidence template olibrandon
 
3. fmp production experiments
3. fmp production experiments3. fmp production experiments
3. fmp production experimentsNathanMead3
 
3. production experiments
3. production experiments3. production experiments
3. production experimentsAmelia France
 
Digi pack photos changed
Digi pack photos changedDigi pack photos changed
Digi pack photos changedyvette95
 

Semelhante a Landscape Photoshoot (20)

Photo shoot edits
Photo shoot editsPhoto shoot edits
Photo shoot edits
 
Long Exposure
Long ExposureLong Exposure
Long Exposure
 
Experiments Evidence Template
Experiments Evidence TemplateExperiments Evidence Template
Experiments Evidence Template
 
Reviewthingdothiscesca
ReviewthingdothiscescaReviewthingdothiscesca
Reviewthingdothiscesca
 
Reviewthingdothiscesca
ReviewthingdothiscescaReviewthingdothiscesca
Reviewthingdothiscesca
 
Evaluation x.1
Evaluation x.1Evaluation x.1
Evaluation x.1
 
Task 4 final images review work sheet landscape
Task 4 final images review work sheet landscapeTask 4 final images review work sheet landscape
Task 4 final images review work sheet landscape
 
Evaluation
EvaluationEvaluation
Evaluation
 
Experiments evidence template
Experiments evidence templateExperiments evidence template
Experiments evidence template
 
Intro to photography
Intro to photographyIntro to photography
Intro to photography
 
6. fmp production reflection
6. fmp production reflection6. fmp production reflection
6. fmp production reflection
 
Task 2
Task 2Task 2
Task 2
 
Formal Elements Presentation
Formal Elements PresentationFormal Elements Presentation
Formal Elements Presentation
 
Task 2&3
Task 2&3Task 2&3
Task 2&3
 
57review
57review57review
57review
 
Horror Alice in Wonderland Edits
Horror Alice in Wonderland EditsHorror Alice in Wonderland Edits
Horror Alice in Wonderland Edits
 
Experiments evidence template
Experiments evidence template Experiments evidence template
Experiments evidence template
 
3. fmp production experiments
3. fmp production experiments3. fmp production experiments
3. fmp production experiments
 
3. production experiments
3. production experiments3. production experiments
3. production experiments
 
Digi pack photos changed
Digi pack photos changedDigi pack photos changed
Digi pack photos changed
 

Mais de Mystifyingproductions (20)

Fourth recreation – toothpaste photo
Fourth recreation – toothpaste photoFourth recreation – toothpaste photo
Fourth recreation – toothpaste photo
 
Iron man
Iron manIron man
Iron man
 
Emily Davis Production Log
Emily Davis Production LogEmily Davis Production Log
Emily Davis Production Log
 
Magazine Evaluation PowerPoint
Magazine Evaluation PowerPointMagazine Evaluation PowerPoint
Magazine Evaluation PowerPoint
 
Iron man 3 script
Iron man 3 scriptIron man 3 script
Iron man 3 script
 
Iron man 3
Iron man 3Iron man 3
Iron man 3
 
Pitch
PitchPitch
Pitch
 
Editing butlins photo
Editing butlins photoEditing butlins photo
Editing butlins photo
 
Editing my pictures
Editing my picturesEditing my pictures
Editing my pictures
 
Editing my pictures
Editing my picturesEditing my pictures
Editing my pictures
 
Third recreation – black and white picture
Third recreation – black and white pictureThird recreation – black and white picture
Third recreation – black and white picture
 
Third recreation – black and white picture
Third recreation – black and white pictureThird recreation – black and white picture
Third recreation – black and white picture
 
Me and my movies
Me and my moviesMe and my movies
Me and my movies
 
Portrait Shoot PowerPoint
Portrait Shoot PowerPointPortrait Shoot PowerPoint
Portrait Shoot PowerPoint
 
Me and my movies
Me and my moviesMe and my movies
Me and my movies
 
Me and my movies
Me and my moviesMe and my movies
Me and my movies
 
Me and My Movies
Me and My MoviesMe and My Movies
Me and My Movies
 
Me and My Movies
Me and My MoviesMe and My Movies
Me and My Movies
 
Article
ArticleArticle
Article
 
Article
ArticleArticle
Article
 

Landscape Photoshoot

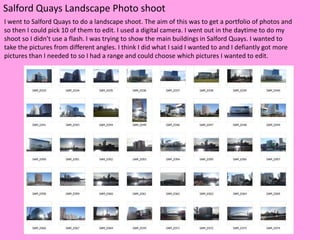
  • 1. Salford Quays Landscape Photo shoot I went to Salford Quays to do a landscape shoot. The aim of this was to get a portfolio of photos and so then I could pick 10 of them to edit. I used a digital camera. I went out in the daytime to do my shoot so I didn’t use a flash. I was trying to show the main buildings in Salford Quays. I wanted to take the pictures from different angles. I think I did what I said I wanted to and I defiantly got more pictures than I needed to so I had a range and could choose which pictures I wanted to edit.
  • 2. For this picture first I changed the brightness and contrast. I turned the contrast up to give the picture a black sharp effect. I then used the equalize effect on my picture which gave my picture a darker look, so I turned up he brightness a bit more. I then clicked on the variations effect and chose to add more magenta to my picture and this is what gave my final picture the pink look. I also chose the lighter version of magenta so that it kept my overall picture lighter. Because in the original there was mainly only three main colours I picked this out and made them more bright so that these would stand out against the white for the building. I wanted to make my picture more bright and fun and I think I did this using the magenta and making the sky more blue. This made my picture darker and picked up on the shadows. This made my picture darker on one side and lighter on the other so I liked the spreading effect it gave.
  • 3. This was the effect that made my picture more pink on the darker parts of the original image. I think this effect gave the picture a different look and made the picture look a lot different. On the right hand side I could pick whether I wanted the pink lighter or darker or just normal and I made it lighter so that the sky would stand out more against the darker pink. I think this worked. This is my final edit.
  • 4. First I selected the top area of my picture so I could then change the effects of just this section of the picture. I did this because the sky is a lot brighter than the bottom of the picture so when I added an effect the picture got to dark. Then still with section selected I used the curves effect this made the top half of my picture a lot darker and the building turn into silhouettes. Then I used the black and white effect to make the silhouettes look darker and the sky more dramatic. Then I selected the bottom part of the picture and just added the black and white effect. I think it worked because to get the sky bright like I wanted it, it had to be dark and the bottom of the picture wouldn’t of looked right because it wouldn’t of shown anything.
  • 5. I used this effect to make the bottom of my picture black and white. This effect made the top half of my picture black and white. This is my final edit.
  • 6. First I changed the brightness and contrast to make the sky look brighter. I changed the contrast quite high so that the image would look sharper and the shadows would be darker on the image. Then I just used the colour balance effect to make my picture more blue. I think this worked because the building was already blue and so I just wanted to make it stand out more against the white of the sky. I didn't want to change this picture to much because I liked the blue anyway so I just enhanced it.
  • 7. First I changed the brightness and contrast this was so that the sky looked bright. I put the contrast high so that the crisscross effect on the bridge would show up better. . This worked and the strings were much darker. Then I used an effect called curves which gave the whole picture a darker look and made the bridge and other building s look like silhouettes against the sky. I liked the effect and how it picked up on the clouds and showed the shape of them more. Then the last effect I used was colour balance, I made the picture more pink using this effect. I like what this effect did and I think it looks good and makes the picture look like it was taken in the evening rather than the day.
  • 8.
  • 9.
  • 10. First I changed the brightness and contrast. I turned the brightness up but not to much because the picture was bright anyway because of the sun. Then I changed the contrast to make sure some of the detail stood out against the brightness. Then I used an effect called variations where I made my picture more yellow, I liked this effect and it made my picture look more warm and later in the day. Then I used the curves effect this made the corners and some of the buildings a bit darker and stand out more. Then used an effect called vibrance to make the brighter colours stand out on the picture. Then I used an effect called levels this made the sky look like it had different layers of colour on top of each.
  • 11.
  • 12. First I selected a part of the picture I wanted to edit so only this bit would be changed by the effects I used. I used the effect colour balance on this section to make it purple. Then I changed the contrast to make it a darker purple. Then I selected the bottom right of my picture as my second section. Then I used the colour balance effect again for this section and made it the blue colour. I think this worked because it enhanced the colour the water already was.
  • 13. Then I changed the contrast to a bit higher so that it made the water look darker. I then selected the final part of my picture I hadn’t edited. I changed the contrast and brightness of this part then. Then I used the colour balance effect and turned up the yellow effect to make it look like the sun was shining on the path way. Then I turned up the contrast a bit more so the shadows showed up more.
  • 14.
  • 15.
  • 16. First I turned up the contrast of the picture to make the building sharper and darker against the sun. then I turned the brightness up so the sun would look brighter. Then I used the colour balance effect to make the whole picture a purple colour. Then I changed the contrast and brightness again. I turned the contrast up more to make the darker things in the picture stand out especially the shadows on the water. It think this effect made the picture look better. The I turned the brightness up a bit more so the sun rays would show up on my picture.
  • 17.
  • 18.
  • 19.
  • 20. Capture log ISO – 80 Shutter speed - 1/1000 sec Aperture - F/3.3 Setting - 3D camera mode ISO – 80 Shutter speed - 1/450 sec Aperture - F/10.4 Setting – 3D camera mode ISO – 80 Shutter speed – 1/680 sec Aperture – F/3.1 Setting – 3D camera mode
  • 21. ISO – 80 Shutter speed – 1/385 sec Aperture - F/3.5 Setting - 3D camera mode ISO – 80 Shutter speed – 1/250 sec Aperture – F/10 Setting – 3D camera mode ISO – 80 Shutter speed – 1/350 sec Aperture – F/9.7 Setting – 3D camera mode
  • 22. ISO – 80 Shutter speed – 1/200 sec Aperture – F/9.7 Setting – 3D camera mode ISO – 80 Shutter speed – 1/350 sec Aperture – F/9.7 Setting – 3D camera mode ISO – 80 Shutter speed – 1/188 sec Aperture – F/9.7 Setting – 3D camera mode
  • 23. Rejected images These are three of the images I didn’t pick. I didn’t like the first and second one because of the angle I had taken the picture on. It made the building look like it was on a slant. I must have moved the camera so the picture looked wonky. I didn’t like all the building and other stuff around the first two either. It looked like I’d cropped the images and gotten rid of bits. I didn't like the last one because of the lighting in the picture I don’t think I could of done much with it. I had some better versions of this picture as well so I used them.
  • 24. Aims for next project Next time if I was going to do this project again I would make sure I took more pictures than this time. I didn’t need to but I would of liked to have gone to some different places to get different angles of the same view. I didn’t go everywhere around Salford Quays so I would do that next time so that I photographed as much as I could. Next time I would like to try different shutter speeds and move my camera to see what it did to my pictures, also maybe do a shoot at night so I could use a flash and see how it effected the picture. I didn’t use a flash in any of my pictures because it was bright out but next time I could try and see of it made my pictures look any better.