SlideShare uma empresa Scribd logo
1 de 12
Baixar para ler offline
IDIN Build-it: Hand-held foam cutter
GOALS:
o Participants learn how to use basic woodworking tools
o Participants have made a nichrome wire foam cutter.
o Participants know how to measure simple dimensions
precicely.
TIME:
60 min
PREPARATION:
Collect materials and tools
Make a foam cutter yourself to discover what participants might find difficult. This is
helpful to have available for participants to explore while they are making the cutter.
Review and/or print Build-It instructions
Have a first aid kit and safety glasses for participants on hand
ROOM SET-UP:
A clean, flat surface such as a table for participants is useful to have for easier assembly.
2014-04-2 2
TOOLS MATERIALS*
Item Amount Cost
Saw
Hard wood
40mm wide x
40mm thick
150mm
long
$1
Hand crank
brace and
3mm bit
Filler rod
3mm thick
400mm $2
Tape measure
and marker
A piece of a
straw
~20mm
long
minimal
Hacksaw or
Bolt cutters
Nichrome
wire
32 gauge
250mm $0.10
Pliers
Brass shim
(very thin
brass sheet)
25mm x
50mm
$0.10
Vice D-batteries 2 $4
Wire cutters Strong tape
300mm-
450mm
minimal
Metal file Total Cost = $7.20
Hammer
2014-04-2 3
1. What is a Build-It?
A Build-It is a lesson where people make a small technology and learn some workshop
skills. Everyone will build together, step by step. As you build the technology, you will
learn good techniques for handling metal and wood. Each member will have an
opportunity to learn these hands-on skills by using some tools and materials. At the end
of the Build-It, you will have had some practice using tools and also have a technology
for you to take home.
2. What is a foam cutter?
This foam cutter allows people to cut
interesting shapes from foam without
needing electricity or a large machine.
Foam parts can be used when casting metal
parts. Using the foam cutter, someone could
make the part they want out of the foam, and
then put it into the sand casting frame, so
create the mold.
Unlike when using a solid part to make the
mold, the foam can be left inside the mold.
When the molten metal is poured in, the
foam evaporates, leaving only the solid cast
part behind.
Demonstrate how to use the foam cutter. Show how to switch it on and off with the switch
and straw.
3. Setting up the Build-It
ENCOURAGE PARTICIPANTS TO ENGAGE FULLY
• Ask, “Why?” “Where?” “What?” “How?” at any time during the session
• Engage everyone in the building activities and be sure that each person in the group can
both observe and participate in learning and doing all of the different techniques
DIVIDE INTO PAIRS AND INTRODUCE THE STATIONS
• Half of the pairs will make the wooden base with one facilitator; the other half of the
pairs will make the metal pieces with the other facilitator. Then, the pairs will switch
and those who were making the wooden base will make the metal pieces, and vice versa.
• Single-gender pairings often work best for allowing all members of the group to
participate evenly. Explain which tools need to be shared by the larger group, and where
they will be located.
2014-04-2 4
4. Preparing the wooden frame
Tools Materials
Steps
1. Cut a 150mm piece from the
40mm thick x 40mm wide piece
of wood
SHOW THE PARTICIPANTS HOW TO PROPERLY MEASURE AND CUT THE WOOD.
o Begin by explaining the details of the measuring tape. If there are both imperial and
metric units, clarify which you are using and what the different-sized lines mean (1cm,
1mm, etc.) Then, mark the plank
o Situate yourself to begin cutting, with your feet firmly planted and your saw, arm, and
shoulder are all in a line. Explain how to use a backwards stroke on the first cut of the
saw. You can use your thumb to help guide and steady the saw.
o It may be necessary to have teams share wood and/or saws.
o Walk around to ensure each participant has used the saw.
2. Place the wood so that the rings
lie horizontally. Identify which
way the rings are lying by
looking at the edge you cut.
Drilling through horizontal
rings will keep the wood from
splitting.
We are using hard wood so that the risk of splitting is reduced even more. Hard wood will
also hold the rods in tension for a long time without slowly getting squished, as soft wood
would tend to do.
2014-04-2 5
10mm
10mm
20mm
10mm
3. Keeping the rings horizontal,
on the top, mark halfway along
the width.
4. Mark 10mm from each end.
Mark an additional 10mm from
the right end's mark.
Which end is the “right” end
doesn’t matter, but this
description will be used to help
distinguish between sides.
5. Drill using a 3mm drill bit.
Drill through, but do not wiggle
the bit! Making the hole larger
could make the rod slip
through. This is easiest to be
careful with a drill press, but
possible with a hand drill.
5. Adding the metal rods
Tools Materials
Steps
1. Cut three filler rods: 80mm,
150mm, and 180mm
Filler rods are strong because they have a steel core, but very conductive because they have a
copper coating. The copper has little resistance, so the electricity takes the easy path along
the copper to reach the resistance wire, and does not heat up in the process! The copper also
helps prevent rusting.
2014-04-2 6
2. File the edges of the filler rod
so they are slightly rounded.
This helps the filler rod slide
into the hole easier. This is very
easy to do with a belt sander
and is fine to do with a hand-
held file.
3. Insert and hammer in the
180mm filler rod into the single
hole, on the left end until it
sticks out 15mm.
Support the wood very near the
hole (on a table or vice), but
allow empty space for the rod
to come out. Hit the rods into
the holes before you bend the
rods, so the rods are straight
and easy to get in.
4. Hit the 150mm filler rod in the
middle hole, on the right end.
Hit the 80mm filler rod in the
far hole, on the right end
Be careful to not drive the filler
rod too far – if you have to
drive it back the opposite
direction, it will loosen the
wood’s grip on the rod.
5. Slide a 20mm piece of a straw
onto the 150mm rod.
The straw is an electric
insulator and will act as part of
the "switch" for the foam
cutter.
6. Mark at 10mm and 20mm
down the two long filler rods
(150mm and 180mm rods)
180mm rod 150mm rod
80mm rod
10mm 130mm 20mm
180mm rod 150mm rod
80mm rod
10mm
10mm
2014-04-2 7
7. Bend the top 10mm of the
180mm filler rods outward
Clamp the rod so that the top
10mm is sticking out of the vice.
Bend with pliers.
The purpose of bending the
wire is to give the wire a place
to sit and not slip off the rods.
8. Raise the rod to 20mm and
bend the 180mm filler rod
inward (the opposite
direction), so the rod looks like
an "S"
9. Repeat with the 150mm rod.
10. You will have the basic form of
the foam cutter! Make sure the
bent areas are bent in opposite
directions.
If they are not, then adjust
them with the pliers. If you bent
them the wrong way, just spin
the rods around so they look
like the picture.
2014-04-2 8
11. Bend the two short pieces of
filler bar coming out of the
bottom so the tips are tipped
toward the middle and each
other.
This helps create a firmer
contact between the batteries
and filler rod.
6. Make the switch and assemble
Tools Materials
Steps
1. Cut the 20mm x 40mm brass
sheet.
It should be about the same
height as the top part of the
80mm rod.
We are using brass sheets because brass is strong, somewhat springy, and very conductive
(all things that are good for a switch). Copper sheets are not used because they bend very
easily and do not hold their form.
2. Bend the shim around a piece
of rod.
This helps you shape the shim
so that it will fit tightly around
the 80mm rod.
2014-04-2 9
3. Slip the shim off the other rod,
and squeeze the rolled piece
slightly with the pliers.
This will make sure it will fit
snugly on the 80mm rod
4. Slide the brass shim onto the
80mm rod, making sure it can
swing nicely, but not slide off
too easily.
5. Bend the brass shim around the
long rod.
Go slowly and sort of "pull" the
shim to make sure it is wrapped
tightly around the rod.
6. Add a bend in the
opposite direction at the
end of the tab to make it
easy to engage/disengage.
7. You have everything except the
wire and power source, the
batteries.
Make sure you leave the straw in
the "OFF" (closed) position for
the next steps, when you add
the wire so you do not get
burned!
2014-04-2 10
8. Add the batteries between the
rods by wedging the battery
ends next to the rods first,
keeping the middle where the
batteries meet sticking up in
the air.
Doing this before you add the
wire is nice so that the wire
doesn't get messed up while you
put the batteries in.
9. With it flat on the table,
carefully push downward
where the batteries meet.
The batteries will "snap" into
place when they form a straight
line.
10. Pull a piece of tape around the
wooden handle and the two
batteries.
Pull it tight!
11. Cut a 250mm long piece of 32-
gague nichrome wire.
Other wire should not be used in
this project! See the note below.
2014-04-2 11
The nichrome wire is special because it will not corrode with high temeratures and has
a consistent electrical resistance.
A 32-gague nichrome wire is used because the resistance from a ~90mm length
(Resistance=3Ω) corresponds to the battery power supply (Voltage=3V) and a desirable
current output (I). In other words, the demand of the wire matches the supply from the
two batteries and creates enough heat to melt the foam.
When you find the wire is not cutting the foam as easily as it usually does, it could be the
voltage coming from the batteries has dropped. This has created an imbalance in your V=IR
equation! Your current has dropped to match the voltage drop. To counteract this and
increase your current output, reduce the resistance. To do so, simply squeeze the rods in
towards each other and wrap the wire around the rod a couple of more times. This reduces
the length of the wire, which reduces its resistance, and increases the heat released (I) by the
wire, cutting the foam faster.
12. Wrap the wire around one of
the long rods, 5-10 times.
Alternate wrapping above and below.
13. Twist the end around the rest
of the wire and snip any long
wire remaining.
14. Squeeze the rods toward each
other to be ~90mm apart and
begin wrapping the wire
around the other rod.
The wire should be tight! The
filler bars should be squeezed to
be 10mm closer at the top than
the bottom.
Be careful to not kink the wire – it will
create unwanted "hot spots!"
2014-04-2 12
As before, alternate wrapping
above and below the wire
stretched across, as before – it
will make the wrapping tighter
and prevent it from loosening
from slipping.
15. Twist the end and snip any long
wire remaining.
16. Unlatch the switch, move the
straw and click it back in to
turn the foam cutter on!
Build-Its are published by IDIN. The
International Development Innovation
Network (IDIN) is a consortium funded
through USAID’s Higher Education
Solutions Network (HESN) that supports
leading universities to catalyze the
development and application of
innovative science, technology, and
engineering approaches and tools to
solve some of the world’s most
challenging development problems.
The foam cutter featured here was designed with critical contributions from D-Lab staff,
Dennis Nagle. Participants in IDIN contributed as well. The document was created by Benji
Moncivaiz in collaboration with IDIN representatives at UC-Davis and Olin College.

Mais conteúdo relacionado

Mais procurados (20)

"Submerged Arc Welding" Introduction and Types
"Submerged Arc Welding" Introduction and Types"Submerged Arc Welding" Introduction and Types
"Submerged Arc Welding" Introduction and Types
 
10 gear manufacturing process
10  gear manufacturing process10  gear manufacturing process
10 gear manufacturing process
 
Weld Defects
Weld DefectsWeld Defects
Weld Defects
 
topik 6 menggerudi (1)
topik 6 menggerudi (1)topik 6 menggerudi (1)
topik 6 menggerudi (1)
 
Cutting tools
Cutting toolsCutting tools
Cutting tools
 
Milling
MillingMilling
Milling
 
Pengenalan mesin larik
Pengenalan mesin larikPengenalan mesin larik
Pengenalan mesin larik
 
Mechanical fasteners
Mechanical fastenersMechanical fasteners
Mechanical fasteners
 
Jig and fixture
Jig and fixtureJig and fixture
Jig and fixture
 
4 fundamentals of machining
4 fundamentals of machining4 fundamentals of machining
4 fundamentals of machining
 
Electro chemical grinding
Electro chemical grindingElectro chemical grinding
Electro chemical grinding
 
DESIGN OF WELDING FIXTURES AND POSITIONERS
DESIGN OF WELDING FIXTURES AND POSITIONERSDESIGN OF WELDING FIXTURES AND POSITIONERS
DESIGN OF WELDING FIXTURES AND POSITIONERS
 
Workshop technology-milling machine
Workshop technology-milling machineWorkshop technology-milling machine
Workshop technology-milling machine
 
Bolt Screw
Bolt ScrewBolt Screw
Bolt Screw
 
Unit 5B High Velocity Forming Methods
Unit 5B High Velocity Forming MethodsUnit 5B High Velocity Forming Methods
Unit 5B High Velocity Forming Methods
 
PENGENALAN KEPADA MESIN LARIK
PENGENALAN KEPADA MESIN LARIKPENGENALAN KEPADA MESIN LARIK
PENGENALAN KEPADA MESIN LARIK
 
MPI 3023 MESIN EDM DIE SINKING
MPI 3023 MESIN EDM DIE SINKING MPI 3023 MESIN EDM DIE SINKING
MPI 3023 MESIN EDM DIE SINKING
 
Electron Beam Welding
Electron Beam WeldingElectron Beam Welding
Electron Beam Welding
 
welded joints
welded jointswelded joints
welded joints
 
Fasteners & fastening
Fasteners & fasteningFasteners & fastening
Fasteners & fastening
 

Destaque

Apresentação dos trabalhos e confecção dos slides 28-11-2016
Apresentação dos trabalhos e confecção dos slides   28-11-2016Apresentação dos trabalhos e confecção dos slides   28-11-2016
Apresentação dos trabalhos e confecção dos slides 28-11-2016Marcos Itamar
 
Bookkeeping outsourcing companies
Bookkeeping outsourcing companiesBookkeeping outsourcing companies
Bookkeeping outsourcing companiesRAMAN AGGARWAL
 
Мое первое предприятие
Мое первое предприятиеМое первое предприятие
Мое первое предприятиеYuliua Rudenko
 
Nuovo Progetto per Campo - Elezioni 2014
Nuovo Progetto per Campo - Elezioni 2014Nuovo Progetto per Campo - Elezioni 2014
Nuovo Progetto per Campo - Elezioni 2014Emiliano Provenzali
 
Holy macaroni!
Holy macaroni!Holy macaroni!
Holy macaroni!Zertab Q
 
Brc presentation Engineering Group
Brc presentation Engineering GroupBrc presentation Engineering Group
Brc presentation Engineering GroupArtyom462
 
ОАО «Ургалуголь»
ОАО «Ургалуголь»ОАО «Ургалуголь»
ОАО «Ургалуголь»Yuliua Rudenko
 
Сферы деятельности 360° Виртуальный Тур
Сферы деятельности 360° Виртуальный ТурСферы деятельности 360° Виртуальный Тур
Сферы деятельности 360° Виртуальный ТурAID360 Limited
 
OCHA Think Brief - Hashtag Standards for emergencies
OCHA Think Brief - Hashtag Standards for emergenciesOCHA Think Brief - Hashtag Standards for emergencies
OCHA Think Brief - Hashtag Standards for emergenciesJan Husar
 
Turtle mountain interview questions and answers
Turtle mountain interview questions and answersTurtle mountain interview questions and answers
Turtle mountain interview questions and answersSelinasimpson235
 

Destaque (20)

Apresentação dos trabalhos e confecção dos slides 28-11-2016
Apresentação dos trabalhos e confecção dos slides   28-11-2016Apresentação dos trabalhos e confecção dos slides   28-11-2016
Apresentação dos trabalhos e confecção dos slides 28-11-2016
 
GBG Hobby
GBG HobbyGBG Hobby
GBG Hobby
 
Arsq
ArsqArsq
Arsq
 
Empresa
EmpresaEmpresa
Empresa
 
Bookkeeping outsourcing companies
Bookkeeping outsourcing companiesBookkeeping outsourcing companies
Bookkeeping outsourcing companies
 
Мое первое предприятие
Мое первое предприятиеМое первое предприятие
Мое первое предприятие
 
Benefits of Doggie Day Care
Benefits of Doggie Day CareBenefits of Doggie Day Care
Benefits of Doggie Day Care
 
Nuovo Progetto per Campo - Elezioni 2014
Nuovo Progetto per Campo - Elezioni 2014Nuovo Progetto per Campo - Elezioni 2014
Nuovo Progetto per Campo - Elezioni 2014
 
розробка-програм
розробка-програмрозробка-програм
розробка-програм
 
Sörprezentáció
SörprezentációSörprezentáció
Sörprezentáció
 
Holy macaroni!
Holy macaroni!Holy macaroni!
Holy macaroni!
 
Brc presentation Engineering Group
Brc presentation Engineering GroupBrc presentation Engineering Group
Brc presentation Engineering Group
 
Build-It: Bicycle Hacksaw
Build-It: Bicycle HacksawBuild-It: Bicycle Hacksaw
Build-It: Bicycle Hacksaw
 
ОАО «Ургалуголь»
ОАО «Ургалуголь»ОАО «Ургалуголь»
ОАО «Ургалуголь»
 
CEM
CEMCEM
CEM
 
Сферы деятельности 360° Виртуальный Тур
Сферы деятельности 360° Виртуальный ТурСферы деятельности 360° Виртуальный Тур
Сферы деятельности 360° Виртуальный Тур
 
OCHA Think Brief - Hashtag Standards for emergencies
OCHA Think Brief - Hashtag Standards for emergenciesOCHA Think Brief - Hashtag Standards for emergencies
OCHA Think Brief - Hashtag Standards for emergencies
 
Turtle mountain interview questions and answers
Turtle mountain interview questions and answersTurtle mountain interview questions and answers
Turtle mountain interview questions and answers
 
Why PD/H/PE?
Why PD/H/PE?Why PD/H/PE?
Why PD/H/PE?
 
4582
45824582
4582
 

Semelhante a Build-It: Hand-held foam cutter

Mechanical Technology Grade 12 Chapter 4 Tools
Mechanical Technology Grade 12 Chapter 4 ToolsMechanical Technology Grade 12 Chapter 4 Tools
Mechanical Technology Grade 12 Chapter 4 ToolsFuture Managers
 
howtospliceelectricalwires-160915075216.pdf
howtospliceelectricalwires-160915075216.pdfhowtospliceelectricalwires-160915075216.pdf
howtospliceelectricalwires-160915075216.pdfJhoanaTamondong
 
Basic Electrical Splicing
Basic Electrical SplicingBasic Electrical Splicing
Basic Electrical SplicingRaymar Baquilar
 
Mega Collection of Southwest Inspired Metal Work Jewelry Tutorials
Mega Collection of Southwest Inspired Metal Work Jewelry TutorialsMega Collection of Southwest Inspired Metal Work Jewelry Tutorials
Mega Collection of Southwest Inspired Metal Work Jewelry TutorialsThe Beading Gem's Journal
 
How To Solder V3.5
How To Solder V3.5How To Solder V3.5
How To Solder V3.5JasonDeMoe
 
IRJET- Design and Manufacturing of Helical Copper Tube Heat Exchanger Winding...
IRJET- Design and Manufacturing of Helical Copper Tube Heat Exchanger Winding...IRJET- Design and Manufacturing of Helical Copper Tube Heat Exchanger Winding...
IRJET- Design and Manufacturing of Helical Copper Tube Heat Exchanger Winding...IRJET Journal
 
Amar askandar metal sheet works
Amar askandar metal sheet worksAmar askandar metal sheet works
Amar askandar metal sheet worksAmar A.Mahmood
 
Wood reel - bamboo journal 6 - italian bamboo rodmakers association
Wood reel - bamboo journal 6 - italian bamboo rodmakers associationWood reel - bamboo journal 6 - italian bamboo rodmakers association
Wood reel - bamboo journal 6 - italian bamboo rodmakers associationAnibal Ruben Reyes
 
F-F-Fiddle Assembly Instructions
F-F-Fiddle Assembly InstructionsF-F-Fiddle Assembly Instructions
F-F-Fiddle Assembly Instructionsdsp39
 
About Plumbing Tools
About Plumbing ToolsAbout Plumbing Tools
About Plumbing ToolsTradusway12
 
What is Plumbing Tool and work of Plumbing Tools.
 What is Plumbing Tool and work of Plumbing Tools. What is Plumbing Tool and work of Plumbing Tools.
What is Plumbing Tool and work of Plumbing Tools.Tradusway12
 
Build your own wind turbine
Build your own wind turbineBuild your own wind turbine
Build your own wind turbinepason de mexico
 

Semelhante a Build-It: Hand-held foam cutter (20)

Build-It: Charcoal press
Build-It: Charcoal pressBuild-It: Charcoal press
Build-It: Charcoal press
 
Mechanical Technology Grade 12 Chapter 4 Tools
Mechanical Technology Grade 12 Chapter 4 ToolsMechanical Technology Grade 12 Chapter 4 Tools
Mechanical Technology Grade 12 Chapter 4 Tools
 
howtospliceelectricalwires-160915075216.pdf
howtospliceelectricalwires-160915075216.pdfhowtospliceelectricalwires-160915075216.pdf
howtospliceelectricalwires-160915075216.pdf
 
Basic Electrical Splicing
Basic Electrical SplicingBasic Electrical Splicing
Basic Electrical Splicing
 
Mega Collection of Southwest Inspired Metal Work Jewelry Tutorials
Mega Collection of Southwest Inspired Metal Work Jewelry TutorialsMega Collection of Southwest Inspired Metal Work Jewelry Tutorials
Mega Collection of Southwest Inspired Metal Work Jewelry Tutorials
 
Createspace gilad
Createspace giladCreatespace gilad
Createspace gilad
 
How To Solder V3.5
How To Solder V3.5How To Solder V3.5
How To Solder V3.5
 
IRJET- Design and Manufacturing of Helical Copper Tube Heat Exchanger Winding...
IRJET- Design and Manufacturing of Helical Copper Tube Heat Exchanger Winding...IRJET- Design and Manufacturing of Helical Copper Tube Heat Exchanger Winding...
IRJET- Design and Manufacturing of Helical Copper Tube Heat Exchanger Winding...
 
Amar askandar metal sheet works
Amar askandar metal sheet worksAmar askandar metal sheet works
Amar askandar metal sheet works
 
Hollow ring final
Hollow ring finalHollow ring final
Hollow ring final
 
Hand tools
Hand toolsHand tools
Hand tools
 
Wood reel - bamboo journal 6 - italian bamboo rodmakers association
Wood reel - bamboo journal 6 - italian bamboo rodmakers associationWood reel - bamboo journal 6 - italian bamboo rodmakers association
Wood reel - bamboo journal 6 - italian bamboo rodmakers association
 
F-F-Fiddle Assembly Instructions
F-F-Fiddle Assembly InstructionsF-F-Fiddle Assembly Instructions
F-F-Fiddle Assembly Instructions
 
Hand saws
Hand sawsHand saws
Hand saws
 
Swaging tools
Swaging toolsSwaging tools
Swaging tools
 
Orbital Earrings Tutorial
Orbital Earrings TutorialOrbital Earrings Tutorial
Orbital Earrings Tutorial
 
About Plumbing Tools
About Plumbing ToolsAbout Plumbing Tools
About Plumbing Tools
 
What is Plumbing Tool and work of Plumbing Tools.
 What is Plumbing Tool and work of Plumbing Tools. What is Plumbing Tool and work of Plumbing Tools.
What is Plumbing Tool and work of Plumbing Tools.
 
Saws
Saws Saws
Saws
 
Build your own wind turbine
Build your own wind turbineBuild your own wind turbine
Build your own wind turbine
 

Último

"Debugging python applications inside k8s environment", Andrii Soldatenko
"Debugging python applications inside k8s environment", Andrii Soldatenko"Debugging python applications inside k8s environment", Andrii Soldatenko
"Debugging python applications inside k8s environment", Andrii SoldatenkoFwdays
 
Nell’iperspazio con Rocket: il Framework Web di Rust!
Nell’iperspazio con Rocket: il Framework Web di Rust!Nell’iperspazio con Rocket: il Framework Web di Rust!
Nell’iperspazio con Rocket: il Framework Web di Rust!Commit University
 
Developer Data Modeling Mistakes: From Postgres to NoSQL
Developer Data Modeling Mistakes: From Postgres to NoSQLDeveloper Data Modeling Mistakes: From Postgres to NoSQL
Developer Data Modeling Mistakes: From Postgres to NoSQLScyllaDB
 
Unleash Your Potential - Namagunga Girls Coding Club
Unleash Your Potential - Namagunga Girls Coding ClubUnleash Your Potential - Namagunga Girls Coding Club
Unleash Your Potential - Namagunga Girls Coding ClubKalema Edgar
 
Transcript: New from BookNet Canada for 2024: BNC CataList - Tech Forum 2024
Transcript: New from BookNet Canada for 2024: BNC CataList - Tech Forum 2024Transcript: New from BookNet Canada for 2024: BNC CataList - Tech Forum 2024
Transcript: New from BookNet Canada for 2024: BNC CataList - Tech Forum 2024BookNet Canada
 
"ML in Production",Oleksandr Bagan
"ML in Production",Oleksandr Bagan"ML in Production",Oleksandr Bagan
"ML in Production",Oleksandr BaganFwdays
 
SAP Build Work Zone - Overview L2-L3.pptx
SAP Build Work Zone - Overview L2-L3.pptxSAP Build Work Zone - Overview L2-L3.pptx
SAP Build Work Zone - Overview L2-L3.pptxNavinnSomaal
 
AI as an Interface for Commercial Buildings
AI as an Interface for Commercial BuildingsAI as an Interface for Commercial Buildings
AI as an Interface for Commercial BuildingsMemoori
 
Unraveling Multimodality with Large Language Models.pdf
Unraveling Multimodality with Large Language Models.pdfUnraveling Multimodality with Large Language Models.pdf
Unraveling Multimodality with Large Language Models.pdfAlex Barbosa Coqueiro
 
Search Engine Optimization SEO PDF for 2024.pdf
Search Engine Optimization SEO PDF for 2024.pdfSearch Engine Optimization SEO PDF for 2024.pdf
Search Engine Optimization SEO PDF for 2024.pdfRankYa
 
Commit 2024 - Secret Management made easy
Commit 2024 - Secret Management made easyCommit 2024 - Secret Management made easy
Commit 2024 - Secret Management made easyAlfredo García Lavilla
 
Are Multi-Cloud and Serverless Good or Bad?
Are Multi-Cloud and Serverless Good or Bad?Are Multi-Cloud and Serverless Good or Bad?
Are Multi-Cloud and Serverless Good or Bad?Mattias Andersson
 
Beyond Boundaries: Leveraging No-Code Solutions for Industry Innovation
Beyond Boundaries: Leveraging No-Code Solutions for Industry InnovationBeyond Boundaries: Leveraging No-Code Solutions for Industry Innovation
Beyond Boundaries: Leveraging No-Code Solutions for Industry InnovationSafe Software
 
Vector Databases 101 - An introduction to the world of Vector Databases
Vector Databases 101 - An introduction to the world of Vector DatabasesVector Databases 101 - An introduction to the world of Vector Databases
Vector Databases 101 - An introduction to the world of Vector DatabasesZilliz
 
Advanced Test Driven-Development @ php[tek] 2024
Advanced Test Driven-Development @ php[tek] 2024Advanced Test Driven-Development @ php[tek] 2024
Advanced Test Driven-Development @ php[tek] 2024Scott Keck-Warren
 
My Hashitalk Indonesia April 2024 Presentation
My Hashitalk Indonesia April 2024 PresentationMy Hashitalk Indonesia April 2024 Presentation
My Hashitalk Indonesia April 2024 PresentationRidwan Fadjar
 
Integration and Automation in Practice: CI/CD in Mule Integration and Automat...
Integration and Automation in Practice: CI/CD in Mule Integration and Automat...Integration and Automation in Practice: CI/CD in Mule Integration and Automat...
Integration and Automation in Practice: CI/CD in Mule Integration and Automat...Patryk Bandurski
 
Training state-of-the-art general text embedding
Training state-of-the-art general text embeddingTraining state-of-the-art general text embedding
Training state-of-the-art general text embeddingZilliz
 

Último (20)

"Debugging python applications inside k8s environment", Andrii Soldatenko
"Debugging python applications inside k8s environment", Andrii Soldatenko"Debugging python applications inside k8s environment", Andrii Soldatenko
"Debugging python applications inside k8s environment", Andrii Soldatenko
 
Nell’iperspazio con Rocket: il Framework Web di Rust!
Nell’iperspazio con Rocket: il Framework Web di Rust!Nell’iperspazio con Rocket: il Framework Web di Rust!
Nell’iperspazio con Rocket: il Framework Web di Rust!
 
Developer Data Modeling Mistakes: From Postgres to NoSQL
Developer Data Modeling Mistakes: From Postgres to NoSQLDeveloper Data Modeling Mistakes: From Postgres to NoSQL
Developer Data Modeling Mistakes: From Postgres to NoSQL
 
Unleash Your Potential - Namagunga Girls Coding Club
Unleash Your Potential - Namagunga Girls Coding ClubUnleash Your Potential - Namagunga Girls Coding Club
Unleash Your Potential - Namagunga Girls Coding Club
 
Transcript: New from BookNet Canada for 2024: BNC CataList - Tech Forum 2024
Transcript: New from BookNet Canada for 2024: BNC CataList - Tech Forum 2024Transcript: New from BookNet Canada for 2024: BNC CataList - Tech Forum 2024
Transcript: New from BookNet Canada for 2024: BNC CataList - Tech Forum 2024
 
"ML in Production",Oleksandr Bagan
"ML in Production",Oleksandr Bagan"ML in Production",Oleksandr Bagan
"ML in Production",Oleksandr Bagan
 
SAP Build Work Zone - Overview L2-L3.pptx
SAP Build Work Zone - Overview L2-L3.pptxSAP Build Work Zone - Overview L2-L3.pptx
SAP Build Work Zone - Overview L2-L3.pptx
 
AI as an Interface for Commercial Buildings
AI as an Interface for Commercial BuildingsAI as an Interface for Commercial Buildings
AI as an Interface for Commercial Buildings
 
Unraveling Multimodality with Large Language Models.pdf
Unraveling Multimodality with Large Language Models.pdfUnraveling Multimodality with Large Language Models.pdf
Unraveling Multimodality with Large Language Models.pdf
 
Search Engine Optimization SEO PDF for 2024.pdf
Search Engine Optimization SEO PDF for 2024.pdfSearch Engine Optimization SEO PDF for 2024.pdf
Search Engine Optimization SEO PDF for 2024.pdf
 
Commit 2024 - Secret Management made easy
Commit 2024 - Secret Management made easyCommit 2024 - Secret Management made easy
Commit 2024 - Secret Management made easy
 
Are Multi-Cloud and Serverless Good or Bad?
Are Multi-Cloud and Serverless Good or Bad?Are Multi-Cloud and Serverless Good or Bad?
Are Multi-Cloud and Serverless Good or Bad?
 
Beyond Boundaries: Leveraging No-Code Solutions for Industry Innovation
Beyond Boundaries: Leveraging No-Code Solutions for Industry InnovationBeyond Boundaries: Leveraging No-Code Solutions for Industry Innovation
Beyond Boundaries: Leveraging No-Code Solutions for Industry Innovation
 
Vector Databases 101 - An introduction to the world of Vector Databases
Vector Databases 101 - An introduction to the world of Vector DatabasesVector Databases 101 - An introduction to the world of Vector Databases
Vector Databases 101 - An introduction to the world of Vector Databases
 
Advanced Test Driven-Development @ php[tek] 2024
Advanced Test Driven-Development @ php[tek] 2024Advanced Test Driven-Development @ php[tek] 2024
Advanced Test Driven-Development @ php[tek] 2024
 
E-Vehicle_Hacking_by_Parul Sharma_null_owasp.pptx
E-Vehicle_Hacking_by_Parul Sharma_null_owasp.pptxE-Vehicle_Hacking_by_Parul Sharma_null_owasp.pptx
E-Vehicle_Hacking_by_Parul Sharma_null_owasp.pptx
 
My Hashitalk Indonesia April 2024 Presentation
My Hashitalk Indonesia April 2024 PresentationMy Hashitalk Indonesia April 2024 Presentation
My Hashitalk Indonesia April 2024 Presentation
 
DMCC Future of Trade Web3 - Special Edition
DMCC Future of Trade Web3 - Special EditionDMCC Future of Trade Web3 - Special Edition
DMCC Future of Trade Web3 - Special Edition
 
Integration and Automation in Practice: CI/CD in Mule Integration and Automat...
Integration and Automation in Practice: CI/CD in Mule Integration and Automat...Integration and Automation in Practice: CI/CD in Mule Integration and Automat...
Integration and Automation in Practice: CI/CD in Mule Integration and Automat...
 
Training state-of-the-art general text embedding
Training state-of-the-art general text embeddingTraining state-of-the-art general text embedding
Training state-of-the-art general text embedding
 

Build-It: Hand-held foam cutter

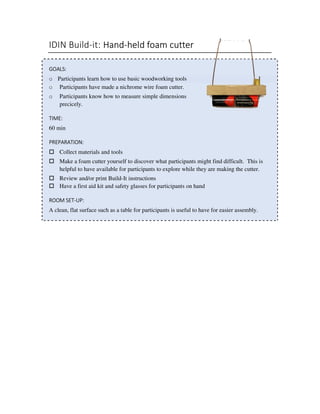
  • 1. IDIN Build-it: Hand-held foam cutter GOALS: o Participants learn how to use basic woodworking tools o Participants have made a nichrome wire foam cutter. o Participants know how to measure simple dimensions precicely. TIME: 60 min PREPARATION: Collect materials and tools Make a foam cutter yourself to discover what participants might find difficult. This is helpful to have available for participants to explore while they are making the cutter. Review and/or print Build-It instructions Have a first aid kit and safety glasses for participants on hand ROOM SET-UP: A clean, flat surface such as a table for participants is useful to have for easier assembly.
  • 2. 2014-04-2 2 TOOLS MATERIALS* Item Amount Cost Saw Hard wood 40mm wide x 40mm thick 150mm long $1 Hand crank brace and 3mm bit Filler rod 3mm thick 400mm $2 Tape measure and marker A piece of a straw ~20mm long minimal Hacksaw or Bolt cutters Nichrome wire 32 gauge 250mm $0.10 Pliers Brass shim (very thin brass sheet) 25mm x 50mm $0.10 Vice D-batteries 2 $4 Wire cutters Strong tape 300mm- 450mm minimal Metal file Total Cost = $7.20 Hammer
  • 3. 2014-04-2 3 1. What is a Build-It? A Build-It is a lesson where people make a small technology and learn some workshop skills. Everyone will build together, step by step. As you build the technology, you will learn good techniques for handling metal and wood. Each member will have an opportunity to learn these hands-on skills by using some tools and materials. At the end of the Build-It, you will have had some practice using tools and also have a technology for you to take home. 2. What is a foam cutter? This foam cutter allows people to cut interesting shapes from foam without needing electricity or a large machine. Foam parts can be used when casting metal parts. Using the foam cutter, someone could make the part they want out of the foam, and then put it into the sand casting frame, so create the mold. Unlike when using a solid part to make the mold, the foam can be left inside the mold. When the molten metal is poured in, the foam evaporates, leaving only the solid cast part behind. Demonstrate how to use the foam cutter. Show how to switch it on and off with the switch and straw. 3. Setting up the Build-It ENCOURAGE PARTICIPANTS TO ENGAGE FULLY • Ask, “Why?” “Where?” “What?” “How?” at any time during the session • Engage everyone in the building activities and be sure that each person in the group can both observe and participate in learning and doing all of the different techniques DIVIDE INTO PAIRS AND INTRODUCE THE STATIONS • Half of the pairs will make the wooden base with one facilitator; the other half of the pairs will make the metal pieces with the other facilitator. Then, the pairs will switch and those who were making the wooden base will make the metal pieces, and vice versa. • Single-gender pairings often work best for allowing all members of the group to participate evenly. Explain which tools need to be shared by the larger group, and where they will be located.
  • 4. 2014-04-2 4 4. Preparing the wooden frame Tools Materials Steps 1. Cut a 150mm piece from the 40mm thick x 40mm wide piece of wood SHOW THE PARTICIPANTS HOW TO PROPERLY MEASURE AND CUT THE WOOD. o Begin by explaining the details of the measuring tape. If there are both imperial and metric units, clarify which you are using and what the different-sized lines mean (1cm, 1mm, etc.) Then, mark the plank o Situate yourself to begin cutting, with your feet firmly planted and your saw, arm, and shoulder are all in a line. Explain how to use a backwards stroke on the first cut of the saw. You can use your thumb to help guide and steady the saw. o It may be necessary to have teams share wood and/or saws. o Walk around to ensure each participant has used the saw. 2. Place the wood so that the rings lie horizontally. Identify which way the rings are lying by looking at the edge you cut. Drilling through horizontal rings will keep the wood from splitting. We are using hard wood so that the risk of splitting is reduced even more. Hard wood will also hold the rods in tension for a long time without slowly getting squished, as soft wood would tend to do.
  • 5. 2014-04-2 5 10mm 10mm 20mm 10mm 3. Keeping the rings horizontal, on the top, mark halfway along the width. 4. Mark 10mm from each end. Mark an additional 10mm from the right end's mark. Which end is the “right” end doesn’t matter, but this description will be used to help distinguish between sides. 5. Drill using a 3mm drill bit. Drill through, but do not wiggle the bit! Making the hole larger could make the rod slip through. This is easiest to be careful with a drill press, but possible with a hand drill. 5. Adding the metal rods Tools Materials Steps 1. Cut three filler rods: 80mm, 150mm, and 180mm Filler rods are strong because they have a steel core, but very conductive because they have a copper coating. The copper has little resistance, so the electricity takes the easy path along the copper to reach the resistance wire, and does not heat up in the process! The copper also helps prevent rusting.
  • 6. 2014-04-2 6 2. File the edges of the filler rod so they are slightly rounded. This helps the filler rod slide into the hole easier. This is very easy to do with a belt sander and is fine to do with a hand- held file. 3. Insert and hammer in the 180mm filler rod into the single hole, on the left end until it sticks out 15mm. Support the wood very near the hole (on a table or vice), but allow empty space for the rod to come out. Hit the rods into the holes before you bend the rods, so the rods are straight and easy to get in. 4. Hit the 150mm filler rod in the middle hole, on the right end. Hit the 80mm filler rod in the far hole, on the right end Be careful to not drive the filler rod too far – if you have to drive it back the opposite direction, it will loosen the wood’s grip on the rod. 5. Slide a 20mm piece of a straw onto the 150mm rod. The straw is an electric insulator and will act as part of the "switch" for the foam cutter. 6. Mark at 10mm and 20mm down the two long filler rods (150mm and 180mm rods) 180mm rod 150mm rod 80mm rod 10mm 130mm 20mm 180mm rod 150mm rod 80mm rod 10mm 10mm
  • 7. 2014-04-2 7 7. Bend the top 10mm of the 180mm filler rods outward Clamp the rod so that the top 10mm is sticking out of the vice. Bend with pliers. The purpose of bending the wire is to give the wire a place to sit and not slip off the rods. 8. Raise the rod to 20mm and bend the 180mm filler rod inward (the opposite direction), so the rod looks like an "S" 9. Repeat with the 150mm rod. 10. You will have the basic form of the foam cutter! Make sure the bent areas are bent in opposite directions. If they are not, then adjust them with the pliers. If you bent them the wrong way, just spin the rods around so they look like the picture.
  • 8. 2014-04-2 8 11. Bend the two short pieces of filler bar coming out of the bottom so the tips are tipped toward the middle and each other. This helps create a firmer contact between the batteries and filler rod. 6. Make the switch and assemble Tools Materials Steps 1. Cut the 20mm x 40mm brass sheet. It should be about the same height as the top part of the 80mm rod. We are using brass sheets because brass is strong, somewhat springy, and very conductive (all things that are good for a switch). Copper sheets are not used because they bend very easily and do not hold their form. 2. Bend the shim around a piece of rod. This helps you shape the shim so that it will fit tightly around the 80mm rod.
  • 9. 2014-04-2 9 3. Slip the shim off the other rod, and squeeze the rolled piece slightly with the pliers. This will make sure it will fit snugly on the 80mm rod 4. Slide the brass shim onto the 80mm rod, making sure it can swing nicely, but not slide off too easily. 5. Bend the brass shim around the long rod. Go slowly and sort of "pull" the shim to make sure it is wrapped tightly around the rod. 6. Add a bend in the opposite direction at the end of the tab to make it easy to engage/disengage. 7. You have everything except the wire and power source, the batteries. Make sure you leave the straw in the "OFF" (closed) position for the next steps, when you add the wire so you do not get burned!
  • 10. 2014-04-2 10 8. Add the batteries between the rods by wedging the battery ends next to the rods first, keeping the middle where the batteries meet sticking up in the air. Doing this before you add the wire is nice so that the wire doesn't get messed up while you put the batteries in. 9. With it flat on the table, carefully push downward where the batteries meet. The batteries will "snap" into place when they form a straight line. 10. Pull a piece of tape around the wooden handle and the two batteries. Pull it tight! 11. Cut a 250mm long piece of 32- gague nichrome wire. Other wire should not be used in this project! See the note below.
  • 11. 2014-04-2 11 The nichrome wire is special because it will not corrode with high temeratures and has a consistent electrical resistance. A 32-gague nichrome wire is used because the resistance from a ~90mm length (Resistance=3Ω) corresponds to the battery power supply (Voltage=3V) and a desirable current output (I). In other words, the demand of the wire matches the supply from the two batteries and creates enough heat to melt the foam. When you find the wire is not cutting the foam as easily as it usually does, it could be the voltage coming from the batteries has dropped. This has created an imbalance in your V=IR equation! Your current has dropped to match the voltage drop. To counteract this and increase your current output, reduce the resistance. To do so, simply squeeze the rods in towards each other and wrap the wire around the rod a couple of more times. This reduces the length of the wire, which reduces its resistance, and increases the heat released (I) by the wire, cutting the foam faster. 12. Wrap the wire around one of the long rods, 5-10 times. Alternate wrapping above and below. 13. Twist the end around the rest of the wire and snip any long wire remaining. 14. Squeeze the rods toward each other to be ~90mm apart and begin wrapping the wire around the other rod. The wire should be tight! The filler bars should be squeezed to be 10mm closer at the top than the bottom. Be careful to not kink the wire – it will create unwanted "hot spots!"
  • 12. 2014-04-2 12 As before, alternate wrapping above and below the wire stretched across, as before – it will make the wrapping tighter and prevent it from loosening from slipping. 15. Twist the end and snip any long wire remaining. 16. Unlatch the switch, move the straw and click it back in to turn the foam cutter on! Build-Its are published by IDIN. The International Development Innovation Network (IDIN) is a consortium funded through USAID’s Higher Education Solutions Network (HESN) that supports leading universities to catalyze the development and application of innovative science, technology, and engineering approaches and tools to solve some of the world’s most challenging development problems. The foam cutter featured here was designed with critical contributions from D-Lab staff, Dennis Nagle. Participants in IDIN contributed as well. The document was created by Benji Moncivaiz in collaboration with IDIN representatives at UC-Davis and Olin College.