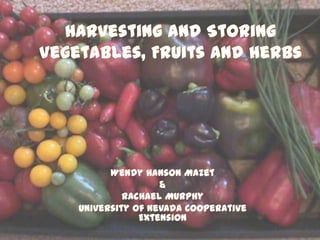
Grow Your Own, Nevada! Fall 2011: Harvesting, Preserving and Winterizing
•Transferir como PPTX, PDF•
1 gostou•2,330 visualizações

This document provides information on harvesting times for various vegetables and fruits grown in home gardens. It includes details on when to harvest onions, garlic, peas, spinach, greens, radishes, beets, carrots and other root crops, potatoes, cucumbers, beans, melons, squash, corn, peppers, eggplant, tomatoes, berries, stone fruits, grapes, herbs and more. It also provides tips on food preservation methods like cold storage, freezing, dehydrating and canning.

Recomendados
Recomendados
Mais conteúdo relacionado
Mais procurados
Mais procurados (20)
Semelhante a Grow Your Own, Nevada! Fall 2011: Harvesting, Preserving and Winterizing
Semelhante a Grow Your Own, Nevada! Fall 2011: Harvesting, Preserving and Winterizing (20)
Mais de University of Nevada Cooperative Extension
Mais de University of Nevada Cooperative Extension (20)
Grow Your Own, Nevada! Fall 2011: Harvesting, Preserving and Winterizing
- 2. Helpful links and resources Getting Started with a Vegetable Garden www.unce.unr.edu/publications/files /ho/2010/fs1015.pdf Searching for Fact Sheets? www.extension.org www.growyourownnevada.com
- 3. Onions Garlic •The ideal onion bulb is 2 to 4 • Harvest when the leaves lose •inches in diameter. color and the tops begin to fall •Pull all onions when the tops fall over. over. •Let the harvested onions dry for a day or two with the tops on; then clip 1 inch above bulb before storing them in a cool, dry place. •Harvest green onions when they are 6 to 8 inches tall.
- 4. Peas Spinach • If the peas will be shelled, • Harvested when the large harvest the pods when they are leaves are 4 to 6 inches long. shiny green and fully developed. • Pull the larger, whole plants or • Overly mature peas are of poor harvest the older leaves and quality. allow new growth to develop. • For the edible podded varieties (such as snow and Chinese peas), harvest when the pods are fully developed (about 3 inches) and before the seeds are more than half developed.
- 5. Greens - Swiss Chard Rhubarb • There are many kinds of • Only the long, thick leaf petioles, greens, including beet the ―stalks,‖ are edible. Wait until greens, collards, dandelions, kale, the second season, or the third mustard greens, Swiss season if the plants were started chard, turnip greens, and others. from seed, before harvesting. • Break off the outer leaves when • To pick, hold the stalk firmly, pull, they are 6 to 10 inches long and and twist. Using a knife to cut the before they start to yellow. stalks from the plant is not • Avoid wilted or flabby leaves. recommended. • The harvest season for rhubarb lasts until the end of June. Until then, pick as many stalks as you wish.
- 6. Root Crops Jerusalem Radishes artichoke: • Harvest radishes when • Dig the tubers after early they are about 1 inch in fall frosts or in very early diameter. spring before the new growth starts.
- 7. Beets Carrots • Pull early beets when they are • Carrots are ready to be about 2 inches in diameter. If harvested when they are small they are allowed to get much and succulent. larger, they become • Do not let them get over about woody, especially in warm, dry 1 inch in diameter. weather. • Always pull the largest carrots • For late-crop beets, remove all in the row. but about 1½ inches of the tops.
- 8. Potatoes • Mature tubers can be harvested after leaves have dried or when tubers have reached full size. • For Irish potatoes, a good harvest size is 2 to 3 inches in diameter. (individual preference is the rule) • Harvest ―new‖ potatoes at any size, but generally do not dig before they are 1¼ to 1½ inches in diameter. • ―New‖ small potatoes can be harvested about 7-8 weeks after planting. • Let the potatoes dry several hours in garden after digging them.
- 9. Irish Potatoes Cultivar Remarks Kennebec Smooth, oblong white tuber; heavy yields; good quality; high starch. Irish Cobbler Round white tuber; early; well adapted, high starch. Pontiac Round, oblong red tuber; heavy yields; low starch. Superior Early, round white tubers; moderate heat tolerance; low starch. All Blue Deep blue/purple-colored skins and flesh. Retains color after cooking as well. Suitable for all cooking. Mid to late maturity; vigorous plants. Blue flowered; medium starch. Yukon Gold Mid-early variety; oval, medium-large potato with light yellow flesh. Large, upright plants have violet flowers; medium starch. Dark Red Norland Early, stores well. Oval-oblong, smooth red potato with white flesh. Great for early digging. Medium-large purple flowering plants with low starch
- 10. Cucumbers Beans • Harvest them when fruits are • Harvest these beans when the bright, firm, and green and pods are well filled but have before they get too large. not begun to yellow. • A rule of thumb: harvest sweet Beans—snap: pickles at 1½ to 2 inches long; • For maximum tenderness, • harvest dills when they are 3 to harvest snap beans before 4 inches long, bright green, they are fully mature, when the and less crisp. pods are almost full size but • Avoid yellowed cucumbers. before the seeds begin to bulge.
- 11. Melons Winter Squash Muskmelon: Pumpkins: • muskmelon when it is at three • Pick pumpkins when they are full quarters to full slip; full slip or ripe is size, the rind is firm and glossy, and when the stem separates readily the bottom of the fruit (the portion from the fruit under moderate touching the soil) is cream to orange pressure and leaves a circular colored. depression. • Harvest before frost or when rind • The outer rind should not have any resist fingernails scratches. Leave a green color. 2 to 4 inch stem with the fruit. Watermelon: • Harvest watermelon when the fruits Winter Squash are full size and have a dull surface • when the fruits are full size. The rind and a cream-colored ground spot. is firm and glossy and bottom • If it’s a dull sound , similar to tapping (portion touching soil) of fruit is your forehead, it’s not ripe. A hollow cream to orange colored. sound, similar to tapping you chest • Light frost will not damage mature means it’s ripe. fruit. Honeydew: • When it is yellowish to creamy white with a soft, velvety feel. The rind should be slightly soft at the blossom end and have a faint, pleasant odor.
- 12. Summer Squash Corn • Harvest squash when it is 4 • Watch corn for signs of to 6 inches long for yellow ripeness for earliest harvest. crookneck squash, 6 to 8 • Corn silks darken and dry inches long for yellow out as the ears mature. straight neck, and 3 to 4 • As the kernels fill out toward inches in diameter for white the top, the ends become scallop. more rounded instead of pointed. • A glossy color indicates • Pick sweet corn in the milk tenderness. stage, when a milk like juice exudes from the kernels if crushed with a thumbnail.
- 13. Peppers Eggplant • Harvest bell peppers • Harvest eggplants when they are 4 to 5 when the fruits are inches long and have full, well-formed near full size—about lobes. Immature 6 to 8 inches in peppers are pale, diameter—but still soft, pliable, and thin firm and bright in fleshed. color. • Harvest jalapeños when they are 2 to • Older fruits become 2½ inches long. soft, seedy, and dull • Mature peppers turn colored. orange or red; this does not mean that they are hotter.
- 14. Tomatoes • Harvest tomatoes when they are fully colored but still firm. • Harvest red tomatoes for eating fresh, cooking, or canning. • Do not can overripe tomatoes! • If necessary, pick mature green or slightly pink tomatoes and ripen them at room temperature, out of direct sunlight.
- 16. Pip Fruits Apples • Pick ripe apples from the tree by pulling fruit upward Pears and outward while rotating the fruit slightly. • Pears picked when slightly • If picked prematurely, apples immature will ripen with are likely to be better quality than pears sour, tough, small and poorly that are over mature when colored; if picked picked. overripe, they may develop internal breakdown and store • Most mature, ready to ripen poorly. pears will usually detach • a frost will not sweeten or when "tilted" to a horizontal mature apples or other fruit. position from their usual Sugars accumulate with vertical hanging position. bright, warm (not hot) days
- 17. Stone Trees Stone fruits include peaches, plums, cherries, and apricots: all have a hard pit Peach/ Apricot/ Nectarine • As stone fruits ripen, the flesh softens and the skin changes from green to purple, red, orange, or a combination of these colors. You may test for ripeness by applying pressure (the flesh should yield to gentle thumb pressure), but the best way to determine ripeness is to taste the fruit. harvested without the stems attached. • To harvest without hurting the fruit buds for next year’s crop, twist the fruit slightly while pulling. Handle fruit gently to avoid bruising.
- 18. Cherry • Fruit maturity can be determined by color • sweet cherries are hand- harvested leaving the pedicels intact.
- 19. Shrubs Cane Fruit Gooseberry • Raspberries are ready to • Many gardeners pick pick when they easily gooseberries when they separate from the receptacle reach full size, but are not or core. fully ripe. (At this stage, the • Blackberries do not separate fruit are green, tart, and still from the core, so ripeness quite hard.) should be judged by color • Others prefer to allow the and taste. fruit to ripen to a pinkish color • All bramble fruit are and sweeter flavor. extremely perishable & should be harvested frequently.
- 20. Grapes Grapes • Color, size, sweetness, and flavor are the most useful indicators of table grape maturity. • Berry color will change from green to blue, red, or white as the different grape varieties approach maturity. • Color alone should not be the sole basis for harvesting grapes. The berries of many varieties change color long before they are fully ripe.
- 21. Strawberries Currants • Strawberries are • Fully ripe currants are fully ripe when slightly soft, juicy, and uniformly red. Pick develop the the berries with the characteristic color of cap and stem attached to retain the variety. firmness and • Most currant varieties quality. are red at maturity, a • When few are white. harvesting, pinch • Harvest currants by the stem off about picking the fruit clusters 1/4 inch above the from the plant then cap. stripping individual berries from the stem.
- 22. Herbs •The time of day and time of season can affect the quantity of oil present in the leaves of your herbs. The oil present in the leaves can determine the flavor intensity of the herb and its nutritional content or medicinal value. •Harvest your herbs on a dry day, in late morning after the dew has evaporated. •Harvest your herbs before the plants flower (the energy it takes to produce the flowers can reduce the oil content in the leaves and the existence of flowers can slow or stop the further production of leaves). •Remove any flower heads from the plant to ensure it keeps producing as many leaves as possible. •Harvest your herbs on the same day you intend to use them, preferably just a couple of hours beforehand. This preserves their freshness. •For more information on herbs: www.extension.umn.edu/distribution/horticulture/components/M1223.pdf
- 23. Preserving
- 24. Food Safety • Your life depends on it! • Only use fresh, clean food • When canning, know the pH and your altitude • Maintain proper temperatures, avoid the ―danger zone‖ • Label everything with name & date to ensure it is consumed within its
- 25. Cold Storage Refrigerated, 33°to 38° Cold Storage, 39° to 50° • Vegetables: • Squashes, Onions & – All Veggies except Potatoes tomatoes – Must be washed, dried, and cured before storage – Keep a high relative humidity – Onions can be stored in mesh bags • Use crisper drawer • Perforated plastic bags • Apples (store away from – Root Vegetables should other vegetables and have the greens removed fruits as they emit to a ¼‖ and the tap root cut ethylene gas) off – Must be kept humid to prevent shriveling Storing Vegetables at Home - Fact Sheet A1135 http://nchfp.uga.edu/how/store/wisc_vegetables.pdf
- 26. Freezing temperatures 20°- 30° Vegetables • Most should be blanched prior to freezing; blanching is immersing in boiling water then quickly cooling. Time varies with the vegetable • Vacuum sealing, freezer- specific plastic bags and boxes, and glass canning jars best Preserving Food: Freezing Vegetables Complete information on freezing food at home, Pub # FDNS-E-43-5 The University of Georgia Cooperative Extension http://www.fcs.uga.edu/ext/pubs/fdns/FDNS-E-43-05.pdf
- 27. Freezing temperatures 20°- 30° Meats & Dairy • Meats should be repackaged into freezer paper or vacuum sealed if they are purchased in plastic wrapped styrofoam containers • Cheese should be packed in freezer paper or vacuum sealed Feb. 2011
- 28. Dehydrating Meats & Dairy Fruits & Vegetables • Must be temperature • To prevent browning dip controlled. A minimum of fruits in lemon juice. 160° required to ensure • Some fruits need to be safety. blanched before drying
- 29. Canning Water Bath Method Things to know • Know your pH • 4.6 or higher cannot be • Check jars for cracks and water bath canned chips (even new jars) • Steam canning is not • Only use lids once recommended • Use a proven USDA or • Know your altitude University tested recipe • Maintain proper head space • Maintain 1‖ of water above the lid
- 30. Resources National Center for Home Food Preservation www.nchfp.uga.edu Ball / Kerr www.freshpreserving.com Canning Pantry http://www.canningpantry.com/
- 31. winterizing
- 32. Feed Your Soil
- 33. Double Digging 1.Spread a layer of compost and other soil amendments on the surface of the area to be dug. 2.Using a spade or short-handled shovel, remove a trench of soil approximately one foot deep and one foot wide along the narrow end of the bed. 3.Loosen the soil at the bottom of the trench with the shovel or a spading fork. Avoid mixing soil layers as much as possible. 4.Dig a one foot by one foot trench next to your existing one and place the soil removed on top of the loosened soil in your first trench. 5.Repeat steps 3 and 4 along the length of the bed.
- 34. Tips for success Keep Notes from Year to Year
- 35. It’s time to start planning….
- 36. Thank you
Notas do Editor
- The seeds, leaves, flowering tops, bark, and occasionally the roots of the different plants are used for flavoring purposes. Their flavor is due for the most park to a volatile or essential oil contained in small glands in the leaves, seeds, and fruits. The flavor is retained longer if the herbs are harvested at the right time and properly cured and stored. The young tender leaves can be gathered and used fresh at any time during the season, but for winter use they should be harvested when the plants begin to flower, and should be dried rapidly in a well-ventilated, darkened room. If the leaves are at all dusty or gritty, they should be washed in cold water and thoroughly drained before drying. The tender leaf herbs -- basil, costmary, tarragon, lemon balm, and the mints -- which have a high moisture content, must be dried rapidly away from the light if they are to retain their green color. If dried too slowly, they will turn dark or mold. For this reason a well ventilated, darkened room, such as an attic or other dry, airy room, furnishes ideal conditions for curing these herbs in a short time. The less succulent leaf herbs -- sage, rosemary, thyme, and summer savory -- which contain less moisture, can be partially dried in the sun without affecting their color, but too long exposure should be avoided. The seed crops should be harvested when mature or when their color changes from green to brown or gray. A few plants of the annual varieties should be left undisturbed to flower and mature seed for planting each season. Seeds should be thoroughly dried before storing, to prevent loss of viability for planting and to prevent molding or loss of quality. After curing for several days in an airy room, a day or two in the sun before storing will insure safekeeping. As soon as the herb leaves or seeds are dry they should be cleaned by separating them from stems and other foreign matter and packed in suitable containers to prevent loss of the essential oils that give the herbs their delicate flavor. Glass, metal, or cardboard containers that can be closed tightly will preserve the odor and flavor. Glass jars make satisfactory containers, but they must be painted black or stored in a dark room to prevent bleaching of the green leaves by light. Drying. After harvesting, hang herbs in loosely tied bundles in a well-ventilated room. You can also spread the branches on a screen or cheesecloth, or spread herb leaves on flat trays when only the leaves are needed. To keep dust off the herbs, use a cloth or similar protective cover that allows moisture to pass through.It is generally best to dry naturally in a cool, dark room rather than use artificial heat. Experts can use artificial heat, but you may lose flavor and quality by attempting this drying method.
- Beet and Goat Cheese Salad with SpinachInspired by The City Cook6 to 8 small to medium red or golden beets, or a variety of both4 cups baby spinach, washed and dried1 small red onion, halved and thinly sliced2/3 cup crumbled goat cheese1/4 cup pine nuts1/4 cup extra virgin olive oil plus 2 tablespoons4 tablespoons red wine vinegar1 tablespoon freshly squeezed lemon juiceSaltPepperPre-heat oven to 425º F.Scrub the beets and trim off the tops. Do not peel them.Tear off 5 inch portions of aluminum foil for as many beets as you have. If you have some small beets, they can be grouped together. Wrap each beet in their foil and seal well. Place the beet packets on a sheet pan and roast for 45 minutes to 1 hour, or until tender and their skins slide off easily.Radishes differ in shape and color of their roots. In terms of form, there are round radishes, half long (most wanted) or long. They can be white, pale pink, bright red, purplish red, black and white often with a bit more or less important. They also differ according to time of cultivation and harvesting:• Radishes to force: they are early, with small leaves, and cultures for haste (under plastic tunnels) and the first plantings homeless. Radishes are formed quickly and without waiting to be harvested because they become hollow very quickly. There are radishes to force long, long, half round, red, bright red with a white tip more often.• Radishes of every month they are grown in the ground and are likely, as the name implies, to be sown for a long period from mid-March to late September. They are round radishes and a half-length, pink, red, bright red with a white tip more often.• The radish radishes: radishes as all the months, it is possible to grow them over a long period. Their culture time is longer and the crops begin 6-8 weeks after sowing. These radish long, narrow and pointed. They have a soft flesh with a sweet flavor. They do not become empty quickly.• Radishes summer and autumn varieties are sown in the summer, from June to August. These are large radish, root at long or round, pink, red, bright red, white. They have a soft flesh with a taste and do not become empty quickly. They are delicious grated and eaten in salads.• The winter radish: their root is usually long and cylindrical, sometimes round, black or purple. Their flesh is firm, more or less pungent flavor, and they consume sliced. Sown in summer, they are harvested from November. It is possible to keep them in the cellar to keep them all winter.Soil and exposure> Radishes like:• The sunny, but they accept partial shade.• Soils light and fresh.• The regular watering during dry and hot.• Soils rich in humus.> Radishes do not like:• The pebbles or soil too compact that hinder root development.• Drought makes radishes hollow quills.Sowing and plantingPeriods of seedlings vary depending on the type of radish. They start as early as mid-February and protection force for radish. They continue until September to March with radishes every month from June to August for summer radishes, autumn and winter. In October, it is possible to sow radishes forcing under plastic tunnels.> Spacing2 to 3 cm between plants15 cm for winter radish• Avoid planting too thick, otherwise the radishes will form easily. After sowing, the soil should be well compacted. Then, it is useful to cover the seed with a thin layer of soil. The round varieties should be planted close to the surface, half-long varieties deeper and long (1.5 to 3 cm).• For regular harvests and quality, we must sow small amounts several times, every 2 to 3 weeks for example and clear after emergence.• The radishes are grown in forcing under plastic tunnels or in the ground. They are planted on the fly with harvest beginning 4-6 weeks later.• Radishes of all months, the radishes turnips, radishes, summer and fall are sown on the fly in wide rows or rows spaced 10 to 20 cm.For radish every month, the culture time from 4 to 6 weeks. It is longer by about 2 weeks for radishes turnips and radishes summer and fall (6-8 weeks).• The winter radishes are sown in rows 25 to 30 cm. It is then necessary to clarify the culture by simply leaving a radish on the line every 15 cm.Crop managementRadishes are very easy to grow. After emergence, it should clear up the plants to facilitate the development of radish. Then you have to constantly keep the soil cool by frequent light watering but especially in summer. In this way, radishes become slower hollow quills.Crops should be regular when the radishes are formed. Do not delay not to give them time to become hollow. For regular consumption of crisp radish and tasty, it is necessary to stagger plantings every 2 to 3 weeks.EnemiesBecause of the short duration between sowing and harvesting, there is no treatment to predict. The regular watering can prevent attacks by beetles that devour the leaves of radish.
- In-Soil Growing Methods:The Double Digging ApproachThis method of creating planting beds is similar to raised beds in some ways. In this approach, the soil is deeply worked not with a plow, rototiller or harrows, but with shovel and/or pitchfork (but be sure to check out our Update below). The approach works best when combined with planting beds as opposed to single-row or wide block plantings.The double-dug method is aptly named because the simplest technique is to dig down two spade or shovel blade depths. The first spade depth is actually lifted and removed from that section of the planting bed (and returned later either into the previous section, or at the end of the bed). Then once that first spade depth worth of soil has been lifted, a second spade depth (or pitchfork depth) is worked loose to allow extremely deep root penetrations. Advantages:The advantages of this approach are:1) a tremendous amount of air is mixed into the soil when digging and moving the various blocks of soil. If the planting beds are not subsequently walked on, that extremely loose soil stays well aerated throughout the growing season. Plant roots, soil organisms and water also have an easier time moving through the soil for better nutrient availability.2) Various slow-release soil amendments can be introduced when the bed is dug, instead of merely spread on top or side-dressed alongside the roots. This thorough mixing thereby brings these otherwise slow-to-sink-in materials directly into the root zone.3) this method almost invariably also raises the planting bed, resulting in all the same benefits as those listed under the Raised Beds page. But in this instance, the depth of that fine soil goes deeply down below grade, instead of merely resting on top of ground level.4) This approach creates the finest seedbed I've ever had the pleasure of working with, bar none. I've never approached this fine and uniform a seedbed consistency with any other manual or mechanical cultivation method. It's a pure joy to work with.5) When beds are repeatedly double-dug, they become easier to work over time. Reportedly, soils which have been double-dug for many years get to a point where they don't need to be dug anymore. We're not there yet.6) Last but not least, the double-digging method can produce dramatic increases in per-area crop yields. This is due to several factors:* The double-digging provides such easy root growth and aeration that plants can be grown much closer together without competition* As in other forms of raised bed gardening or farming, the plants are concentrated in one area instead of having aisles or walkways between each row.* The raised bed surface provides slightly more planting area than the flat grade surface would provide. While per-bed area may only be slightly larger than a flat bed, add up all the beds' additional area and it could add up to another bed worth of growing area.* Super-close plantings dramatically reduce weed competition for water, light and nutrients. All the resources in the environment are then available to the desired crops.Disadvantages:Despite the many advantages of this method, there are some potentially serious drawbacks:1) this method can be fairly strenuous to build. If you have 100sqft of planting bed to prep, that's a half-day of solid work but it's do-able. If you have 10,000 sqft of planting area to prep, you either need to bribe some friends, hire some help, or start digging your beds in autumn (which isn't a bad idea in and of itself). But you'd never be able to prep that much ground by yourself in springtime with shovel and fork, and still get anything else done.2) There are soil scientists, organic growers and traditional gardeners who would all protest the mixing of various soil layers. This method does not seem to create the dreaded rototiller hardpan below the dug area, but mixing those soil laters is a no-no according to these folks. I honestly don't know how big a problem that is. It may depend on the soils you're working with. We have never see problems with mixing those layers here but that could just be our own individual site characteristics. 3) If you have shallow soils, ie 24" deep or less between surface and bedrock, water table, clay or some other undesirable layer, you may be better served to build the soil up rather than dig all the way down to that barrier. Large stones and boulders at those lower depths can also create real headaches, either to move or to work around. Shallow tillage could avoid those obstacles entirely. When we first got started, we used double-digging almost excusively because we liked the seedbed so much. And we only had a relatively small area to prep. But as we have grown in size of tilled area, we have sadly waved adieu to this method. Since I generally work the ground by myself, it simply became too labor-intensive to prep all our beds in this manner. But I cherish the double-dug beds that we still use because they are always the first to warm up, the easiest to work and yield the happiest plants. I continue to revisit the idea of how to somehow double-dig more beds so as to enjoy those benefits. The only solution I've come up with is to work the ground in autumn as I have the time, and rotate through the beds such that I don't double-dig them all every year, but I try to double-dig each bed at least once every few years. That's not ideal, but it does provide at least a measure of all the method's many benefits without quite as steep a labor cost.UPDATE: The Broadfork for double-diggingWe have recently become aware of a tool called a broadfork that may allow us to continue using this planting method, without the fatigue we've experienced using shovel and fork. The broadfork is a tool which has been used in a variety of cultures around the world to deeply dig the soil in a manner roughly consistent with the double-digging method described above. The main advantage with the broadfork is that instead of using shoulder and back muscles to dig, lift and mix the soil, you actually stand on the tool and rock backwards, such that your entire relaxed body weight moves the soil instead. The fact that these tools came into existence repeatedly around the world tells me that our concerns about this planting method have been experienced, and answered, by others throughout history. Information like that tends to make me stop and take notice.Another concern we had was that such a tool would be even more prone to breakage, if a person's entire body weight was lifting the tines. Yet there may be an answer to that as well. A professional blacksmith by trade, and gardener by hobby, developed a broadfork with replaceable tines in case one of them broke during use. This particular model was also built for extensive use. The inventor of this particular broadfork used traditional designs, but made it robust enough, and comfortable enough, to use throughout the growing seasons, for many years. Such a robust, yet user-friendly tool, could make the difference for us as we explore ways to continue using this method even as our growing area increases. We'll keep you posted as we test this possibility. To read more about this broadfork, visit Gulland Forge Broadforks.