SlideShare uma empresa Scribd logo
1 de 9
Baixar para ler offline
Owner’s Manual and Assembly Instructions


  “Vignola” Gazebo
                       Item Num: PC-10811
         Dimensions: 15’L x 15’W x 10.5’H
***Important***
Use the parts list above and check the contents of your box for any missing parts.
Do NOT return to place of purchase. Call the toll free number below for customer
                         service and warranty information:
                                 888-474-2770
                                     Page 2
Assembly Instructions
Thank you for choosing a Pacific Currents Product! Please make sure you have
 carefully read and understood these assembly instructions before you begin.

                                      Prepare the work area
       First, choose and measure the final location where you would like to place the product
       so that it will fit a 15 x 15’ square with 11’ height clearance. Then, choose an assembly
       area as close as possible to this final location and large enough to layout and pre-as-
       semble all the parts for this Gazebo.

       Check all the parts with the parts list on the previous page and make sure that none are
       missing. If you discover any missing parts, please visit www.pacificcurrentsinc.com or call
       888-474-2770. Save your sales receipt as you will need this to obtain replacement parts.

       It is highly recommended that you cover the work surface with a tarp or other fabric to
       prevent scratches to the finish during assembly.

       You will need these additional tools: 10mm socket, 10mm ratchet, combination wrench,
       and a ladder.

  Once a unit has been pre-assembled in each step, please set it aside until further instructions.

                                          IMPORTANT
  Do not completely tighten any bolts or nuts until the last step prior to attaching the canvas top.


 Step 1 - Assembling the Four “A” Panel Frames                    (see fig. 1)
           Parts you will need:
                                                              Figure 1:
           4 Decorative Panels (Part A4)
           4 Panel Frame Bars (Part A5)
           4 Panel Frame Columns (Part A2)
           4 Panel Frame Columns (Part A1)
           16 60 mm Bolt assemblies (Part X)
           8 20 mm Bolt and Washer (Part S)

  Gather the required parts for this step. Fasten one
  Frame Column (A1 or A2) at a time to the Decorative
  Panel (A4) with the bolts and nuts provided (X). Do
  not fully tighten the bolts at this time. Finally, attach
  the top Frame Bar and secure loosely with the bolts
  (S) at both ends. Do not put on the plastic caps at
  this time. Repeat above for remaining 3 panels.

                                                Page 3
Step 2 - Assembling the Four “B” Panel Frames (fig. 2)
                                                          Parts you will need:
     Figure 2:
                                                          4 Decorative Panels (Part A4)
                                                          4 Panel Frame Columns (Part A1)
                                                          4 Panel Frame Columns (Part A3)
                                                          4 Panel Frame Bars (Part A5)
                                                          8 20 mm Bolt and Washer (Part S)
                                                          8 40 mm Bolt Assemblies (Part U)
                                                          8 60 mm Bolt Assemblies (Part X)

                                                      Gather the required parts for this step. Fas-
                                                      ten one Frame Column (A1 or A3) at a time
                                                      to the Decorative Panel (A4) with the bolts
                                                      and nuts provided (U and X). Do not fully
                                                      tighten the bolts at this time. Finally, attach
                                                      the top Frame Bar and secure loosely with
                                                      the bolts (S) at both ends. Repeat above for
                                                      remaining 3 panels.

Step 3 - Assembling Frame Panels to Form Gazebo Leg                      (fig. 3, 4)
      Parts you will need:

      4 Panel “A” (Step 1)                               Figure 3:
      4 Panel “B” (Step 2)
      8 52 mm Bolt Assemblies (Part L)

      Gather the 8 panels you’ve assembled in
      Steps 1 and 2. Take one panel frame A from
      Step 1 and one panel frame B from Step 2
      and align the holes in the frames as show in
      fig. 3. Secure using bolts, washers, and nuts
      (L) but do not fully tighten. Repeat for the
      remaining 3 sets of A and B panels frames.
      You may now move the four gazebo “legs” to
      their final position as shown in fig. 4.

                 Figure 4:


                                           Page 4
Step 4 - Assemble the Roof Frame Crossbars (fig. 5)                              Figure 5:

 Parts you will need:

 8 Roof Crossbars (Part H)
 4 Crossbar Sleeve Connectors (Part E)
 16 32 mm Bolt Assemblies (Part R)

Join two Roof Crossbars (H) with a crossbar
sleeve connector (E) and loosely secure with
32 mm Bolt, washers, and nut (R). Repeat
above for remaining 3 sides of gazebo. Set
assembled parts aside until further instruc-
tions.

Step 5- Attaching Roof Crossbars to Gazebo Frame (fig. 6)
                                               Gather the required parts for this step. Place the
Parts you will need:                           assembled crossbar (Step 4) over the two gazebo
                                               legs (Step 3). Slide one corner connector (C) over
4 Assembled Gazebo Legs (Step 3)               the end and line up the pre-drilled holes. Loosely
4 Assembled Roof Frame Cross Bars (Step 4)     tighten with bolt, washers, and nut (L). Slide the
4 Corner Connectors (Part C)                   Roof Frame Connector (G2) over the holes in the
4 Roof Frame Connectors (Part G1)              crossbar and panel frame. Loosely fasten with
4 Roof Frame Connectors (Part G2)              bolt/washer/nut assemblies (L and R). Next,
8 32mm Bolt Assemblies (Part R)                attach G1 and the other corner connector in the
16 52mm Bolt Assemblies (Part L)               same fashion. Repeat the above for the other 3
                                               sides.

                 Figure 6:


                                           Page 5
Step 6 - Assemble the Roof Frame Corner Bars (fig. 7)
Parts you will need for this step:
                                                                                           Figure 7:
4 Roof Frame Corner Bars (Part J)
4 Roof Frame Corner Bars (Part K)
4 Roof Frame Corner Bars (Part P1)
4 Roof Frame Corner Bars (Part P2)
32 32 mm Bolt Assemblies (Part R)
8 Corner Bar Sleeve Connectors (Part Z)

Insert Roof Frame Corner Bar (J) into end of Roof
Frame Corner Bar (K) and line up the pre-drilled
holes. Add the Corner Bar Sleeve Connector and
loosely fasten using 4 sets of Bolts/Washers/Nuts
(R). Repeat for remaining 3 sets of Roof Frame
Corner Bars.

Insert Roof Vent Support Bars (P1) into end of Roof Vent Support Bars (P2) and line up the pre-drilled
holes. Join P1 and P2 with a corner bar sleeve connector (Part Z) and loosely secure with 4 sets of
Bolts/Washers/Nuts/ (Part R). Repeat the above for remaining 3 sets of Roof Frame Corner Bars.

Step 7 - Assemble the Roof Frame (fig. 8, 9)                                             Figure 8:
Parts you will need for this step:

1 Top Connector (Part D)
4 Assembled Roof Frame Corner Bars (Step 6)
8 Roof Vent Support Bars (Part P)
12 32 mm Bolt Assemblies (Part R)
Gather the parts needed for this step. Insert one
Frame Corner Bar (Step 6) into the Corner Connec-
tor (C) and the other end into the Top Connector (D).                  Step 6 (P1+P2)
Loosely fasten with Bolts/Washer/Nuts (R)
 as shown in Fig.8 and 9.

Attach a Roof Vent Support Bar (P)
in the same manner. Repeat for all
                                                                                   Figure 9:
Roof Vent Support Bars and Corner
Bars until the Roof Frame is As-
sembled. You May need to move
the gazebo legs to allow for proper
fit.


                                                Page 6
Step 8 - Attach Vent Support Bars to Gazebo Roof (fig. 10)
                                                                                      Figure 10:
Parts you will need for this step:

4 Vent Opening Support Bars (part I1)
4 Vent Opening Support Bars (part I2)
4 Vent Opening Support Bars (part I3)
16 32mm Bolt Assemblies (part R)
1 Assembled Gazebo Roof Top (Step 7)
8 32mm Bolt Assemblies (Part R)
16 25mm Bolt/Washer/Nut/Plastic Cap
(part Y)

Connect one Roof Vent Support Bar (I1) to the Roof Frame (Step 7) and loosely fasten using one
Bolt/Washer/Nut assembly (R) for each end. Repeat for the other Roof Vent Support Bar (I2). Use
I3 to connect I1 and I2 with Bolt/Washer/Nut assembly (R) provided. Repeat for remaining 3 vents.


Your gazebo should now resemble the image below. Please check to make sure
                  all parts are in their respective locations.


Step 9 - Tightening all Nuts and Bolts
  You may tighten all bolts and nuts in the gazebo frame at this time. Tighten just enough so that the
  parts are no longer loose. Caution! Do not overtighten as this may bend or damage the steel
  frame. Plastic end caps are also provided to protect the nuts at each connection. You may attach
  those at this time.
Step 10 - Attach Canvas Top and/or Bug Screen
  Carefully pull the canvas top over the gazebo roof frame and slide the vent bars into each respec-
  tive vent opening in the canvas. The fit will be very snug. You may need to reposition the gazebo
  legs slightly in order to pull the canvas top into position. Use the velcro straps to secure the can-
  vas top to the gazebo frame.

  If you purchased a bug screen, you may attach it now using the velcro straps provided. Also, you
  may use Part F to help you secure the gazebo to the ground. The spikes are not intended to
  permanently mount the gazebo to any surface.
                                                Page 7
FAQ (Frequently Asked Questions)

Q: Will the gazebo frame ever rust?

A: The powder coated finish of the metal frame prevents rusting so long as the metal itself is not
exposed. Exposure of the metal may occur due to accidental scratches or long-term wear and tear.
Occasional touch ups to affected areas with weatherproof paint will ensure many years of continued
enjoyment from your gazebo.


Q: Does the gazebo include the fabric top?

A: Yes! All our gazebos are sold with a weather and UV light resistant polyester fabric top.


Q: Will the gazebo move or blow away in strong winds?

A: Several features of our design were considered to allow the gazebo to remain very stable across
a wide range of weather conditions. The four vents in the canopy top help to allow low to medium
winds to pass through the covering.

However, if you install the gazebo in an area where strong winds are persistent, it is advisable to take
further steps to fasten the gazebo to the ground. If the gazebo is installed over a soft natural surface
(grass or dirt), you may drive metal stakes (included) through the holes located at the bottom of the
panels and into the ground. If the gazebo is installed over a hard surface (wooden decks or concrete
patios) it will be necessary to separately purchase screws or bolts and nuts to affix the frame to your
installation surface. Please visit your local hardware store for more options.

For all customers, we highly recommend that you remove your canopy top in cases of severe
inclement weather such as thunderstorms. Please exercise good judgement.


Q: I like being outdoors, but cannot stay for long because of mosquitoes. Are bug screens
available for my gazebo?

A: Yes! Bug screens for all gazebo models are available separately for purchase as an accessory.


Q: I live in an area that snows in the winter. Should I be concerned about the weight of snow
on my gazebo?

A: You do not have to disassemble the gazebo during winter months. However, to prevent damage
to your gazebo frame from heavy snow loads, remove the canvas top and store it in a dry location
until spring.

                       Your satisfaction is very important to us. Please contact us at
                       info@pacificcurrentsinc.com if you have any questions or visit
                             www.pacificcurrentsinc.com for more information.

                                                 Page 8
Care Instructions:
The polyester top (Canvas Top) can be machine washed using a small amount of detergent. Do not
machine dry or use bleach. Top may also be spray rinsed while attached to Gazebo and lightly scrubbed
with a soft broom. Do not use hard abrasive cleansers to scrub.


1 Year Limited Warranty:
Purchaser assumes all risk in the assembly and use of this unit.


All components carry a one year limited warranty from date of purchase against defects in material and
workmanship arising under normal use. This warranty does not cover normal wear and tear, nor
weathering due to climate and other environmental factors, nor does it cover failure resulting from
accident, misuse, abuse, neglect , mishandling, alteration or modification, failure to maintain, or damage
that is attributed to acts of nature. This warranty does not cover incidental or consequential damages
resulting from use of product, or losses arising out of any breach of this warranty other than the
replacement parts. Fulfillments of this warrant shall only include replacement of parts damaged while
inside original packing materials or a defective allowance with the place of purchase to be arranged at
the discretion of Pacific Currents Inc.


This warranty only extends to the original purchaser. Proof of purchase (such as sales receipt) will
be required before warranty performance is rendered.


Customer Service:
Please contact us should you have any questions concerning assembly, care information, warranty
coverage, and missing or defective parts.

                                          Call Toll Free:
                                          888-474-2770
               Customer Service Contact: Cherree Theisen, CT Sales Associates., Inc.

                                  Email: info@pacificcurrentsinc.com

                                 Website: www.pacificcurrentsinc.com


                        Thank you for choosing a Pacific Currents Inc. product!


                                                 Page 9

Mais conteúdo relacionado

Mais procurados

9. How to install asphalt roofing on a shed
9. How to install asphalt roofing on a shed9. How to install asphalt roofing on a shed
9. How to install asphalt roofing on a shedicreatablesseo
 
4. How to build shed roof rafters
4. How to build shed roof rafters4. How to build shed roof rafters
4. How to build shed roof raftersicreatablesseo
 
8. How to install trim on the storage shed
8. How to install trim on the storage shed8. How to install trim on the storage shed
8. How to install trim on the storage shedicreatablesseo
 
7. How to build shed roof
7. How to build shed roof7. How to build shed roof
7. How to build shed rooficreatablesseo
 
Solar cooker installation
Solar cooker installationSolar cooker installation
Solar cooker installationPrabhat Kumar
 
plano gabinete servidores
plano gabinete servidoresplano gabinete servidores
plano gabinete servidoresAlejandro Jerez
 
CoFold Ultra Sliding Folding Door Gear Installation Instructions
CoFold Ultra Sliding Folding Door Gear Installation InstructionsCoFold Ultra Sliding Folding Door Gear Installation Instructions
CoFold Ultra Sliding Folding Door Gear Installation InstructionsCoastal Joinery Hardware
 
Sonal Gupta , Interior Design
Sonal Gupta , Interior DesignSonal Gupta , Interior Design
Sonal Gupta , Interior Designdezyneecole
 
newtableconcept user manual
newtableconcept user manualnewtableconcept user manual
newtableconcept user manualRenzo Lisei
 
Step by step guide
Step by step guideStep by step guide
Step by step guideel04927567
 
Biltong SA - Centurion - Plan @ Floor Level
Biltong SA - Centurion - Plan @ Floor LevelBiltong SA - Centurion - Plan @ Floor Level
Biltong SA - Centurion - Plan @ Floor LevelTrevain Bechan
 
M3 EG BQ metal frame door
M3 EG BQ metal frame doorM3 EG BQ metal frame door
M3 EG BQ metal frame doorEst
 

Mais procurados (16)

9. How to install asphalt roofing on a shed
9. How to install asphalt roofing on a shed9. How to install asphalt roofing on a shed
9. How to install asphalt roofing on a shed
 
4. How to build shed roof rafters
4. How to build shed roof rafters4. How to build shed roof rafters
4. How to build shed roof rafters
 
8. How to install trim on the storage shed
8. How to install trim on the storage shed8. How to install trim on the storage shed
8. How to install trim on the storage shed
 
7. How to build shed roof
7. How to build shed roof7. How to build shed roof
7. How to build shed roof
 
Design Portfolio
Design PortfolioDesign Portfolio
Design Portfolio
 
gaveteiro
gaveteirogaveteiro
gaveteiro
 
Adega modular
Adega modularAdega modular
Adega modular
 
Solar cooker installation
Solar cooker installationSolar cooker installation
Solar cooker installation
 
plano gabinete servidores
plano gabinete servidoresplano gabinete servidores
plano gabinete servidores
 
Sample Product Reseach
Sample Product ReseachSample Product Reseach
Sample Product Reseach
 
CoFold Ultra Sliding Folding Door Gear Installation Instructions
CoFold Ultra Sliding Folding Door Gear Installation InstructionsCoFold Ultra Sliding Folding Door Gear Installation Instructions
CoFold Ultra Sliding Folding Door Gear Installation Instructions
 
Sonal Gupta , Interior Design
Sonal Gupta , Interior DesignSonal Gupta , Interior Design
Sonal Gupta , Interior Design
 
newtableconcept user manual
newtableconcept user manualnewtableconcept user manual
newtableconcept user manual
 
Step by step guide
Step by step guideStep by step guide
Step by step guide
 
Biltong SA - Centurion - Plan @ Floor Level
Biltong SA - Centurion - Plan @ Floor LevelBiltong SA - Centurion - Plan @ Floor Level
Biltong SA - Centurion - Plan @ Floor Level
 
M3 EG BQ metal frame door
M3 EG BQ metal frame doorM3 EG BQ metal frame door
M3 EG BQ metal frame door
 

Semelhante a Vignola Gazebo Assembly Manual

How to assemble a base blind corner 1 drawer 1 door cabinet
How to assemble a base blind corner 1 drawer 1 door cabinetHow to assemble a base blind corner 1 drawer 1 door cabinet
How to assemble a base blind corner 1 drawer 1 door cabinetDomain CabinetsDirect
 
iMovr Omega Olympus Manual 12 24-15
iMovr Omega Olympus Manual 12 24-15iMovr Omega Olympus Manual 12 24-15
iMovr Omega Olympus Manual 12 24-15iMovR
 
Steel Staircase Manufacturers
Steel Staircase ManufacturersSteel Staircase Manufacturers
Steel Staircase Manufacturerstmpservices01
 
Installation Manual Aluminum
Installation Manual AluminumInstallation Manual Aluminum
Installation Manual Aluminumtmpservices01
 
Installation Manual Aluminum
Installation Manual AluminumInstallation Manual Aluminum
Installation Manual Aluminumtmpservices01
 
Henri Studio Fountains - 2222 instructions11 25
Henri Studio Fountains - 2222 instructions11 25Henri Studio Fountains - 2222 instructions11 25
Henri Studio Fountains - 2222 instructions11 25Brook Kavanugh
 
iMovR Vigor: 3 Leg Kit Installation Manual
iMovR Vigor: 3 Leg Kit Installation ManualiMovR Vigor: 3 Leg Kit Installation Manual
iMovR Vigor: 3 Leg Kit Installation ManualiMovR
 
Veranda Gazebo Assembly Manual
Veranda Gazebo Assembly ManualVeranda Gazebo Assembly Manual
Veranda Gazebo Assembly ManualGiller Doit
 
TMP Services, Inc. has been the largest manufacturer of modular ramps and stairs
TMP Services, Inc. has been the largest manufacturer of modular ramps and stairsTMP Services, Inc. has been the largest manufacturer of modular ramps and stairs
TMP Services, Inc. has been the largest manufacturer of modular ramps and stairstmpservices01
 
Installation Manual: Height Adjustable Table - Three Leg Kit
Installation Manual: Height Adjustable Table - Three Leg KitInstallation Manual: Height Adjustable Table - Three Leg Kit
Installation Manual: Height Adjustable Table - Three Leg KitiMovR
 
thi cong vach ngan ve sinh compact
thi cong vach ngan ve sinh compactthi cong vach ngan ve sinh compact
thi cong vach ngan ve sinh compactTrần Khánh
 
iMovR Xtend Monitor Arm Manual
iMovR Xtend Monitor Arm ManualiMovR Xtend Monitor Arm Manual
iMovR Xtend Monitor Arm ManualiMovR
 
Xtend Dual Screen Crossbar Monitor Arm Assembly Instructions
Xtend Dual Screen Crossbar Monitor Arm Assembly InstructionsXtend Dual Screen Crossbar Monitor Arm Assembly Instructions
Xtend Dual Screen Crossbar Monitor Arm Assembly InstructionsiMovR
 
Technical Instructions (FSAE)
Technical Instructions (FSAE)Technical Instructions (FSAE)
Technical Instructions (FSAE)Michael Walker
 

Semelhante a Vignola Gazebo Assembly Manual (20)

How to assemble a sink base vanity
How to assemble a sink base vanityHow to assemble a sink base vanity
How to assemble a sink base vanity
 
How to Assemble a Sink Base Vanity
How to Assemble a Sink Base Vanity How to Assemble a Sink Base Vanity
How to Assemble a Sink Base Vanity
 
How to assemble a base blind corner 1 drawer 1 door cabinet
How to assemble a base blind corner 1 drawer 1 door cabinetHow to assemble a base blind corner 1 drawer 1 door cabinet
How to assemble a base blind corner 1 drawer 1 door cabinet
 
How To Assemble A Base Trash Can
 How To Assemble A Base Trash Can How To Assemble A Base Trash Can
How To Assemble A Base Trash Can
 
How To Assemble A Base Trash Can
How To Assemble A Base Trash CanHow To Assemble A Base Trash Can
How To Assemble A Base Trash Can
 
iMovr Omega Olympus Manual 12 24-15
iMovr Omega Olympus Manual 12 24-15iMovr Omega Olympus Manual 12 24-15
iMovr Omega Olympus Manual 12 24-15
 
Steel Staircase Manufacturers
Steel Staircase ManufacturersSteel Staircase Manufacturers
Steel Staircase Manufacturers
 
Installation Manual Aluminum
Installation Manual AluminumInstallation Manual Aluminum
Installation Manual Aluminum
 
Installation Manual Aluminum
Installation Manual AluminumInstallation Manual Aluminum
Installation Manual Aluminum
 
Mobile Wire Shelving Installation Instructions
Mobile Wire Shelving Installation InstructionsMobile Wire Shelving Installation Instructions
Mobile Wire Shelving Installation Instructions
 
Henri Studio Fountains - 2222 instructions11 25
Henri Studio Fountains - 2222 instructions11 25Henri Studio Fountains - 2222 instructions11 25
Henri Studio Fountains - 2222 instructions11 25
 
iMovR Vigor: 3 Leg Kit Installation Manual
iMovR Vigor: 3 Leg Kit Installation ManualiMovR Vigor: 3 Leg Kit Installation Manual
iMovR Vigor: 3 Leg Kit Installation Manual
 
Veranda Gazebo Assembly Manual
Veranda Gazebo Assembly ManualVeranda Gazebo Assembly Manual
Veranda Gazebo Assembly Manual
 
TMP Services, Inc. has been the largest manufacturer of modular ramps and stairs
TMP Services, Inc. has been the largest manufacturer of modular ramps and stairsTMP Services, Inc. has been the largest manufacturer of modular ramps and stairs
TMP Services, Inc. has been the largest manufacturer of modular ramps and stairs
 
Installation Manual: Height Adjustable Table - Three Leg Kit
Installation Manual: Height Adjustable Table - Three Leg KitInstallation Manual: Height Adjustable Table - Three Leg Kit
Installation Manual: Height Adjustable Table - Three Leg Kit
 
thi cong vach ngan ve sinh compact
thi cong vach ngan ve sinh compactthi cong vach ngan ve sinh compact
thi cong vach ngan ve sinh compact
 
Cadeira de jardin
Cadeira de jardinCadeira de jardin
Cadeira de jardin
 
iMovR Xtend Monitor Arm Manual
iMovR Xtend Monitor Arm ManualiMovR Xtend Monitor Arm Manual
iMovR Xtend Monitor Arm Manual
 
Xtend Dual Screen Crossbar Monitor Arm Assembly Instructions
Xtend Dual Screen Crossbar Monitor Arm Assembly InstructionsXtend Dual Screen Crossbar Monitor Arm Assembly Instructions
Xtend Dual Screen Crossbar Monitor Arm Assembly Instructions
 
Technical Instructions (FSAE)
Technical Instructions (FSAE)Technical Instructions (FSAE)
Technical Instructions (FSAE)
 

Mais de Giller Doit

Maclaren Strollers.pdf
Maclaren Strollers.pdfMaclaren Strollers.pdf
Maclaren Strollers.pdfGiller Doit
 
Baby Trend Umbrella Stroller.pdf
Baby Trend Umbrella Stroller.pdfBaby Trend Umbrella Stroller.pdf
Baby Trend Umbrella Stroller.pdfGiller Doit
 
Digital Baby Monitor.pdf
Digital Baby Monitor.pdfDigital Baby Monitor.pdf
Digital Baby Monitor.pdfGiller Doit
 
Chicco Car Seat.pdf
Chicco Car Seat.pdfChicco Car Seat.pdf
Chicco Car Seat.pdfGiller Doit
 
Baby Monitor Reviews.pdf
Baby Monitor Reviews.pdfBaby Monitor Reviews.pdf
Baby Monitor Reviews.pdfGiller Doit
 
Fisher Price Baby Monitor.pdf
Fisher Price Baby Monitor.pdfFisher Price Baby Monitor.pdf
Fisher Price Baby Monitor.pdfGiller Doit
 
10x10 Gazebo.pdf
10x10 Gazebo.pdf10x10 Gazebo.pdf
10x10 Gazebo.pdfGiller Doit
 
MTD Lawn Mowers.pdf
MTD Lawn Mowers.pdfMTD Lawn Mowers.pdf
MTD Lawn Mowers.pdfGiller Doit
 
Electric Lawnmowers.pdf
Electric Lawnmowers.pdfElectric Lawnmowers.pdf
Electric Lawnmowers.pdfGiller Doit
 
Electric Lawn Trimmers.pdf
Electric Lawn Trimmers.pdfElectric Lawn Trimmers.pdf
Electric Lawn Trimmers.pdfGiller Doit
 
Cordless Trimmer.pdf
Cordless Trimmer.pdfCordless Trimmer.pdf
Cordless Trimmer.pdfGiller Doit
 
Murray Riding Mower.pdf
Murray Riding Mower.pdfMurray Riding Mower.pdf
Murray Riding Mower.pdfGiller Doit
 
Greenhouse Glass.pdf
Greenhouse Glass.pdfGreenhouse Glass.pdf
Greenhouse Glass.pdfGiller Doit
 
Green House Designs.pdf
Green House Designs.pdfGreen House Designs.pdf
Green House Designs.pdfGiller Doit
 
Modern Outdoor Furniture.pdf
Modern Outdoor Furniture.pdfModern Outdoor Furniture.pdf
Modern Outdoor Furniture.pdfGiller Doit
 
Gazebo Covers Replacement.pdf
Gazebo Covers Replacement.pdfGazebo Covers Replacement.pdf
Gazebo Covers Replacement.pdfGiller Doit
 
Lowes Gazebo.pdf
Lowes Gazebo.pdfLowes Gazebo.pdf
Lowes Gazebo.pdfGiller Doit
 
John Deere Mowers.pdf
John Deere Mowers.pdfJohn Deere Mowers.pdf
John Deere Mowers.pdfGiller Doit
 
Exmark Lawn Mowers.pdf
Exmark Lawn Mowers.pdfExmark Lawn Mowers.pdf
Exmark Lawn Mowers.pdfGiller Doit
 

Mais de Giller Doit (20)

Maclaren Strollers.pdf
Maclaren Strollers.pdfMaclaren Strollers.pdf
Maclaren Strollers.pdf
 
Baby Trend Umbrella Stroller.pdf
Baby Trend Umbrella Stroller.pdfBaby Trend Umbrella Stroller.pdf
Baby Trend Umbrella Stroller.pdf
 
Digital Baby Monitor.pdf
Digital Baby Monitor.pdfDigital Baby Monitor.pdf
Digital Baby Monitor.pdf
 
Chicco Car Seat.pdf
Chicco Car Seat.pdfChicco Car Seat.pdf
Chicco Car Seat.pdf
 
Baby Monitor Reviews.pdf
Baby Monitor Reviews.pdfBaby Monitor Reviews.pdf
Baby Monitor Reviews.pdf
 
Fisher Price Baby Monitor.pdf
Fisher Price Baby Monitor.pdfFisher Price Baby Monitor.pdf
Fisher Price Baby Monitor.pdf
 
10x10 Gazebo.pdf
10x10 Gazebo.pdf10x10 Gazebo.pdf
10x10 Gazebo.pdf
 
MTD Lawn Mowers.pdf
MTD Lawn Mowers.pdfMTD Lawn Mowers.pdf
MTD Lawn Mowers.pdf
 
Electric Lawnmowers.pdf
Electric Lawnmowers.pdfElectric Lawnmowers.pdf
Electric Lawnmowers.pdf
 
Electric Lawn Trimmers.pdf
Electric Lawn Trimmers.pdfElectric Lawn Trimmers.pdf
Electric Lawn Trimmers.pdf
 
Cordless Trimmer.pdf
Cordless Trimmer.pdfCordless Trimmer.pdf
Cordless Trimmer.pdf
 
Murray Riding Mower.pdf
Murray Riding Mower.pdfMurray Riding Mower.pdf
Murray Riding Mower.pdf
 
Greenhouse Glass.pdf
Greenhouse Glass.pdfGreenhouse Glass.pdf
Greenhouse Glass.pdf
 
Green House Designs.pdf
Green House Designs.pdfGreen House Designs.pdf
Green House Designs.pdf
 
Modern Outdoor Furniture.pdf
Modern Outdoor Furniture.pdfModern Outdoor Furniture.pdf
Modern Outdoor Furniture.pdf
 
Cub Cadet.pdf
Cub Cadet.pdfCub Cadet.pdf
Cub Cadet.pdf
 
Gazebo Covers Replacement.pdf
Gazebo Covers Replacement.pdfGazebo Covers Replacement.pdf
Gazebo Covers Replacement.pdf
 
Lowes Gazebo.pdf
Lowes Gazebo.pdfLowes Gazebo.pdf
Lowes Gazebo.pdf
 
John Deere Mowers.pdf
John Deere Mowers.pdfJohn Deere Mowers.pdf
John Deere Mowers.pdf
 
Exmark Lawn Mowers.pdf
Exmark Lawn Mowers.pdfExmark Lawn Mowers.pdf
Exmark Lawn Mowers.pdf
 

Último

Genesis 1:8 || Meditate the Scripture daily verse by verse
Genesis 1:8  ||  Meditate the Scripture daily verse by verseGenesis 1:8  ||  Meditate the Scripture daily verse by verse
Genesis 1:8 || Meditate the Scripture daily verse by versemaricelcanoynuay
 
NoHo First Good News online newsletter May 2024
NoHo First Good News online newsletter May 2024NoHo First Good News online newsletter May 2024
NoHo First Good News online newsletter May 2024NoHo FUMC
 
Lucknow 💋 best call girls in Lucknow ₹7.5k Pick Up & Drop With Cash Payment 8...
Lucknow 💋 best call girls in Lucknow ₹7.5k Pick Up & Drop With Cash Payment 8...Lucknow 💋 best call girls in Lucknow ₹7.5k Pick Up & Drop With Cash Payment 8...
Lucknow 💋 best call girls in Lucknow ₹7.5k Pick Up & Drop With Cash Payment 8...anilsa9823
 
Call Girls in sarojini nagar Delhi 8264348440 ✅ call girls ❤️
Call Girls in sarojini nagar Delhi 8264348440 ✅ call girls ❤️Call Girls in sarojini nagar Delhi 8264348440 ✅ call girls ❤️
Call Girls in sarojini nagar Delhi 8264348440 ✅ call girls ❤️soniya singh
 
Study of the Psalms Chapter 1 verse 2 - wanderean
Study of the Psalms Chapter 1 verse 2 - wandereanStudy of the Psalms Chapter 1 verse 2 - wanderean
Study of the Psalms Chapter 1 verse 2 - wandereanmaricelcanoynuay
 
VIP mohali Call Girl 7001035870 Enjoy Call Girls With Our Escorts
VIP mohali Call Girl 7001035870 Enjoy Call Girls With Our EscortsVIP mohali Call Girl 7001035870 Enjoy Call Girls With Our Escorts
VIP mohali Call Girl 7001035870 Enjoy Call Girls With Our Escortssonatiwari757
 
Lesson 4 - How to Conduct Yourself on a Walk.pptx
Lesson 4 - How to Conduct Yourself on a Walk.pptxLesson 4 - How to Conduct Yourself on a Walk.pptx
Lesson 4 - How to Conduct Yourself on a Walk.pptxCelso Napoleon
 
black magic specialist amil baba pakistan no 1 Black magic contact number rea...
black magic specialist amil baba pakistan no 1 Black magic contact number rea...black magic specialist amil baba pakistan no 1 Black magic contact number rea...
black magic specialist amil baba pakistan no 1 Black magic contact number rea...Black Magic Specialist
 
Surah Yasin and Daily Spiritual Practices
Surah Yasin and Daily Spiritual PracticesSurah Yasin and Daily Spiritual Practices
Surah Yasin and Daily Spiritual Practicesaijazuddin14
 
MEIDUNIDADE COM JESUS PALESTRA ESPIRITA1.pptx
MEIDUNIDADE COM JESUS  PALESTRA ESPIRITA1.pptxMEIDUNIDADE COM JESUS  PALESTRA ESPIRITA1.pptx
MEIDUNIDADE COM JESUS PALESTRA ESPIRITA1.pptxMneasEntidades
 
Pradeep Bhanot - Friend, Philosopher Guide And The Brand By Arjun Jani
Pradeep Bhanot - Friend, Philosopher Guide And The Brand By Arjun JaniPradeep Bhanot - Friend, Philosopher Guide And The Brand By Arjun Jani
Pradeep Bhanot - Friend, Philosopher Guide And The Brand By Arjun JaniPradeep Bhanot
 
+92343-7800299 No.1 Amil baba in Pakistan amil baba in Lahore amil baba in Ka...
+92343-7800299 No.1 Amil baba in Pakistan amil baba in Lahore amil baba in Ka...+92343-7800299 No.1 Amil baba in Pakistan amil baba in Lahore amil baba in Ka...
+92343-7800299 No.1 Amil baba in Pakistan amil baba in Lahore amil baba in Ka...Amil Baba Mangal Maseeh
 
Famous No1 Amil baba in UK/Australia, Canada, Germany Amil baba Kala jadu
Famous No1 Amil baba in UK/Australia, Canada, Germany Amil baba Kala jaduFamous No1 Amil baba in UK/Australia, Canada, Germany Amil baba Kala jadu
Famous No1 Amil baba in UK/Australia, Canada, Germany Amil baba Kala jaduAmil Baba Naveed Bangali
 
Codex Singularity: Search for the Prisca Sapientia
Codex Singularity: Search for the Prisca SapientiaCodex Singularity: Search for the Prisca Sapientia
Codex Singularity: Search for the Prisca Sapientiajfrenchau
 
Part 1 of the Holy Quran- Alif Laam Meem
Part 1 of the Holy Quran- Alif Laam MeemPart 1 of the Holy Quran- Alif Laam Meem
Part 1 of the Holy Quran- Alif Laam MeemAbdullahMohammed282920
 
(NISHA) Call Girls Sanath Nagar ✔️Just Call 7001035870✔️ HI-Fi Hyderabad Esco...
(NISHA) Call Girls Sanath Nagar ✔️Just Call 7001035870✔️ HI-Fi Hyderabad Esco...(NISHA) Call Girls Sanath Nagar ✔️Just Call 7001035870✔️ HI-Fi Hyderabad Esco...
(NISHA) Call Girls Sanath Nagar ✔️Just Call 7001035870✔️ HI-Fi Hyderabad Esco...Sanjna Singh
 
CALL ON ➥8923113531 🔝Call Girls Balaganj Lucknow best sexual service
CALL ON ➥8923113531 🔝Call Girls Balaganj Lucknow best sexual serviceCALL ON ➥8923113531 🔝Call Girls Balaganj Lucknow best sexual service
CALL ON ➥8923113531 🔝Call Girls Balaganj Lucknow best sexual serviceanilsa9823
 
No 1 Amil baba in UK Best Astrologer in UK Famous Vashikaran Specialist in UK
No 1 Amil baba in UK Best Astrologer in UK Famous Vashikaran Specialist in UKNo 1 Amil baba in UK Best Astrologer in UK Famous Vashikaran Specialist in UK
No 1 Amil baba in UK Best Astrologer in UK Famous Vashikaran Specialist in UKAmil Baba Naveed Bangali
 

Último (20)

English - The Story of Ahikar, Grand Vizier of Assyria.pdf
English - The Story of Ahikar, Grand Vizier of Assyria.pdfEnglish - The Story of Ahikar, Grand Vizier of Assyria.pdf
English - The Story of Ahikar, Grand Vizier of Assyria.pdf
 
Call Girls In Nehru Place 📱 9999965857 🤩 Delhi 🫦 HOT AND SEXY VVIP 🍎 SERVICE
Call Girls In Nehru Place 📱  9999965857  🤩 Delhi 🫦 HOT AND SEXY VVIP 🍎 SERVICECall Girls In Nehru Place 📱  9999965857  🤩 Delhi 🫦 HOT AND SEXY VVIP 🍎 SERVICE
Call Girls In Nehru Place 📱 9999965857 🤩 Delhi 🫦 HOT AND SEXY VVIP 🍎 SERVICE
 
Genesis 1:8 || Meditate the Scripture daily verse by verse
Genesis 1:8  ||  Meditate the Scripture daily verse by verseGenesis 1:8  ||  Meditate the Scripture daily verse by verse
Genesis 1:8 || Meditate the Scripture daily verse by verse
 
NoHo First Good News online newsletter May 2024
NoHo First Good News online newsletter May 2024NoHo First Good News online newsletter May 2024
NoHo First Good News online newsletter May 2024
 
Lucknow 💋 best call girls in Lucknow ₹7.5k Pick Up & Drop With Cash Payment 8...
Lucknow 💋 best call girls in Lucknow ₹7.5k Pick Up & Drop With Cash Payment 8...Lucknow 💋 best call girls in Lucknow ₹7.5k Pick Up & Drop With Cash Payment 8...
Lucknow 💋 best call girls in Lucknow ₹7.5k Pick Up & Drop With Cash Payment 8...
 
Call Girls in sarojini nagar Delhi 8264348440 ✅ call girls ❤️
Call Girls in sarojini nagar Delhi 8264348440 ✅ call girls ❤️Call Girls in sarojini nagar Delhi 8264348440 ✅ call girls ❤️
Call Girls in sarojini nagar Delhi 8264348440 ✅ call girls ❤️
 
Study of the Psalms Chapter 1 verse 2 - wanderean
Study of the Psalms Chapter 1 verse 2 - wandereanStudy of the Psalms Chapter 1 verse 2 - wanderean
Study of the Psalms Chapter 1 verse 2 - wanderean
 
VIP mohali Call Girl 7001035870 Enjoy Call Girls With Our Escorts
VIP mohali Call Girl 7001035870 Enjoy Call Girls With Our EscortsVIP mohali Call Girl 7001035870 Enjoy Call Girls With Our Escorts
VIP mohali Call Girl 7001035870 Enjoy Call Girls With Our Escorts
 
Lesson 4 - How to Conduct Yourself on a Walk.pptx
Lesson 4 - How to Conduct Yourself on a Walk.pptxLesson 4 - How to Conduct Yourself on a Walk.pptx
Lesson 4 - How to Conduct Yourself on a Walk.pptx
 
black magic specialist amil baba pakistan no 1 Black magic contact number rea...
black magic specialist amil baba pakistan no 1 Black magic contact number rea...black magic specialist amil baba pakistan no 1 Black magic contact number rea...
black magic specialist amil baba pakistan no 1 Black magic contact number rea...
 
Surah Yasin and Daily Spiritual Practices
Surah Yasin and Daily Spiritual PracticesSurah Yasin and Daily Spiritual Practices
Surah Yasin and Daily Spiritual Practices
 
MEIDUNIDADE COM JESUS PALESTRA ESPIRITA1.pptx
MEIDUNIDADE COM JESUS  PALESTRA ESPIRITA1.pptxMEIDUNIDADE COM JESUS  PALESTRA ESPIRITA1.pptx
MEIDUNIDADE COM JESUS PALESTRA ESPIRITA1.pptx
 
Pradeep Bhanot - Friend, Philosopher Guide And The Brand By Arjun Jani
Pradeep Bhanot - Friend, Philosopher Guide And The Brand By Arjun JaniPradeep Bhanot - Friend, Philosopher Guide And The Brand By Arjun Jani
Pradeep Bhanot - Friend, Philosopher Guide And The Brand By Arjun Jani
 
+92343-7800299 No.1 Amil baba in Pakistan amil baba in Lahore amil baba in Ka...
+92343-7800299 No.1 Amil baba in Pakistan amil baba in Lahore amil baba in Ka...+92343-7800299 No.1 Amil baba in Pakistan amil baba in Lahore amil baba in Ka...
+92343-7800299 No.1 Amil baba in Pakistan amil baba in Lahore amil baba in Ka...
 
Famous No1 Amil baba in UK/Australia, Canada, Germany Amil baba Kala jadu
Famous No1 Amil baba in UK/Australia, Canada, Germany Amil baba Kala jaduFamous No1 Amil baba in UK/Australia, Canada, Germany Amil baba Kala jadu
Famous No1 Amil baba in UK/Australia, Canada, Germany Amil baba Kala jadu
 
Codex Singularity: Search for the Prisca Sapientia
Codex Singularity: Search for the Prisca SapientiaCodex Singularity: Search for the Prisca Sapientia
Codex Singularity: Search for the Prisca Sapientia
 
Part 1 of the Holy Quran- Alif Laam Meem
Part 1 of the Holy Quran- Alif Laam MeemPart 1 of the Holy Quran- Alif Laam Meem
Part 1 of the Holy Quran- Alif Laam Meem
 
(NISHA) Call Girls Sanath Nagar ✔️Just Call 7001035870✔️ HI-Fi Hyderabad Esco...
(NISHA) Call Girls Sanath Nagar ✔️Just Call 7001035870✔️ HI-Fi Hyderabad Esco...(NISHA) Call Girls Sanath Nagar ✔️Just Call 7001035870✔️ HI-Fi Hyderabad Esco...
(NISHA) Call Girls Sanath Nagar ✔️Just Call 7001035870✔️ HI-Fi Hyderabad Esco...
 
CALL ON ➥8923113531 🔝Call Girls Balaganj Lucknow best sexual service
CALL ON ➥8923113531 🔝Call Girls Balaganj Lucknow best sexual serviceCALL ON ➥8923113531 🔝Call Girls Balaganj Lucknow best sexual service
CALL ON ➥8923113531 🔝Call Girls Balaganj Lucknow best sexual service
 
No 1 Amil baba in UK Best Astrologer in UK Famous Vashikaran Specialist in UK
No 1 Amil baba in UK Best Astrologer in UK Famous Vashikaran Specialist in UKNo 1 Amil baba in UK Best Astrologer in UK Famous Vashikaran Specialist in UK
No 1 Amil baba in UK Best Astrologer in UK Famous Vashikaran Specialist in UK
 

Vignola Gazebo Assembly Manual

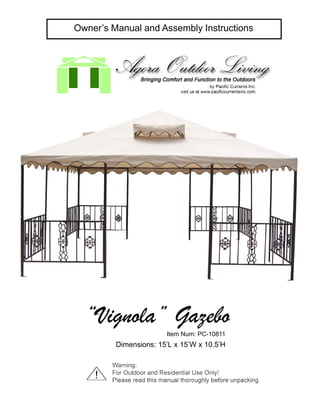
  • 1. Owner’s Manual and Assembly Instructions “Vignola” Gazebo Item Num: PC-10811 Dimensions: 15’L x 15’W x 10.5’H
  • 2. ***Important*** Use the parts list above and check the contents of your box for any missing parts. Do NOT return to place of purchase. Call the toll free number below for customer service and warranty information: 888-474-2770 Page 2
  • 3. Assembly Instructions Thank you for choosing a Pacific Currents Product! Please make sure you have carefully read and understood these assembly instructions before you begin. Prepare the work area First, choose and measure the final location where you would like to place the product so that it will fit a 15 x 15’ square with 11’ height clearance. Then, choose an assembly area as close as possible to this final location and large enough to layout and pre-as- semble all the parts for this Gazebo. Check all the parts with the parts list on the previous page and make sure that none are missing. If you discover any missing parts, please visit www.pacificcurrentsinc.com or call 888-474-2770. Save your sales receipt as you will need this to obtain replacement parts. It is highly recommended that you cover the work surface with a tarp or other fabric to prevent scratches to the finish during assembly. You will need these additional tools: 10mm socket, 10mm ratchet, combination wrench, and a ladder. Once a unit has been pre-assembled in each step, please set it aside until further instructions. IMPORTANT Do not completely tighten any bolts or nuts until the last step prior to attaching the canvas top. Step 1 - Assembling the Four “A” Panel Frames (see fig. 1) Parts you will need: Figure 1: 4 Decorative Panels (Part A4) 4 Panel Frame Bars (Part A5) 4 Panel Frame Columns (Part A2) 4 Panel Frame Columns (Part A1) 16 60 mm Bolt assemblies (Part X) 8 20 mm Bolt and Washer (Part S) Gather the required parts for this step. Fasten one Frame Column (A1 or A2) at a time to the Decorative Panel (A4) with the bolts and nuts provided (X). Do not fully tighten the bolts at this time. Finally, attach the top Frame Bar and secure loosely with the bolts (S) at both ends. Do not put on the plastic caps at this time. Repeat above for remaining 3 panels. Page 3
  • 4. Step 2 - Assembling the Four “B” Panel Frames (fig. 2) Parts you will need: Figure 2: 4 Decorative Panels (Part A4) 4 Panel Frame Columns (Part A1) 4 Panel Frame Columns (Part A3) 4 Panel Frame Bars (Part A5) 8 20 mm Bolt and Washer (Part S) 8 40 mm Bolt Assemblies (Part U) 8 60 mm Bolt Assemblies (Part X) Gather the required parts for this step. Fas- ten one Frame Column (A1 or A3) at a time to the Decorative Panel (A4) with the bolts and nuts provided (U and X). Do not fully tighten the bolts at this time. Finally, attach the top Frame Bar and secure loosely with the bolts (S) at both ends. Repeat above for remaining 3 panels. Step 3 - Assembling Frame Panels to Form Gazebo Leg (fig. 3, 4) Parts you will need: 4 Panel “A” (Step 1) Figure 3: 4 Panel “B” (Step 2) 8 52 mm Bolt Assemblies (Part L) Gather the 8 panels you’ve assembled in Steps 1 and 2. Take one panel frame A from Step 1 and one panel frame B from Step 2 and align the holes in the frames as show in fig. 3. Secure using bolts, washers, and nuts (L) but do not fully tighten. Repeat for the remaining 3 sets of A and B panels frames. You may now move the four gazebo “legs” to their final position as shown in fig. 4. Figure 4: Page 4
  • 5. Step 4 - Assemble the Roof Frame Crossbars (fig. 5) Figure 5: Parts you will need: 8 Roof Crossbars (Part H) 4 Crossbar Sleeve Connectors (Part E) 16 32 mm Bolt Assemblies (Part R) Join two Roof Crossbars (H) with a crossbar sleeve connector (E) and loosely secure with 32 mm Bolt, washers, and nut (R). Repeat above for remaining 3 sides of gazebo. Set assembled parts aside until further instruc- tions. Step 5- Attaching Roof Crossbars to Gazebo Frame (fig. 6) Gather the required parts for this step. Place the Parts you will need: assembled crossbar (Step 4) over the two gazebo legs (Step 3). Slide one corner connector (C) over 4 Assembled Gazebo Legs (Step 3) the end and line up the pre-drilled holes. Loosely 4 Assembled Roof Frame Cross Bars (Step 4) tighten with bolt, washers, and nut (L). Slide the 4 Corner Connectors (Part C) Roof Frame Connector (G2) over the holes in the 4 Roof Frame Connectors (Part G1) crossbar and panel frame. Loosely fasten with 4 Roof Frame Connectors (Part G2) bolt/washer/nut assemblies (L and R). Next, 8 32mm Bolt Assemblies (Part R) attach G1 and the other corner connector in the 16 52mm Bolt Assemblies (Part L) same fashion. Repeat the above for the other 3 sides. Figure 6: Page 5
  • 6. Step 6 - Assemble the Roof Frame Corner Bars (fig. 7) Parts you will need for this step: Figure 7: 4 Roof Frame Corner Bars (Part J) 4 Roof Frame Corner Bars (Part K) 4 Roof Frame Corner Bars (Part P1) 4 Roof Frame Corner Bars (Part P2) 32 32 mm Bolt Assemblies (Part R) 8 Corner Bar Sleeve Connectors (Part Z) Insert Roof Frame Corner Bar (J) into end of Roof Frame Corner Bar (K) and line up the pre-drilled holes. Add the Corner Bar Sleeve Connector and loosely fasten using 4 sets of Bolts/Washers/Nuts (R). Repeat for remaining 3 sets of Roof Frame Corner Bars. Insert Roof Vent Support Bars (P1) into end of Roof Vent Support Bars (P2) and line up the pre-drilled holes. Join P1 and P2 with a corner bar sleeve connector (Part Z) and loosely secure with 4 sets of Bolts/Washers/Nuts/ (Part R). Repeat the above for remaining 3 sets of Roof Frame Corner Bars. Step 7 - Assemble the Roof Frame (fig. 8, 9) Figure 8: Parts you will need for this step: 1 Top Connector (Part D) 4 Assembled Roof Frame Corner Bars (Step 6) 8 Roof Vent Support Bars (Part P) 12 32 mm Bolt Assemblies (Part R) Gather the parts needed for this step. Insert one Frame Corner Bar (Step 6) into the Corner Connec- tor (C) and the other end into the Top Connector (D). Step 6 (P1+P2) Loosely fasten with Bolts/Washer/Nuts (R) as shown in Fig.8 and 9. Attach a Roof Vent Support Bar (P) in the same manner. Repeat for all Figure 9: Roof Vent Support Bars and Corner Bars until the Roof Frame is As- sembled. You May need to move the gazebo legs to allow for proper fit. Page 6
  • 7. Step 8 - Attach Vent Support Bars to Gazebo Roof (fig. 10) Figure 10: Parts you will need for this step: 4 Vent Opening Support Bars (part I1) 4 Vent Opening Support Bars (part I2) 4 Vent Opening Support Bars (part I3) 16 32mm Bolt Assemblies (part R) 1 Assembled Gazebo Roof Top (Step 7) 8 32mm Bolt Assemblies (Part R) 16 25mm Bolt/Washer/Nut/Plastic Cap (part Y) Connect one Roof Vent Support Bar (I1) to the Roof Frame (Step 7) and loosely fasten using one Bolt/Washer/Nut assembly (R) for each end. Repeat for the other Roof Vent Support Bar (I2). Use I3 to connect I1 and I2 with Bolt/Washer/Nut assembly (R) provided. Repeat for remaining 3 vents. Your gazebo should now resemble the image below. Please check to make sure all parts are in their respective locations. Step 9 - Tightening all Nuts and Bolts You may tighten all bolts and nuts in the gazebo frame at this time. Tighten just enough so that the parts are no longer loose. Caution! Do not overtighten as this may bend or damage the steel frame. Plastic end caps are also provided to protect the nuts at each connection. You may attach those at this time. Step 10 - Attach Canvas Top and/or Bug Screen Carefully pull the canvas top over the gazebo roof frame and slide the vent bars into each respec- tive vent opening in the canvas. The fit will be very snug. You may need to reposition the gazebo legs slightly in order to pull the canvas top into position. Use the velcro straps to secure the can- vas top to the gazebo frame. If you purchased a bug screen, you may attach it now using the velcro straps provided. Also, you may use Part F to help you secure the gazebo to the ground. The spikes are not intended to permanently mount the gazebo to any surface. Page 7
  • 8. FAQ (Frequently Asked Questions) Q: Will the gazebo frame ever rust? A: The powder coated finish of the metal frame prevents rusting so long as the metal itself is not exposed. Exposure of the metal may occur due to accidental scratches or long-term wear and tear. Occasional touch ups to affected areas with weatherproof paint will ensure many years of continued enjoyment from your gazebo. Q: Does the gazebo include the fabric top? A: Yes! All our gazebos are sold with a weather and UV light resistant polyester fabric top. Q: Will the gazebo move or blow away in strong winds? A: Several features of our design were considered to allow the gazebo to remain very stable across a wide range of weather conditions. The four vents in the canopy top help to allow low to medium winds to pass through the covering. However, if you install the gazebo in an area where strong winds are persistent, it is advisable to take further steps to fasten the gazebo to the ground. If the gazebo is installed over a soft natural surface (grass or dirt), you may drive metal stakes (included) through the holes located at the bottom of the panels and into the ground. If the gazebo is installed over a hard surface (wooden decks or concrete patios) it will be necessary to separately purchase screws or bolts and nuts to affix the frame to your installation surface. Please visit your local hardware store for more options. For all customers, we highly recommend that you remove your canopy top in cases of severe inclement weather such as thunderstorms. Please exercise good judgement. Q: I like being outdoors, but cannot stay for long because of mosquitoes. Are bug screens available for my gazebo? A: Yes! Bug screens for all gazebo models are available separately for purchase as an accessory. Q: I live in an area that snows in the winter. Should I be concerned about the weight of snow on my gazebo? A: You do not have to disassemble the gazebo during winter months. However, to prevent damage to your gazebo frame from heavy snow loads, remove the canvas top and store it in a dry location until spring. Your satisfaction is very important to us. Please contact us at info@pacificcurrentsinc.com if you have any questions or visit www.pacificcurrentsinc.com for more information. Page 8
  • 9. Care Instructions: The polyester top (Canvas Top) can be machine washed using a small amount of detergent. Do not machine dry or use bleach. Top may also be spray rinsed while attached to Gazebo and lightly scrubbed with a soft broom. Do not use hard abrasive cleansers to scrub. 1 Year Limited Warranty: Purchaser assumes all risk in the assembly and use of this unit. All components carry a one year limited warranty from date of purchase against defects in material and workmanship arising under normal use. This warranty does not cover normal wear and tear, nor weathering due to climate and other environmental factors, nor does it cover failure resulting from accident, misuse, abuse, neglect , mishandling, alteration or modification, failure to maintain, or damage that is attributed to acts of nature. This warranty does not cover incidental or consequential damages resulting from use of product, or losses arising out of any breach of this warranty other than the replacement parts. Fulfillments of this warrant shall only include replacement of parts damaged while inside original packing materials or a defective allowance with the place of purchase to be arranged at the discretion of Pacific Currents Inc. This warranty only extends to the original purchaser. Proof of purchase (such as sales receipt) will be required before warranty performance is rendered. Customer Service: Please contact us should you have any questions concerning assembly, care information, warranty coverage, and missing or defective parts. Call Toll Free: 888-474-2770 Customer Service Contact: Cherree Theisen, CT Sales Associates., Inc. Email: info@pacificcurrentsinc.com Website: www.pacificcurrentsinc.com Thank you for choosing a Pacific Currents Inc. product! Page 9