Virtual Box Sharepoint2010
•
0 gostou•2,147 visualizações

Un exemple d'installation de SP2010 sur une plateforme 32 bits avec une solution Virtual BOX

Recomendados
Recomendados
Mais conteúdo relacionado
Mais procurados
Mais procurados (20)
Semelhante a Virtual Box Sharepoint2010
Semelhante a Virtual Box Sharepoint2010 (20)
Mais de UGAIA
Mais de UGAIA (20)
Virtual Box Sharepoint2010
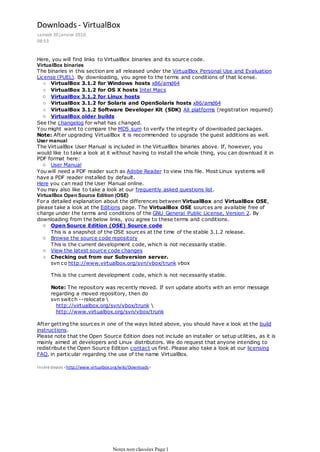
- 1. Downloads - VirtualBox samedi 30 janvier 2010 08:53 Here, you will find links to VirtualBox binaries and its source code. VirtualBox binaries The binaries in this section are all released under the VirtualBox Personal Use and Evaluation License (PUEL). By downloading, you agree to the terms and conditions of that license. ○ VirtualBox 3.1.2 for Windows hosts x86/amd64 ○ VirtualBox 3.1.2 for OS X hosts Intel Macs ○ VirtualBox 3.1.2 for Linux hosts ○ VirtualBox 3.1.2 for Solaris and OpenSolaris hosts x86/amd64 ○ VirtualBox 3.1.2 Software Developer Kit (SDK) All platforms (registration required) ○ VirtualBox older builds See the changelog for what has changed. You might want to compare the MD5 sum to verify the integrity of downloaded packages. Note: After upgrading VirtualBox it is recommended to upgrade the guest additions as well. User manual The VirtualBox User Manual is included in the VirtualBox binaries above. If, however, you would like to take a look at it without having to install the whole thing, you can download it in PDF format here: ○ User Manual You will need a PDF reader such as Adobe Reader to view this file. Most Linux systems will have a PDF reader installed by default. Here you can read the User Manual online. You may also like to take a look at our frequently asked questions list. VirtualBox Open Source Edition (OSE) For a detailed explanation about the differences between VirtualBox and VirtualBox OSE, please take a look at the Editions page. The VirtualBox OSE sources are available free of charge under the terms and conditions of the GNU General Public License, Version 2. By downloading from the below links, you agree to these terms and conditions. ○ Open Source Edition (OSE) Source code This is a snapshot of the OSE sources at the time of the stable 3.1.2 release. ○ Browse the source code repository This is the current development code, which is not necessarily stable. ○ View the latest source code changes ○ Checking out from our Subversion server. svn co http://www.virtualbox.org/svn/vbox/trunk vbox This is the current development code, which is not necessarily stable. Note: The repository was recently moved. If svn update aborts with an error message regarding a moved repository, then do svn switch --relocate http://virtualbox.org/svn/vbox/trunk http://www.virtualbox.org/svn/vbox/trunk After getting the sources in one of the ways listed above, you should have a look at the build instructions. Please note that the Open Source Edition does not include an installer or setup utilities, as it is mainly aimed at developers and Linux distributors. We do request that anyone intending to redistribute the Open Source Edition contact us first. Please also take a look at our licensing FAQ, in particular regarding the use of the name VirtualBox. Ins éré depuis <http://www.virtualbox.org/wiki/Downloads> Notes non classées Page 1
- 2. HOW TO: Create a Sharepoint 2010 VM in 32 bits host machine (1 of 4) samedi 30 janvier 2010 08:53 Sharepoint 2007 / 2010 HOW TO: Create a Sharepoint 2010 VM in 32 bits host machine (1 of 4) The objetive of this serie of posts is to explain in detail how to create a 64 bits virtual machine with Sharepoint 2010 in a 32 bits host machine. The first thing we have to do is download all the necessary software for our Sharepoint 2010 VM. This is the list of software we need: SUN VirtualBox 3.0: this software enables create 64 bits guest machine into 32 bits host machines. You can download this free software from http://www.virtualbox.org/wiki/Downloads. Microsoft Windows Server 2008 64 bits: you can download a trial version from Microsoft site (http://www.microsoft.com/windowsserver2008/en/us/trial-software.aspx). Microsoft SQL Server 2008 64 bits: you can download a trial version from Microsoft site (http://www.microsoft.com/sqlserver/2008/en/us/trial-software.aspx). Before we can start the installation we have to enable Intel® VT and AMD-V virtualizations extension in BIOS. You must open the BIOS setup utility of your computer, then access the processor section and enable intel®virtualization technology or AMD-V. In the next post we’ll iniziate the installation of our virtual machine. Ins éré depuis <http://comunidad.terra.es/blogs/moss/archive/2009/07/18/howtocreateasharepoint2010vmin32bitshostmachine1of5.aspx> Notes non classées Page 2
- 3. HOW TO: Create a Sharepoint 2010 VM in 32 bits host machine (2 of 4) samedi 30 janvier 2010 09:01 HOW TO: Create a Sharepoint 2010 VM in 32 bits host machine (2 of 4) Now that we already have all the necessary software to create the virtual machine, we are going to start installing VirtualBox 3.0. I won’t explain the steps to install VirtualBox. You have all the necessary information in the user manual (http://www.virtualbox.org/manual/UserManual.html). Once we have installed VirtualBox we’re going to create the virtual machine: Run VirtualBox 3.0: double click in desktop icon. Click New and you’ll see the wizard window: Introduce the VM name (for example “Sharepoint 2010”) and select the OS version (Microsoft Windows 2008 64 bit): Next define the RAM memory to asign to VM: Notes non classées Page 3
- 4. Next define the name, size and location of a new virtual disk: Notes non classées Page 4
- 5. Finally click Finish is the summary windows and you’ll have your VM created: Now we have the VM ready to install all the software. First of all we have to install Windows Server 2008 64 bit: Select the VM is VirtualBox and click Configuration button. Select CD/DVD-ROM section and introduce the location of the ISO image file downloaded from Microsoft site: Save the changes and the Start button to iniciate the VM VirtualBox will execute the installation of Windows Server 2008. Select language, date format and keyboard and click Next: Notes non classées Page 5
- 6. Wait till all steps of installation have been completed and then enter the new password for Administrator. Once you have logged in the VM, change other settings like date and time, keyboard, display resolution, etc. Finally you have to install Sun VirtualBox Guest Addtions 3.0 clicking In the option Install Guest Additions of the Devices menu: After the installation you must restart the virtual machine. In the next post we’ll install SQL Server 2008. Ins éré depuis <http://comunidad.terra.es/blogs/moss/archive/2009/07/18/howtocreateasharepoint2010vmin32bitshostmachine2of5.aspx> Notes non classées Page 6
- 7. HOW TO: Create a Sharepoint 2010 VM in 32 bits host machine (3 of 4) samedi 30 janvier 2010 09:02 Sharepoint 2007 / 2010 HOW TO: Create a Sharepoint 2010 VM in 32 bits host machine (3 of 4) Continuing with the installation of our Sharepoint 2010 VM, in this post we’re going to install SQL Server 2008. Before we can start, we need to create a shared forlder in order to access the installation software stored in the host machine. To create a shared folder: Click in Shared Folder option of the devices menu of your VM. Click the icon to create a new Shared folder and select the path of your host machine where you have downloaded the SQL Server 2008 software: Once you have created the shared folder you are able to access its content through the windows explorer of the VM with the following URL vboxsvr<shared folder name>: Now we are ready to install SQL Server 2008 64 bit: Execute the Setup program. A message box is shown advicing you that SQL Server 2008 requires Microsoft .NET framework 3.5 SP1. Click Ok and .NET framework will be installed: Notes non classées Page 7
- 8. 3.5 SP1. Click Ok and .NET framework will be installed: SQL Server 2008 also requires Hotfix KB942288. Click ok in the message box and the Hotfix will be installed. At this point you must restart the virtual machine. After you restart the virtual machine you must execute Setup again, and this time the SQL Server Installation center is opened: Notes non classées Page 8
- 9. In the planning section you have to execute the System Configuration Checker: If no errors ocurres you can change to the Installation section and execute the stand-alone installation. First you have to select the feature you want to install: Next you have to select the instance ID and the instance root directory: Notes non classées Page 9
- 10. Next disk space requirements are cheked: Next you have to enter the account credentials for different services: Next you have to enter the account for SQL Server Administration: Notes non classées Page 10
- 11. Next you have to decide if send errors and logs to Microsoft: Then installation rules are checked: Next a installation summary is shown and when you click Install the installation process begins: Notes non classées Page 11
- 12. Next a installation summary is shown and when you click Install the installation process begins: After installation is finished you are able to view the log file: In the next post we’ll finally install Sharepoint Server 2010 and Office 2010 TP. Ins éré depuis <http://comunidad.terra.es/blogs/moss/archive/2009/07/18/howtocreateasharepoint2010vmin32bitshostmachine3of5.aspx> Notes non classées Page 12
- 13. HOW TO: Create a Sharepoint 2010 VM in 32 bits host machine (4 of 4) samedi 30 janvier 2010 09:02 Sharepoint 2007 / 2010 HOW TO: Create a Sharepoint 2010 VM in 32 bits host machine (4 of 4) Finally we’re going to install Sharepoint Server 2010 TP. Before we proceed with the installantion, we’ll create a second virtual disk to stored all data. To create a second virtual disk: With the VM off, click in Configuration button and select virtual disks section: Click the icon to create a new Virtual Disk and select the path and size of the virtual disk: Then click Ok in the configuration window of VM. Finally run the SQL Management Studio, open the Server Properties, select the Database Settings section and change the Database Default Location to a path of the new virtual disk: Notes non classées Page 13
- 14. Now we are ready to install Sharepoint Server 2010: Execute the Setup program. A start window is shown with links to upgrade and installation guide. In the install section click Install Software Prerequisites. During few minutes a list of prerequisites will be installed. Once prerequisites are installed we can click Install Office Sharepoint Server (I heard “Office” wouldn’t be part of the product name ¿?). After check license agreement, click Advance and confirm that you install Sharepoint as Completed. Then click Install Now. The installation of Sharepoint 2010 will take several minutes and when it finished you must run Sharepoint Products and Technologies Configuration Wizard. The wizard has the same steps like MOSS 2007 wizard, so I won’t explain these steps. Next access the Sharepoint Central Administration Web site and click Launch the Farm Configuration Wizard. Select the services you want to run in your farm. Then create a site collection. A summary installation page will be shown. Click Ok and after the installation process you will be able to access you new site. Ins éré depuis <http://comunidad.terra.es/blogs/moss/archive/2009/07/19/howtocreateasharepoint2010vmin32bitshostmachine4of4.aspx> Notes non classées Page 14