4. Table of Appendices
Appendix 1 Peer Review Form – Simone Barnett ..............................................................5
Appendix 2 Peer Review Form – Robert Cummings .........................................................6
Appendix 3 Peer Review Form – Henry Debrosse .............................................................7
Appendix 4 Peer Review Form – Elaine Mom ...................................................................8
iii
5. Objective
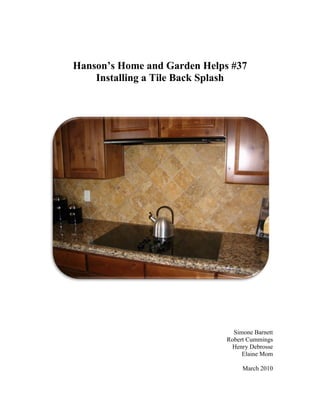
Installing a tile back splash has never been easier. In this instruction manual, you will
find the simple steps required along with the materials needed to add a tile back splash to
your kitchen and/or bathroom. “Installing a tile back splash in the kitchen or bathroom
can enhance the beauty of your home and add to its value.” Adding a tile back splash to
your kitchen or bathroom will give you that finishing look you always wanted and
capture the attention of any individual entering the room. A tile back splash can be an
easy weekend project if you follow these steps.
Materials & Equipments
2 small buckets or medium sized bowls
Disposable gloves (optional)
Grout Figure 1: Notched trowel
Masking tape
Notched trowel
Paper towels or rags
Pencil
Roll of blank paper (example: brown wrapping paper)
Ruler
Safety glasses
Soft towel or rag Figure 2: Plain Tile
Sponge
Tile (plain, corners, and bullnose)
Tile adhesive
Tile cutter (Available at Hanson’s or other home improvement stores)
Tile spacers
Water
Figure 3: Safety glasses Figure 4: Tile Cutter Figure 5: Tile Spacers
1
6. Safety Precautions
Figure 6: Protective Eyewear Symbol
Eye Protection is recommended at all times spent in the project workspace.
Hand and finger protection while handling any and all sharp devices is recommended.
Latex or vinyl gloves maybe worn to provide skin protection when working with tile
adhesive and/or grout.
Site Preparation
Step 1
Remove any and all existing wall covering.
Step 2
Repair any damage to the wall caused during the
existing covering removal.
Step 3
Figure 7: Remove existing
Verify the wall is clean, smooth and free from debris. wall covering
Step 4
Cover your existing countertop with a paper or plastic sheet to protect the
surface.
Tile Preparation
Step 5
Attach a paper sheet to the approximate area to be
tiled.
Step 6
Outline the area to be tiled as exactly as possible
utilizing a pencil and ruler.
Figure 8: Outline and
measure area
2
7. Step 7
Transfer your paper outline to a smooth, flat, level surface such as a
tabletop or floor surface.
Step 8
Measure to the center point of the desired area and draw a line. This line would
be vertical if the paper was still mounted on the wall.
Step 9
Lay out your tiles starting from this center point. Be sure to include tile spacers
between your tiles. Please note that adjustments maybe made to facilitate easier
or even less frequent cutting of the tiles.
Tile Installation
Step 10
Mark another centerline on the wall as on the removed paper sheet.
Step 11
Apply the tile adhesive to the wall. Begin at the
lower center point and cover an area roughly two
square feet.
Step 12
Place your tiles making sure to include spacers.
Continue placing tiles, adhesive, and spacers
outwards from your lower center starting point.
Step 13
Mark your tile with a pencil and trim with the tile
cutter when you reach within a single tiles width
of the edge of your project area. Figure 9: Apply tile
adhesive
Step 14
Finish the tiled area with bull nosed tiles to provide an attractive edge.
Step 15
Allow the tile adhesive to dry. This should require approximately 6 hours.
3
8. Grout Application
Step 16
Prepare the grout as per the manufacturers instructions in a bowl or bucket.
Combine the grout and water until the mixture is uniform.
Step 17
Spread the grout diagonally across the tiles using a sponge. Be sure to work he
grout completely into the area between the tiles. Once again your work area
should be approximately two square feet.
Step 18
Repeat this process scraping off any excess grout
before applying new grout to your sponge.
Step 19
Remove all excess grout from the tiles. Return the
excess grout to the bucket.
Step 20
Rinse the sponge in a bucket or bowl of clean
water and gently wipe off the surface of your tiles.
Wipe the sponge diagonally removing the excess
grout. Any heavy concentrations of grout should Figure 10: Remove
be removed. excess grout
Step 21
Allow the tiles and grout to sit for 15 minutes.
Cleaning & Final Steps
Step 22
Wipe a clean soft cloth over the tiles removing the grout residue or haze.
Step 23
Repeat the wiping every thirty minutes until all residue or haze is removed
4
9. Appendix 1
PROJECT PEER REVIEW FORM
Please judge the quality of each team member's contribution to the group project by
allocating the sum of 100% among all members. For example, given a three-member team,
Member 1, who did a good job, gets 30%; Member 2, who did a mediocre job, gets 15%,
and Member 3, who did an outstanding job, gets 55%.
Perform this allocation twice: once, including yourself, and a second time, excluding
yourself.
Your name: Simone Barnett
Team member name: Percent Allocated (include Percent Allocated (exclude
yourself) yourself)
Elaine K. Mom 30% 45%
Simone Barnett 30% 0%
Robert Cummings 25% 35 %
Henry Debrosse 15% 20%
Totals: 100% 100%
Comments:
I did not feel our group had synergy I will take some responsibility. We changed the topic
from the Museum to Backsplash late in the game. I don’t know how often Henry checks
email but when a project is due it is necessary to check regularly. We had a hard time
getting Henry up to date yet once we did he did prepare the steps however Rob and I had
already done the steps. Needless to say there was over lapping. We did decide to use the
format Henry used because it was easier to edit. Overall Elaine was the glue and she was
very accommodating with all the changes and she helped me get the pictures together that
Rob sent. I am not that great at computer usage.
I was not that sure of how to allocate the percentages excluding myself so I did it as if I
had no input and look from the outside.
5
10. Appendix 2
PROJECT PEER REVIEW FORM
Please judge the quality of each team member's contribution to the group project by
allocating the sum of 100% among all members. For example, given a three-member team,
Member 1, who did a good job, gets 30%; Member 2, who did a mediocre job, gets 15%,
and Member 3, who did an outstanding job, gets 55%.
Perform this allocation twice: once, including yourself, and a second time, excluding
yourself.
Your name: Robert Cummings
Team member name: Percent Allocated (include Percent Allocated (exclude
yourself) yourself)
Robert Cummings 25%
Elaine Mom 25% 33%
Simone Barnett 25% 33%
Henry Debrosse 25% 33%
Totals: 100% 100%
Comments:
I think this project was very even as far as effort and workload goes. A couple members
of the group did separate variations of the instructions on their own initiative. I think
people just wanted to make sure they contributed and it was not just wasted effort. It was
good we had some different choices and it’s much better than no one wanting to do
anything. So in the end I think everyone spent a very equal amount of time and effort
and I think the final product looks fantastic.
6
11. Appendix 3
PROJECT PEER REVIEW FORM
Please judge the quality of each team member's contribution to the group project by
allocating the sum of 100% among all members. For example, given a three-member team,
Member 1, who did a good job, gets 30%; Member 2, who did a mediocre job, gets 15%,
and Member 3, who did an outstanding job, gets 55%.
Perform this allocation twice: once, including yourself, and a second time, excluding
yourself.
Your name: Henry Debrosse
Team member name: Percent Allocated (include Percent Allocated (exclude
yourself) yourself)
Henry Debrosse 25%
Elaine Mom 25% 33%
Simone Barnett 25% 33%
Robert Cummings 25% 33%
Totals: 100% 100%
Comments:
I think this project turned out very well. We did experience some problems when first
starting the project but things rolled along pretty well once we got started with the
project. I believe that everyone did a fair share of the workload and played significant
roles in ensuring that this project was completed.
7
12. Appendix 4
PROJECT PEER REVIEW FORM
Please judge the quality of each team member's contribution to the group project by
allocating the sum of 100% among all members. For example, given a three-member team,
Member 1, who did a good job, gets 30%; Member 2, who did a mediocre job, gets 15%,
and Member 3, who did an outstanding job, gets 55%.
Perform this allocation twice: once, including yourself, and a second time, excluding
yourself.
Your name: Elaine K. Mom
Team member name: Percent Allocated (include Percent Allocated (exclude
yourself) yourself)
Elaine K. Mom 25% 0.00%
Simone Barnett 25% 33.33%
Robert Cummings 25% 33.33%
Henry Debrosse 25% 33.33%
Totals: 100% 99.99%
Comments:
The team did a great job in coming together to finalize the project. Although we waited
to the final week to start, we made significant progress in a matter of days. Everyone
played a role and the work was equally divided. I don’t believe one person did more than
the next.
8
13. Glossary
Bullnose Tile that has one or two finished edges
Notched trowel A hand trowel with a serrated edge
Tile spacers Small pieces of plastic, often shaped like the letter “x,” that are
placed between tiles so that the tiles are evenly spaced
Tile Cutter An instrument that scores a tile and then clamps it until the tile breaks
9