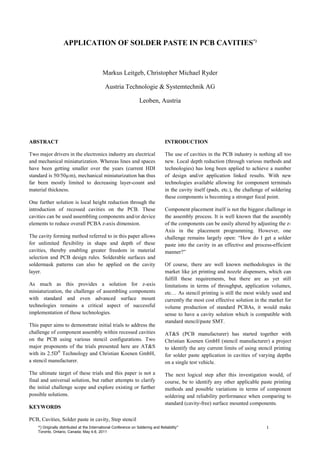
![TEST MATERIALS AND EQUIPMENT test) (see figure 2). Minimum distance from the test
pattern to the cavity wall for the experiment was 2mm.
Test Vehicle
As there is no standard test vehicle for the testing of
solder paste printing in cavities available, an attempt was
made to create a vehicle based as much as possible on a
stencil printing manufacturer`s design. The vehicle
created contains a number of typical component
footprints: 0603, 0402, 0,5mm and 0,4mm fine pitch pads,
and µBGAs with 0,5 mm 0,3 mm pitch (see Figure 1).
Figure 2. Test board with cavity areas
The build for the 2,1mm thick PCB was a 12 layer multi-
layer with Panasonic R1650M material (halogenated
epoxy resin based prepreg). This stack up and production
method enables the removal of 5 layers at varying depths
on a single card. The specific depth is achieved by the
application of a paste on the release layer with subsequent
relamination of the entire board. A laser cutting process
Figure 1. Test pattern then trims and cuts at the predetermined shape to separate
the relaminated layers from the release layer. The final
The exact copper feature dimensions can be found in
step is then “cap removal” and paste stripping (see Figure
Table 1 and 2 below.
3). What remains is the solder footprint pattern. Diverse
Table 1. Copper features surface finishes and also application of solder mask may
be employed in the cavities, but for the sake of this
Pad Dimensions experiment solder mask was only used on the outer layer
Footprint x [mm] y [mm] P [mm] (0µm cavity). Entek HT (Organic surface protection) was
0603 0,66 1,06 1,50 used as a surface finish for all solderable surfaces.
0402 0,46 0,66 1,00
Fine Pitch 0,5mm 0,31 1,66 0,50
Fine Pitch 0,4mm 0,26 1,66 0,40
µBGA 0,5mm d = 0,33 0,50
µBGA 0,3mm d = 0,20 0,30
Figure 3. Schematic process flow of cavity formation.
Table 2. Stencil apertures
The unused copper on all inner layers was “hatched”,
Stencil Aperture which means they were not full copper surfaces. This is
Footprint x [mm] y [mm]
standard practice in PCB design to achieve warpage
0603 0,60 1,00
control and enhance thermal reliability performance.
0402 0,40 0,60
Fine Pitch 0,5mm 0,25 1,60
Fiducials for SMT registration and cavity printing were
Fine Pitch 0,4mm 0,20 1,60
µBGA 0,5mm 0,33 0,33 located on outer layer to enable printing the solder paste
µBGA 0,3mm 0,20 0,20 in a one step process. Therefore the only influence for
registration is the layer shift caused by the several
relamination steps. However, this shift is by any means
This footprint pattern was placed on the test vehicle on compatible with current HDI manufacturing standards.
recessed areas of 0µm (no cavity), 50µ, 250µm, 500µm
and 750µm (The 100µm cavity was not employed for this Testing Material and Equipment
*) Originally distributed at the International Conference on Soldering and Reliability” 2
Toronto, Ontario, Canada; May 4-6, 2011](data:image/gif;base64,R0lGODlhAQABAIAAAAAAAP///yH5BAEAAAAALAAAAAABAAEAAAIBRAA7)
Recommended
Recommended
More Related Content
Similar to AT&S SMTA
Similar to AT&S SMTA (20)
Recently uploaded
Recently uploaded (20)
AT&S SMTA
- 1. APPLICATION OF SOLDER PASTE IN PCB CAVITIES*) Markus Leitgeb, Christopher Michael Ryder Austria Technologie & Systemtechnik AG Leoben, Austria ABSTRACT INTRODUCTION Two major drivers in the electronics industry are electrical The use of cavities in the PCB industry is nothing all too and mechanical miniaturization. Whereas lines and spaces new. Local depth reduction (through various methods and have been getting smaller over the years (current HDI technologies) has long been applied to achieve a number standard is 50/50µm), mechanical miniaturization has thus of design and/or application linked results. With new far been mostly limited to decreasing layer-count and technologies available allowing for component terminals material thickness. in the cavity itself (pads, etc.), the challenge of soldering these components is becoming a stronger focal point. One further solution is local height reduction through the introduction of recessed cavities on the PCB. These Component placement itself is not the biggest challenge in cavities can be used assembling components and/or device the assembly process. It is well known that the assembly elements to reduce overall PCBA z-axis dimension. of the components can be easily altered by adjusting the z- Axis in the placement programming. However, one The cavity forming method referred to in this paper allows challenge remains largely open: “How do I get a solder for unlimited flexibility in shape and depth of these paste into the cavity in an effective and process-efficient cavities, thereby enabling greater freedom in material manner?” selection and PCB design rules. Solderable surfaces and soldermask patterns can also be applied on the cavity Of course, there are well known methodologies in the layer. market like jet printing and nozzle dispensers, which can fulfill these requirements, but there are as yet still As much as this provides a solution for z-axis limitations in terms of throughput, application volumes, miniaturization, the challenge of assembling components etc… As stencil printing is still the most widely used and with standard and even advanced surface mount currently the most cost effective solution in the market for technologies remains a critical aspect of successful volume production of standard PCBAs, it would make implementation of these technologies. sense to have a cavity solution which is compatible with standard stencil/paste SMT. This paper aims to demonstrate initial trials to address the challenge of component assembly within recessed cavities AT&S (PCB manufacturer) has started together with on the PCB using various stencil configurations. Two Christian Koenen GmbH (stencil manufacturer) a project major proponents of the trials presented here are AT&S to identify the any current limits of using stencil printing with its 2.5D® Technology and Christian Koenen GmbH, for solder paste application in cavities of varying depths a stencil manufacturer. on a single test vehicle. The ultimate target of these trials and this paper is not a The next logical step after this investigation would, of final and universal solution, but rather attempts to clarify course, be to identify any other applicable paste printing the initial challenge scope and explore existing or further methods and possible variations in terms of component possible solutions. soldering and reliability performance when comparing to standard (cavity-free) surface mounted components. KEYWORDS PCB, Cavities, Solder paste in cavity, Step stencil *) Originally distributed at the International Conference on Soldering and Reliability” 1 Toronto, Ontario, Canada; May 4-6, 2011
- 2. TEST MATERIALS AND EQUIPMENT test) (see figure 2). Minimum distance from the test pattern to the cavity wall for the experiment was 2mm. Test Vehicle As there is no standard test vehicle for the testing of solder paste printing in cavities available, an attempt was made to create a vehicle based as much as possible on a stencil printing manufacturer`s design. The vehicle created contains a number of typical component footprints: 0603, 0402, 0,5mm and 0,4mm fine pitch pads, and µBGAs with 0,5 mm 0,3 mm pitch (see Figure 1). Figure 2. Test board with cavity areas The build for the 2,1mm thick PCB was a 12 layer multi- layer with Panasonic R1650M material (halogenated epoxy resin based prepreg). This stack up and production method enables the removal of 5 layers at varying depths on a single card. The specific depth is achieved by the application of a paste on the release layer with subsequent relamination of the entire board. A laser cutting process Figure 1. Test pattern then trims and cuts at the predetermined shape to separate the relaminated layers from the release layer. The final The exact copper feature dimensions can be found in step is then “cap removal” and paste stripping (see Figure Table 1 and 2 below. 3). What remains is the solder footprint pattern. Diverse Table 1. Copper features surface finishes and also application of solder mask may be employed in the cavities, but for the sake of this Pad Dimensions experiment solder mask was only used on the outer layer Footprint x [mm] y [mm] P [mm] (0µm cavity). Entek HT (Organic surface protection) was 0603 0,66 1,06 1,50 used as a surface finish for all solderable surfaces. 0402 0,46 0,66 1,00 Fine Pitch 0,5mm 0,31 1,66 0,50 Fine Pitch 0,4mm 0,26 1,66 0,40 µBGA 0,5mm d = 0,33 0,50 µBGA 0,3mm d = 0,20 0,30 Figure 3. Schematic process flow of cavity formation. Table 2. Stencil apertures The unused copper on all inner layers was “hatched”, Stencil Aperture which means they were not full copper surfaces. This is Footprint x [mm] y [mm] standard practice in PCB design to achieve warpage 0603 0,60 1,00 control and enhance thermal reliability performance. 0402 0,40 0,60 Fine Pitch 0,5mm 0,25 1,60 Fiducials for SMT registration and cavity printing were Fine Pitch 0,4mm 0,20 1,60 µBGA 0,5mm 0,33 0,33 located on outer layer to enable printing the solder paste µBGA 0,3mm 0,20 0,20 in a one step process. Therefore the only influence for registration is the layer shift caused by the several relamination steps. However, this shift is by any means This footprint pattern was placed on the test vehicle on compatible with current HDI manufacturing standards. recessed areas of 0µm (no cavity), 50µ, 250µm, 500µm and 750µm (The 100µm cavity was not employed for this Testing Material and Equipment *) Originally distributed at the International Conference on Soldering and Reliability” 2 Toronto, Ontario, Canada; May 4-6, 2011
- 3. To distinguish whether solder paste type (ball size) plays a Figure 5. Squeegee blade with moveable parts role in cavity printing performance, two different types of solder pastes were used for the printing trials: The sloped edges of the step openings ensure that excess paste is removed from the stencil during printing (see • Manufacturer A (Type 3) Figure 6). • Manufacturer B (Type 4) Both solder pastes are widely used lead-free pastes for volume stencil printing process. The solder paste printing system used in this trial is a two part system consisting of a step stencil and a customized squeegee. The stencil was a laser cut stainless steel stencil glued in polyester mesh and tensioned in an aluminum frame. The dimensions of the stencil were (736 x 736 x 40 mm³). Stencil base thickness was 1mm. Stencil thickness in the print area was 80µm. The depth of the stencil is Figure 6. Cross section of Step stencil with sloped edge adjusted for each individual cavity and is furthermore recessed on the top side of the stencil to achieve a The printer used was an Ersa Versaprint. The parameters consistent aspect ratio throughout the print (i.e. the stencil employed are shown in Table 3. thickness 80µm is constant for all areas despite cavity depth) (see Figure 4). Table 3. Printing parameters Parameter Value Unit Speed F/B 50/ 50 mm/s Squeegee pressure F/B 25/ 25 N Snap off speed 50,0 mm/s Snap off distance 2,0 mm A Koh Young KY-3020T tabletop full automatic system was used for the inspection of the volume and printed surface coverage of solder paste. A Cyberscan CT300 was used for profiling the solder Figure 4. Overview Step Stencil on PCB paste and 3D image evaluation after printing. The customized steel squeegee is 150mm in length and is TEST METHODOLGY designed with movable sections to account for variable depth. Therefore the multi-depth top side contour of the The first step in the trial methodology included the depth stencil is accounted for through the varying pressure of inspection and verification of the cavity depths on the test the movable squeegee sections (Figure 5). vehicle (nominal depths: 0µm, 50µm, 250µm, 500µm, 750µm). Measurements points were soldermask surface on the outer layer (outermost point of solder stencil contact) to copper surface in each cavity. Depth tolerance should be understood as the accumulation of the single layer thickness tolerances (i.e. +-10% for dielectric thickness). All test vehicles were verified for as within tolerance for the given depths. The stencil and customized squeegee were subsequently installed and registered. The squeegee must be aligned to the specific cavities for which the movable parts are designed. This was done manually using the alignment of arrow markings on both stencil and squeegee (Figure 7). *) Originally distributed at the International Conference on Soldering and Reliability” 3 Toronto, Ontario, Canada; May 4-6, 2011
- 4. Figure 7. Alignment marking on Squeegee and stencil Figure 9. 3D paste print verification with CT300 (750µm cavity) The type 3 solder paste was mixed accordingly and applied to the step stencil surface. Using the print The first paste used for testing was the lead free type 3 parameters described above in Testing Material and from manufacturer A. Ten test vehicles were then printed. Equipment, several test prints were then carried out to Subsequently the 10 PCBs were analyzed for paste verify effectiveness and accuracy. volume and surface coverage (2D evaluation of print coverage versus aperture opening) with the Koh Young. The test prints were first inspected manually with an The results will be discussed in the “evaluation” section of optical microscope to inspect general print status in terms this paper. of accuracy and application. Considerations were made to evaluate any obvious differences between the cavities, the The next step after ultrasonic cleaning of the step stencil component footprints and/or solder paste types (type 3 was to print the type 4 solder paste onto 10 further test and 4 were used, as mentioned above) (Figure 8). vehicles. The test vehicles were subsequently analyzed in the Koh Young AOI device. The complete results, as stated above will be discussed at a later point. Due to obvious and somewhat expected paste voids with the type 3 solder paste (see Figure 10), it was decided to proceed only with type 4 as it was deemed more suitable for further analysis. Figure 8. Alignment check with optical microscope (750µm cavity) During manual inspection some slight misregistration was observed, whereupon the stencil was realigned to the PCB test vehicle. New prints were carried out, inspected and registration was verified. The test prints were then measured with the solder paste Figure 10. Comparison type 3 and 4 solder balls in fine print AOI device (Koh Young) in order to assess transfer pitch area efficiency (paste volume V) and surface coverage (SC) A further 10 cards were paste printed with type 4. measurement capability for varying focal points (i.e. Furthermore the element of stencil cleaning was added varying cavity depths). The device was able to with this run, whereas the stencil was cleaned with a successfully scan the single test vehicle despite the depth solution after every 2nd print. The cards were subsequently variations. The results were verified using the CT300 analyzed with the AOI device. (Figure 9). *) Originally distributed at the International Conference on Soldering and Reliability” 4 Toronto, Ontario, Canada; May 4-6, 2011
- 5. To summarize, a total of 30 test vehicles were printed as Excluding the 0µm surface coverage values, a mean value such: of 95,1% was found over all footprints and depths. • 10 PCBs with type 3 • 10 PCBs with type 4 • 10 PCBs with type 4 (with stencil cleaning) TEST EVALUATION After AOI measurement and evaluation was carried out the data was entered into Minitab and Excel to explore interactions, deviations and trends. The first trial with type 3 paste revealed the following results. Broken down into component footprint, paste volume analysis revealed a clear and reproducible trend. The paste volume at 0µm (i.e. no cavity) was on average 113,9%. Highest value was 147,9% on the 0402 footprint and lowest value was 57,9% on the 0,3mm µBGA. Figure 12. Type 3 – Surface coverage per footprint and The overall higher values on the 0µm footprints are linked cavity depth to the presence of solder mask and in particular the 25µm The second trial with type 4 paste revealed the following delta between copper and solder mask height (Figure 11). results. Broken down into component footprint, paste The exceptionally low value of 57,9% on the 0,3mm volume analysis revealed similar results with some µBGA can be traced to the presence of solder paste voids variation to those of the type 3 paste. Excluding the 0µm due to the nature of the type 3 solder ball size (as paste volume values, a mean value of 93,7% was found illustrated above in Figure 10). Otherwise a general trend over all footprints and depths. Compared to the 62,9% of decreasing paste volume was observed as cavity depth mean paste volume value found with the type 3 paste, a increased (with few exceptions). Excluding the 0µm paste clear indication of improved performance is recognizable volume values, a mean value of 62,9% was found over all (Figure 13). footprints and depths. Figure 13. Type 4 – Paste Volume per footprint and cavity depth Figure 11. Type 3 – Paste Volume per footprint and cavity depth In terms of surface coverage a similar trend was noticeable, whereas the deviation between type 3 and type In terms surface coverage (SC) a similar trend was of 4 was not as pronounced. The mean value of 102,7% over course noticeable (Figure 12). Highest value was for 0402 all footprints and depths (excluding the 0µm depth) footprint with 116,7% at 0µm and lowest value was compared to the 95,1% from type 3 is indicative of the 2D 0,3mm µBGA footprint with 57,1% at 750µm. Reasons nature of the testing (Figure 14). for this variation are similar to those described above. Otherwise a general trend of decreasing surface coverage was observed as cavity depth increased (with few exceptions). *) Originally distributed at the International Conference on Soldering and Reliability” 5 Toronto, Ontario, Canada; May 4-6, 2011
- 6. Figure 14. Type 4 – Surface coverage per footprint and Figure 16. Type 4 / with cleaning – Surface coverage per cavity depth footprint and cavity The third trial employed type 4 paste with manual stencil The interaction plots between the individual test elements cleaning after each second print. The following results (paste type, footprint, cavity depth and cleaning y/n) were found. The mean paste volume value for all revealed some clear indications. footprints on the 0µm depth was 89,4%. The mean paste volume value for all remaining footprints and depths was First we will investigate the interaction plot for paste 70,7%. Here we see a lower overall volume when volume (Figure 17). The interaction between paste and compared to the type 4 paste without cleaning results component footprint demonstrates a slight overall (Figure 15). However, the standard deviation for the type superiority of the type 4 paste versus type 3. However, the 4 with cleaning is 4% lower than without cleaning performance indicators run relatively parallel (i.e. better (respectively 10% and 14%). The greatest observable performance on larger component footprint compared to difference in standard deviation was seen in 0,3mm smaller). µBGA: without cleaning 35,9% and with cleaning 19,1%. Figure 15. Type 4 / with cleaning – Paste Volume per Figure 17. Interaction plot for paste volume footprint and cavity depth The interaction between paste type and cavity depth The data for surface coverage with type 4 and stencil demonstrates somewhat better overall performance with cleaning after every second print presented a more the type 4 paste. However, performance in the cavities homogenous pattern than the other trials, especially regardless of depth can be viewed as consistent. The considering the 0µm footprint performance with the visible difference on the 0µm cavity depth is, once again, cavity depth performance (Figure 16). Similar to the linked to the presence of solder mask and therefore a situation described above with paste volume, surface higher contact plane for the stencil. coverage overall is less with the type 4 cleaning trials compared to the type 4 without cleaning trials. However, The interaction between footprint and cavity depth once again we see a lower standard deviation with the demonstrates consistent patterns with exception of the type 4 with cleaning trials (with cleaning 6,9% and 0,3mm µBGA. In general, the larger component footprints without cleaning 10,7%). fared better as did the smaller depths. The 0,3mm µBGA showed a consistently low performance regardless of cavity depths. *) Originally distributed at the International Conference on Soldering and Reliability” 6 Toronto, Ontario, Canada; May 4-6, 2011
- 7. The interaction between paste and cleaning is moot as the coverage. The biggest variations in performance can be cleaning trials were carried out only with the type 4. accounted for with the solder mask height delta over copper on the 0µm cavity depth and the 0,3mm µBGA. The interaction between component footprint and cleaning provides conflicting results. The 0,3mm and 0,5mm pitch Regarding the solder mask we would suggest this is a BGAs as well as the 0603 demonstrated slightly improved common a phenomenon on standard non cavity PCBs. In performance in terms of volume when cleaned, the future trials, there would be the possibility of applying remaining footprints, however, demonstrate slightly less solder mask in the cavities as well to aid in more direct volume when cleaned. comparison. The plot for cavity depth and cleaning demonstrates the The somewhat inferior performance of the 0,3mm µBGA, largest interaction at 0µm cavity depth. Here we see the we would also suggest, is demonstrative of general largest reduction of volume on the type 4 with cleaning limitations of the stencil printing method on this pitch and compared to no cleaning. Otherwise, no major interaction not related necessarily to cavity depth. can be extrapolated. It would appear after these initial trials that with some Now we will examine the interaction plot for surface further optimization in terms of both material and process coverage (Figure 18). The interactions for paste/ footprint, improvements could be made to increase transfer paste/ cavity, footprint/ cavity and footprint/ cleaning can efficiency and surface coverage. Such optimizations be considered in line with the paste volume interaction would also have to consider the specific PCB design and analysis described above. component footprint (design rules). The plot for cavity depth and cleaning revealed a Considerations will be made on our part to examine the somewhat more pronounced interaction for the larger manufacturing and reliability performance of the paste cavity depths. These depths demonstrated an increased printed cavity PCBs as a next step. Additional and/or surface coverage after cleaning. alternative printing and soldering processes and materials may be drawn into the further trials. Figure 18. Interaction plot for surface coverage SUMMARY The initial task at hand was to evaluate the feasibility and effectiveness of using a standard method of paste printing to print on to PCBs with varying cavity depths. The trials employed, however, a non-standard stencil and squeegee solution. Despite the usage of non-standard materials (i.e. stencil/squeegee system and multi-cavity depths PCB), the printing process as such did not deviate from general volume manufacturing practices. In general, the trials demonstrated successful solder paste printing results in terms of paste volume and surface *) Originally distributed at the International Conference on Soldering and Reliability” 7 Toronto, Ontario, Canada; May 4-6, 2011